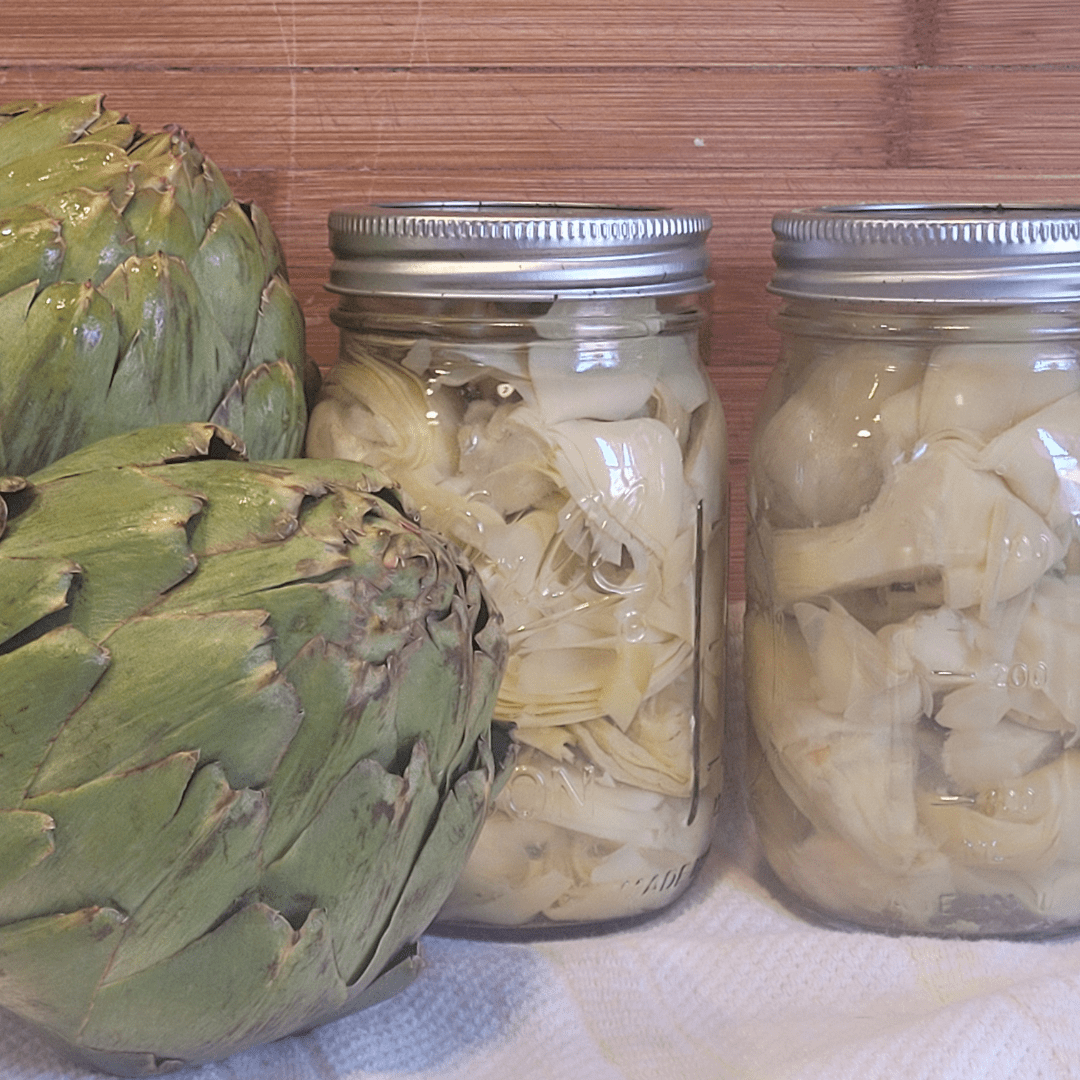
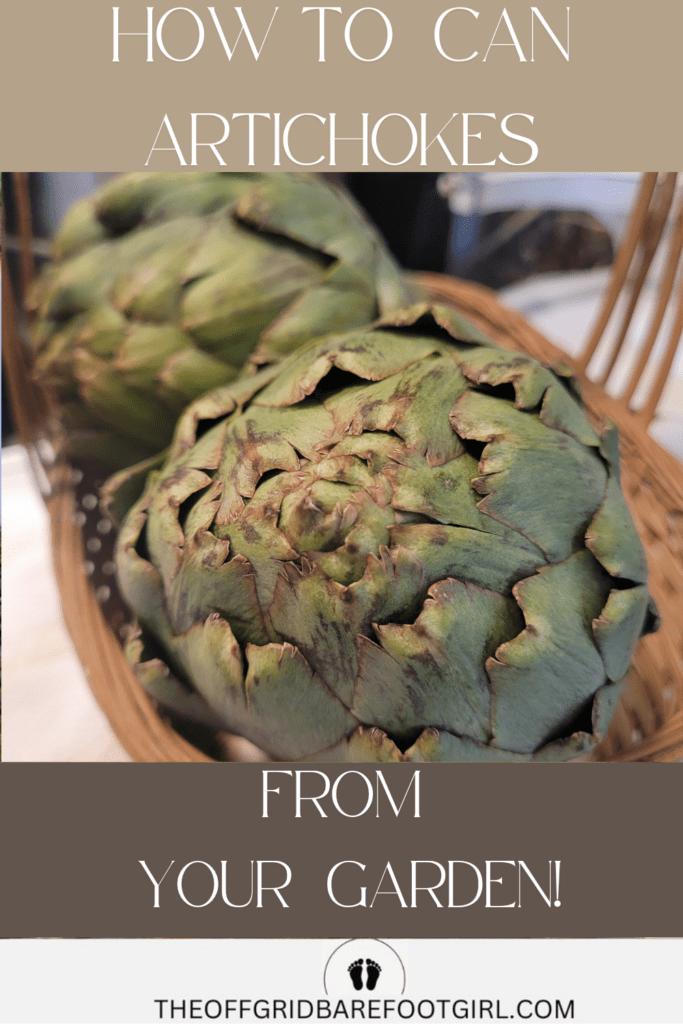
Learn how to can artichokes from your garden with this simple, step-by-step guide. Preserve the fresh, tender flavor of your homegrown artichokes for year-round use in dips, pastas, salads, and more. Safe, easy, and perfect for any home canner.
If you’ve ever savored the rich, nutty flavor of a freshly steamed artichoke, you already know why they’re such a treasure. Not only are they delicious, but they’re packed with fiber, antioxidants, and essential vitamins like C and K. Artichokes support digestion, boost your immune system, and even help regulate blood sugar. But here’s the thing—fresh artichokes don’t last long. That’s where canning comes in, letting you enjoy their goodness year-round without worrying about waste.
This is a pinnable post. Tap or hover over any image in this post to pin to your Pinterest Boards.

The Benefits of Canning Artichokes for Long-Term Storage
Canning is one of my favorite ways to preserve garden harvests, and artichokes are no exception. By canning them, you lock in their peak freshness and flavor while creating a convenient pantry staple. Store-bought canned artichokes are often packed with preservatives and lack the rich, homemade taste.
When you can your own, you control the ingredients and get the satisfaction of knowing exactly where your food comes from. Plus, having jars of home-canned artichokes on hand means quick and easy meal prep—perfect for tossing into salads, casseroles, pasta dishes, or even homemade dips.
Why Fresh, Homegrown Artichokes Make All the Difference
If you grow your own artichokes, you already know the difference between garden-fresh and store-bought. Freshly harvested artichokes are sweeter, more tender, and free from chemicals used in commercial farming.
The moment artichokes are picked, they start to lose moisture and flavor, so using them at their peak makes for the best-tasting canned results. Even if you don’t have a garden, try sourcing your artichokes from a local farmer’s market—you’ll still get better quality than most grocery store options.
What You’ll Learn in This Guide
In this post, I’ll walk you through everything you need to know about canning artichokes from start to finish. We’ll cover how to pick the best artichokes, the step-by-step canning process, and tips to keep them fresh and flavorful.
Whether you’re a first-time canner or a seasoned pro, you’ll find helpful insights to make your home-canned artichokes safe and delicious. Let’s get started!
Preparing to Can Artichokes
Choosing the Right Artichokes
The key to delicious canned artichokes starts with choosing the right ones. If you’re growing them yourself, you already have an advantage—you get to pick them at the perfect moment! If you’re buying them, be selective.
If you’re lucky enough to have artichokes growing in your garden, timing is everything. The best time to harvest is when the buds are still tight and firm, just before they start to open. If you wait too long, they become tough and fibrous—better suited for letting bloom than for eating.
When to Harvest Artichokes for the Best Texture and Flavor
A good rule of thumb is to cut them when they’re about the size of a fist and the outer leaves still hug the bud. Harvesting at the right time ensures they’ll be tender and flavorful when canned.
Look for artichokes with tightly packed leaves and a deep green color. They should feel firm and heavy for their size. Avoid any that look dry, have browning edges, or feel too soft, as they might be past their prime. Remember, the fresher your artichokes, the better they’ll taste once canned!
If you want to learn how to grow artichokes for years after your first planting, I wrote all about it in my other post!
How to Grow Artichokes: Plant Once and Harvest for 5 Years!
Signs of Fresh, High-Quality Artichokes
Whether you’re harvesting from your garden or buying from the market, knowing how to spot fresh artichokes is essential. A high-quality artichoke will have a bright green (or purple, depending on the variety) color, with leaves that snap back when you press them.
Give it a squeeze—if it makes a slight squeaking sound, it’s a good one! The stem should look fresh and not dried out. Also, don’t shy away from artichokes with a little frost damage—this can actually make them sweeter!
Gathering Your Supplies
Before getting right into the canning process, it’s important to have everything you need ready to go. You’ll need clean mason jars with new lids and rings, a pressure canner (since artichokes are low-acid and must be pressure canned for safety), a jar lifter, and a funnel to make filling easier.
For the brine, all you need is water, salt, and lemon juice—though I like to add a touch of garlic or herbs for extra flavor. Having everything laid out beforehand will make the canning process smooth and stress-free.
Prepping Your Work Area
Canning is all about cleanliness and efficiency, so setting up your workspace properly is a must. Start by washing and sanitizing your jars, lids, and tools—this prevents any bacteria from ruining your hard work. The easiest way is to run the jars through a hot dishwasher cycle or boil them for a few minutes.
Then, set up your station with everything within reach: your pressure canner, prepped artichokes, brine, and tools. Trust me, having a well-organized workspace makes the whole process more enjoyable and much faster!
Cleaning and Preparing Artichokes for Canning
Trimming and Peeling
Before we can preserve these delicious artichokes, we need to do a little prep work. First, remove the tough outer leaves until you reach the softer, pale green layers. These are the ones that will stay tender after canning. Then, trim the stem, leaving about half an inch if you like a bit of extra texture, or remove it entirely for a cleaner look.
If you’re working with large artichokes, cut them into halves or quarters—just be sure to scoop out the fuzzy choke in the center. The goal is to have manageable, bite-sized pieces that will fit easily into your jars.
Preventing Browning
Artichokes are notorious for turning brown the moment they’re cut, but don’t worry—there’s an easy fix! As you trim each one, drop it into a bowl of lemon water (a mix of cold water and fresh lemon juice). This keeps them looking vibrant and fresh while you work. If you skip this step, you might end up with dull, unappetizing artichokes in your jars.
Also, try to work quickly and avoid too much air exposure. The fresher they stay before canning, the better their final color and texture will be.
Blanching the Artichokes
Blanching might seem like an extra step, but trust me, it’s worth it. It helps soften the artichokes slightly, locks in their color and removes any lingering bitterness.
To do this, bring a large pot of water to a boil and add the prepped artichokes.
Let them cook for about 3–5 minutes, then transfer them straight into ice water to stop the cooking process.
This quick blanching step not only preserves the texture, but also ensures your artichokes will absorb the canning brine better, giving you the most flavorful results.
The Canning Process: Step-by-Step

Choosing the Right Canning Method
When it comes to canning artichokes, there’s only one safe way to do it—pressure canning. I know, I know, water bath canning is easier, but because artichokes are a low-acid vegetable, they require the high heat of a pressure canner to kill off harmful bacteria like botulism.
Don’t let the idea of pressure canning intimidate you! It’s actually pretty simple once you get the hang of it, and it ensures your artichokes stay shelf-stable and safe to eat for months (or even years).
Filling the Jars
Now comes the fun part—packing the jars! You’ll want to fill each sterilized jar with your prepped artichokes, making sure to pack them in snugly but not too tight. Leave about an inch of headspace at the top to allow for proper sealing.
Once they’re packed, pour in your hot brine—a simple mix of water, salt, and lemon juice—to cover the artichokes completely. If you love a little extra flavor, this is the perfect time to add garlic, peppercorns, or even a sprig of rosemary. Just be sure to remove any air bubbles before sealing the jars!
Processing the Jars
With your jars filled and lids secured, it’s time to fire up the pressure canner. Place the jars inside, add the right amount of water (following your canner’s instructions), and lock the lid. Process the jars at 10–11 pounds of pressure for 40 minutes (adjusting for altitude if needed).
Once the timer goes off, turn off the heat and let the pressure release naturally—never force it! You’ll know the process is complete when the canner is fully depressurized, and you hear the satisfying “pop” of the lids sealing as they cool. That’s when you know your artichokes are safely preserved and ready for storage!
Storing and Using Canned Artichokes
Checking for a Proper Seal
After all that work, the last thing you want is a bad seal ruining your batch! Once your jars have cooled completely (let them sit undisturbed for at least 12–24 hours), it’s time to check the seals. Press down on the center of each lid—if it doesn’t move or pop back, you’ve got a good seal.
If a lid flexes, that jar didn’t seal properly. Don’t panic! You can either refrigerate it and use it within a few days or reprocess it with a new lid. Just be sure to follow proper canning times to ensure safety.
Storing Your Canned Artichokes
Proper storage is key to keeping your artichokes fresh for as long as possible. I like to keep mine in a cool, dark place like a pantry or basement, where the temperature stays consistent. I have one of my pantries in my basement. Avoid direct sunlight or humid areas, as they can weaken the seal over time.
When stored correctly, canned artichokes can last up to a year (sometimes even longer!), but I always recommend using them within that time for the best flavor and texture. Be sure to label your jars with the date so you can keep track of your stash!
How to Use Canned Artichokes in Recipes
Once you have your own homemade canned artichokes, the possibilities are endless! Toss them into salads, blend them into a creamy spinach and artichoke dip, or add them to pasta for a rich, earthy flavor. If you want to enhance their taste, try marinating them in olive oil, garlic, and herbs before using them.
They also work beautifully in casseroles, pizzas, or even as a simple side dish sautéed with butter and lemon. With a shelf full of canned artichokes, you’ll never run out of ways to enjoy them!
Troubleshooting and Safety Tips
Common Canning Mistakes and How to Avoid Them
Canning is a skill, and like any skill, it takes practice to get it just right. One of the biggest mistakes I see is overpacking jars. It might be tempting to squeeze in as many artichokes as possible, but doing so can prevent even heat distribution, leading to unsafe canning.
Another common issue is under-processing—always follow the recommended pressure and time to ensure bacteria are fully destroyed.
Lastly, don’t forget the acid! Lemon juice isn’t just for flavor; it helps preserve texture and safety. Skipping or reducing it can lead to spoilage. Stick to the guidelines, and you’ll have perfect artichokes every time.
Signs of Spoilage
Even with careful canning, it’s important to check your jars before eating. If you pop open a jar and notice an off smell, cloudy liquid, or mold, that’s a clear sign something went wrong.
Another major red flag is a bulging or leaking lid—this usually means gases from bacteria are building up inside. If the seal is broken when you go to use it, play it safe and toss it. Trust me, it’s not worth the risk!
Safe Disposal Methods for Spoiled Canned Goods
If you find a spoiled jar, never taste-test it to “make sure”—botulism and other foodborne toxins are invisible but dangerous. Instead, carefully dispose of the contents. If the jar is intact, dump the spoiled food into a sealed bag before discarding it to avoid contamination. If you suspect botulism, boil the jar and contents for 30 minutes before disposal to neutralize the bacteria.
Always sanitize any surfaces the spoiled food may have touched. A little caution goes a long way in keeping your food (and your family) safe!
Conclusion
Give Canning a Try!
If you’ve never canned artichokes before, I highly encourage you to give it a shot. There’s something incredibly satisfying about preserving your own harvest, knowing exactly what’s in your food, and having a pantry stocked with home-canned goodness.
Plus, once you’ve mastered artichokes, you’ll be inspired to try canning other veggies and homemade creations!
I’d love to hear from you! Have you tried canning artichokes before? Do you have any favorite ways to use them in recipes? Drop a comment below and share your experience—or feel free to ask any questions. I’m always happy to help fellow canners troubleshoot or swap ideas!
More Canning Resources & Recipes
If you’re excited to explore deeper into home canning, check out these related posts:
Click the links and explore more ways to stock your pantry with delicious, home-canned foods!
Resources: Here are some helpful resources for further information.
- Marinated Artichoke Hearts Recipe (Canning Option) – By Penniless Parenting
- Canning Pickled Artichokes – By SBCanning
- Marinated Artichoke Hearts Recipe – By Serious Eats
Frequently Asked Questions
1. Do I need to use a pressure canner for artichokes?
Yes, artichokes are a low-acid vegetable, so they must be pressure-canned to ensure safety and prevent botulism. A water bath canner is not safe for canning artichokes.
2. How long do canned artichokes last?
When properly sealed and stored in a cool, dark place, canned artichokes can last up to 12-18 months. Always check for signs of spoilage before consuming.
3. Why did my artichokes turn brown after canning?
Browning can occur if the artichokes are not soaked in lemon water before canning. It can also happen if the jars are not processed correctly. Using a proper acid level (lemon juice or citric acid) helps preserve their color.
4. Can I add garlic or herbs to the jars for flavor?
Yes, you can add dried herbs and spices, but fresh garlic and herbs can increase the risk of spoilage. If you want extra flavor, consider adding seasonings when using the artichokes in recipes instead.

Canned Artichokes
Equipment
- 1 pressure canner.
- 4-5 pint jars
- 1 Large pot for blanching
- 1 Set of tongs or jar lifter
- 1 knife and cutting board.
Ingredients
- 8-10 fresh artichokes
- 4 cups water
- ½ cup lemon juice (for soaking)
- 4-5 tsp canning salt (1 tsp per pint jar)
- 2 tbsp lemon juice (1/2 tsp per pint jar)
Instructions
Preparing the Artichokes
- Trim tough outer leaves and cut off the top third of each artichoke.
- Slice in halves or quarters, removing the fuzzy choke.
- Place pieces in lemon water to prevent browning.
Blanching the Artichokes
- Boil water in a large pot and blanch artichokes for 5 minutes.
- Drain and set aside.
Packing the Jars
- Place artichokes into sterilized jars, leaving 1-inch headspace.
- Add 1 tsp salt and ½ tbsp lemon juice per pint jar.
- Fill with boiling water, maintaining headspace.
Processing in the Pressure Canner
- Secure lids and place jars in a pressure canner.
- Process at 10 PSI for 25 minutes (pints) or 30 minutes (quarts) (adjust for altitude).
Cooling and Storing
- Let jars cool for 12–24 hours, then check seals.
- Store in a cool, dark place for up to 1 year.
Summary
I hope I have inspired you to stockpile your pantry for your survival needs.
If you were encouraged by this post, I invite you to check out my FREE Printables Page for fun free printables, planners, and charts.
ENTER MY FREE Printables Page HERE
Here are some more of my canning inspiration posts to check out!
Pumpkin: How to Make Canned Pumpkin
How to Make and Can Pumpkin Butter
Quince: How to Make and Can Fall Spiced Quince Chutney
Quince: How to Can Quince
Carrot Cake Butter: How to Make and Can Carrot Cake Butter
Peach Pie Filling: How to Make and Can Peach Pie Filling
Pear Pie Filling: How to Make and Can Pear Pie Filling
The Best Winter Pantry Staples to Stockpile Now!
Grapes: How to Make and Can Grape Jam
Apple Cider: How to Make Homemade Apple Cider Vinegar
How to Make and Can Cherry Plum Jam
How to Make and Can Apple Butter In Crockpot
More Fun Posts
Stockpiling Condiments for Survival: Learn How I Do It!
How to Make and Can Vegetable Pot Pie Filling
Easy Canning Applesauce Recipes to Stalk Your Pantry!
How to Make Peach Jalapeno Jam
Cherries: How to Make Cherry Pie Filling
Cherries: How to Make Cherry Syrup
Salsa: How to Make and Can Cherry Salsa
Peaches: How to Make and Can Peach Salsa
Canning Supplies You Need Now for a Successful Canning Season!
How to Make and Can Balsamic Onion Jam
Cranberry Sauce: How to Make and Can Old Fashioned Cranberry Sauce
How to Make and Can Cranberry Merry Jam
How to Make and Can Strawberry Shortcake Jam
Cherry Jam: How to Make and Can Cherry Pie Jam
Carrot Cake Jam: How to Make and Can Carrot Cake Jam
Quince Jam: How to Can a Year’s Supply of Quince Jam
Root Beer Float Jelly: How to Make and Can Root Beer Float Jelly
Blessings,
The Off Grid Barefoot Girl

