If you love the rich flavor of chocolate and the tangy chew of sourdough, then Hershey’s Kisses sourdough bread is a must-try!
This unique recipe combines the deep, complex taste of fermented dough with the sweet, melty goodness of Hershey’s Kisses, creating a delicious balance of flavors.
Whether you’re baking it for a cozy weekend treat or a special dessert, this bread is sure to impress with its soft texture and bursts of chocolate in every bite.
Try making your own Hershey’s Kisses sourdough bread and enjoy a delightful twist on a classic favorite!
Hershey’s Kisses Sourdough Bread Recipe Tutorial
Why Combine Sourdough Bread with Hershey’s Kisses?
I’m excited to share this unique recipe that combines the rustic tang of sourdough with the sweet, melty goodness of Hershey’s Kisses. You might be wondering, “Why would I add chocolate to sourdough?”
Well, this combination creates an irresistible fusion of flavors, blending the chewy texture and depth of sourdough with the smooth, rich sweetness of Hershey’s Kisses. This fun twist not only elevates a simple bread recipe but also makes it a perfect treat for any occasion. If you love sourdough and chocolate, you’re in for a real treat!
What Makes the Sourdough and Chocolate Combination So Special?
The magic happens when the tangy sourdough meets the luscious, melt-in-your-mouth chocolate. The sourdough’s flavor is enhanced by the fermentation process, giving it a deep, savory profile that pairs surprisingly well with the sweetness of Hershey’s Kisses.
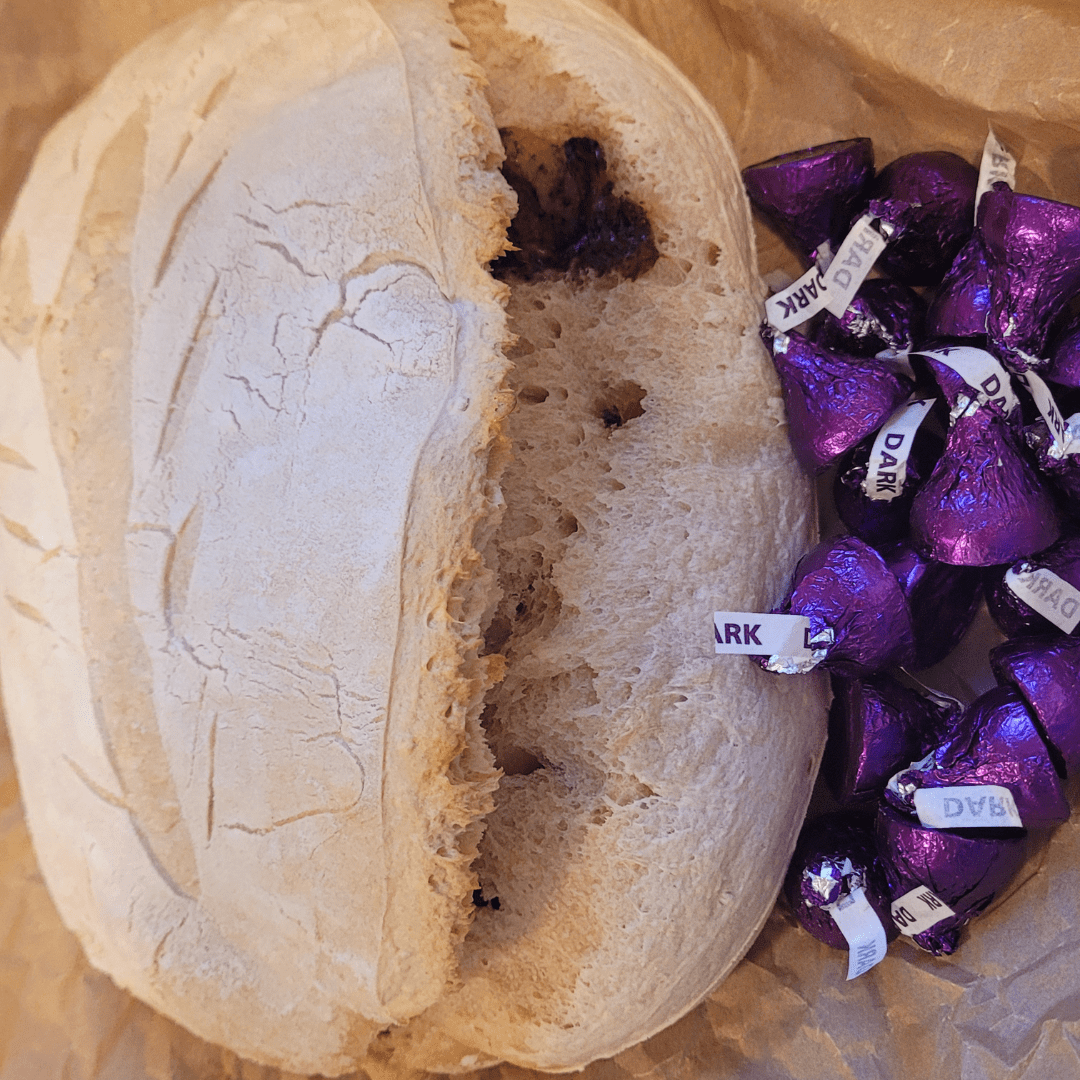
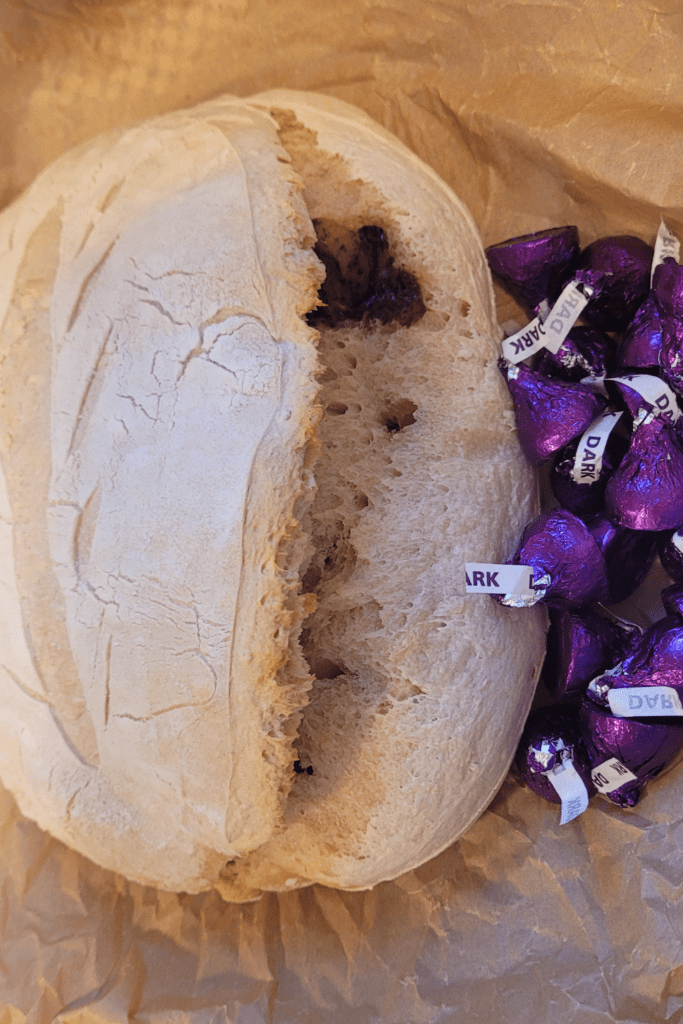
As the bread bakes, the chocolate softens and pockets of gooey chocolate emerge, creating a delightful contrast to the tangy, chewy bread. The result? A perfect balance of flavors that satisfy both sweet and savory cravings in every bite.
What Ingredients Do I Need for Hershey’s Kisses Sourdough Bread?
This recipe starts with a basic sourdough starter made from just three simple ingredients: flour, water, and salt. If you’re already familiar with making sourdough, this recipe won’t be a huge leap. If you’re new to sourdough baking, don’t worry—it’s easier than you might think!
After your starter is active and bubbly, the only extra ingredient you need is a handful of Hershey’s Kisses. Yes, you read that right—just Hershey’s Kisses! Chop them up, mix them into your dough, and you’ve got a chocolatey twist on classic sourdough that’s sure to be a hit.
This is a fun and simple way to give your sourdough a sweet, decadent upgrade without complicating the process!
This is a pinnable post. Tap or hover over any image in this post to pin to your Pinterest Boards.

Why Hershey’s Kisses and Sourdough Work Together
How Does the Flavor Contrast Between Tangy Sourdough and Creamy Chocolate Work?
One of the most exciting parts of making Hershey’s Kisses sourdough bread is the incredible flavor contrast. The tangy, slightly sour taste of the sourdough plays beautifully against the smooth, sweet chocolate from Hershey’s Kisses.
The sourdough’s fermentation process brings out its unique, savory profile, which balances the richness of the chocolate. You might think chocolate belongs only in desserts, but this combination proves that a little sweetness can make savory flavors even more exciting.
The result? A perfect harmony of flavors that leaves your taste buds delighted with each bite.
What Is the Texture of Hershey’s Kisses Sourdough Bread Like?
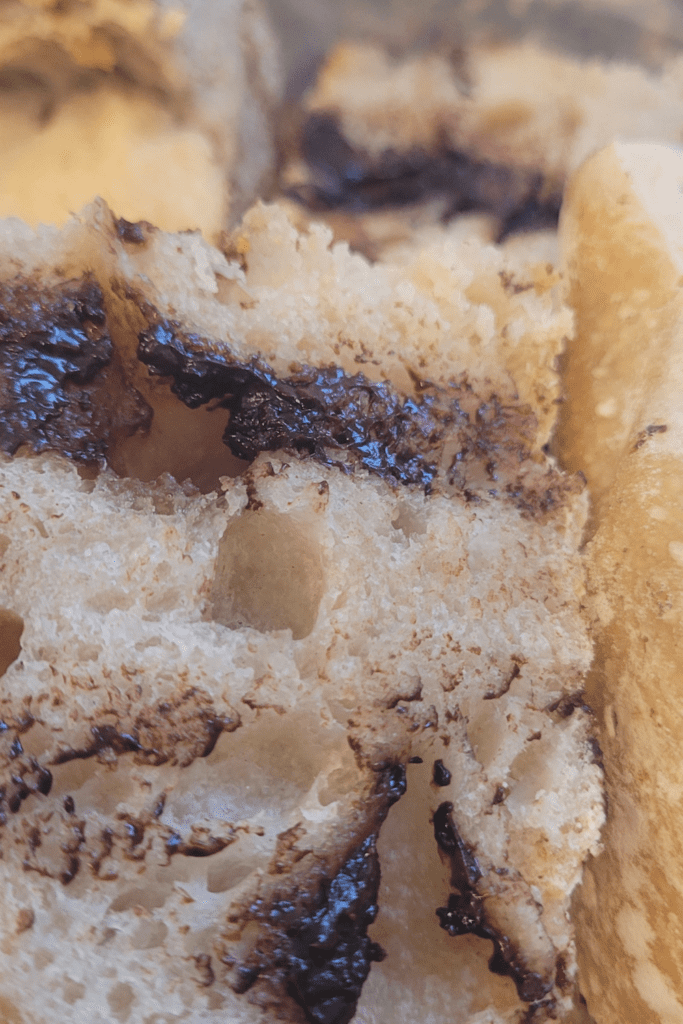
The texture of this bread is truly something special. You’ll experience the chewy, slightly crispy crust of classic sourdough with the soft, airy interior you know and love. As the bread bakes, the Hershey’s Kisses melt, creating pockets of gooey chocolate throughout. This soft, melty chocolate contrasts beautifully with the chewy bread, giving you the best of both worlds.
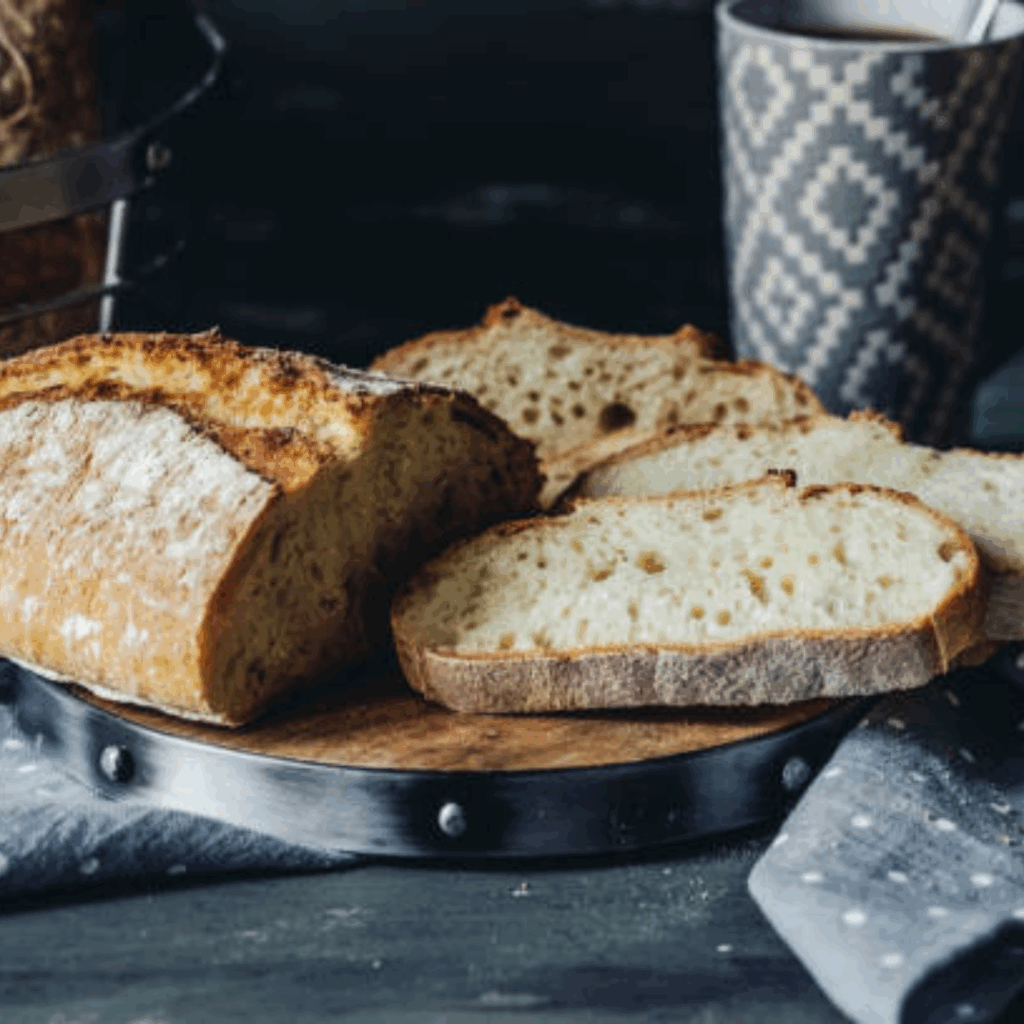
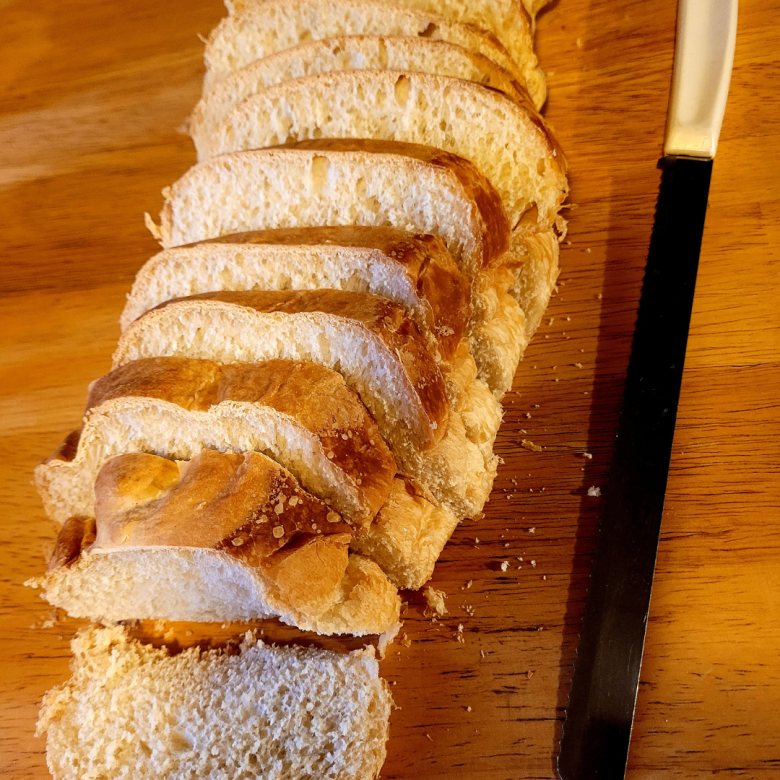
Each slice is a journey of textures—crunchy on the outside, soft and tender on the inside, with bursts of warm, rich chocolate that make it a treat for the senses. Whether you enjoy it on its own or with a spread, the texture of this bread is something you won’t forget.
How Does the Fermentation Process Enhance the Flavor of This Bread?
If you’ve ever baked sourdough before, you know the magic of fermentation. It’s the key to developing the bread’s unique tang and depth of flavor. As the dough rises and ferments, naturally occurring wild yeast and bacteria break down the sugars in the flour, giving sourdough its characteristic sour taste.
In this recipe, the fermentation process not only creates the traditional sourdough flavor but also allows the chocolate to meld with the dough in a way that enhances both flavors. The extended rise time gives the dough a complexity that makes it an ideal backdrop for the sweetness of Hershey’s Kisses. The result is a beautifully balanced flavor profile you can’t get from just any chocolate bread.
What Is the History of Chocolate Bread, and How Does This Recipe Fit Into That Tradition?
Chocolate bread has been around in various forms for centuries, with roots in many cultures that experimented with adding sweetness to bread-like baked goods. In Europe, sweet bread often featured chocolate as a luxury ingredient, and the idea of pairing chocolate with bread grew from a desire to create an indulgent treat.
This Hershey’s Kisses sourdough bread brings a modern twist to that rich history, combining the age-old technique of sourdough baking with the beloved chocolate of Hershey’s Kisses.
While traditional chocolate breads are usually sweet and rich, this recipe strikes a balance by keeping the tang of sourdough, giving it a unique, savory-sweet contrast that’s both nostalgic and innovative. It’s a delightful spin on a centuries-old tradition, made even better with a modern touch!
Ingredients and Tools You’ll Need
- Basic sourdough ingredients:
- Sourdough starter (active and bubbly)
- Water
- All-purpose flour
- Salt
- Hershey’s Kisses selection:
- Classic milk chocolate
- Dark chocolate
- Flavored varieties (e.g., caramel, almond)
- Tools:
- Mixing bowls
- Dutch oven or baking stone
- Dough scraper
- Parchment paper
- Proofing basket (optional)
Step-by-Step Guide to Making Hershey’s Kisses Sourdough Bread
Step 1: Preparing the Sourdough Starter
How Do I Feed and Maintain My Sourdough Starter?
Feeding and maintaining your sourdough starter is a simple yet crucial step in making the best bread possible.
- To start, you’ll need a mixture of equal parts flour and water—about 50g of each.
- Discard half of your starter to keep it from growing too large, and then add the fresh flour and water.
- Mix well, cover loosely, and let it sit at room temperature.
- Repeat this process every 12 hours until your starter becomes bubbly and active.
- If you’re keeping your starter for the long term, you can store it in the fridge and feed it once a week.
- The key is consistency—if you feed it regularly, your starter will stay healthy and ready to make the best sourdough bread!
How Do I Know When My Sourdough Starter Is Ready to Use?
Your sourdough starter is ready to use when it becomes bubbly and active, and doubles in size within 4-6 hours of feeding. At this point, you should see small bubbles on the surface, and it should have a pleasant, slightly tangy smell.
You can also do the “float test” to check its readiness—simply take a spoonful of the starter and drop it in a glass of water. If it floats, your starter is good to go. If it sinks, it needs more time or additional feedings.
An active starter is key to a successful loaf, so be patient and make sure your starter is truly ready before incorporating it into your dough. This ensures your bread will rise beautifully and develop that signature sourdough flavor!
Step 2: Mixing and Autolyse
Why Should I Combine Flour and Water First for Better Gluten Development?
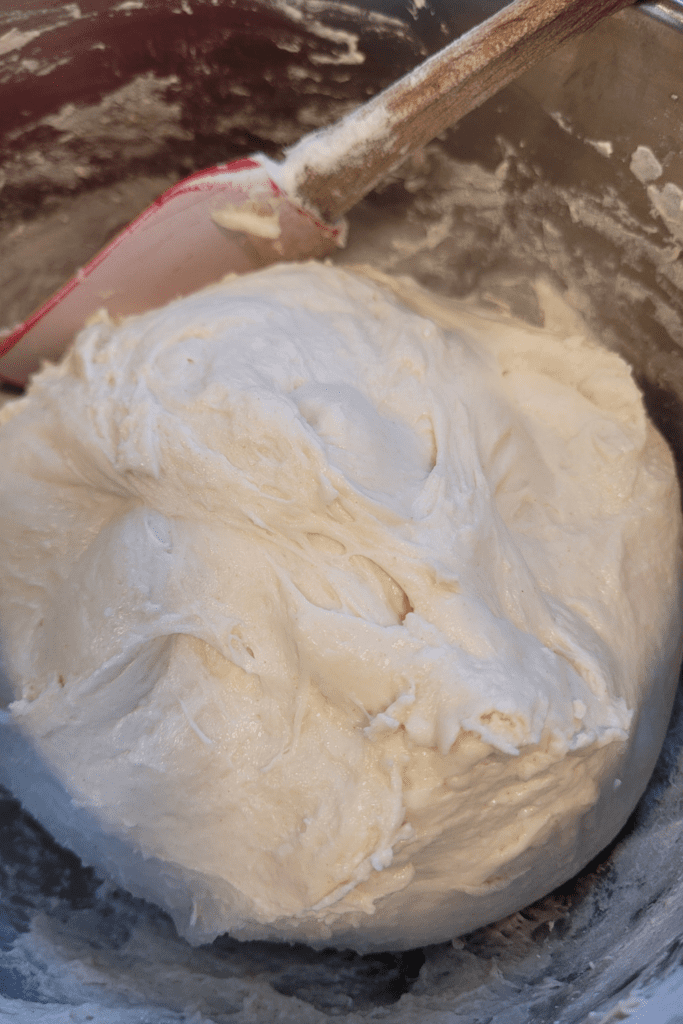
When making sourdough bread, combining flour and water first (without salt) is a crucial step for developing gluten. The water hydrates the flour, allowing the proteins in the flour, mainly glutenin and gliadin, to begin forming gluten strands. This process, known as autolyse, helps improve the dough’s texture and structure.
By letting the flour and water sit for 20-30 minutes before adding salt, you give the gluten a chance to develop naturally, which results in a stronger dough. This extra time enhances the dough’s elasticity, making it easier to shape and helping it hold its rise during baking. It’s a simple but effective step that will give your bread a better crumb and a more satisfying chew.
Why Do I Need to Let the Dough Rest Before Adding Salt?
Letting your dough rest before adding salt is another essential step in the sourdough bread-making process. When you first combine flour and water, it’s important to let the dough rest during the autolyse phase. This rest period allows the flour to fully absorb the water, which activates the gluten and starts the formation of a strong dough.
Adding salt too early can interfere with this process because salt tightens the gluten structure and slows down hydration.
By waiting until after the rest period to add salt, you ensure that your dough develops fully, resulting in a lighter, airier texture once baked. This rest also contributes to the dough’s overall flavor and consistency, setting the foundation for a successful loaf!
Step 3: Kneading
How Do I Add Salt and Knead the Dough for Sourdough Bread?
Once your dough has rested after the autolyse phase, it’s time to add the salt and begin kneading. Adding salt is a critical step because it strengthens the dough’s structure and enhances the flavor.
Sprinkle the salt evenly over the dough, then fold it into the mixture by pinching and folding the dough over itself. After the salt is incorporated, it’s time to knead!
You can knead by hand or use a stand mixer with a dough hook. Knead the dough for about 10-15 minutes, or until it becomes smooth, elastic, and slightly tacky but not sticky.
The goal is to build gluten strength, which helps your dough rise and hold its shape. This process is vital for achieving the signature chewy texture and airy crumb of sourdough bread.
What’s the Best Way to Fold in Chopped Hershey’s Kisses Without Overmixing?

When it’s time to add your chopped Hershey’s Kisses to the dough, you want to make sure they’re folded in gently to prevent overmixing. Overmixing could break up the chocolate too much, causing it to melt prematurely or become too incorporated into the dough.
To avoid this, after your dough has finished its first rise, gently flatten it out on a clean surface. Sprinkle your chopped Hershey’s Kisses evenly over the dough, then use a series of gentle folds—fold the dough over the chocolate and press lightly to incorporate. Do this in stages, folding the dough like you would when folding a letter.
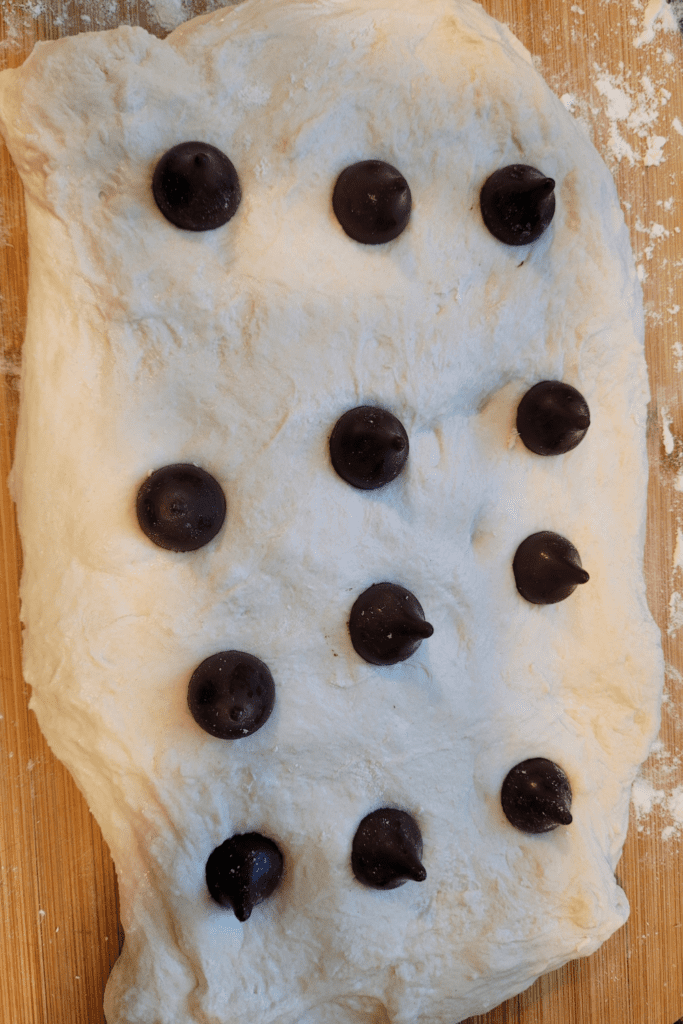
The key is to keep the chocolate pieces intact and evenly distributed without disrupting the dough’s structure. This gentle folding technique will allow you to preserve the chunks of chocolate, ensuring you get lovely pockets of melted Hershey’s Kisses in every slice.
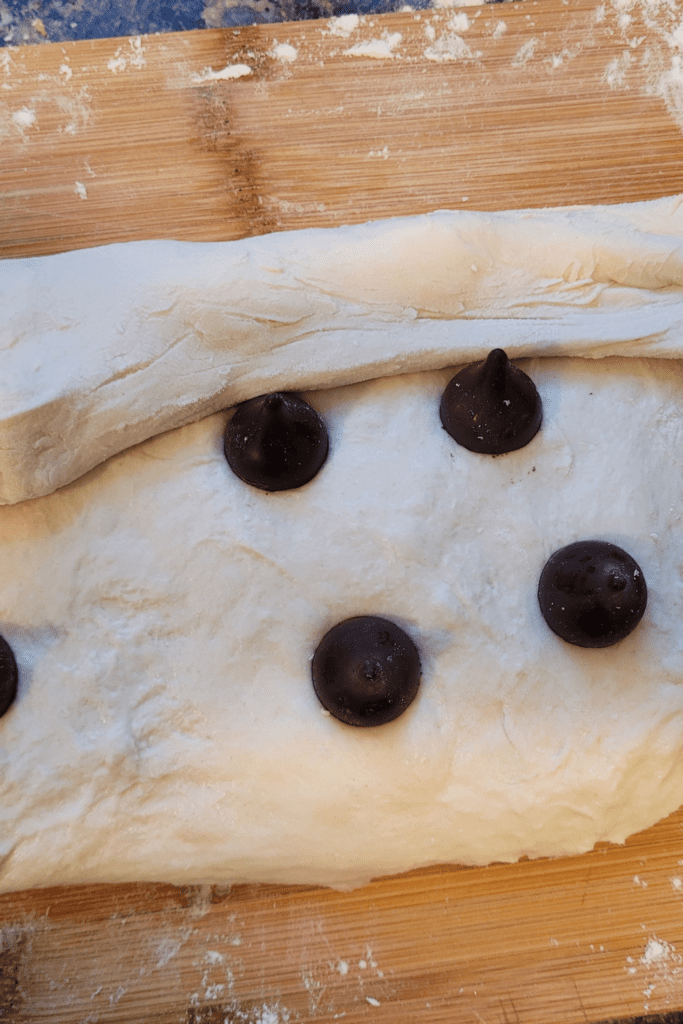
Step 4: Bulk Fermentation
How Long Should I Let My Dough Rise at Room Temperature?
After you’ve mixed your dough, it’s time to let it rise. I recommend letting your dough rise for 4-6 hours at room temperature for the best results. This gives the yeast plenty of time to work its magic, allowing the dough to develop flavor and rise properly. You’ll want to place the dough in a warm, draft-free area, covered with a damp cloth or plastic wrap, so it doesn’t dry out.
During this time, the yeast ferments the sugars in the flour, creating carbon dioxide that makes the dough expand. The longer you allow it to rise, the more complex the flavor becomes. Don’t worry if the dough doesn’t double in size exactly—just ensure it has visibly expanded and feels slightly puffy to the touch before moving on to the next step.
What Is the Stretch and Fold Technique and How Does It Help with Dough Structure?
The stretch and fold technique is one of my favorite ways to build dough structure without overworking it. Once your dough has risen for a few hours, you’ll want to perform the stretch and fold technique to strengthen the gluten and improve the dough’s texture. To do this, gently lift one side of the dough and fold it over itself, then turn the dough 90 degrees and repeat.
This process is done a few times, and it helps to strengthen the dough’s gluten network, which gives your bread better structure and rise. I recommend performing the stretch and fold every 30 minutes or so during the first 2-3 hours of your dough’s rise.
It’s a simple yet highly effective technique that encourages a chewy, airy crumb while preventing the dough from becoming too dense or flat. Plus, it’s much gentler than traditional kneading, which helps maintain the lovely texture of your sourdough.
Step 5: Shaping the Dough
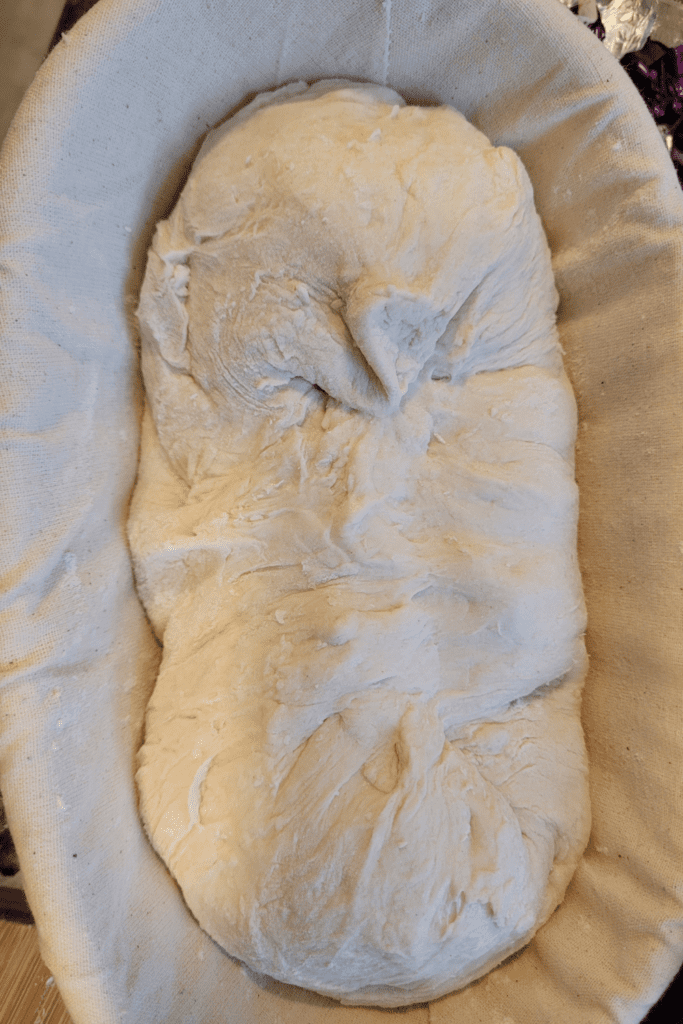
How Do I Shape the Dough and Incorporate Hershey’s Kisses?
Shaping the dough and incorporating Hershey’s Kisses is a fun and simple process that helps you achieve a beautifully risen loaf with pockets of melty chocolate. I start by flattening the dough into a small rectangle on a clean surface. Once it’s shaped, I place Hershey’s Kisses in neat rows across the dough, spacing them evenly to ensure that every slice has a delicious piece of chocolate.
After that, I fold the edges of the dough over the Kisses, creating a sort of envelope to enclose the chocolate. Then, I gently roll the dough into a log, sealing the edges so the Hershey’s Kisses stay tucked inside.
Finally, I place the dough seam-side up into a banneton (a round proofing basket) to help it maintain its shape as it rises. This method ensures that the chocolate stays inside while baking and that you’ll get evenly distributed pockets of chocolate in every bite.
Why Do I Let the Dough Rest Before Final Proofing?
Allowing the dough to rest before final proofing is an essential step in the sourdough bread process. After shaping the dough and incorporating the Hershey’s Kisses, it’s important to give the dough a bit more time to relax.
Resting the dough helps to prevent it from becoming too tight, which could interfere with its final rise. I usually let my dough rest for 20-30 minutes before moving on to the final proofing stage. This short rest period allows the gluten to relax, which makes the dough easier to shape and less likely to shrink back when it’s time to proof it fully.
During this time, the dough continues to ferment gently, developing its flavors further. Plus, it ensures that your bread has the light, airy texture and deliciously rich pockets of chocolate that we all crave!
Step 6: Final Proofing and Baking
Should I Cold Proof My Dough Overnight or Bake It the Same Day?
When it comes to proofing your sourdough bread, you have two great options: overnight cold proofing or same-day baking. Cold-proofing the dough overnight in the refrigerator gives the yeast more time to develop complex flavors, resulting in a tangier taste and better texture.
If you choose this method, place your shaped dough in the fridge after the initial rise and let it rest for 12-16 hours. On the other hand, same-day baking works well if you’re in a rush. You can allow the dough to rise at room temperature for 4-6 hours and then bake it immediately.
While this method doesn’t allow for as much flavor development, it’s a great option if you need bread in a pinch. Personally, I love the flavor depth that comes with cold-proofing overnight, but both methods work well, depending on your schedule!
How Do I Score My Sourdough for the Best Aesthetic and Even Baking?
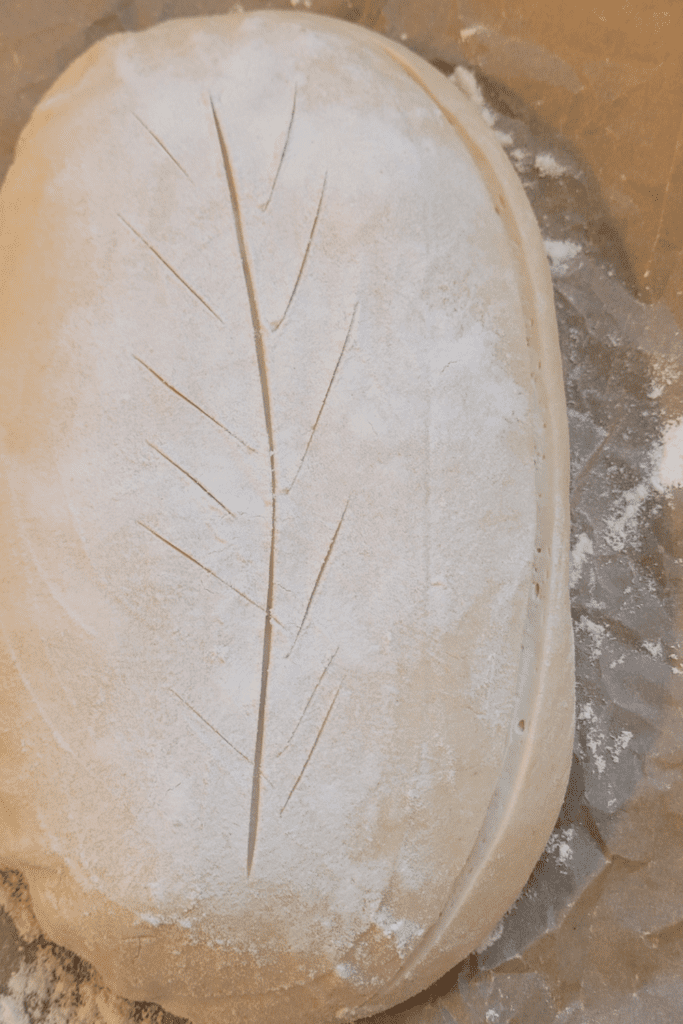
Scoring your sourdough bread is not only a way to create beautiful designs but also helps the bread bake evenly by controlling where the dough expands during baking. For a perfect score, I use a sharp razor blade to gently slice the surface of the dough just before baking.
The scoring should be done in a swift motion to avoid compressing the dough, which can interfere with the rise. I like to create a simple cross pattern or a long slash down the center of the loaf.
These slashes allow the bread to expand predictably, creating a nice, even rise and helping to form that gorgeous crackling crust. Scoring is an essential technique that makes your bread look as good as it tastes, so don’t skip it!
Why Should I Bake Sourdough in a Dutch Oven for the Best Crust?
Baking sourdough in a Dutch oven is one of the secrets to achieving a perfect crust. The heavy cast-iron design traps steam during the first part of the bake, creating a moist environment inside the pot. This steam allows the dough to rise more easily and results in a golden, crispy crust that’s full of flavor.
I preheat my Dutch oven in oven while the dough is resting, and then carefully transfer my shaped dough into the hot pot.
Cover the Dutch oven with its lid and bake it for the first 20 minutes. After that, I remove the lid to let the crust brown and crisp up. The result is a beautifully golden loaf with that signature crunchy, crackly crust and soft, airy interior. Baking in a Dutch oven really does make a difference when it comes to achieving bakery-quality bread at home!
Tips for the Perfect Hershey’s Kisses Sourdough Bread
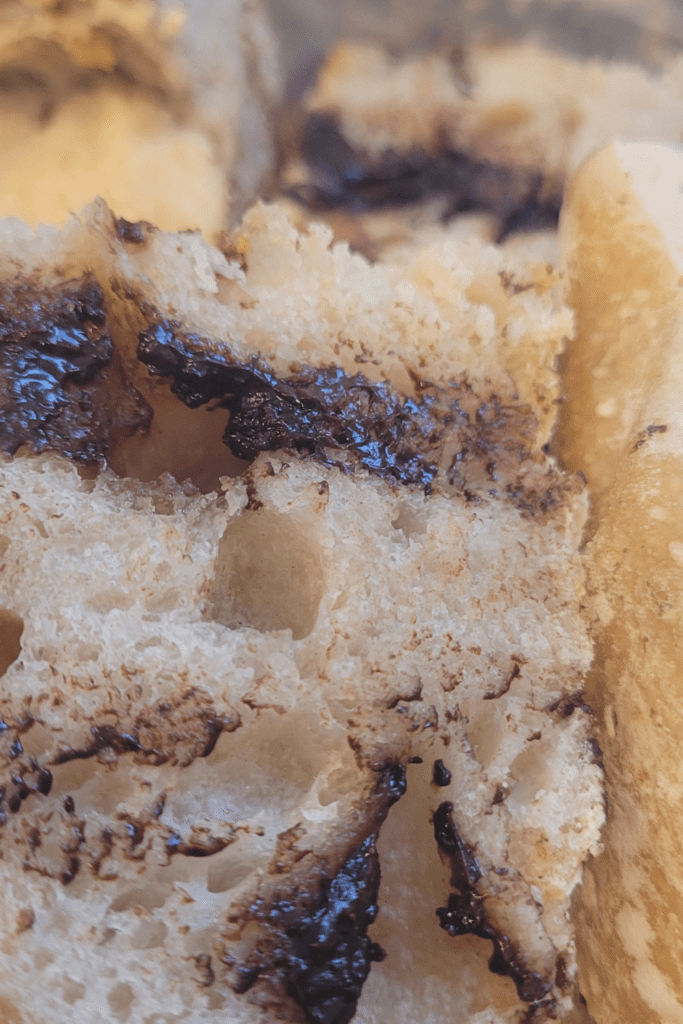
What’s the Best Way to Place Chocolate in Sourdough for Even Distribution?
When it comes to incorporating chocolate into sourdough bread, achieving even distribution is key for that perfect bite of melty, rich chocolate in every slice. I like to chop the Hershey’s Kisses into small, even pieces to ensure the chocolate is well-distributed throughout the dough.
After flattening the dough and arranging the chocolate in rows, I gently fold the dough over the chocolate, creating layers that will allow the chocolate to remain intact while baking. The secret is to avoid overworking the dough while folding it, as this can cause the chocolate to melt too much and disperse unevenly.
By carefully folding and rolling, the chocolate stays tucked inside the dough, ensuring that each slice has a balanced amount of sweetness without overpowering the tangy sourdough flavor. This method guarantees that you’ll enjoy the perfect mix of sour and sweet in every bite!
How Do I Adjust Hydration for Different Flour Types in Sourdough?
Different flour types absorb water differently, so adjusting the hydration level in your sourdough recipe is essential for achieving the right dough consistency. For example, whole wheat flour absorbs more water than all-purpose flour, meaning you may need to increase the hydration when using whole wheat or a combination of flours.
If you’re using high-protein flour, such as bread flour, you might also need to increase the water to create a dough that’s elastic enough to rise properly. I find that adding water gradually is the best approach, allowing you to monitor the dough’s consistency as you go.
The dough should be soft and slightly tacky but not overly sticky. Once you’ve achieved the right hydration, you’ll notice your bread rises beautifully, creating that airy, chewy texture that makes sourdough so irresistible.
How Do I Get a Crispy Crust While Keeping the Inside Soft?
Getting the perfect balance between a crispy crust and a soft, airy interior is one of the hallmarks of great sourdough bread. To achieve this, baking in a Dutch oven is one of my top tips because it traps steam during the first part of the baking, which helps the bread develop a beautiful, crunchy crust.
The key is to bake the bread with the lid on for the first 20 minutes, which allows the steam to work its magic, then remove the lid for the remaining baking time to brown and crisp up the crust. Additionally, maintaining the right hydration level in your dough contributes to the soft interior. Too little water can result in a dense crumb, while too much water may lead to a soggy texture.
By adjusting both your baking method and dough hydration, you’ll create a loaf with a golden, crackly crust and a soft, chewy center that’s simply irresistible!
How Do I Store and Reheat Sourdough Bread for Maximum Freshness?
To keep your sourdough bread fresh, it’s important to store it correctly to maintain its flavor and texture. I recommend wrapping the bread in a clean, dry kitchen towel and placing it in a paper bag or breadbox to keep it from drying out. Avoid storing sourdough in plastic, as it traps moisture and can make the crust soft. If you want to store it for a longer period, freezing the bread is a great option.
Slice the bread first, then wrap individual pieces tightly in plastic wrap and place them in a freezer bag. When you’re ready to enjoy it, simply toast or warm the slices in the oven for a few minutes. This method keeps the bread tasting fresh and ensures the crust stays crispy while the inside remains soft and flavorful.
With the right storage and reheating methods, your sourdough will stay delicious for days!
Variations and Serving Ideas
Flavor variations
Should I Add Cinnamon or Vanilla to My Sourdough to Complement the Chocolate?
If you’re looking to elevate the flavor of your Hershey’s Kisses sourdough bread, adding cinnamon or vanilla is a great way to complement the chocolate. I love adding a dash of ground cinnamon to the dough as it bakes because the warmth of the spice balances the rich, creamy chocolate in a way that creates a comforting, cozy flavor.
You can also stir in a teaspoon of vanilla extract during the mixing process. The vanilla adds a subtle, aromatic sweetness that pairs beautifully with the chocolate, enhancing the overall flavor profile without overpowering it. Both cinnamon and vanilla are classic additions to chocolate bread recipes, giving your sourdough that extra layer of complexity that makes each bite even more delicious.
These simple ingredients bring out the best in both the tangy sourdough and the sweet, melty chocolate, making every slice a treat to remember!
Can I Mix Nuts into My Sourdough for Extra Texture?
If you love a little crunch in your bread, mixing in some nuts is an excellent way to add extra texture to your Hershey’s Kisses sourdough. Nuts like walnuts, pecans, or almonds are perfect for this recipe because they add a satisfying contrast to the chewy bread and the melty chocolate.
When I add nuts to my sourdough, I chop them roughly to ensure they’re evenly distributed throughout the dough, creating little pockets of crunch. You can mix the nuts in during the folding process, right before incorporating the Hershey’s Kisses, to make sure they stay well-mixed without overworking the dough.
Adding nuts not only enhances the texture of the bread but also brings a nutty richness that pairs wonderfully with the chocolate. The result is a loaf that’s as visually appealing as it is delicious, with a perfect combination of chewy, crunchy, and creamy in every bite.
Serving suggestions
What Are the Best Spreads and Toppings for Hershey’s Kisses Sourdough Bread?
When it comes to enjoying a slice of Hershey’s Kisses sourdough bread, the right spread or topping can really take it to the next level. I personally love spreading a thin layer of butter over the warm, freshly baked bread—its creamy texture melts beautifully into the chewy, tangy sourdough.
For a touch of sweetness, fruit preserves like strawberry, raspberry, or even apricot make a fantastic addition, complementing the chocolatey richness of Hershey’s Kisses. If you’re in the mood for something even sweeter, drizzle a little honey over the top for a natural, smooth sweetness that pairs perfectly with both the chocolate and the bread’s tang.
Each of these toppings brings a different layer of flavor, so you can mix and match to suit your mood or the occasion. Whether you’re having it for breakfast, a snack, or dessert, these simple spreads make your sourdough bread even more irresistible!
What’s the Best Drink to Pair with Hershey’s Kisses Sourdough Bread?
Pairing your Hershey’s Kisses sourdough bread with the perfect drink can turn a simple snack into a delightful experience. I’ve found that a hot cup of coffee is a great choice, especially if you’re enjoying your bread in the morning.
The rich, bold flavor of the coffee complements the sweetness of the chocolate while cutting through the tanginess of the sourdough. If you prefer tea, a black tea like Earl Grey or English Breakfast pairs beautifully with the bread’s texture and flavor. The subtle bitterness of the tea enhances the sweetness of the chocolate without overpowering it.
For those who like a more indulgent pairing, a glass of cold milk is always a classic option. The creamy texture of milk balances the warm, melty chocolate and adds a comforting element to each bite of sourdough. Whatever drink you choose, these pairings elevate your bread and create the perfect, cozy snack!
Conclusion
Why Is the Combination of Sourdough and Hershey’s Kisses So Delicious?
The combination of sourdough and Hershey’s Kisses is a match made in baking heaven! The tangy, chewy texture of the sourdough perfectly complements the rich, melty sweetness of the chocolate.
Each bite offers a delightful contrast between the natural sourness of the bread and the creamy sweetness of the chocolate, creating a truly unique flavor profile that will have your taste buds dancing. The crispy crust adds an extra layer of texture, while the soft interior is filled with little pockets of chocolate goodness.
Whether you enjoy it as a snack, dessert, or even as a special breakfast treat, this bread is a comforting and indulgent way to bring together two of the best baking elements—sourdough and chocolate!
Why Should You Try This Hershey’s Kisses Sourdough Bread Recipe?
I encourage you to give this Hershey’s Kisses sourdough bread recipe a try, especially if you love experimenting in the kitchen. It’s a fun twist on traditional sourdough, offering you the perfect opportunity to blend two classic elements—sourdough and chocolate.
The recipe is surprisingly simple, requiring just basic ingredients like flour, salt, and water, but with the addition of Hershey’s Kisses, it turns into something truly extraordinary.
Plus, the flexibility of the recipe allows you to customize it by adding extras like cinnamon, nuts, or even different kinds of chocolate. Feel free to get creative! Experiment with various add-ins or toppings to make this bread your own. Trust me, once you try it, you’ll be hooked!
I’d absolutely love to hear about your results or answer any questions you may have about making this Hershey’s Kisses sourdough bread. If you’ve tried the recipe and made your own variations, share your experiences in the comments below! Was there a flavor or topping you particularly loved? Or maybe you tried a new twist, like adding nuts or spices, and want to tell others about it.
Feel free to ask any questions if you’re stuck on a step, and I’ll be happy to help. I love connecting with my readers and seeing how you all bring your own creativity to this recipe. So, let’s keep the conversation going—leave a comment, share your results, or ask for tips, and I’ll be sure to get back to you!
Resources: Here are some helpful resources for further information.
- Adding Inclusions to Sourdough Artisan Bread – By Amy Bakes Bread
- How to Make Additions to Sourdough Bread By The Pantry Mama
- Sourdough Inclusions: What to Add to Your Bread & When – By Simplicity and a Starter

Frequently Asked Questions
1. Can I use any type of Hershey’s Kisses in this recipe?
Yes! You can use classic milk chocolate, dark chocolate, or flavored varieties like caramel or almond for a unique twist. Just chop them into smaller pieces for better distribution.
2. Will the chocolate melt too much during baking?
Hershey’s Kisses will soften and create delicious chocolate pockets inside the bread. To prevent excessive melting, you can freeze the chocolate pieces before adding them to the dough.
3. How should I store this bread to keep it fresh?
Store it in an airtight container at room temperature for up to 3 days. For longer storage, freeze slices in a sealed bag and reheat as needed.
4. Can I make this bread without a Dutch oven?
Yes! You can bake it on a preheated baking stone with a pan of hot water in the oven to create steam for a crispy crust.
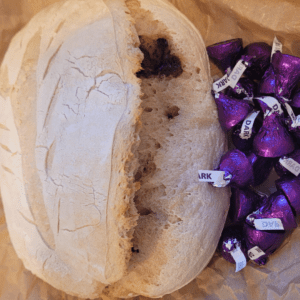
Hershey’s Kisses Sourdough Bread
Equipment
- 1 mixing bowl
- 1 Bannaton (or any bowl for bulk fermentation)
- 1 Dutch oven.
Ingredients
- ½ cup sourdough starter, active and bubbly
- 1 ⅓ cups warm water
- 3 ½ cups all-purpose flour
- 2 tsp salt
- 1 cup Hershey's Kisses, unwrapped, chopped or whole. I left mine whole!
Instructions
Mix the Dough
- In a large bowl, combine the sourdough starter, flour, and salt. Slowly add water, mixing until you have a sticky dough.
- Once the dough comes together, knead it for about 10 minutes until smooth.
First Rise (Bulk Fermentation)
- Cover the bowl with a damp towel or plastic wrap and let the dough rise at room temperature for 4-6 hours, or until it has doubled in size.
Incorporate Hershey’s Kisses
- Once the dough has risen, gently flatten it into a small rectangle. Evenly space chopped Hershey’s Kisses over the dough.
- Carefully fold the dough around the Kisses and roll it into a log, ensuring the chocolate is evenly distributed inside.
Shape and Rest
- Place the dough seam-side up into a banneton or a bowl lined with parchment paper.
- Let it rest for about 30 minutes before the final proofing.
Final Proofing
- Let the dough rest for 1-2 hours for the final rise or refrigerate it overnight for an overnight cold proof (optional).
Preheat Oven
- Preheat your oven to 450°F (230°C). Place a Dutch oven inside to heat as well.
Score and Bake
- Once the dough is ready, carefully score the top with a sharp knife or razor blade. This allows the bread to expand while baking.
- Carefully transfer the dough to the preheated Dutch oven and cover. Bake for 25 minutes, then remove the lid and bake for another 10-15 minutes until the crust is golden brown.
Cool and Enjoy
- Let the bread cool on a wire rack for at least 30 minutes before slicing to allow the chocolate to set. Enjoy your delicious Hershey’s Kisses sourdough bread.
Summary
I hope I have inspired you to bake your very own bread loaves to enjoy and share with your friends and family.
If you were encouraged by this post, I invite you to check out my FREE Printables Page for fun free printables, planners, and charts.
ENTER MY FREE Printables Page HERE
Here are some more of my bread-making inspiration posts to check out!
How to Make Amish Whoopie Pies!
Lazy Cinnamon Rolls: How to Make Easy Cinnamon Rolls the Lazy Way!
Lembas Bread: How to Make Elven Lembas Bread: A Taste of Rivendell
Gnome Bread: How to Make a Sourdough Gnome Bread
The Best Hoagie Buns Recipe Made From Scratch!
Pumpkin: How to Make Chocolate Chip Pumpkin Bread
Sweet Potato Bread: How to Make Sweet Potato Bread
Chocolate Chip Cookies: How to Make Chocolate Chip Cookie Bread
Carrot Cake Quick Bread: How to Make Carrot Cake Quick Bread
How to Make Strawberries and Cream Sourdough Bread
How to Make S’mores Sourdough Bread
July 4th Bread: How to Make a Firecracker Marble Bread Braid
Artisan Bread: How to Make Artisan Bread
Challah Bread: How to Make a 6 Braided Challah Bread
Sweet Bread: How to Make Sweet Bread
Blessings,
The Off Grid Barefoot Girl

