Learn how to propagate and grow grapes in your own backyard with this simple guide to getting started. Whether you’re planting bare-root vines, starting from cuttings, or training established vines, growing grapes is easier than you think. With the right pruning, support system, and sun-loving spot, you can enjoy homegrown table grapes, juice, or even homemade wine. Discover tips for soil prep, watering, and keeping your grapevines healthy year after year.
My Journey with Growing Grapes
Growing grapes in my backyard orchard has been one of the most rewarding experiences of my self-sufficiency lifestyle. I started with just a few cuttings from a neighbor’s vine, unsure if they would even survive. To my delight, those humble beginnings turned into thriving, fruitful vines that now provide us with an abundance of sweet, juicy grapes every year.
Along the way, I’ve learned a lot about the process—from propagation to care—and I can’t wait to share my insights with you so you can experience the joy of homegrown grapes too.
Why Grow Grapes in Your Backyard?
There’s something magical about growing your own grapes. For starters, the fresh, sun-ripened fruit tastes far better than anything you’ll find in stores. Whether you snack on them fresh, make jams and jellies, or even venture into wine-making, grapes are incredibly versatile.
Plus, grapevines add natural beauty to your backyard, creating a lush, green canopy that’s perfect for summer shade. They’re not just plants; they’re an investment in your space and your sustainability journey.
How to Propagate, Plant, and Care for Grapes
If you’ve never grown grapes before, don’t worry—I’ll walk you through every step. We’ll start with propagation, where I’ll teach you how to turn a simple cutting into a thriving vine. From there, I’ll show you how to plant your vines in the right spot to give them the best start possible.
Finally, I’ll share the care techniques that have worked for me, including watering, pruning, and pest management. By the end, you’ll have everything you need to grow a thriving grapevine orchard of your own!
This is a pinnable post. Tap or hover over any image in this post to pin to your Pinterest Boards.

Understanding Grapes: Varieties and Growing Conditions
Choosing the Perfect Grape Variety for Your Goals
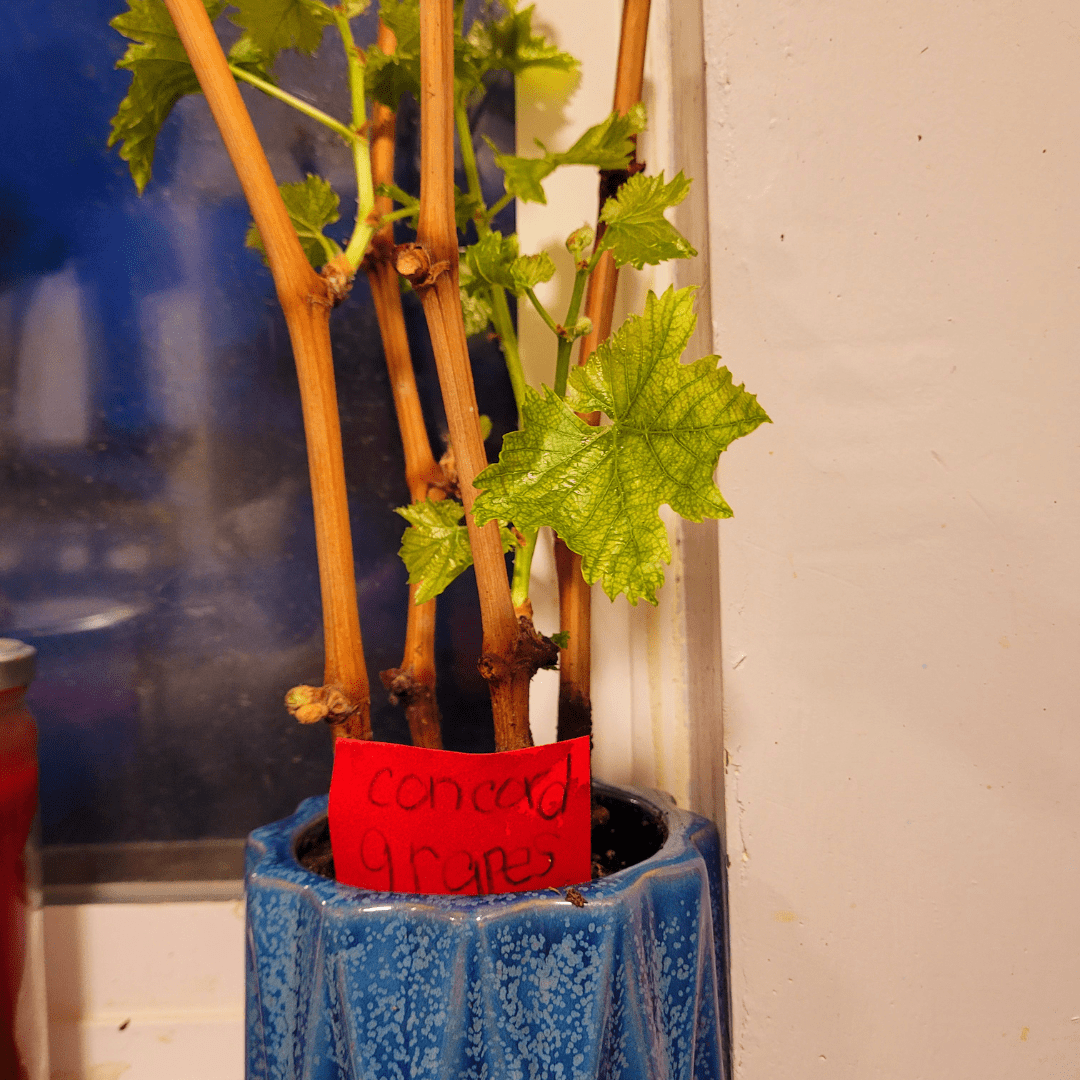
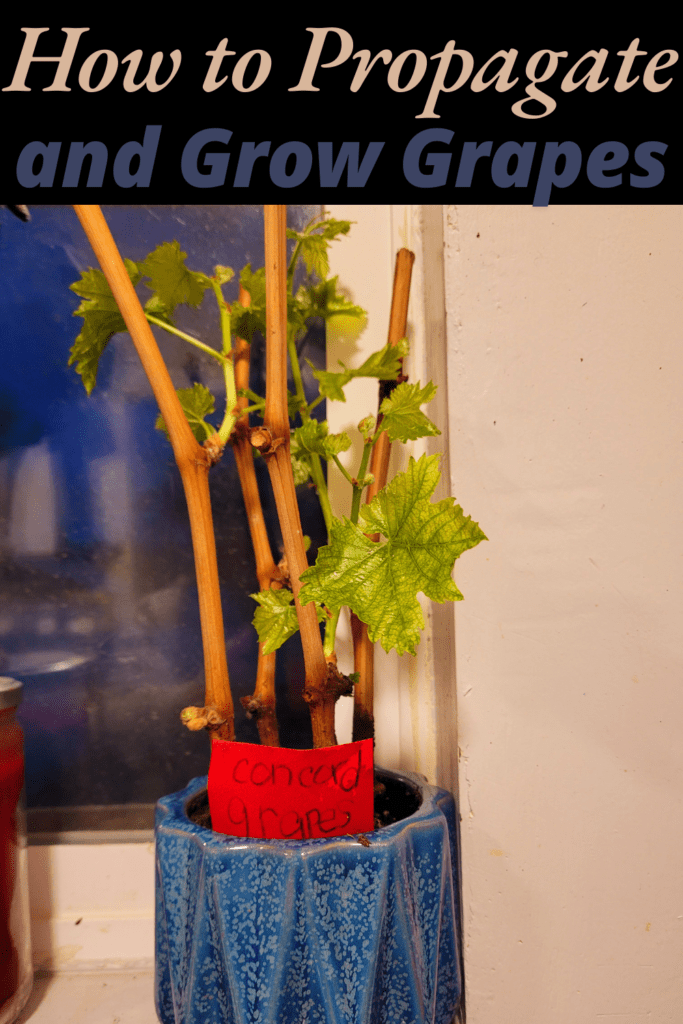
When I first started growing grapes, I had no idea how many varieties there were! Grapes come in two main categories: table grapes and wine grapes. Table grapes, like Concord or Thompson Seedless, are perfect for fresh eating or making homemade jams and jellies. I grow a ton of Concord grapes in my backyard orchard.
Wine grapes, such as Cabernet Sauvignon or Chardonnay, are ideal if you want to try your hand at winemaking. Some varieties, like Muscadine, are multipurpose and thrive in specific climates. Knowing what you want to do with your grapes—whether snacking, preserving, or fermenting—will help you decide which type to plant.
Finding Grapes That Thrive in Your Area
One of the first lessons I learned was that not all grape varieties grow well everywhere. Your climate and soil type play a huge role in which vines will flourish. For example, cold-hardy varieties like Frontenac are better suited for colder regions, while heat-tolerant varieties like Zinfandel love a warm climate.
Soil drainage is another big consideration; grapes don’t like soggy roots. I recommend talking to local growers or visiting a nursery to find out which varieties perform best in your area. Trust me, choosing the right grape is half the battle!
Creating the Ideal Environment for Grapevines
Grapevines are sun-loving plants—they need at least 6 to 8 hours of direct sunlight daily to thrive. I’ve found that a sunny spot with good air circulation helps prevent diseases and keeps the vines healthy. Drainage is equally important; your soil should allow excess water to flow freely to avoid root rot.
Space is another key factor—grapevines need room to spread, whether horizontally along a trellis or vertically on an arbor. Planning these details before planting will set your vines up for success and save you a lot of headaches later.
Propagation Techniques: Starting from Cuttings

How to Select Healthy Parent Vines
When propagating grapes, the success of your new vines starts with the parent plant. I always take cuttings from healthy, mature vines that have been producing well for at least a few years. Look for canes that are disease-free, show no signs of pests, and have grown vigorously throughout the season.
If the parent vine is thriving, your cuttings will have a much better chance of developing into strong, productive plants. Think of it as giving your new vines the best possible head start!
The parent vine that I took these cuttings from was very much thriving as it pushed its way over onto my side of the fence from my neighbor’s yard. If it was determined to venture away from its contained arbor and make its way over onto my side of the fence and halfway across the yard, then I knew this was the vine from which to take the cuttings!
Proper Tools and Techniques for Taking Cuttings
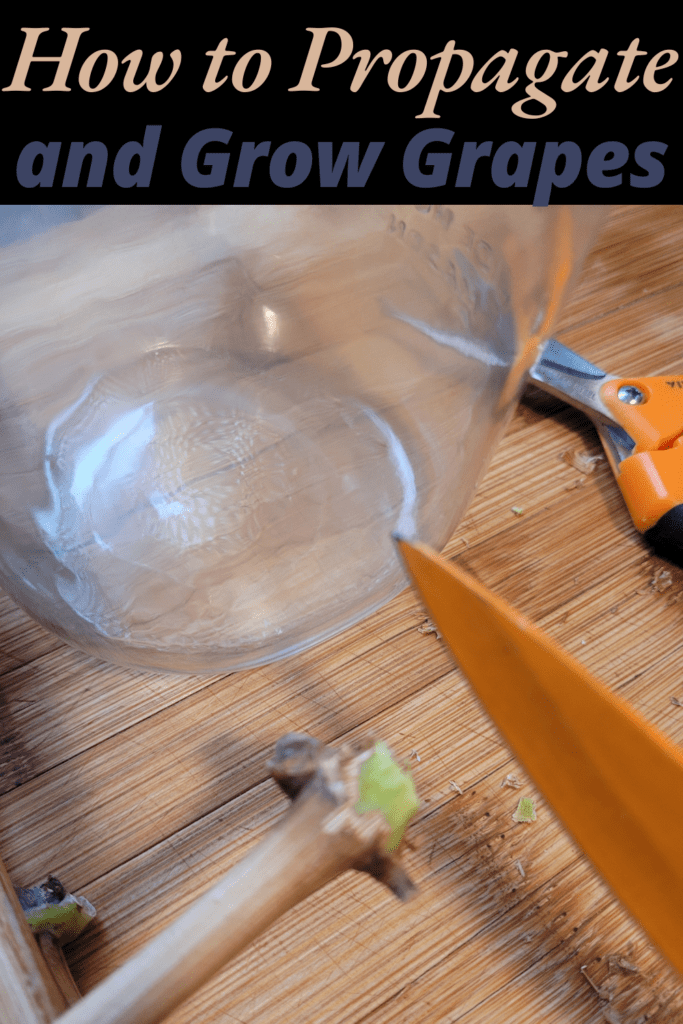
Using the right tools makes all the difference when taking grape cuttings. I always use sharp, clean pruning shears or a knife to make precise cuts without damaging the vine. Dull tools can crush the stems, making it harder for the cuttings to root.
Before I start, I disinfect the blades with rubbing alcohol to prevent the spread of any potential diseases. When cutting, aim for a smooth, diagonal cut just below a node (where roots will grow), which maximizes the surface area for rooting.
Ideal Cutting Length and Number of Nodes
The size and structure of your cuttings are crucial for successful propagation. I’ve found that cuttings about 10-12 inches long work best, with at least three to four nodes. The nodes are the tiny bumps on the vine where new roots and shoots will emerge.
By including multiple nodes, you’re giving your cutting more opportunities to establish itself. Just make sure to leave about an inch of stem below the lowest node and remove any leaves or tendrils to focus the plant’s energy on rooting. These small steps make a big difference in your propagation success!

Water Method for Rooting Grape Cuttings
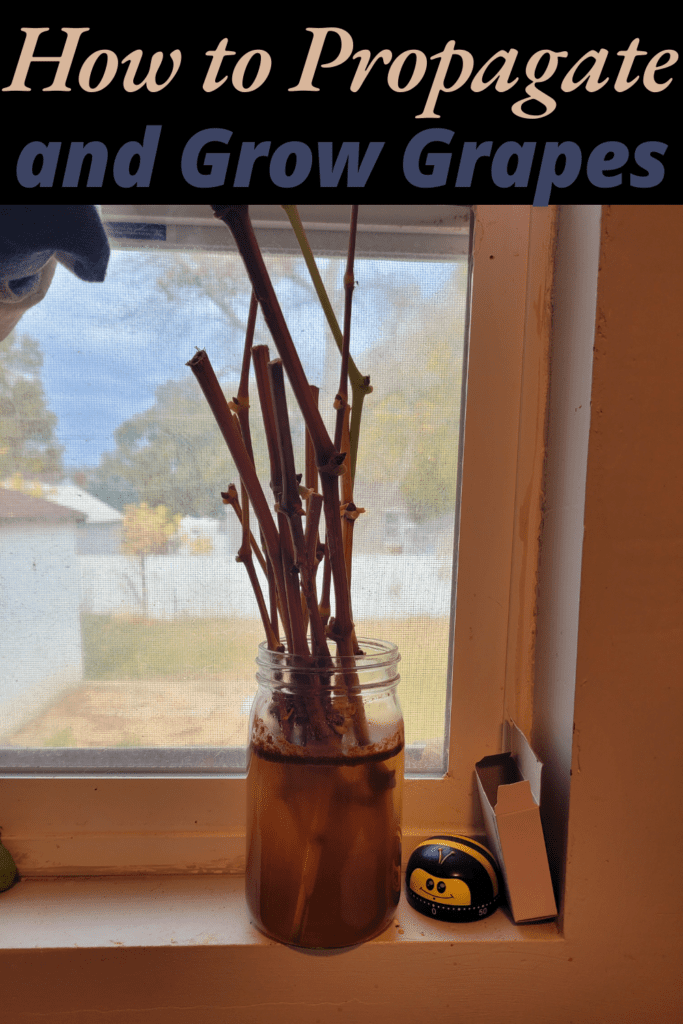
One of the easiest and most effective ways I’ve found to root grape cuttings is by using the water method. After selecting healthy cuttings, I place them in a jar or container filled with water, ensuring that at least one or two nodes are submerged. I keep the container in a warm, bright spot, but out of direct sunlight to avoid stressing the cuttings.
Every few days, I change the water to keep it fresh and prevent any mold or bacteria from forming. Within a few weeks, you should start to see roots forming at the submerged nodes. Once the roots are a few inches long, I transplant the cutting into soil, where it can continue to grow into a strong vine. This method is a simple way to watch your grapevines take root and thrive, and it’s always exciting to see those first signs of growth! It is also a sure way of keeping well-hydrated during the rooting process!
Preparing the Soil or Medium for Rooting
You do not only need to keep them in water. You can directly plant them in the soil. Creating the right environment for your grape cuttings to root is key to their success. I like to use a well-draining mix, such as a combination of sandy soil and peat moss, to encourage healthy root development. The medium should be light and airy, allowing the cuttings to stay moist without becoming waterlogged.
Before planting the cuttings, I moisten the soil just enough so it feels damp but not soggy. This balance ensures the cuttings have the perfect environment to start growing roots.
Using Rooting Hormones (Optional)
While not strictly necessary, I’ve found that using rooting hormones can give your cuttings an extra boost. Rooting hormones help stimulate faster and stronger root growth, especially for varieties that are a bit trickier to propagate. If you decide to use one, simply dip the bottom inch of each cutting into the powder or gel before planting.
Be careful not to overapply—a light coating is all you need. It’s a small step, but it can make a big difference in your success rate.
Maintaining Humidity and Temperature for Successful Rooting
Once the cuttings are planted, keeping the environment humid and warm is essential for rooting. I like to cover my pots with a clear plastic bag or use a mini greenhouse to trap moisture while allowing some airflow. Aim for a temperature of around 70-75°F (21-24°C), as warmth encourages root growth.
Be sure to check the soil regularly and mist the cuttings if they start to dry out. Creating this cozy, stable environment mimics natural growing conditions and helps your cuttings develop strong roots more quickly.
Signs of Successful Rooting
One of the most exciting parts of growing grapes from cuttings is watching for the signs that the roots are taking hold. After about 4-8 weeks, you can gently tug on the cutting to feel if there’s resistance—if the cutting pulls back, that’s a sure sign that roots have developed. This is much easier if you are rooting in water in a glass jar.
Another great indicator is the growth of tiny buds or new leaves emerging from the top of the cutting. This is a clear signal that your cutting has rooted successfully and is ready to take the next step in its growth journey. It’s always a thrilling moment for me when I see those first signs of life!
Timeline for Transplanting
Once your grape cutting has rooted successfully, it’s time to transplant it into its permanent spot. I usually wait until the roots are at least a few inches long and the plant shows signs of strong growth before moving it. Typically, this happens around 2-3 months after planting the cutting.
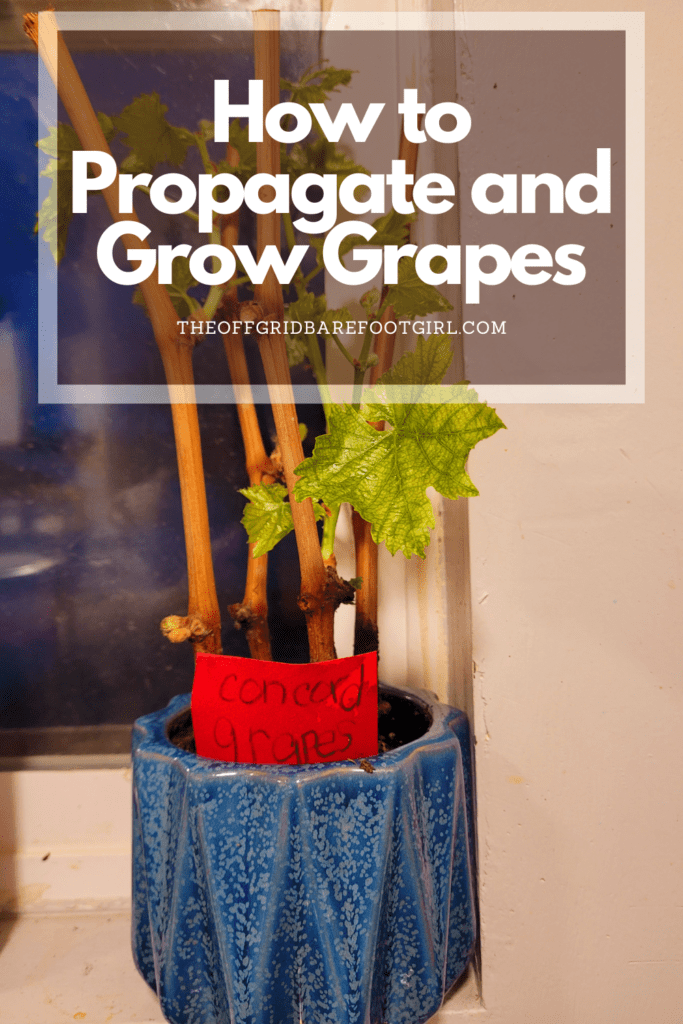
To give you a timeline of my rooting success, I took the cuttings on November 2, 2024, and I noticed signs of roots and growth around mid-December. I just kept the jar on my windowsill in my kitchen. Also, be sure to take more cuttings than you think you may need! I took 12 cuttings and only 4 rooted perfectly, which I am happy with.
At this point, you can either transplant your vine into a larger pot or directly into the ground if the weather is warm enough and your soil is prepared. Be sure to handle the roots gently to avoid damaging them, and give your new vine plenty of space to spread its roots and thrive in its new home. This step marks the beginning of its transformation from a cutting into a mature, productive grapevine!
Planting Your Grape Vines

Preparing and Amending the Soil for Optimal Conditions
When I first planted my grapevines, I learned quickly that the right soil is crucial for healthy growth. Grapes thrive in well-drained, slightly acidic soil, so I took the time to test my soil’s pH and structure before planting. If your soil is heavy or clay-like, I recommend amending it with organic matter like compost or aged manure to improve drainage and aeration.
If the pH is too high, you can lower it with sulfur or a soil acidifier. Over the years, I’ve learned that a little extra care with the soil goes a long way in giving your vines the best start. Healthy soil means healthier vines, which leads to bigger, tastier harvests!
Designing Trellises or Other Support Systems
Grapevines love to grow tall, and one of the most important steps in their care is giving them the proper support. I’ve had great success using simple trellises or arbors, which help the vines spread out and receive ample sunlight. I like to design my trellis systems with horizontal wires that the vines can climb, as this encourages air circulation and reduces the risk of fungal diseases.
Depending on your space, you can opt for freestanding trellises, or if you want something a bit more charming, a grapevine arbor can double as a beautiful focal point in your garden. The key is to provide sturdy support as the vines grow, helping them stay upright and healthy for years to come.
Best Time of Year to Plant
When it comes to planting grapevines, timing is everything. From my experience, the best time to plant grapes is in early spring or late fall, when the weather is mild, and the vines can settle in before the extreme heat or cold sets in. I prefer planting in early spring, just after the last frost, so the vines have time to establish their roots before the summer heat.
If you live in a warmer climate, planting in the fall can give your vines a head start with the cooler, wetter months. No matter when you plant, just make sure the ground is workable and not too soggy to ensure healthy root development.
Spacing Between Vines and Rows
Grapevines need room to grow, and spacing them properly is crucial for their success. From my own experience, I’ve found that spacing vines about 6 to 8 feet apart gives them plenty of room to stretch out and form a healthy canopy. If you’re planting multiple rows, I recommend spacing the rows at least 8 feet apart to allow for easy maintenance and good air circulation between the vines.
Crowding can lead to competition for nutrients and water, and poor airflow increases the risk of disease. Giving each vine enough space ensures they’ll have room to grow strong and produce a bountiful harvest.
Tips for Ensuring Strong Root Establishment
Getting the roots of your grapevines established is the foundation for a healthy, productive plant. One tip I swear by is to dig a hole twice the size of the root ball to allow the roots to spread out easily. I also make sure to loosen the soil around the roots gently to encourage growth in all directions.
After planting, I give the vines a deep watering to help settle the soil around the roots and ensure good contact. To encourage strong root establishment, I mulch around the base of the vine with organic material like straw or wood chips. This helps retain moisture, regulate soil temperature, and prevent weeds from competing with the roots. I’ve found that with a little extra care in these early stages, my grapevines grow stronger and are more resilient in the long run.
Caring for Grape Vines
How Much and How Often to Water
When it comes to watering grapevines, I’ve learned that consistency is key. Grapevines need deep, infrequent watering rather than frequent shallow watering. I typically water my vines once a week during the growing season, making sure to thoroughly soak the soil around the base. It’s important not to let the soil dry out completely, but also not to let it become waterlogged.
I always check the moisture level a few inches below the surface before watering to ensure the roots are getting enough water without sitting in it. Over-watering can lead to root rot, so it’s about striking the right balance. As the vines mature, their water needs decrease, but during the first few growing seasons, consistent hydration is crucial for establishing strong, deep roots.
Choosing and Applying the Right Fertilizers
Fertilizing your grapevines properly helps them grow strong and healthy, but it’s important not to overdo it. From my experience, I’ve found that organic fertilizers, like compost or well-rotted manure, work wonders. I apply a balanced fertilizer in early spring as the vines begin to break dormancy, giving them a boost of nutrients to fuel their growth.
Later in the growing season, I switch to a fertilizer with a higher phosphorus and potassium content, which supports fruit development. I usually spread the fertilizer around the base of the vine, being careful not to let it touch the trunk. After applying, I water the area thoroughly to help the nutrients soak into the soil. By choosing the right fertilizers and timing their application, I’ve seen my grapevines flourish with healthy growth and delicious fruit.
The Importance of Annual Pruning for Grape Production
Pruning is one of the most essential tasks I perform each year to ensure my grapevines produce high-quality fruit. I’ve learned that annual pruning helps remove dead or diseased wood, encourages new growth, and ensures the vine doesn’t become too overgrown. By cutting back old wood, I allow the plant to focus its energy on healthy, productive canes.
Pruning also improves sunlight penetration and airflow within the vine, which is crucial for preventing fungal diseases. I prune my grapevines in late winter or early spring while they’re still dormant, making sure to cut back about 80% of the previous year’s growth. This might seem harsh, but it’s necessary for maintaining a productive, healthy vine!
Techniques for Shaping Vines and Maintaining Airflow
Shaping my grapevines is something I’ve gotten better at over the years, and it’s essential for both their health and fruit production. I like to use a trellis system with horizontal wires to train my vines in a way that maximizes airflow and sunlight exposure.
As the vines grow, I direct the canes to grow along the wires, ensuring they have enough space to stretch out. I focus on keeping the center of the vine open to allow air to circulate, which prevents moisture buildup and reduces the risk of diseases like mildew.
I also remove any side shoots or unnecessary growth that can block sunlight or make the vine too dense. The goal is to create a structure that’s easy to manage and encourages healthy fruit production. With the right training and shaping, my grapevines grow strong, and the fruit is better exposed to sunlight, leading to a larger and tastier harvest.
Common Grapevine Pests and Diseases
Over the years, I’ve encountered a few pests and diseases that love to target my grapevines, but with a little knowledge and preparation, I’ve learned how to manage them. One of the most common pests I face is aphids, which can suck the sap from the vines and spread disease.
Another pest I’ve dealt with is the grape leafhopper, which can cause leaf damage and stunt growth. As for diseases, powdery mildew and downy mildew are the most prevalent in my area, especially when the weather is damp. These fungal diseases can quickly spread if not controlled, affecting both the leaves and grapes. It can feel overwhelming at first, but with the right prevention, these pests and diseases can be managed effectively.
Natural and Organic Solutions for Prevention and Treatment
When it comes to tackling pests and diseases, I prefer to use natural and organic solutions that are gentle on my vines and the environment. For aphids and other insects, I’ve had great success using neem oil, which is a natural pesticide that kills pests without harming beneficial insects. I also use insecticidal soap or a simple mix of water and dish soap to spray on affected areas.
For fungal diseases like mildew, I’ve found that a mixture of baking soda and water works wonders to prevent and treat early signs of powdery mildew. To improve airflow and reduce humidity around my vines, I make sure to prune regularly and avoid overcrowding. These organic treatments help keep my vines healthy without relying on harsh chemicals, allowing me to enjoy a bountiful harvest year after year.
You can learn more about how I grow my grapes in my other post!
How to Grow Concord Grapes In Your Backyard

Harvesting and Enjoying Your Grapes
How to Recognize When Grapes Are Ripe
There’s nothing quite like the excitement of harvesting my grapes, but knowing when they’re truly ripe can be a little tricky. Over the years, I’ve learned to look for a few key signs. First, the color of the grapes will deepen, becoming more vibrant and consistent across the bunch. I also check the texture—ripe grapes will feel plump and slightly soft when you gently squeeze them, but not mushy.
The taste test is the final confirmation; I’ll pop one into my mouth, and if it’s sweet with just the right amount of tartness, I know it’s time to harvest. Be sure to check a few bunches, as grapes on different parts of the vine ripen at slightly different times. Patience is key, but the rewards are worth it!
Tips for Harvesting Without Damaging Vines
When it’s finally time to harvest, I always make sure to do it carefully to avoid damaging the vines. I like to use a pair of sharp garden scissors or pruning shears to cut the grapes from the vine, being careful not to pull or tug on the clusters, as this can damage the delicate stems or surrounding vines. I also make sure to cut the grape bunches at a slight angle to promote healthy regrowth.
During the harvest, I gently handle the grapes, making sure not to crush them or bruise the delicate skin. If I need to reach high up on the vine, I use a ladder or step stool to avoid putting too much pressure on the vine. Harvesting carefully ensures I get the most out of my crop without causing harm to the plant.
Ideas for Using Your Grape Harvest
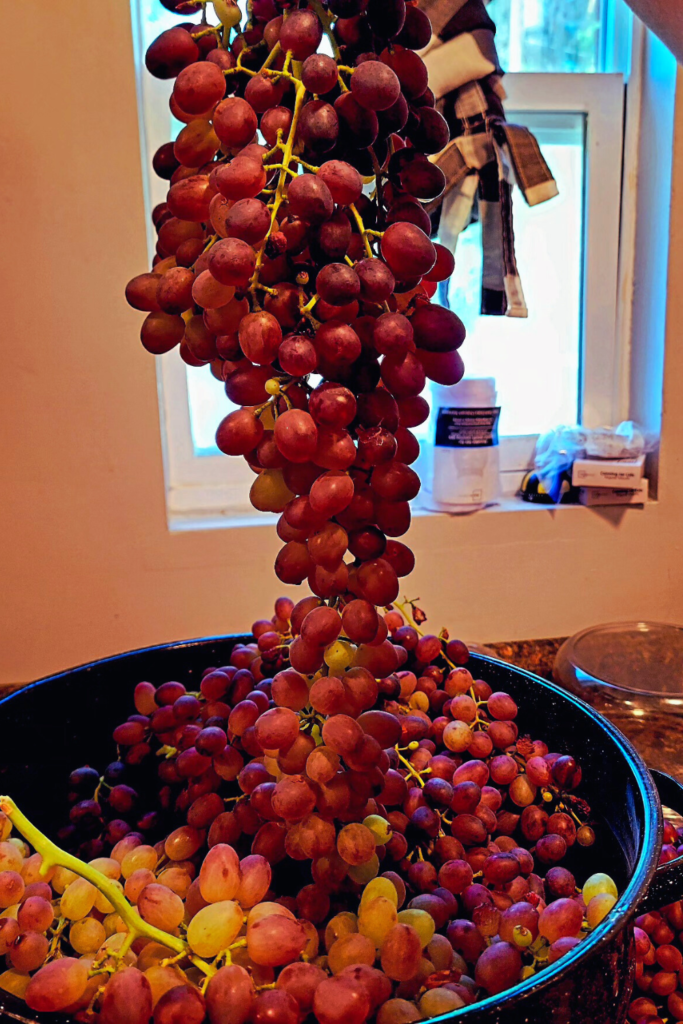
Once my grapes are harvested, the possibilities for using them are endless! Of course, fresh eating is always a favorite in my house—there’s something so satisfying about biting into a sweet, juicy grape that you grew yourself. But if I have a larger harvest, I love experimenting with making grape juice or homemade wine. I’ve also gotten into preserving my grapes by making delicious jams, jellies, and grape preserves that I can enjoy all year long.
The process of turning my fresh grapes into something long-lasting feels so rewarding. Whether fresh, juiced, fermented, or canned, my grape harvest provides a variety of options to enjoy the fruits of my labor throughout the seasons.
Here is how I turn my grapes into jam!
Troubleshooting and Lessons Learned
Common Challenges and How I’ve Overcome Them
Growing grapes hasn’t always been smooth sailing for me—there have been challenges along the way, but each one has taught me valuable lessons. One of the biggest hurdles I faced early on was dealing with fungal diseases, especially mildew. I was initially frustrated, but after researching and trying a few organic treatments, I found that regular pruning, proper spacing, and using a baking soda solution helped to keep mildew at bay.
Another issue I encountered was grapevine pests like aphids and leafhoppers, which could wreak havoc if left unchecked. I’ve found that introducing beneficial insects like ladybugs and using natural remedies like neem oil has worked wonders for pest control. Through trial and error, I’ve learned that paying close attention to the health of my vines and staying proactive with care can prevent many of these challenges.
Tips for Avoiding Common Mistakes
One mistake I’ve made and seen others make is overwatering. Grapevines don’t like “wet feet,” meaning their roots shouldn’t sit in constantly soaked soil. I’ve learned to check the soil before watering—if the top few inches are dry, then it’s time to water, but I avoid frequent shallow watering, as it leads to weak roots. Only keep them well-hydrated during the rooting process.
Another mistake I see often is poor site selection. Grapevines love full sunlight, so planting them in a shaded area can stunt their growth and reduce fruit production. I’ve found that choosing a sunny spot with well-draining soil is key to healthy vines. If you’re planting in an area with heavy clay soil, amending it with compost or planting on a raised bed can make all the difference. By being mindful of these factors, I’ve managed to set up my grapevines for success.
Encouraging Experimentation and Learning
One of the most rewarding aspects of growing grapes is experimenting and learning along the way. I encourage you to get started and see what works best for you—there’s no one-size-fits-all method! Whether it’s trying different propagation techniques, testing new varieties, or experimenting with organic treatments for pests, each attempt teaches you something new. I remember the first time I propagated my vines from cuttings—it took a couple of tries to get it right, but once I understood the process, I felt so accomplished!
Don’t be afraid to make mistakes—they’re just stepping stones to becoming a better grower. By experimenting and staying curious, you’ll be surprised at what you can achieve in your own backyard vineyard!
Your Backyard Vineyard Starts Here
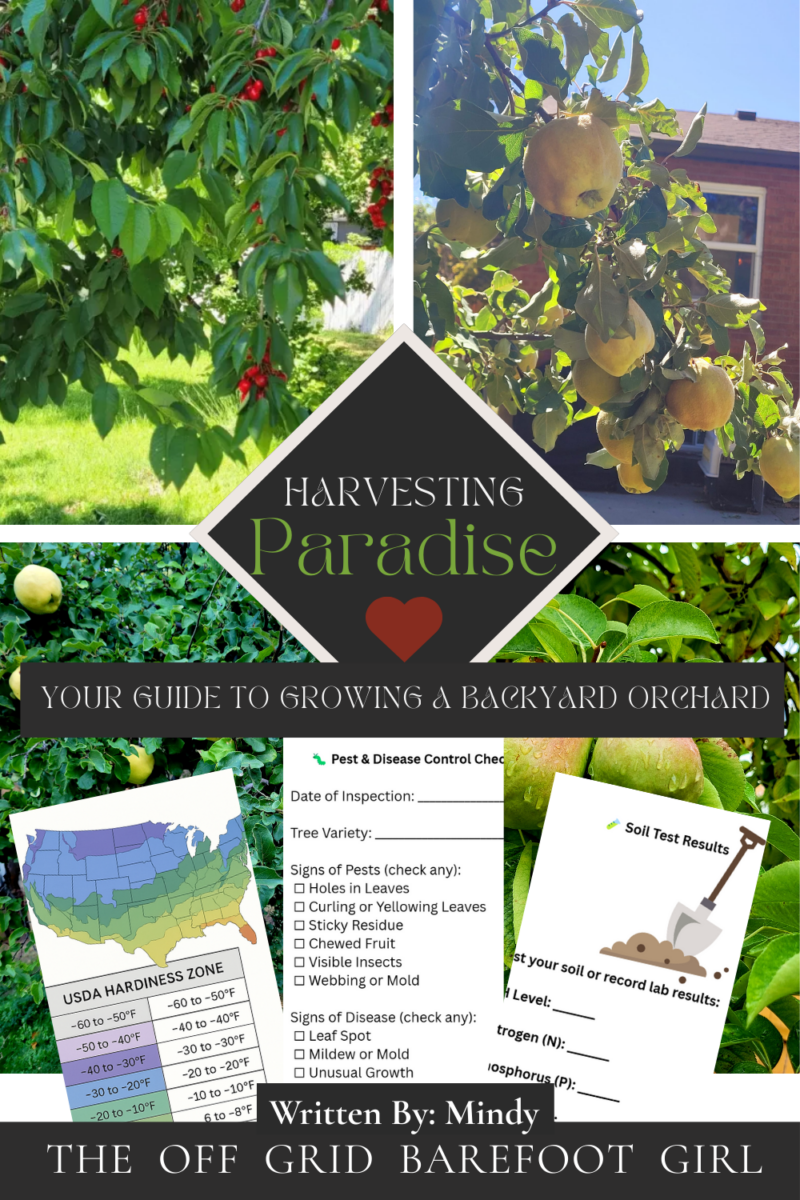
If learning to grow grapes has you dreaming of rows of homegrown fruit, you’re going to love Harvesting Paradise: Your Guide to Growing a Backyard Orchard. This book is packed with down-to-earth advice for growing grapes, apples, peaches, cherries, and more—right from your own homestead. Whether you’re starting from cuttings or nurturing mature trees, I’ll walk you through it all with the same barefoot, hands-in-the-dirt experience I live by. Get your copy and start building the fruit-filled future you’ve been craving.
Get your copy!
Harvesting Paradise: Your Guide to Growing a Backyard Orchard
Conclusion
Propagating and growing grapes is a rewarding journey that requires patience and attention to detail. To start, I select healthy parent vines, taking cuttings from the best canes in late winter. After preparing the cuttings and rooting them in a suitable medium, I keep a close eye on humidity and temperature to ensure successful root development.
Once my cuttings have rooted, it’s time to transplant them into a sunny, well-drained spot in my backyard. Over time, I prune and train the vines to encourage strong growth, while carefully managing water, nutrients, and pest control. By following these steps and being diligent in my care, I’ve watched my grapevines flourish and produce abundant fruit.
The Rewards of Growing Grapes in a Backyard Orchard
There’s something truly magical about growing grapes in your own backyard orchard. Not only do you get the satisfaction of watching your vines grow, but you also enjoy the fresh, sweet fruit that comes with it. For me, there’s nothing like picking ripe grapes off the vine, knowing that I’ve nurtured them from start to finish!
The rewards extend beyond just eating fresh grapes; I’ve turned my harvest into homemade jams, fresh juice, and eventually, I want to try even wine. Growing grapes also adds beauty to my garden, with the vines offering a lush, green aesthetic. The effort I’ve put into learning and caring for my grapes has been more than worth it, making my backyard a more vibrant, productive space.
I would love to hear about your own grape-growing experiences! Whether you’ve already started propagating your vines or you’re just thinking about it, sharing your journey helps all of us learn. If you have any questions about the process, from propagation to harvesting, feel free to ask—I’m happy to offer advice or chat about what’s worked for me.
Gardening is all about trial and error, and I’ve learned so much from others along the way. Let’s build a community of grape growers who can support and encourage each other as we grow our backyard orchards together!
Resources: Here are some helpful resources for further information.
- Propagating Grapevines – By WineMakerMag
- How to Grow Grapes from Cuttings – By Practical Self Reliance
- How to Propagate Grapes from Hardwood Cuttings – By Mike’s Backyard Nursery
Frequently Asked Questions
1. How long does it take for grape cuttings to root?
It typically takes 4-8 weeks for grape cuttings to develop roots, depending on the conditions. Warmer temperatures and consistent humidity can speed up the process.
2. What is the best time of year to propagate grape cuttings?
The best time to take cuttings is during late winter or early spring when the vines are dormant. This ensures the cuttings are healthy and have stored energy to establish roots.
3. How much sunlight do grapevines need?
Grapevines thrive in full sun, requiring at least 6-8 hours of direct sunlight daily. Choose a sunny location with good air circulation for optimal growth.
4. What type of soil is best for growing grapes?
Grapes prefer well-drained, sandy, or loamy soil with a slightly acidic to neutral pH (6.0-7.0). Amend heavy clay soils with organic matter to improve drainage and aeration.
Summary
I hope I have inspired you to grow your own permaculture garden.
If you were encouraged by this post, I invite you to check out my FREE Printables Page for fun free printables, planners, and charts.
ENTER MY FREE Printables Page HERE
I invite you to check out some more of my posts!
Your Ultimate Guide to a Permaculture Garden
How to Grow Concord Grapes In Your Backyard
How to Start a Backyard Orchard: A Beginner’s Guide
All About Cherry Plum Trees: Ultimate Guide
How Persimmon Fruit Trees Can Change Your Life! Unbelievable!
How to Design Your Backyard Orchard for Maximum Yield
How to Grow a Sustainable Backyard Orchard
Surprising Benefits of Growing Garlic Around Your Fruit Trees
How to Can a Year’s Supply of Quince Jam
Pears: All About Pear Trees: Ultimate Guide
Cherries: All About Cherry Trees: Ultimate Guide
Quince: All About Quince Trees: Ultimate Guide
Apples: All About Apple Trees: Ultimate Guide
How to Grow a Productive Perennial Raspberry Patch
Why You Need to Start Micro-Orcharding in Your Backyard
How to Grow a Productive Perennial Strawberry Patch
Blessings,
The Off Grid Barefoot Girl

