Learn how to make homemade apple cider vinegar with this simple, step-by-step guide using fresh apples and natural fermentation. Homemade apple cider vinegar is easy to make, cost-effective, and full of health benefits, perfect for cooking, cleaning, and natural remedies. Follow these tips to ferment your own vinegar safely at home and enjoy a fresh, organic product you can trust.
Have you ever wondered how to make that tangy, golden elixir known as apple cider vinegar right in your own kitchen? This versatile ingredient has been used for centuries in cooking, cleaning, and even natural remedies. Yet many of us simply pick up a bottle from the grocery store without considering how easy – and rewarding – it can be to craft your very own batch at home.
Imagine the sense of pride and accomplishment that comes from transforming a humble apple into a potent, probiotic-rich vinegar. Not only is homemade apple cider vinegar more affordable than store-bought varieties, but you also have complete control over the ingredients and fermentation process. And let’s not forget the unbeatable fresh flavor!
In this step-by-step guide, I’ll walk you through everything you need to know to make your own apple cider vinegar from scratch. From gathering the essential ingredients and equipment to mastering the art of fermentation, troubleshooting common issues, and creative ways to use your homemade vinegar, this comprehensive post has you covered. So roll up your sleeves, grab some apples, and let’s get started on this rewarding culinary adventure!
This is a pinnable post. Tap or hover over any image in this post to pin to your Pinterest Boards.

What is Apple Cider Vinegar?
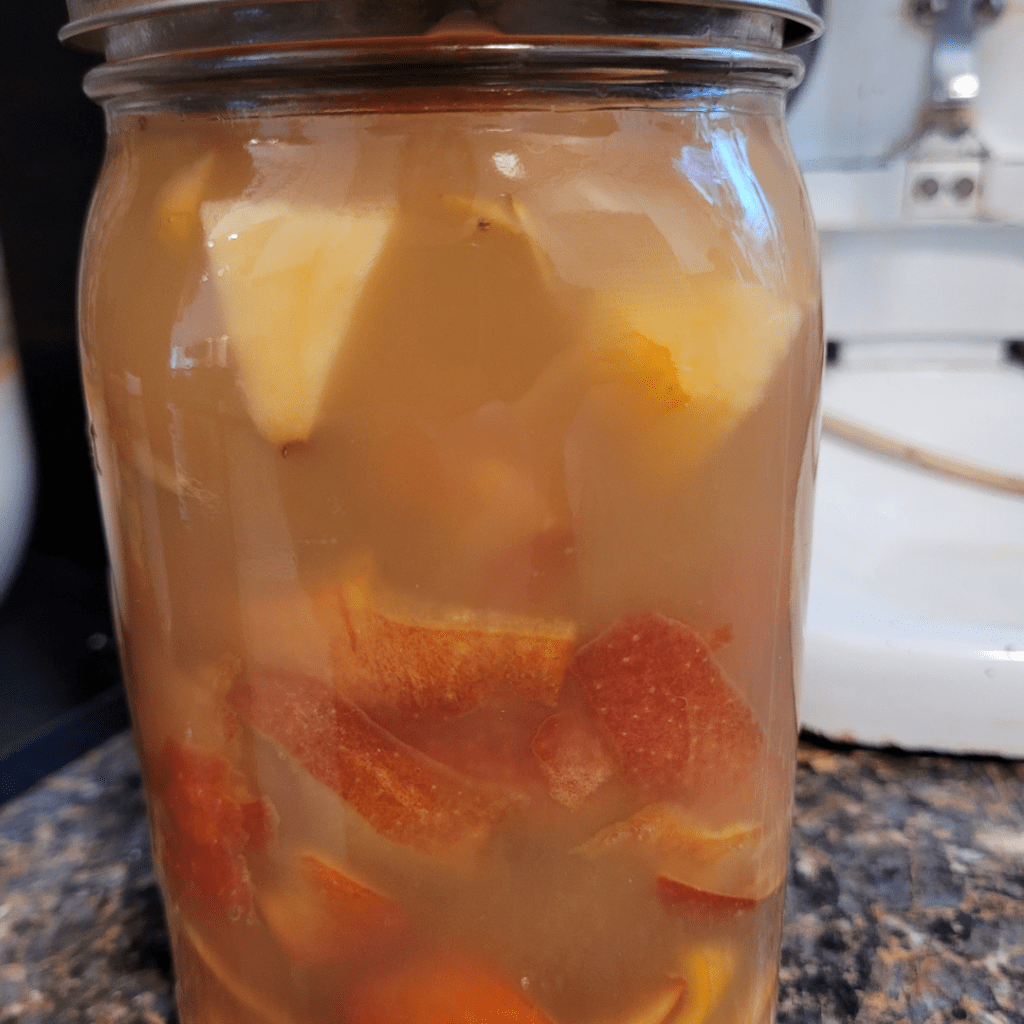
Apple cider vinegar is a versatile and popular ingredient that has gained widespread acclaim for its numerous health benefits. At its core, it’s a fermented liquid made from crushed apples. Let’s discuss a deeper understanding of this tangy elixir.
What is Apple Cider Vinegar?
Apple cider vinegar is produced through a two-step fermentation process. First, the crushed apples are exposed to yeast, which converts their natural sugars into alcohol. Then, bacteria are introduced, which further ferment the alcohol into acetic acid, the main active compound in vinegar.
Benefits of Apple Cider Vinegar
Apple cider vinegar is a powerhouse of nutrients and has been associated with numerous potential health benefits:
- Blood Sugar Regulation: Studies suggest that apple cider vinegar may help regulate blood sugar levels, making it a promising aid for individuals with diabetes or prediabetes.
- Weight Management: Some research indicates that apple cider vinegar may promote feelings of fullness and support weight loss efforts when combined with a balanced diet and exercise.
- Antimicrobial Properties: The acetic acid in apple cider vinegar has been shown to possess antimicrobial properties, potentially helping to fight harmful bacteria and fungi.
Difference from Regular Vinegar
While apple cider vinegar shares some similarities with regular vinegar, there are a few key differences:
- Source: Apple cider vinegar is made from fermented apples, while regular vinegar can be derived from various sources like grapes, grains, or even synthetic materials.
- Flavor and Aroma: Apple cider vinegar has a distinct, slightly sweet, and fruity flavor profile, unlike the more pungent taste of regular vinegar.
- Nutritional Value: Apple cider vinegar contains trace amounts of vitamins, minerals, and other beneficial compounds from the apples, whereas regular vinegar lacks these additional nutrients.
Whether you’re looking to boost your health, add a tangy kick to your recipes, or explore natural remedies, homemade apple cider vinegar is a versatile ingredient worth incorporating into your lifestyle.
Ingredients and Equipment Needed
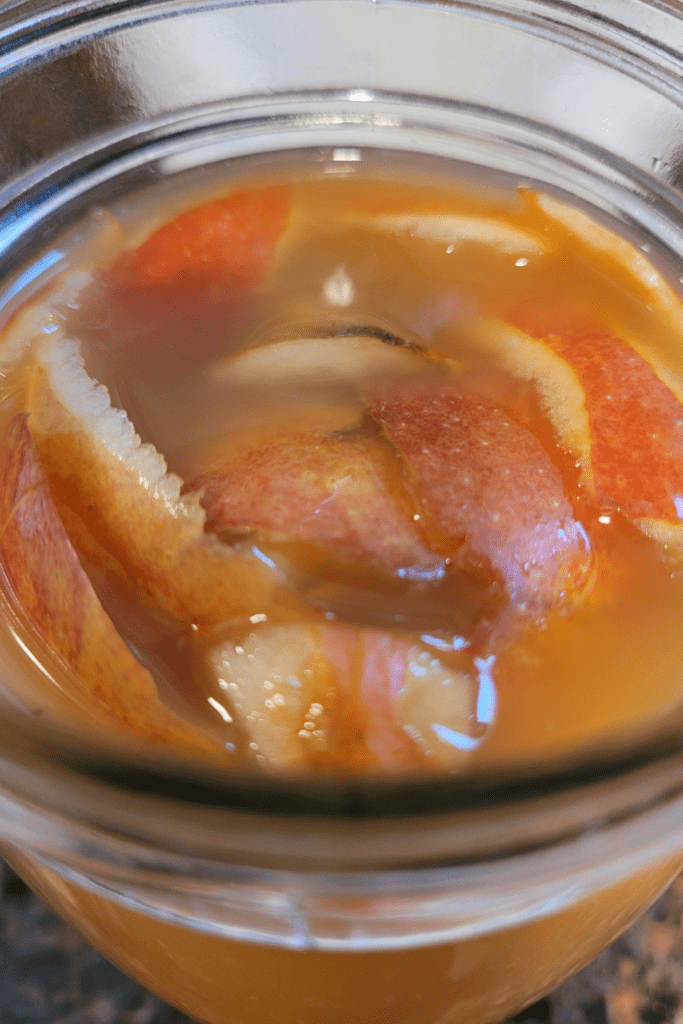
Before you begin the process of making homemade apple cider vinegar, it’s essential to have the right ingredients and equipment on hand. Here’s what you’ll need:
Apples Scraps
Fill your jar about three-quarters full with apple scraps—this can include peels, cores, or chopped apple pieces. Using a mix of all three works best, as it adds more natural sugars and flavor for a stronger, more aromatic vinegar.
Sugar or Honey
To kickstart the fermentation process, you’ll need a small amount of sugar or honey. These natural sweeteners provide food for the beneficial bacteria that convert the apple sugars into vinegar. Just a few tablespoons will do the trick. Keep in mind that using honey over sugar will result in a longer fermentation period.
Non-chlorinated Water
Use non-chlorinated water to cover the apples completely, as chlorine can interfere with the natural fermentation process and prevent your vinegar from developing properly.
Containers and Supplies
You’ll need a few containers for the different stages of the process. A wide-mouth glass jar or crock is ideal for the initial fermentation, while a smaller bottle or jar works well for the final aging stage. You’ll also need a cheesecloth or coffee filter to cover the containers and allow airflow while keeping out pests.
With these simple ingredients and equipment, you’ll be well on your way to making your very own batch of delicious and healthy apple cider vinegar!
Step-by-Step Process

Making homemade apple cider vinegar is a simple process that requires patience and attention to detail. Follow these steps to create your own tangy, flavorful vinegar at home.
Step 1: Combine the Ingredients
- Add the apple pieces to your quart jar. Dissolve the sugar in the water, then pour it over the apples until they’re completely submerged. Leave about 1 inch of headspace at the top.
Step 2: Keep Apples Submerged
- Use a fermentation weight, a small glass, or a clean rock to keep the apples below the liquid line. (Any exposed fruit can mold.)
Step 3: Cover and Ferment
- Cover the jar with a breathable cloth or coffee filter secured with a rubber band.
- Place the jar in a dark, warm spot (60–80°F) for about 3–4 weeks.
- Stir it every few days to prevent surface mold and ensure even fermentation.
Step 4: Strain and Second Ferment
- After 3–4 weeks, strain out the solids and pour the liquid back into the jar
- Cover it again with the cloth and let it ferment another 3–4 weeks.
- During this time, you’ll notice a thin, jelly-like layer (the mother of vinegar) forming on top — that’s a great sign!
- Over the next 4-6 weeks, the mixture will undergo two fermentation stages:
- Alcoholic Fermentation: During this stage, the natural yeasts in the cider will convert the sugars into alcohol, creating a hard cider.
- Acetic Acid Fermentation: The vinegar starter will then convert the alcohol into acetic acid, transforming the hard cider into vinegar. During this time, you’ll notice a vinegar-like aroma and a thin, gelatinous layer forming on the surface – this is the vinegar mother. Be patient and resist the urge to disturb the mixture, as this can disrupt the fermentation process.
- Once the desired level of sourness is achieved, you can strain the vinegar and transfer it to bottles for storage.
Troubleshooting and Tips
Making homemade apple cider vinegar can be a rewarding process, but it’s not without its challenges. Here are some common issues you might encounter, along with solutions and tips to ensure proper fermentation and safety.
Common Issues and Solutions
Mold or Kahm Yeast: If you notice a film or growth on the surface of your vinegar, it could be mold or Kahm yeast. While Kahm yeast is harmless, mold can contaminate your batch. To prevent mold, maintain proper airflow and ensure your equipment is clean. If mold appears, discard the batch and start over.
Slow Fermentation: If your vinegar isn’t fermenting as quickly as expected, it could be due to temperature fluctuations or a lack of oxygen. Try moving your batch to a warmer location (around 70-80°F) and gently stirring it daily to introduce more oxygen.
Ensuring Proper Fermentation
Patience is key. The fermentation process can take several weeks or even months, depending on various factors. Resist the urge to rush or disturb your batch too frequently.
Monitor pH levels. Use pH strips or a digital meter to track the acidity level. The ideal pH for apple cider vinegar is between 2.8 and 3.2.
Maintain a consistent environment. Keep your fermentation vessel in a cool, dark place with minimal temperature fluctuations.
Safety Precautions
Use food-grade containers. Avoid using reactive materials like aluminum or galvanized steel, as they can leach chemicals into your vinegar.
Sterilize equipment. Thoroughly clean and sterilize all equipment before and after use to prevent contamination.
Handle with care. Apple cider vinegar is acidic and can cause skin irritation or damage to surfaces. Handle with caution and wear protective gloves if necessary.
By following these troubleshooting tips and safety precautions, you’ll be well on your way to producing a delicious and safe batch of homemade apple cider vinegar.
Bottling and Storing
Congratulations! You’ve successfully made your own batch of homemade apple cider vinegar. Now it’s time to bottle and store it properly to ensure its longevity and quality. Here’s what you need to know.
Choosing the Right Containers
The best containers for storing your homemade apple cider vinegar are glass bottles or jars. Avoid plastic containers as they can absorb odors and flavors over time. Look for bottles with an airtight seal, such as those with a swing-top or cork stopper. These will prevent oxidation and contamination, preserving the vinegar’s flavor and potency.
Ideal Storage Conditions
Apple cider vinegar should be stored in a cool, dark place away from direct sunlight and heat sources. Excessive heat can cause the vinegar to spoil or lose its potency. A pantry or cabinet is an ideal storage location. Ensure the bottles are tightly sealed to prevent evaporation and maintain the vinegar’s quality.
Shelf Life and Refrigeration
Properly bottled and stored, homemade apple cider vinegar can last for several months at room temperature. However, if you plan to store it for an extended period, consider refrigerating it. Refrigeration can extend the shelf life of your vinegar for up to a year or more.
It’s important to note that even after refrigeration, apple cider vinegar may develop a cloudy appearance or sediment at the bottom of the bottle. This is normal and doesn’t affect the quality or safety of the vinegar. Simply shake the bottle gently before using it.
By following these simple guidelines, you can ensure that your homemade apple cider vinegar stays fresh, flavorful, and ready to use in your favorite recipes or for various household purposes.
Creative Uses for Homemade Apple Cider Vinegar
Homemade apple cider vinegar is a versatile and natural product that can be used in countless ways beyond just a salad dressing or cooking ingredient. Let’s explore some creative uses that will make you appreciate this tangy liquid even more!
Culinary Uses
Apple cider vinegar adds a delightful zing to marinades, sauces, and dressings. Try using it in a vinaigrette for a fresh and tangy salad dressing or as a base for a flavorful BBQ sauce. It’s also a great addition to baked goods like cakes and muffins, adding a subtle tartness that complements the sweetness.
Household and Cleaning Uses
Thanks to its acidic nature, apple cider vinegar is an excellent natural cleaning agent. Dilute it with water and use it to clean countertops, floors, and windows. It’s also effective at removing stubborn stains and odors. For an eco-friendly fabric softener, add a cup of apple cider vinegar to your laundry during the rinse cycle.
Health and Beauty Applications
Apple cider vinegar has been touted for various health and beauty benefits. Some people use it as a natural remedy for issues like digestive problems, skin conditions, and even weight loss (though scientific evidence is limited). Diluted apple cider vinegar can also be used as a hair rinse to add shine and remove buildup.
No matter how you choose to use it, homemade apple cider vinegar is a versatile and affordable addition to your home. With a little creativity, you’ll find countless ways to incorporate this tangy liquid into your daily life.
Conclusion
Making your own apple cider vinegar at home is a rewarding process that allows you to create a versatile and healthy ingredient from simple, natural components. By following the steps we covered – from gathering the necessary ingredients and equipment to bottling and storing your homemade vinegar – you can enjoy the satisfaction of producing a high-quality product tailored to your preferences.
Beyond its culinary uses, homemade apple cider vinegar offers a range of creative applications, from natural cleaning solutions to personal care products. Embrace the opportunity to experiment and discover new ways to incorporate this versatile ingredient into your daily routines.
As you begin making your homemade apple cider vinegar, remember that patience and attention to detail are key. Embrace any challenges as learning opportunities, and don’t hesitate to seek guidance from experienced vinegar enthusiasts or trusted resources.
Ultimately, the process of making apple cider vinegar at home is a testament to the power of simplicity and the joy of creating something nourishing with your own hands. Embrace this opportunity to connect with nature, nurture your curiosity, and revel in the sense of accomplishment that comes from crafting a product that enhances your well-being. With each batch, may you find renewed inspiration to explore the boundless possibilities of homemade goodness.
Resources: Here are some helpful resources for further information.
- How to Make Vinegar from Scratch
- Homemade Vinegar – From Ferment Pittsburg
- How to Make Vinegar – From Revolutions Fermentation

Frequently Asked Questions
1. What ingredients do I need to make apple cider vinegar at home?
You’ll need apple scraps (peels and cores), water, sugar, and a jar or container to ferment the mixture.
2. How long does it take to make apple cider vinegar?
The fermentation process typically takes about 3 to 6 weeks, depending on the temperature and desired strength of the vinegar.
3. Do I need a specific type of apple to make apple cider vinegar?
You can use any variety of apples. A mix of different types often produces a more complex flavor, but even a single variety will work well.
4. How do I know when my apple cider vinegar is ready?
Your vinegar is ready when it has a strong, tangy smell and taste, and the liquid has turned a deep amber color. You can strain it, bottle it, and start using it at this point.
Homemade Apple Cider Vinegar
Equipment
- 1 quart-size jar.
Ingredients
- Apple scraps (peels, cores, or chopped apples) to fill the jar about ¾ full
- 3-4 tbsp sugar (1 tbsp per cup of water).
- 3-4 cups non-chlorinated water (enough to cover the apples completely)
Instructions
Step 1: Combine the Ingredients
- Add the apple pieces to your quart jar. Dissolve the sugar in the water, then pour it over the apples until they’re completely submerged. Leave about 1 inch of headspace at the top.
Step 2: Keep Apples Submerged
- Use a fermentation weight, small glass, or clean rock to keep the apples below the liquid line. (Any exposed fruit can mold.)
Step 3: Cover and Ferment
- Cover the jar with a breathable cloth or coffee filter secured with a rubber band.
- Place the jar in a dark, warm spot (60–80°F) for about 3–4 weeks.
- Stir it every few days to prevent surface mold and ensure even fermentation.
Step 4: Strain and Second Ferment
- After 3–4 weeks, strain out the solids and pour the liquid back into the jar
- .Cover it again with the cloth and let it ferment another 3–4 weeks.
- During this time, you’ll notice a thin, jelly-like layer (the mother of vinegar) forming on top — that’s a great sign!
- Over the next 4-6 weeks, the mixture will undergo two fermentation stages:
- Alcoholic Fermentation: During this stage, the natural yeasts in the cider will convert the sugars into alcohol, creating a hard cider.
- Acetic Acid Fermentation: The vinegar starter will then convert the alcohol into acetic acid, transforming the hard cider into vinegar.During this time, you'll notice a vinegar-like aroma and a thin, gelatinous layer forming on the surface – this is the vinegar mother. Be patient and resist the urge to disturb the mixture, as this can disrupt the fermentation process.
- Once the desired level of sourness is achieved, you can strain the vinegar and transfer it to bottles for storage.
Summary
I hope I have inspired you to stockpile your pantry for your survival needs.
If you were encouraged by this post, I invite you to check out my FREE Printables Page for fun free printables, planners, and charts.
ENTER MY FREE Printables Page HERE
Here are some more of my canning inspiration posts to check out!
How to Make and Can Cherry Plum Jam
How to Make and Can Apple Butter In Crockpot
Stockpiling Condiments for Survival: Learn How I Do It!
How to Make and Can Vegetable Pot Pie Filling
Easy Canning Applesauce Recipes to Stalk Your Pantry!
How to Make Peach Jalapeno Jam
Cherries: How to Make Cherry Pie Filling
Cherries: How to Make Cherry Syrup
Salsa: How to Make and Can Cherry Salsa
Peaches: How to Make and Can Peach Salsa
Canning Supplies You Need Now for a Successful Canning Season!
How to Make and Can Balsamic Onion Jam
Cranberry Sauce: How to Make and Can Old Fashioned Cranberry Sauce
How to Make and Can Cranberry Merry Jam
How to Make and Can Strawberry Shortcake Jam
Cherry Jam: How to Make and Can Cherry Pie Jam
Carrot Cake Jam: How to Make and Can Carrot Cake Jam
Quince Jam: How to Can a Year’s Supply of Quince Jam
Root Beer Float Jelly: How to Make and Can Root Beer Float Jelly
Blessings,
The Off Grid Barefoot Girl



A lot of work went into this wonderful recipe and article you wrote! Beautifully written and love the attention to details. Can’t wait to try this yummy recipe! <3
Thanks! My family loves it ❤️