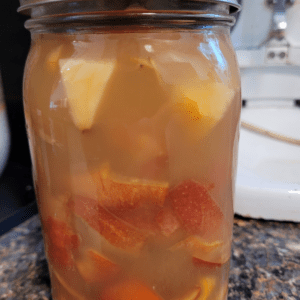
Homemade Apple Cider Vinegar
This homemade apple cider vinegar recipe is a natural, DIY solution that transforms apple scraps into a tangy, health-boosting vinegar. With just a few simple ingredients and a bit of patience, you can create your own flavorful vinegar perfect for cooking, cleaning, or adding to your wellness routine. The process is straightforward and rewarding, offering a sustainable way to use leftover apple peels and cores while crafting a versatile kitchen staple.
Equipment
- 1 quart-size jar.
Ingredients
- Apple scraps (peels, cores, or chopped apples) to fill the jar about ¾ full
- 3-4 tbsp sugar (1 tbsp per cup of water).
- 3-4 cups non-chlorinated water (enough to cover the apples completely)
Instructions
Step 1: Combine the Ingredients
- Add the apple pieces to your quart jar. Dissolve the sugar in the water, then pour it over the apples until they’re completely submerged. Leave about 1 inch of headspace at the top.
Step 2: Keep Apples Submerged
- Use a fermentation weight, small glass, or clean rock to keep the apples below the liquid line. (Any exposed fruit can mold.)
Step 3: Cover and Ferment
- Cover the jar with a breathable cloth or coffee filter secured with a rubber band.
- Place the jar in a dark, warm spot (60–80°F) for about 3–4 weeks.
- Stir it every few days to prevent surface mold and ensure even fermentation.
Step 4: Strain and Second Ferment
- After 3–4 weeks, strain out the solids and pour the liquid back into the jar
- .Cover it again with the cloth and let it ferment another 3–4 weeks.
- During this time, you’ll notice a thin, jelly-like layer (the mother of vinegar) forming on top — that’s a great sign!
- Over the next 4-6 weeks, the mixture will undergo two fermentation stages:
- Alcoholic Fermentation: During this stage, the natural yeasts in the cider will convert the sugars into alcohol, creating a hard cider.
- Acetic Acid Fermentation: The vinegar starter will then convert the alcohol into acetic acid, transforming the hard cider into vinegar.During this time, you'll notice a vinegar-like aroma and a thin, gelatinous layer forming on the surface – this is the vinegar mother. Be patient and resist the urge to disturb the mixture, as this can disrupt the fermentation process.
- Once the desired level of sourness is achieved, you can strain the vinegar and transfer it to bottles for storage.