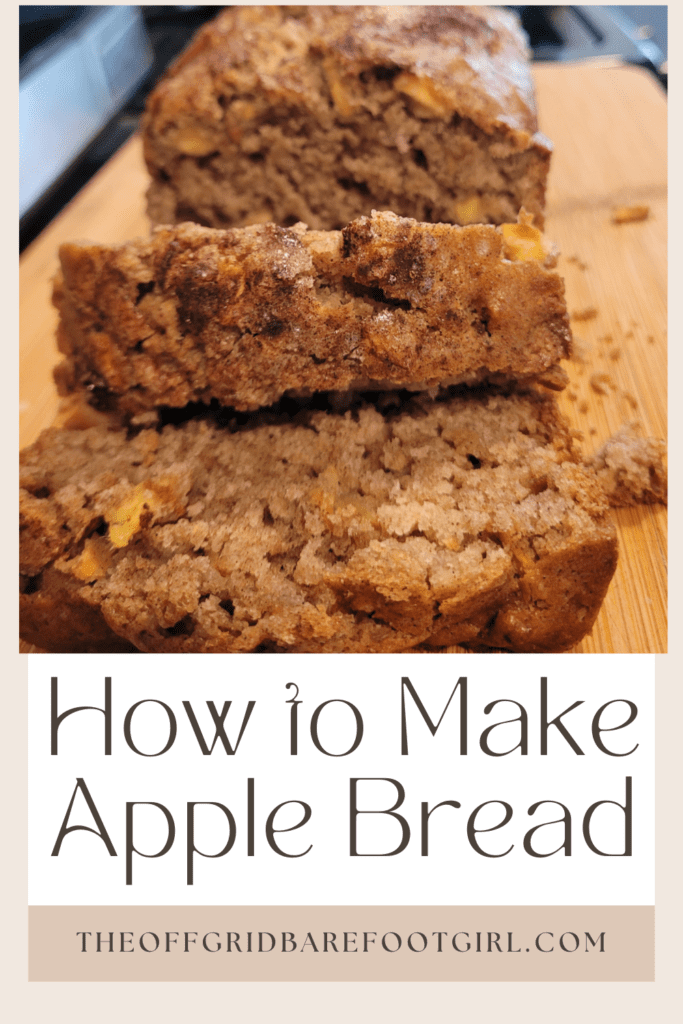
Discover how to make the best apple bread with this easy, homemade recipe that’s moist, flavorful, and packed with fresh apple chunks and warm spices. Perfect for fall baking, this delicious quick bread is ideal for breakfast, snacks, or gifting. Learn the simple steps to create a cozy, from-scratch apple bread your whole family will love!
As the crisp autumn air settles in, there’s nothing quite like the comforting aroma of freshly baked apple bread wafting through your home. Have you ever wondered how to capture the essence of fall in a loaf? Well, you’re in for a treat!
Apple bread isn’t just a delicious way to use up those extra apples from your orchard or farmers’ market haul; it’s a celebration of simple, homemade goodness. Whether you’re a seasoned baker or just starting your journey into self-sufficiency, this recipe is a perfect addition to your repertoire. Did you know that apples have been cultivated for thousands of years, with over 7,500 varieties grown worldwide? That’s a lot of potential for your bread!
In this post, I’ll walk through the entire process of creating a mouthwatering apple bread from scratch. You’ll learn how to select the best apples, prepare them for baking, and combine them with just the right ingredients to create a perfectly moist and flavorful loaf. I’ll also cover baking tips to ensure your bread comes out golden and delicious every time, plus some ideas for serving and storing your creation. So, grab your apron, and let’s get started making homemade apple bread!
This is a pinnable post. Tap or hover over any image in this post to pin to your Pinterest Boards.
Gathering Ingredients and Equipment

When it comes to making apple bread, gathering the right ingredients and equipment is crucial for a successful bake. Let’s discuss what you’ll need to create this delicious homemade treat.
Essential Ingredients for Apple Bread
First, let’s talk about the ingredients. You’ll need:
- All-purpose flour: This forms the base of your bread. If you’re feeling adventurous, you can substitute part of it with whole wheat flour for a nuttier flavor.
- Baking powder and baking soda: These leavening agents help your bread rise and become fluffy.
- Salt: Just a pinch to enhance the flavors.
- Cinnamon: These warm spices complement the apples beautifully.
- Sugar: Brown sugar works well, adding a rich, caramel-like flavor.
- Eggs: They bind the ingredients and add structure to the bread.
- Vegetable oil or melted butter: This adds moisture and richness.
- Vanilla extract: For that extra depth of flavor.
- Apples: Choose firm, tart apples like Granny Smith or Honeycrisp. They hold their shape well during baking.
- Optional add-ins: Chopped nuts, raisins, or dried cranberries can add texture and flavor.
When selecting your apples, consider using homegrown or locally sourced varieties if possible. There’s something special about using apples you’ve picked yourself or bought from a nearby orchard. It adds a personal touch to your baking and supports local agriculture.

Required Kitchen Equipment
Now, let’s gather the equipment you’ll need:
- Mixing bowls: You’ll need at least two – one for dry ingredients and one for wet.
- Measuring cups and spoons: Accurate measurements are key to successful baking.
- Wooden spoon or electric mixer: For combining ingredients.
- Loaf pan: A 9×5 inch pan is standard for most apple bread recipes.
- Parchment paper: This makes it easier to remove the bread from the pan.
- Apple peeler and corer: While not strictly necessary, these tools can save time.
- Sharp knife: For chopping apples and any add-ins.
- Cooling rack: This allows air to circulate around the bread as it cools.
If you’re an avid baker, you might already have most of these items in your kitchen. If not, don’t worry – basic versions of these tools are usually affordable and will serve you well in many baking projects to come.
One thing I’ve learned from years of baking is that quality tools make a difference. A good set of measuring cups and a reliable oven thermometer can be game-changers. They help ensure consistency in your bakes, which is especially important when you’re preserving the harvest or preparing for the long winter months.
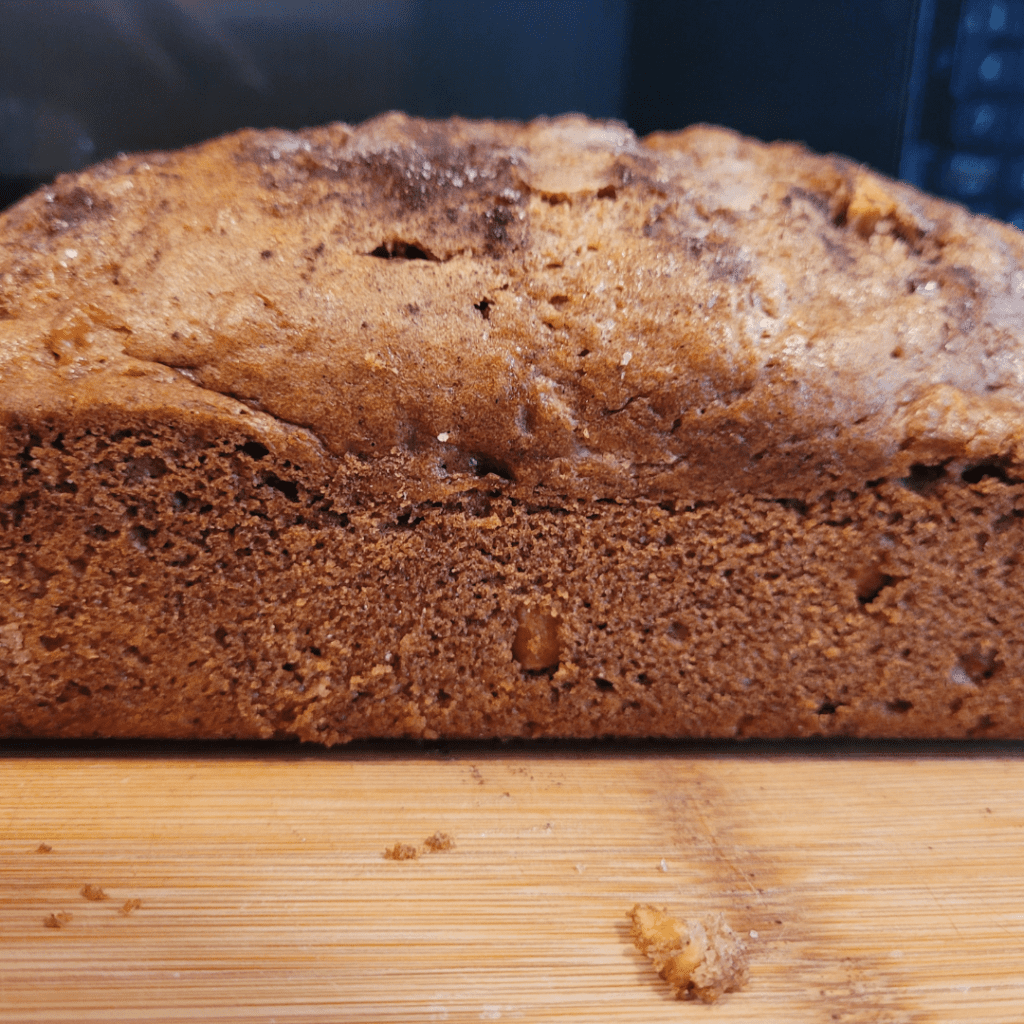
Remember, baking is both a science and an art. Having the right ingredients and equipment sets you up for success, but don’t be afraid to experiment a little. Maybe you’ll discover a unique twist on apple bread that becomes a family favorite!
Before you start mixing, make sure all your ingredients are at room temperature. This helps them blend more easily and creates a smoother batter. And don’t forget to preheat your oven – a steady, accurate temperature is crucial for even baking.
With these ingredients and tools at hand, you’re well-prepared to create a loaf of apple bread that’s not just delicious, but also a testament to your self-sufficiency and baking skills.
Preparing the Apples
When it comes to making delicious apple bread, the key to success lies in the preparation of your apples. As someone who’s spent countless hours in the kitchen perfecting recipes with homegrown produce, I can tell you that this step is crucial for achieving that perfect flavor and texture we all crave in our baked goods.

Selecting the Right Apples
Choosing the right apples is fundamental to creating a mouthwatering apple bread. While you might be tempted to use any apples you have on hand, some varieties work better than others. Here’s what to look for:
- Flavor profile: Opt for apples with a balance of sweetness and tartness. Varieties like Granny Smith, Honeycrisp, or Braeburn work wonderfully.
- Texture: Choose apples that hold their shape well during baking. You want chunks of apple in your bread, not applesauce!
- Freshness: Always use fresh, crisp apples. Avoid those with bruises or soft spots.
If you’re lucky enough to have an apple tree in your backyard or access to a local orchard, freshly picked apples will give your bread an unbeatable flavor. There’s something special about using apples you’ve grown or sourced yourself – it adds a touch of homestead magic to your baking!
Peeling and Chopping Techniques
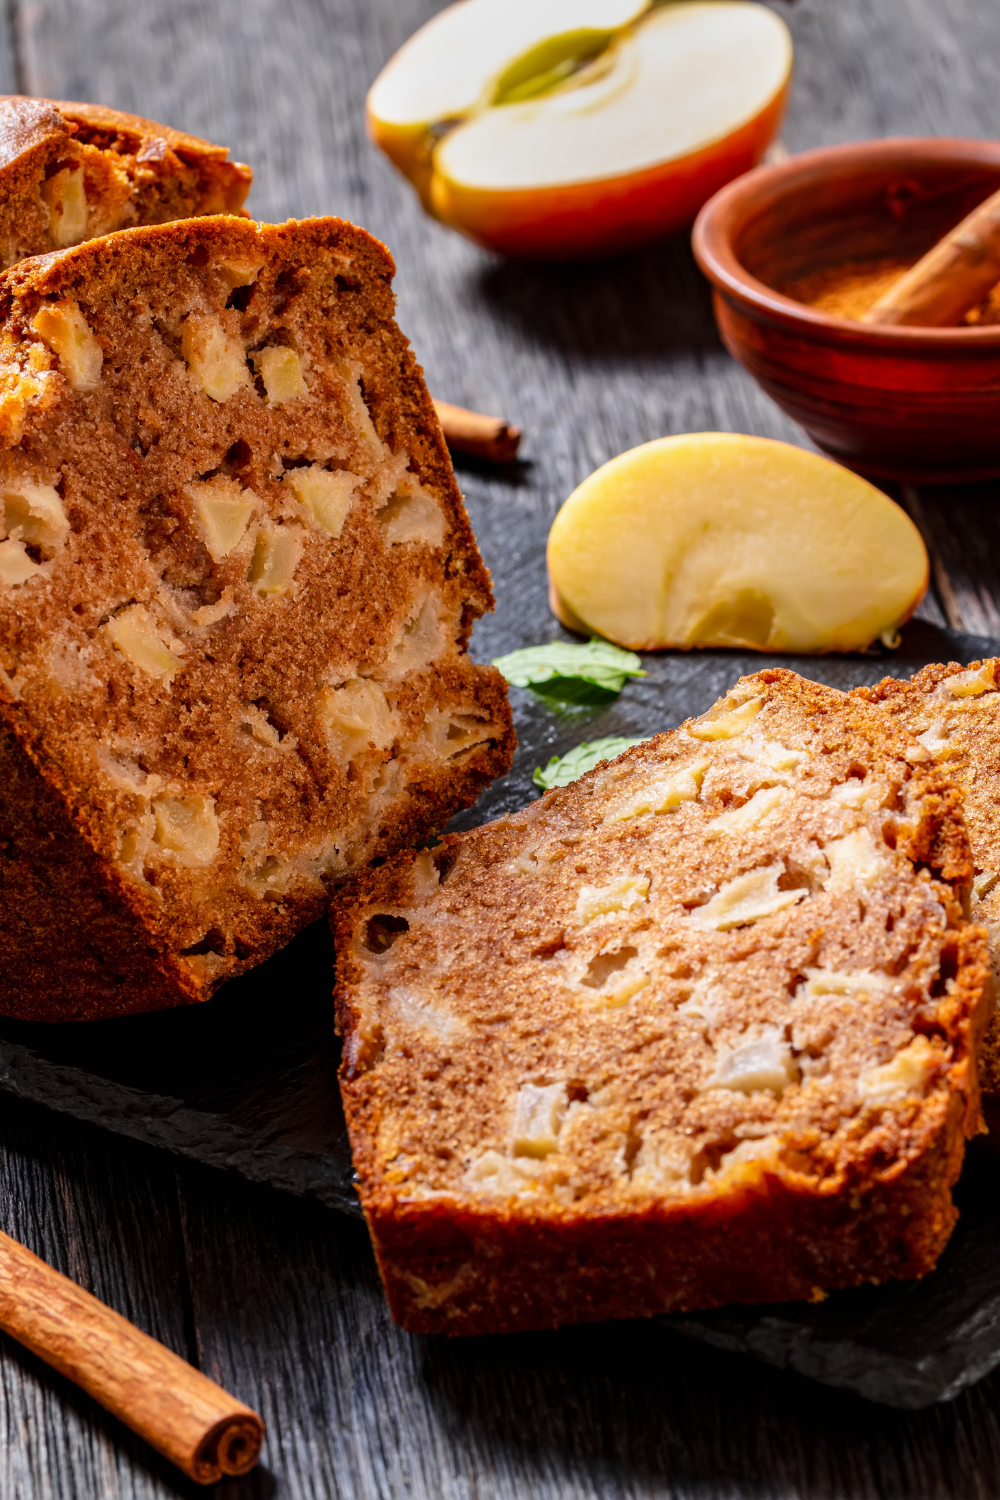
Now that you’ve selected your apples, it’s time to prep them for your bread. Here’s how to peel and chop like a pro:
- Washing: Always start by thoroughly washing your apples to remove any dirt or residues.
- Peeling: While some recipes might call for leaving the peel on, most apple bread recipes work best with peeled apples. Use a sharp vegetable peeler or paring knife to remove the skin in long, continuous strokes.
- Coring: Cut the apple into quarters and use a sharp knife to remove the core and seeds from each section.
- Chopping: Aim for uniform pieces to ensure even baking. I prefer to chop my apples into roughly 1/4-inch cubes. This size allows the apple pieces to soften during baking while still maintaining some texture.
- Preventing browning: If you’re not using the chopped apples immediately, toss them with a bit of lemon juice to prevent browning.
A little tip from my homesteading experience: don’t discard those apple peels! They can be used to make apple cider vinegar, a versatile ingredient for cooking and cleaning around the homestead.
How to Make Homemade Apple Cider Vinegar
When chopping your apples, consistency is key. Unevenly sized pieces can lead to some parts of your bread being too moist while others are dry. Take your time with this step – it’s worth the extra effort for a perfectly textured loaf.
Remember, the amount of apples you’ll need can vary depending on your recipe, but a good rule of thumb is about 2 cups of chopped apples for a standard loaf of apple bread. This usually translates to 2-3 medium-sized apples.
By taking care in selecting and preparing your apples, you’re setting the foundation for a delicious, homemade apple bread that’s sure to become a family favorite. Whether you’re baking for your family or stocking up your pantry with hearty, homemade goods, this attention to detail will make all the difference in your final product.
Making the Apple Bread Batter
Now that we’ve gathered all our ingredients, it’s time to begin the heart of our apple bread-making adventure. Making the batter is where the magic begins, and I’m excited to share some tips I’ve learned over years of baking in my kitchen.
Mixing Dry Ingredients
First things first, let’s combine our dry ingredients. In a large bowl, whisk together the flour, baking powder, baking soda, salt, and any spices you’re using. I love adding a generous pinch of cinnamon and a dash of nutmeg to really bring out that cozy autumn flavor. Mixing these ingredients separately ensures they’re evenly distributed throughout the batter, which is key for a consistent texture in your bread.
Pro tip: If you’re using homemade ground flour, as I often do, sift it before measuring to remove any lumps and ensure accurate measurements.
Combining Wet Ingredients
In another bowl, it’s time to mix our wet ingredients. This usually includes:
- Melted butter or oil.
- Eggs.
- Sugar (yes, it’s considered a wet ingredient in baking!).
- Vanilla extract.
Whisk these together until they’re well combined. If you’re using honey from your own bees or maple syrup as a sweetener, now’s the time to add it. The key here is to make sure everything is at room temperature before mixing. This helps create a smooth, well-incorporated batter.
Incorporating Apples into the Batter
Now comes my favorite part – adding the apples! There are a few ways to do this:
- Grated apples: This method distributes the apple flavor evenly throughout the bread and adds moisture.
- Chopped apples: For a more textured bread with pockets of apple goodness.
- A combination of both: My personal favorite for the best of both worlds!
Whichever method you choose, make sure to fold the apples gently into the batter. Over-mixing at this stage can lead to tough bread, and we want ours to be tender and moist.
Once your apples are incorporated, it’s time to combine the wet and dry ingredients. Add the wet mixture to the dry ingredients and stir just until combined. You might see a few lumps, but that’s okay – they’ll bake out in the oven.
Remember, the key to a light and fluffy apple bread is not overworking the batter. Mix just until you don’t see any more dry flour. This gentle handling preserves the air bubbles that will give your bread a beautiful rise and texture.
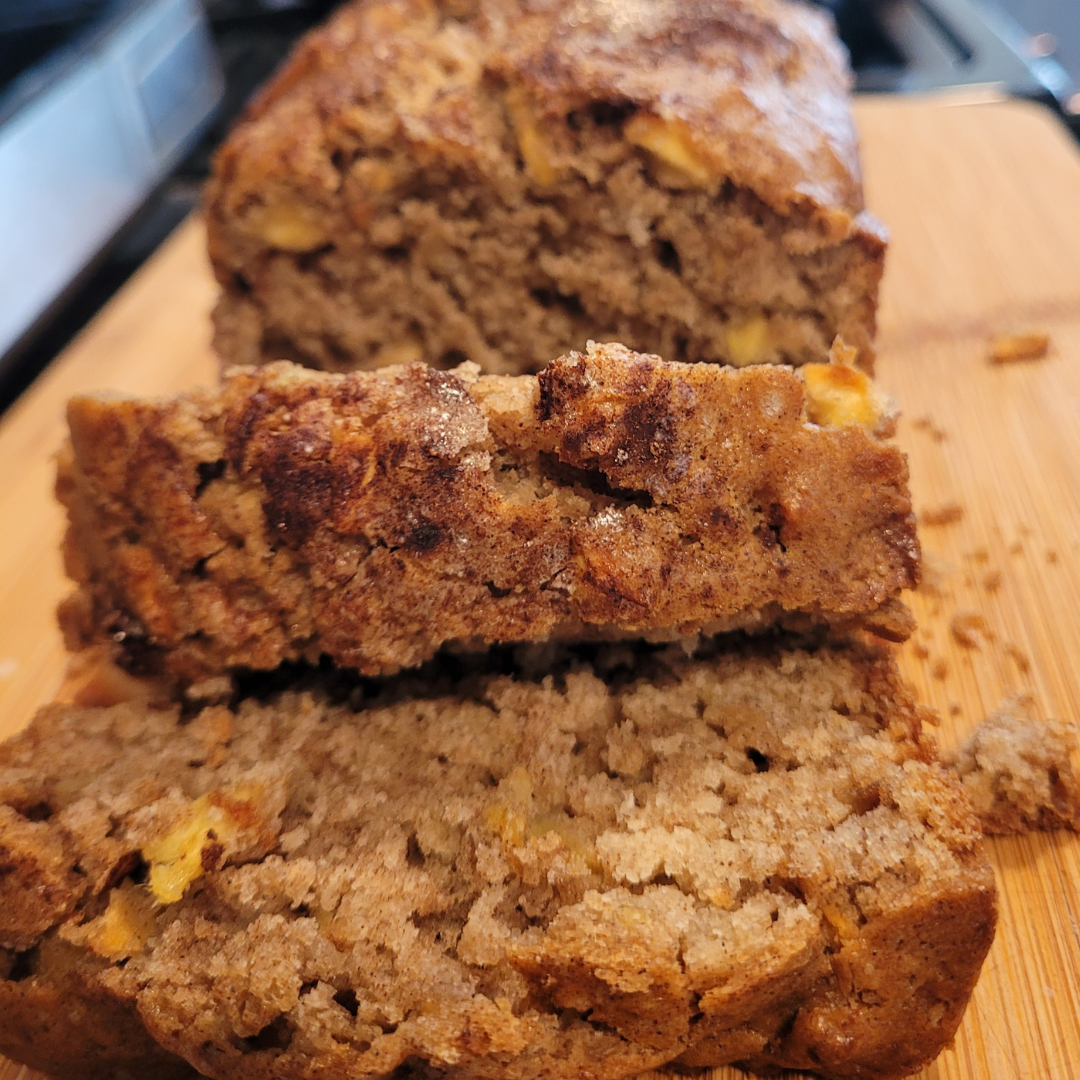
As a final touch, I like to sprinkle a bit of cinnamon sugar on top of the batter before it goes into the oven. It creates a delightful crispy crust that’s simply irresistible.
With your batter prepared, you’re now ready to pour it into your prepared loaf pan and bake. The aroma that will soon fill your kitchen is one of the many joys of baking your own bread. There’s something truly special about creating this wholesome treat from scratch, especially when you’ve grown the apples yourself or sourced them from a local orchard.
As we move on to the baking process, remember that patience is key. Good things come to those who wait, and a perfectly baked apple bread is certainly worth the anticipation!
Baking the Apple Bread
Now that we’ve prepared our delicious apple bread batter, it’s time to bake it to perfection. As someone who’s baked countless loaves in my kitchen, I can assure you that this part is crucial for achieving that perfect texture and flavor. Let’s discuss the baking process step by step.
Preparing the Baking Pan
Before we pour our batter, we need to ensure our baking pan is ready. I prefer using a 9×5 inch loaf pan for apple bread, but an 8×4 inch pan works well too. To prevent sticking, grease the pan thoroughly with butter or oil. For extra insurance against sticking (and easier cleanup), line the bottom and sides with parchment paper, leaving some overhang for easy removal.
If you’re using a glass or ceramic pan, keep in mind that these materials retain heat differently than metal. You might need to adjust your baking time slightly, so keep a close eye on your bread as it bakes.
Oven Temperature and Baking Time
Preheat your oven to 350°F (175°C). If you’re using a wood-fired oven like I sometimes do, aim for a consistent medium heat. Pour your prepared batter into the greased and lined pan, spreading it evenly.
The typical baking time for apple bread is about 50-60 minutes. However, this can vary depending on your oven and the moisture content of your apples. It’s always better to start checking a bit earlier rather than risk overbaking.

Checking for Doneness
Determining when your apple bread is perfectly baked is an art form. Here are a few methods I use:
- The toothpick test: Insert a toothpick or thin skewer into the center of the loaf. If it comes out clean or with just a few moist crumbs, your bread is done.
- Visual cues: The top of the bread should be golden brown, and you might see some cracks forming on the surface. These are good signs of doneness.
- Touch test: Gently press the top of the loaf. If it springs back, it’s likely done. If it leaves an indentation, it needs more time.
- Internal temperature: For the most accurate results, use a food thermometer. The internal temperature should reach about 200°F (93°C) when it’s fully baked.
Remember, ovens can be temperamental, especially if you’re working with alternative heat sources like I often do. Trust your instincts and don’t be afraid to give it a few more minutes if you’re unsure.
Once your apple bread is baked to perfection, remove it from the oven and let it cool in the pan for about 10 minutes. This allows the bread to set and makes it easier to remove from the pan. After 10 minutes, use the parchment paper overhang to lift the bread out and transfer it to a wire rack to cool completely.
As tempting as it may be to slice into your warm, fragrant loaf immediately, allowing it to cool fully will make for cleaner slices and help the flavors develop. Plus, it gives you time to brew a cup of tea or coffee to enjoy with your freshly baked apple bread.
With these tips in mind, you’re well on your way to baking a delicious loaf of apple bread that would make any homesteader proud.
Serving and Storing Apple Bread
After putting in the effort to bake a delicious apple bread, it’s essential to know how to serve and store it properly. As someone who’s baked countless loaves in my kitchen, I’ve learned a thing or two about maximizing the enjoyment and shelf life of homemade bread. Let’s discuss some tips that will help you savor every slice of your apple bread.
Cooling and Slicing Tips
Patience is key when it comes to cooling your freshly baked apple bread. It’s tempting to cut into that warm, fragrant loaf right away, but resist the urge! Allow your bread to cool completely on a wire rack before slicing. This process typically takes about 1-2 hours and is crucial for several reasons:
- Texture development: Cooling allows the crumb structure to set, resulting in a better texture.
- Easier slicing: A cooled loaf is less likely to crumble or tear when cut.
- Flavor enhancement: The flavors continue to develop as the bread cools.
When you’re ready to slice, use a serrated knife with a gentle sawing motion. This helps prevent crushing the bread and ensures clean, even slices. For best results, slice only what you plan to eat immediately, keeping the rest of the loaf intact to maintain freshness.
Storage Methods for Freshness
Proper storage is crucial for maintaining the quality of your apple bread. Here are some effective methods to keep your loaf fresh:
- Room temperature storage: Ideal for short-term storage (2-3 days). Use a bread box or paper bag to allow air circulation. Avoid plastic bags, which can trap moisture and lead to mold.
- Refrigeration: Extends shelf life to about a week. Wrap the bread tightly in plastic wrap or aluminum foil. Note that refrigeration can slightly alter the texture, so bring it to room temperature before serving
- Freezing: Best for long-term storage (up to 3 months). Slice the bread before freezing for easy portioning. Wrap individual slices or the whole loaf in plastic wrap, then place in a freezer bag. Thaw at room temperature or toast frozen slices directly.
When storing apple bread, it’s important to consider your local climate. In humid environments, you might need to be extra vigilant about preventing moisture buildup. In my experience, I’ve found that a cool, dry pantry works wonders for keeping bread fresh without electricity.
To revive slightly stale bread, try toasting the slices lightly. This can bring back some of that fresh-baked crispness and enhance the apple flavor. For a special treat, spread a thin layer of butter or homemade apple butter on your toasted slice – it’s absolutely delightful!
Remember, homemade apple bread doesn’t contain preservatives, so it won’t last as long as store-bought varieties. That’s part of its charm, though – it encourages us to savor each slice and share with friends and neighbors. There’s something deeply satisfying about baking bread that you’ve made with your own hands, especially when it’s infused with the comforting flavors of autumn apples.
By following these serving and storage tips, you’ll be able to enjoy your apple bread at its best, whether you’re having a slice with your morning coffee or packing it for a woodland picnic. Happy baking, and may your homestead always be filled with the warm, inviting aroma of freshly baked bread!
Conclusion
As we wrap up our apple bread adventure, I hope you’re feeling inspired to roll up your sleeves and get baking. From gathering those crisp apples and warm spices to the heavenly aroma that’ll fill your kitchen, making apple bread is a delightful experience from start to finish. Remember, the key to success lies in properly preparing your apples and achieving the right batter consistency. Don’t be afraid to experiment with different apple varieties or add your own twist with nuts or dried fruits. Whether you’re serving it warm with a pat of butter or storing it for later, this apple bread is sure to become a fall favorite in your homestead. So, why not give it a try this weekend? Your taste buds (and your family) will thank you. Happy baking, and may your home always be filled with the comforting scent of freshly baked apple bread!
Resources: Here are some helpful resources for further information.
- The Art of Quick Breads – By Land O’Lakes
- Quick Loaf Breads – By The Kitchen Magpie
- Basic Quick Bread Recipe – By A Pretty Life In The Suburbs

Frequently Asked Questions
1. Can I use any type of apples for this recipe?
Yes, you can use any type of apples, but tart varieties like Granny Smith or Honeycrisp work best as they balance the sweetness of the bread and add a nice texture.
2. Can I substitute the all-purpose flour with whole wheat flour?
Yes, you can substitute whole wheat flour for a healthier option. Just keep in mind that the bread may be denser and slightly more dry, so you might need to adjust the liquid slightly.
3. How should I store leftover apple bread?
Store leftover apple bread in an airtight container at room temperature for up to 3 days. For longer storage, you can freeze it for up to 3 months. Simply thaw at room temperature before enjoying.
4. Can I add nuts or raisins to the apple bread?
Absolutely! Feel free to add chopped nuts or raisins to the batter for extra texture and flavor. Just fold them in gently before baking.
Apple Bread
Equipment
- 2 mixing bowls.
- 1 loaf pan
Ingredients
Dry Ingredients
- 2 cups all-purpose flour.
- 1 ½ tsp cinnamon.
- 1 tsp salt.
- 1 tsp baking powder.
- ½ tsp baking soda.
Wet Ingredients
- ¾ cup brown sugar.
- 2 large eggs.
- ½ cup vegetable oil.
- 2 tsp vanilla extract.
- 2 cups peeled and chopped apples.
Instructions
Preparing the Apples
- Washing: Always start by thoroughly washing your apples to remove any dirt or residues.Peeling: While some recipes might call for leaving the peel on, most apple bread recipes work best with peeled apples. Use a sharp vegetable peeler or paring knife to remove the skin in long, continuous strokes.Coring: Cut the apple into quarters and use a sharp knife to remove the core and seeds from each section.Chopping: Aim for uniform pieces to ensure even baking. I prefer to chop my apples into roughly 1/4-inch cubes. This size allows the apple pieces to soften during baking while still maintaining some texture.Preventing browning: If you're not using the chopped apples immediately, toss them with a bit of lemon juice to prevent browning.
Mixing Dry Ingredients
- In a large bowl, whisk together the flour, baking powder, baking soda, salt, and any spices you're using.
- Pro tip: If you're using homemade ground flour, as I often do, sift it before measuring to remove any lumps and ensure accurate measurements.
Combining Wet Ingredients
- In another bowl, it's time to mix our wet ingredients.
- Whisk these together until they're well combined. If you're using honey from your own bees or maple syrup as a sweetener, now's the time to add it. The key here is to make sure everything is at room temperature before mixing. This helps create a smooth, well-incorporated batter.
Incorporating Apples into the Batter
- Grated apples: This method distributes the apple flavor evenly throughout the bread and adds moisture.Chopped apples: For a more textured bread with pockets of apple goodness.A combination of both: My personal favorite for the best of both worlds!Whichever method you choose, make sure to fold the apples gently into the batter. Over-mixing at this stage can lead to tough bread, and we want ours to be tender and moist.Once your apples are incorporated, it's time to combine the wet and dry ingredients. Add the wet mixture to the dry ingredients and stir just until combined. You might see a few lumps, but that's okay – they'll bake out in the oven.
- Remember, the key to a light and fluffy apple bread is not overworking the batter. Mix just until you don't see any more dry flour. This gentle handling preserves the air bubbles that will give your bread a beautiful rise and texture.
Final Touches
- As a final touch, I like to sprinkle a bit of cinnamon sugar on top of the batter before it goes into the oven. It creates a delightful crispy crust that's simply irresistible.
Preparing the Baking Pan
- Before we pour our batter, we need to ensure our baking pan is ready. I prefer using a 9×5 inch loaf pan for apple bread, but an 8×4 inch pan works well too. To prevent sticking, grease the pan thoroughly with butter or oil. For extra insurance against sticking (and easier cleanup), line the bottom and sides with parchment paper, leaving some overhang for easy removal.
- If you're using a glass or ceramic pan, keep in mind that these materials retain heat differently than metal. You might need to adjust your baking time slightly, so keep a close eye on your bread as it bakes.
Oven Temperature and Baking Time
- Preheat your oven to 350°F (175°C). If you're using a wood-fired oven like I sometimes do, aim for a consistent medium heat. Pour your prepared batter into the greased and lined pan, spreading it evenly.
- The typical baking time for apple bread is about 50-60 minutes. However, this can vary depending on your oven and the moisture content of your apples. It's always better to start checking a bit earlier rather than risk overbaking.
Checking for Doneness
- Determining when your apple bread is perfectly baked is an art form. Here are a few methods I use:The toothpick test: Insert a toothpick or thin skewer into the center of the loaf. If it comes out clean or with just a few moist crumbs, your bread is done.Visual cues: The top of the bread should be golden brown, and you might see some cracks forming on the surface. These are good signs of doneness.Touch test: Gently press the top of the loaf. If it springs back, it's likely done. If it leaves an indentation, it needs more time.Internal temperature: For the most accurate results, use a food thermometer. The internal temperature should reach about 200°F (93°C) when it's fully baked.Remember, ovens can be temperamental, especially if you're working with alternative heat sources like I often do. Trust your instincts and don't be afraid to give it a few more minutes if you're unsure.
- Once your apple bread is baked to perfection, remove it from the oven and let it cool in the pan for about 10 minutes. This allows the bread to set and makes it easier to remove from the pan. After 10 minutes, use the parchment paper overhang to lift the bread out and transfer it to a wire rack to cool completely.
Cooling and Slicing Tips
- Patience is key when it comes to cooling your freshly baked apple bread. It's tempting to cut into that warm, fragrant loaf right away, but resist the urge! Allow your bread to cool completely on a wire rack before slicing. This process typically takes about 1-2 hours and is crucial for several reasons:
- Texture development: Cooling allows the crumb structure to set, resulting in a better texture.Easier slicing: A cooled loaf is less likely to crumble or tear when cut.Flavor enhancement: The flavors continue to develop as the bread cools.When you're ready to slice, use a serrated knife with a gentle sawing motion. This helps prevent crushing the bread and ensures clean, even slices. For best results, slice only what you plan to eat immediately, keeping the rest of the loaf intact to maintain freshness.
Summary
I hope I have inspired you to bake your very own bread loaves to enjoy and share with your friends and family.
If you were encouraged by this post, I invite you to check out my FREE Printables Page for fun free printables, planners, and charts.
ENTER MY FREE Printables Page HERE
Here are some more of my bread-making inspiration posts to check out!
The Best Hoagie Buns Recipe Made From Scratch!
Pumpkin: How to Make Chocolate Chip Pumpkin Bread
Sweet Potato Bread: How to Make Sweet Potato Bread
Chocolate Chip Cookies: How to Make Chocolate Chip Cookie Bread
Carrot Cake Quick Bread: How to Make Carrot Cake Quick Bread
How to Make Strawberries and Cream Sourdough Bread
How to Make S’mores Sourdough Bread
July 4th Bread: How to Make a Firecracker Marble Bread Braid
Artisan Bread: How to Make Artisan Bread
Challah Bread: How to Make a 6 Braided Challah Bread
Sweet Bread: How to Make Sweet Bread
Blessings,
The Off Grid Barefoot Girl



Yum 😋 I love apples and I love bread what a great autumn recipe idea! Definitely have to go cook this homemade recipe in my kitchen! ❤️
So glad you like it too!!