Learn how to make and can pumpkin butter at home with this easy, flavorful recipe! I’ll walk you through each step—from cooking the perfect spiced pumpkin puree to safely preserving it in jars for long-term storage. Whether you’re prepping your pantry for fall or looking for a cozy homemade gift idea, this guide will help you make pumpkin butter that’s smooth, sweet, and shelf-stable.
As the leaves begin to change and the air turns crisp, there’s nothing quite like the warm, inviting aroma of pumpkin butter simmering on the stove or in the crockpot! This delightful spread, made from pureed pumpkin, sugar, and a blend of warm spices, has become a beloved fall staple in many households. Its smooth, rich texture and sweet, spiced flavor make it perfect for slathering on toast, dolloping onto pancakes, or even incorporating into seasonal baked goods. Pumpkin butter not only celebrates the flavors of autumn, but also evokes a sense of nostalgia, reminding us of cozy gatherings and festive celebrations.
For me, making pumpkin butter is a cherished autumn tradition that brings back fond memories of my childhood. Each year, my family would gather in the kitchen, transforming freshly harvested pumpkins into delicious preserves. I remember the excitement of picking the perfect pumpkins, the laughter shared over chopping and stirring, and the warm scent of spices filling our home. It’s not just about creating a tasty treat; it’s about the joy of spending time with loved ones and embracing the spirit of the season. Now, I carry on this tradition in my own kitchen, creating batches of pumpkin butter that my family eagerly anticipates each fall.
In this post, I’m excited to share my favorite pumpkin butter recipe with you, along with essential tips for canning it safely so you can enjoy it throughout the year. I’ll guide you through each step of the process, from selecting the best pumpkins to perfecting the spice blend that makes this spread so irresistible. Additionally, I’ll share creative ideas for using pumpkin butter in your everyday meals and festive gatherings. Whether you’re a seasoned canner or a beginner, this post will inspire you to make your own pumpkin butter and savor the flavors of fall!
This is a pinnable post. Tap or hover over any image in this post to pin to your Pinterest Boards.
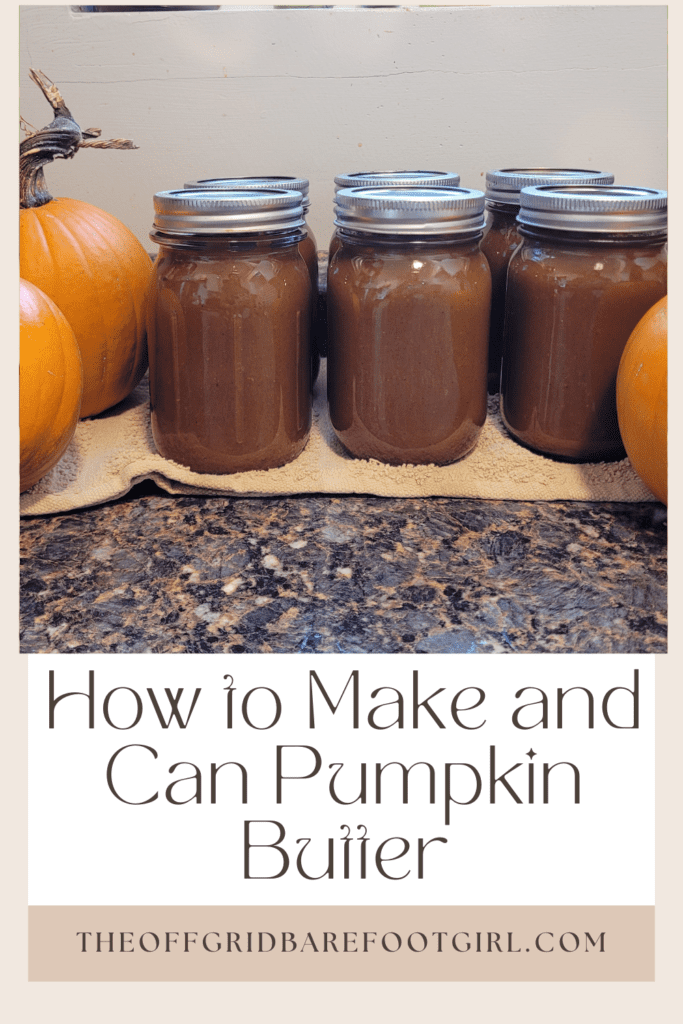
Understanding Pumpkin Butter
Defining Pumpkin Butter and Its Uses
Pumpkin butter is a smooth, spreadable condiment made from pumpkin purée, sugar, and a blend of warm spices like cinnamon, nutmeg, and cloves. Its rich, velvety texture and sweet, spiced flavor make it a versatile addition to many dishes.
You can slather it on toast, mix it into oatmeal, use it as a topping for pancakes or waffles, or swirl it into yogurt for a flavorful boost. Pumpkin butter also works beautifully as a filling for pastries or cookies, and can even be added to savory dishes like roasted meats for an autumnal twist. Its uses are only limited by your imagination!
History and Origin of Pumpkin Butter
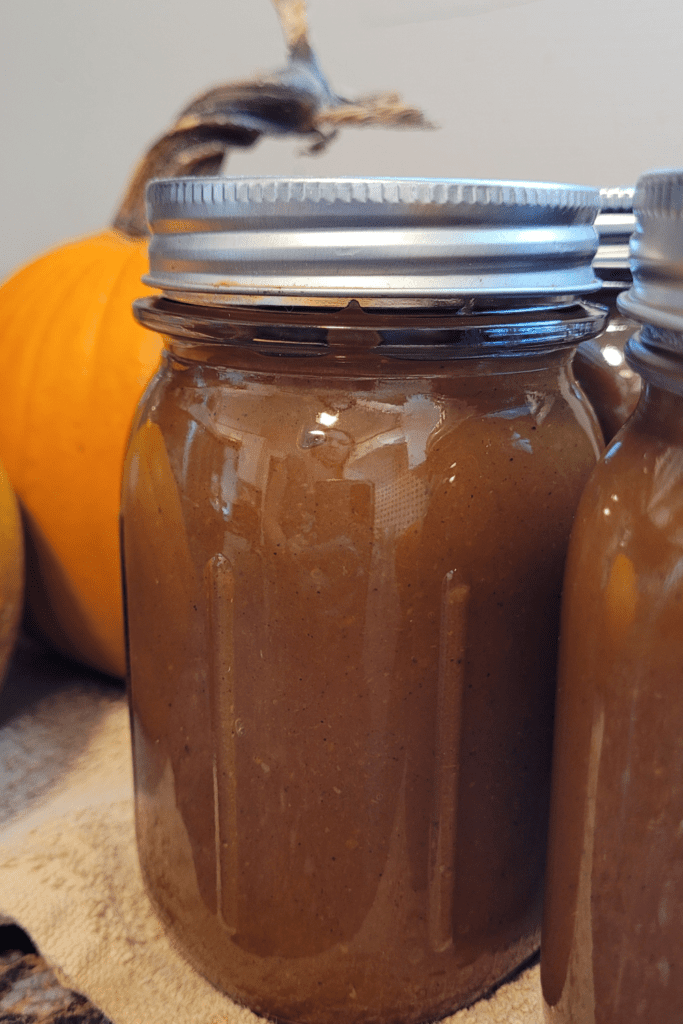
Pumpkin butter has its roots in early American homesteads, where preserving the fall harvest was essential for survival through the winter months. Early settlers would make fruit butter from apples or pumpkins, cooking the produce down with sugar and spices until it reached a thick, spreadable consistency.
This method was not only practical for preservation, but also a way to bring comforting, seasonal flavors to the table year-round. Over time, pumpkin butter became a fall favorite, enjoyed for its ability to capture the essence of the season in a jar!
Difference Between Pumpkin Butter and Other Pumpkin Spreads
Though they both feature pumpkin as the star ingredient, pumpkin butter, and pumpkin pie filling are quite different. Pumpkin butter is cooked slowly with sugar and spices until it becomes a thick, caramelized spread, whereas pumpkin pie filling is typically used as a base for pies and is mixed with cream, eggs, and spices for a more custard-like texture.
Pumpkin butter is richer in flavor, less sweet, and more concentrated than pie filling, making it perfect for spreading, while pumpkin pie filling is more suited for baking into pies and tarts.
Ingredients for Pumpkin Butter
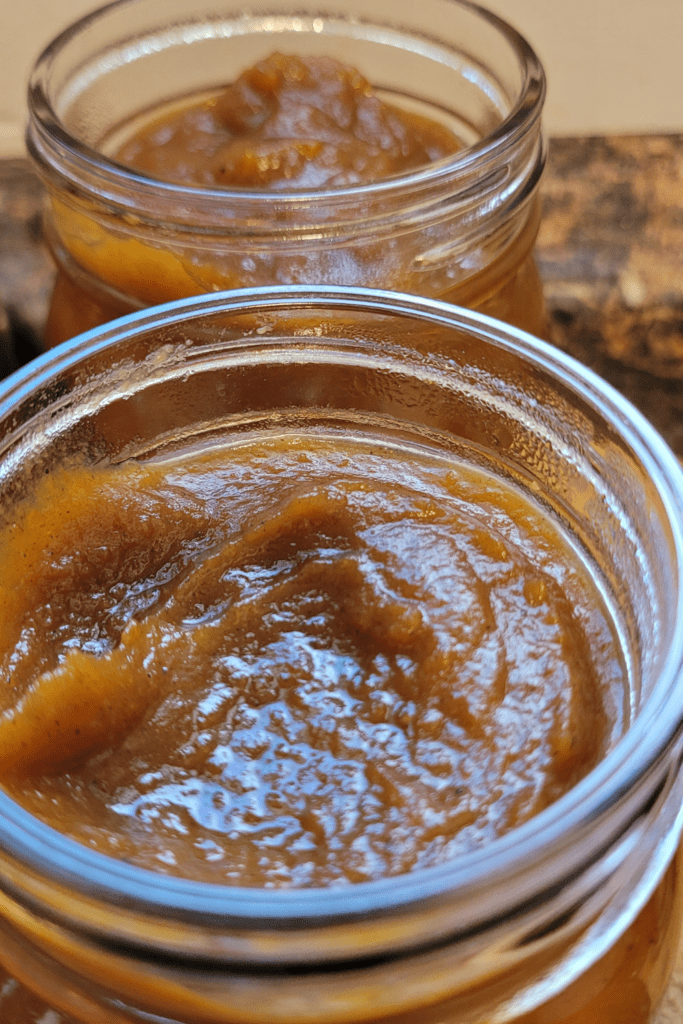
- 6 cups pumpkin purée (or four 15 oz. cans of 100% pumpkin purée)
Note: Be sure to use pure pumpkin purée, not pumpkin pie filling. If using fresh pumpkins, opt for sugar or pie pumpkins for the best texture and flavor. - 3 cups light brown sugar, packed
Note: The molasses in light brown sugar adds depth and a caramel-like sweetness, balancing the spices beautifully. You can substitute dark brown sugar for a richer flavor. - 1 ½ cups granulated sugar
Note: Granulated sugar adds sweetness and helps with the preservation process, ensuring the pumpkin butter has the right consistency. - 3 cups apple juice (or apple cider)
Note: Apple juice provides liquid to help break down the pumpkin while adding a mild sweetness. Apple cider will give it an extra boost of autumn flavor. My family loves to use apple cider for our pumpkin butter! - 4 tablespoons lemon juice
Note: Lemon juice adds acidity, which is crucial for safe canning and balancing the sweetness. - 2 ¼ teaspoons ground cinnamon
Note: Cinnamon is a key spice that adds warmth and enhances the natural flavors of the pumpkin. - 1 ½ teaspoons ground nutmeg
Note: Nutmeg gives the pumpkin butter a cozy, spiced flavor that pairs perfectly with cinnamon. - ½ teaspoon ground cloves
Note: Cloves add a deep, aromatic spice that enhances the overall complexity of the butter. Be careful not to overdo it, as cloves can be quite strong. - 1 teaspoon salt
Note: A small amount of salt is essential to enhance the sweetness and spices, bringing balance to the overall flavor.
Optional Add-ins:
- Raisins or dried cranberries
Note: For added texture and a bit of tart sweetness, stir in raisins or dried cranberries towards the end of cooking. - Chili flakes
Note: If you like a little heat, add a pinch of chili flakes for a subtle kick that contrasts nicely with the sweetness. - Vanilla extract
Note: A splash of vanilla can add warmth and round out the flavors. Add it towards the end to preserve its aromatic quality.
Preparing to Make Pumpkin Butter
Tips for Selecting the Best Pumpkins (if using fresh)
When making pumpkin butter from fresh pumpkins, it’s important to choose the right variety for the best flavor and texture. Look for small sugar or pie pumpkins, as they have sweeter, denser flesh compared to larger carving pumpkins, which can be watery and bland.
The pumpkins should feel firm, heavy for their size, and free from blemishes or soft spots. A vibrant orange color is also a good indicator of ripeness. Once you’ve selected your pumpkins, be sure to roast or steam them until tender before puréeing, as this helps concentrate their natural sweetness.
Equipment Needed for Making Pumpkin Butter
To make pumpkin butter, you’ll need a few essential tools: a large pot or slow cooker to cook down the pumpkin purée, a sturdy spoon or spatula for stirring and measuring cups for precise ingredient proportions. If you’re canning the pumpkin butter for long-term storage, you’ll also need mason jars, lids, and rings, along with a jar lifter and funnel to make the process easier.
A wide pot or water bath canner is necessary for processing the jars, ensuring they seal properly for safe storage. Additionally, you may want to have an immersion blender or food processor on hand to achieve a smooth, even consistency.
Step-by-Step Preparation: How to Sterilize Jars
Before you start cooking your pumpkin butter, it’s important to sterilize your jars to ensure safe canning. Begin by washing your jars, lids, and rings with hot, soapy water. Once clean, you can sterilize the jars by placing them in a pot of boiling water for 10 minutes, or you can run them through a dishwasher cycle using the hottest setting.
Keep the jars warm until you’re ready to fill them, as adding hot pumpkin butter to cold jars can cause them to crack. Be sure to have all your canning tools ready and your work area organized before starting the cooking process, so everything runs smoothly.
Step-by-Step Instructions for Making Pumpkin Butter
Combining Ingredients and Initial Cooking Steps
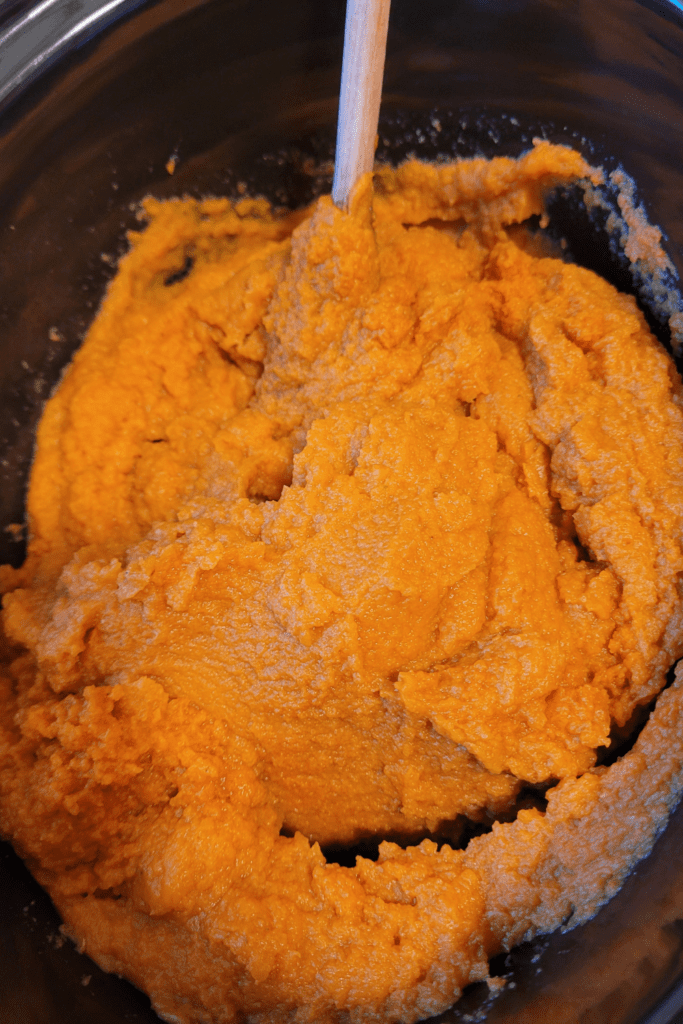
To start the process of making pumpkin butter, combine your pumpkin purée, sugars, apple juice or cider, and spices in a large, heavy-bottomed pot. Stir the mixture well to evenly distribute the sugars and spices. As the pumpkin mixture begins to heat up, bring it to a gentle simmer over medium heat, allowing the flavors to meld together.
It’s important to avoid cooking over high heat to prevent scorching, especially since the sugars can burn quickly. Once the mixture begins to simmer, lower the heat to maintain a slow, steady bubbling and let it cook down. I like to use my crockpot on high for hours for a hands-off approach to this recipe!

The Importance of Stirring and Monitoring Consistency
Stirring consistently is key to achieving a smooth, even texture and preventing it from sticking to the bottom of the pot. As the pumpkin butter thickens, it becomes more prone to scorching, so be sure to stir frequently, especially around the edges where it can settle and burn.
Keep an eye on the texture as it reduces—your goal is to have a thick, creamy consistency without any watery separation. Slow cooking helps intensify the flavors, so it’s worth the patience to give it time.
How to Check for Doneness and Proper Consistency

Knowing when it is done comes down to the texture and thickness. A good rule of thumb is to check if the mixture clings to the back of a spoon without running off too quickly. You can also place a small amount on a plate, allowing it to cool slightly—if no liquid pools around it, then it’s ready.
It should be thick enough to hold its shape when spread on toast, but still smooth and creamy. If it feels too loose, continue simmering and stirring until it thickens up to your liking.
Troubleshooting Common Issues (e.g., Too Thick or Too Thin)
If your pumpkin butter ends up too thick, it might start to look more like a paste than a spreadable butter. In this case, you can thin it out by gradually adding more apple juice or water and stirring well to incorporate the liquid.
On the other hand, if the mixture is too runny and isn’t thickening, continue simmering it over low heat, stirring frequently to prevent burning, and letting more moisture evaporate. Patience is key—sometimes it just needs more time to reduce to the right consistency.
Adjusting Flavors to Personal Preference
As your pumpkin butter nears the final stages, it’s the perfect time to taste and adjust the flavors. If you prefer a sweeter butter, add a little more sugar, but do so gradually to avoid overpowering the spices. For a stronger spice profile, feel free to add an extra pinch of cinnamon, nutmeg, or cloves to deepen the fall flavors.
If you like a bit of tang, a touch more lemon juice or apple cider vinegar can brighten up the richness. Tailor the flavors to match your personal preference—this is your homemade creation, after all!
Canning Pumpkin Butter
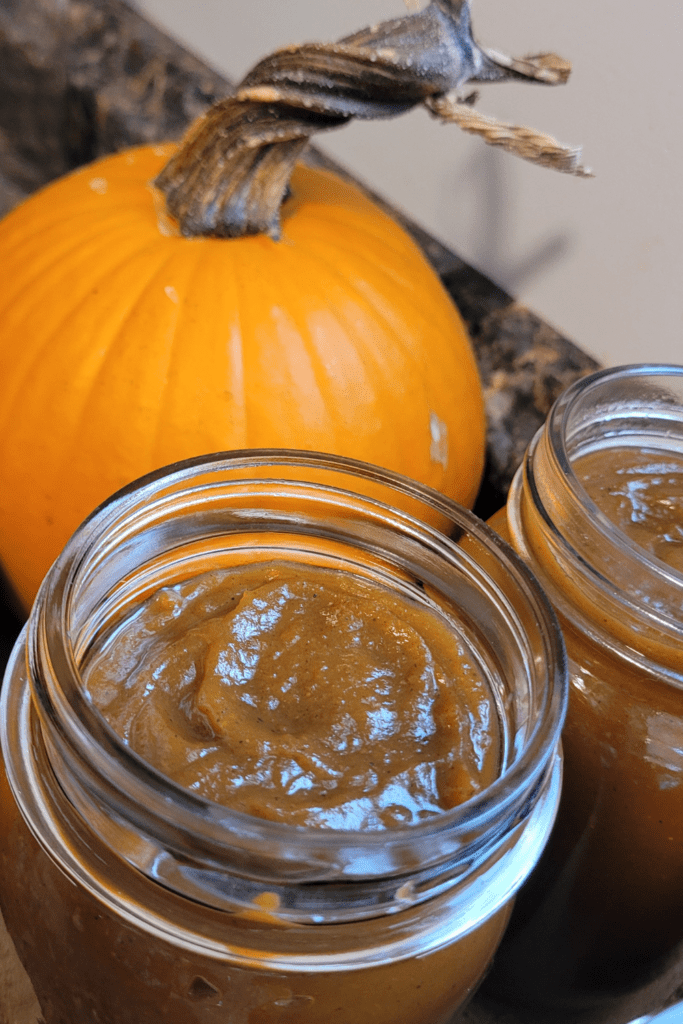
Importance of Proper Canning Techniques for Safety and Longevity
Canning pumpkin butter properly is essential for both safety and extending the shelf life of your delicious spread. Since pumpkin butter is a low-acid food, improper canning can lead to harmful bacteria growth, such as botulism.
Using proper water bath canning techniques ensures that the jars are sealed in a sterile environment, making them shelf-stable for months. It also helps preserve the flavors and freshness of your pumpkin butter, so you can enjoy it long after the fall season has passed. Following these steps precisely ensures that your homemade creation is both safe and long-lasting.
Step-by-Step Instructions for Filling Jars, Sealing, and Processing in a Water Bath
Once it is ready, carefully ladle it into sterilized jars, leaving about 1/4 inch of headspace to allow room for expansion during processing. Wipe the rims of the jars with a clean, damp cloth to remove any spills that could interfere with sealing. Place the lids on top and screw the rings on until they are just finger-tight.
Using a jar lifter, place the filled jars into a large pot or water bath canner filled with boiling water, ensuring that the jars are fully submerged with at least an inch of water above them. Process the jars in the boiling water bath for 10-15 minutes, depending on your altitude, then carefully remove them and let them cool completely.
Tips on Ensuring a Good Seal and Checking Jar Integrity After Processing

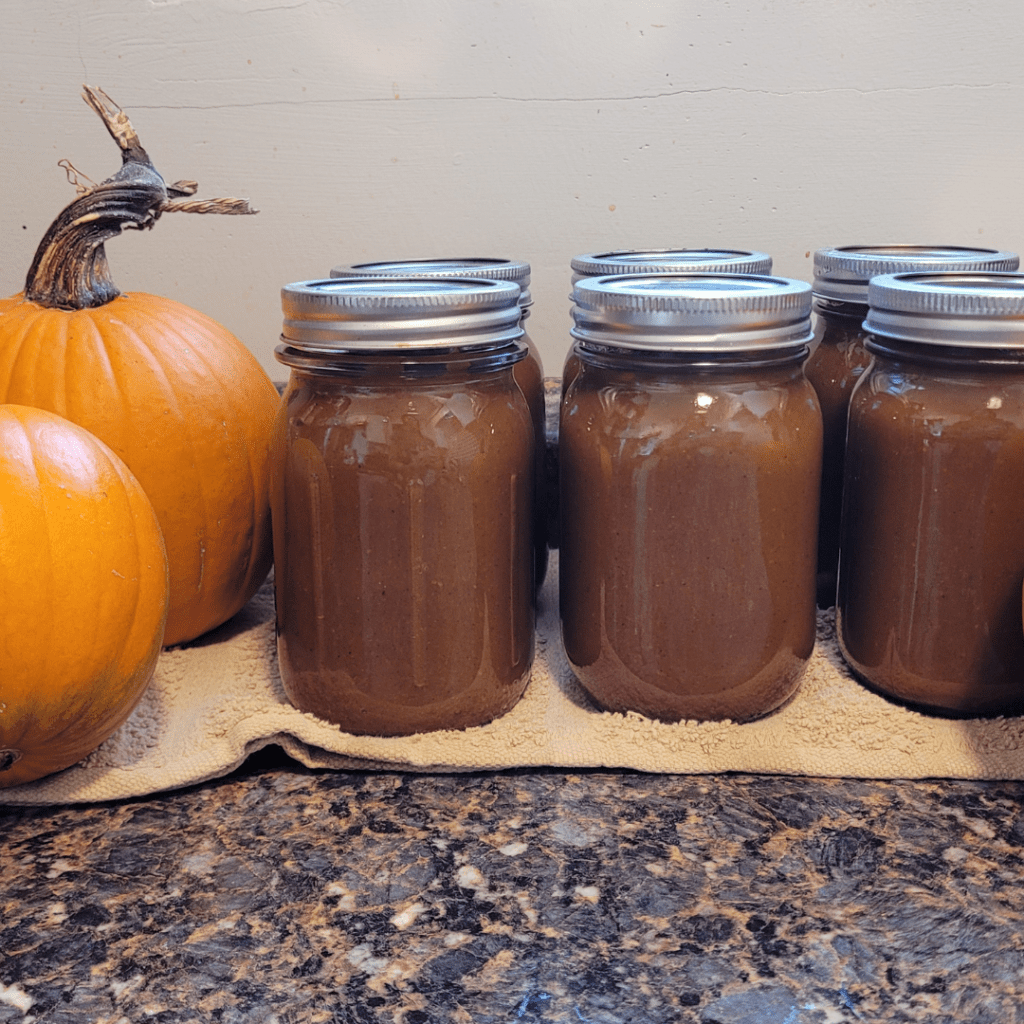
After your jars have cooled for 12-24 hours, check to ensure they have sealed properly by pressing the center of each lid. If the lid doesn’t pop back, you’ve got a good seal! If any jars don’t seal, refrigerate and use those within a week or reprocess them with new lids.
It’s also important to inspect the jars for any cracks or chips that could compromise the seal. Store your sealed jars in a cool, dark place, and check periodically for any signs of spoilage, such as leaks or bulging lids. A well-sealed jar will keep your pumpkin butter safe and flavorful for up to a year.
Storage and Shelf Life
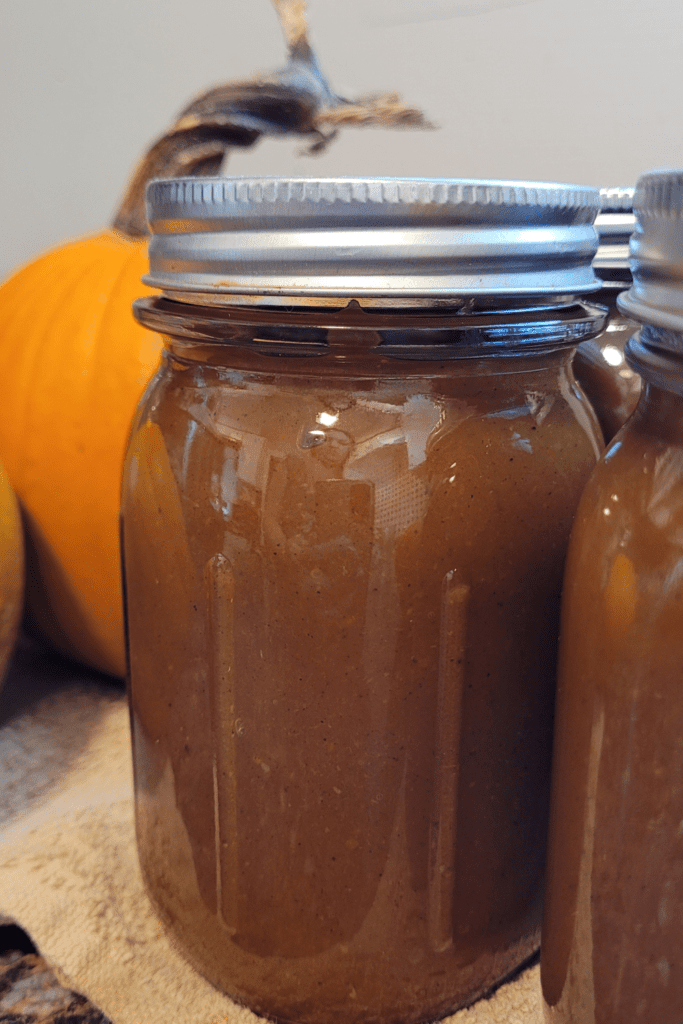
How to Store Sealed Jars of Pumpkin Butter
Once your jars of pumpkin butter have been sealed and processed properly, it’s important to store them in the right environment to maintain their quality. The ideal storage space is a cool, dark pantry or cupboard, away from direct sunlight and fluctuating temperatures. Make sure the jars are kept in a dry spot to prevent any rusting of the lids.
As long as the jars remain sealed, you won’t need to refrigerate them until after they’re opened. This proper storage setup helps preserve the flavors and texture of your pumpkin butter for the months ahead.
Shelf Life and Proper Conditions for Long-Term Storage
When stored under the right conditions, canned pumpkin butter can last up to a year, maintaining its delicious fall flavors through the seasons. It’s important to regularly check that the lids remain sealed and intact, as this ensures the food inside is safe to eat.
Once a jar is opened, it should be kept in the refrigerator and consumed within two to three weeks for the best flavor and safety. Keeping your jars in a consistently cool, dark space will help extend their shelf life, ensuring your hard work lasts as long as possible.
Signs That Pumpkin Butter Has Gone Bad
Even with proper canning and storage, it’s crucial to know the signs that your pumpkin butter may have gone bad. If you notice any bulging lids, leaking jars, or an off-putting odor when you open the jar, it’s best to discard the contents immediately.
Mold growth or a change in texture, such as separation or discoloration, are also indicators that the pumpkin butter is no longer safe to eat. If a jar’s seal has broken before opening or you detect any strange flavors, do not consume it. Staying mindful of these warning signs ensures you’re only enjoying pumpkin butter at its best.
Creative Ways to Use Pumpkin Butter
Ideas for Serving Pumpkin Butter (On Toast, in Recipes)
Pumpkin butter is a wonderfully versatile spread that can add a burst of fall flavor to simple dishes or more elaborate recipes. The classic way to enjoy it is slathered on toast, biscuits, or warm scones, where its rich, spiced flavor shines. You can also stir it into oatmeal or yogurt for a sweet and seasonal twist to your breakfast.
Pumpkin butter can serve as a delicious topping for pancakes or waffles, or even as a filling for crepes. If you’re feeling creative, try mixing it into savory recipes, like using it as a glaze for roasted vegetables or meats.
Incorporating Pumpkin Butter into Baked Goods (e.g., Muffins, Cakes)
Pumpkin butter can be a secret ingredient that takes your baked goods to the next level. Its smooth, thick texture and concentrated pumpkin flavor make it perfect for stirring into muffins or cake batters.
You can swirl it into the top of bread dough before baking to create a beautifully marbled pumpkin loaf, or even use it as a filling between cake layers for an autumn-inspired treat. It also pairs well in cookie dough or as a filling for hand pies, adding a rich, spiced taste that enhances your favorite fall desserts.
Suggestions for Pairing Pumpkin Butter with Cheese, Meats, or Desserts
For a savory twist, pumpkin butter pairs beautifully with a variety of cheeses and meats. Try it as a spread on a cheese board alongside sharp cheddar, creamy brie, or tangy goat cheese—the sweetness and spice complement the richness of these cheeses perfectly. You can also use it as a glaze for roasted meats like chicken, where it adds a slightly sweet, spiced finish.
On the dessert side, serve pumpkin butter as a topping for vanilla ice cream, or fold it into whipped cream for a decadent autumn-inspired dip for fresh fruit or pound cake.
Gifting Pumpkin Butter
Tips for Packaging Pumpkin Butter as Gifts (Labels, Decorative Jars)
When gifting pumpkin butter, the presentation can make all the difference in turning a simple jar into a heartfelt gift. Use decorative jars or mason jars with unique lids to give your preserves a more personal touch. Adding custom labels that list the ingredients, the date it was canned, or even a fun name for your pumpkin butter adds charm and makes it look polished.
Tie a ribbon or some twine around the jar and attach a small tag with serving suggestions or a short note for an extra special touch. The effort in packaging shows the thoughtfulness behind the homemade gift, making it feel even more appreciated.
Ideas for Holiday Gifting and Special Occasions
Pumpkin butter makes a perfect gift during the holiday season or for special occasions, especially since its warm, spiced flavors evoke the coziness of fall and winter. Include it in a gift basket with homemade bread, biscuits, or even a few cheese pairings for a complete treat. For Thanksgiving or Christmas, pumpkin butter can be a great hostess gift or stocking stuffer.
Consider giving it for birthdays, housewarming parties, or any event where a homemade touch would be valued. Pairing your pumpkin butter with other homemade items, like preserves or baked goods, makes for a thoughtful, unique gift that will be cherished.
One of the most rewarding experiences is sharing a jar of homemade pumpkin butter with family and friends. Every time I gift it, I feel like I’m giving a piece of my homestead, a little slice of the fall season captured in a jar. People are always surprised at how something so simple can taste so good, and I love hearing how they’ve used it—whether it’s on their morning toast or as a glaze for meats.
I remember gifting jars one Christmas to neighbors, and the warm responses I received made all the hours spent canning completely worth it. There’s something truly special about gifting something you made yourself, knowing it’ll be enjoyed and appreciated.
Conclusion
I’d love to hear from you! Have you tried making pumpkin butter before? What are your favorite ways to use it? Whether you follow this recipe or put your own spin on it, feel free to share your thoughts, creative variations, or unique serving ideas in the comments below. I’m always curious to see how others make this fall favorite their own, and your tips could inspire someone else to get creative in the kitchen, too!
There’s something incredibly satisfying about making your own pumpkin butter and stocking your pantry with jars that capture the essence of fall. From the fragrant spices filling the kitchen to the beautiful jars lined up and cooling after canning, the entire process is a rewarding way to preserve the season’s flavors. It’s not just about having a delicious spread on hand—it’s about the joy of crafting something homemade, knowing it’s filled with care and love that you can share with others.
If you’ve never made pumpkin butter before, now is the perfect time to give it a try! This recipe is simple, but the result is a rich, flavorful spread you can enjoy throughout the season. Once you’ve made your batch, let me know how it turned out! Whether you follow the recipe to the letter or add your own tweaks, I’d love to hear about your experience. Don’t forget to share with friends and family—they’ll be impressed with your homemade creation!
One of the best things about homemade pumpkin butter is how easy it is to adapt and make your own. Feel free to experiment with different spices or sweeteners to create a flavor that’s uniquely yours. Want a little more heat? Add some chili flakes. Prefer a sweeter spread? Go heavier on the sugar. The possibilities are endless, so don’t be afraid to get creative! Let your pantry inspire you, and turn this basic recipe into something that reflects your personal taste.
Resources: Here are some helpful resources for further information.
- Sweet and Savory Flavored Butters – By Your Homebased Mom
- Fall Butter Recipes – By Kitchen Divas
- Slow Cooker Fall Harvest Butter – By Healthy Slow Cooking
Frequently Asked Questions
1. Can I use fresh pumpkins instead of canned pumpkin purée?
Yes, you can use fresh pumpkins! Just make sure to cook and purée the pumpkin before adding it to the recipe. Choose sugar pumpkins or pie pumpkins for the best flavor and texture.
2. How long does homemade pumpkin butter last when canned?
Properly canned pumpkin butter can last up to one year when stored in a cool, dark place. Once opened, store it in the refrigerator and consume it within 2-3 weeks.
3. What can I use pumpkin butter for?
Pumpkin butter is incredibly versatile! Use it as a spread on toast or bagels, incorporate it into baked goods like muffins or cakes, or serve it alongside cheese and meats for a delicious appetizer.
4. Can I adjust the sweetness of the pumpkin butter?
Absolutely! Feel free to adjust the amount of granulated and brown sugar according to your taste preferences. You can also add spices like cinnamon or ginger to enhance the flavor without adding extra sweetness.

Pumpkin Butter
Equipment
- 1 crockpot or stockpot
- 1 water bath canner
- 7 pint jars
- canning supplies
Ingredients
- 6 cups pumpkin puree (or four 15-oz cans of 100% pumpkin puree).
- 3 cups light brown sugar, packed.
- 1 ½ cups sugar.
- 3 cups apple juice (apple cider works great too!)
- 4 tbps lemon juice.
- 2 ¼ tsp cinnamon.
- 1 ½ tsp nutmeg.
- ½ tsp cloves.
- ½ tsp ginger.
- 1 tsp salt.
Instructions
Combing the Ingredients
- In a large saucepan, combine the pumpkin purée, light brown sugar, granulated sugar, apple juice, and lemon juice. Stir until the sugars are well mixed.
Adding the Spices
- Add the ground cinnamon, nutmeg, cloves, ginger, and salt to the mixture. Stir to combine thoroughly.
Cooking the Pumpkin Butter
- Heat the mixture over medium heat, stirring frequently. Once it begins to bubble, reduce the heat to low and let it simmer for about 40-50 minutes. Continue stirring occasionally to prevent sticking, until the pumpkin butter thickens and darkens in color.
Checking the Consistency
- To test for doneness, spoon a small amount onto a plate and let it cool for a minute. It should hold its shape and not be too runny.
Preparing the Jars
- While the pumpkin butter is cooking, sterilize your 7 pint jars by boiling them in water for 10 minutes.
Filling the Jars
- Remove the pumpkin butter from the heat and let it cool slightly. Fill the sterilized pint jars with the pumpkin butter, leaving about ¼ inch of headspace at the top.
Sealing the Jars
- Wipe the rims of the jars clean, place the lids on top, and screw on the metal rings until fingertip-tight.
Processing the Jars
- Process the filled jars in a boiling water bath for 10-15 minutes to ensure a safe seal.
Cooling and Storing the Jars
- Carefully remove the jars from the water bath and let them cool on a clean kitchen towel or rack. Check that the jars are sealed properly; a sealed jar will have a lid that doesn’t pop back when pressed.
Enjoy!
- Once cooled, store your pumpkin butter in a cool, dark place or refrigerate. Enjoy it as a spread on toast, in recipes, or as a thoughtful gift during the holiday season!
Summary
I hope I have inspired you to stockpile your pantry for your survival needs.
If you were encouraged by this post, I invite you to check out my FREE Printables Page for fun free printables, planners, and charts.
ENTER MY FREE Printables Page HERE
Here are some more of my canning inspiration posts to check out!
How to Make and Can Fall Spiced Quince Chutney
Quince: How to Can Quince
Carrot Cake Butter: How to Make and Can Carrot Cake Butter
Peach Pie Filling: How to Make and Can Peach Pie Filling
Pear Pie Filling: How to Make and Can Pear Pie Filling
The Best Winter Pantry Staples to Stockpile Now!
Grapes: How to Make and Can Grape Jam
Apple Cider: How to Make Homemade Apple Cider Vinegar
How to Make and Can Cherry Plum Jam
How to Make and Can Apple Butter In Crockpot
Stockpiling Condiments for Survival: Learn How I Do It!
How to Make and Can Vegetable Pot Pie Filling
Easy Canning Applesauce Recipes to Stalk Your Pantry!
How to Make Peach Jalapeno Jam
Cherries: How to Make Cherry Pie Filling
Cherries: How to Make Cherry Syrup
Salsa: How to Make and Can Cherry Salsa
Peaches: How to Make and Can Peach Salsa
Canning Supplies You Need Now for a Successful Canning Season!
How to Make and Can Balsamic Onion Jam
Cranberry Sauce: How to Make and Can Old Fashioned Cranberry Sauce
How to Make and Can Cranberry Merry Jam
How to Make and Can Strawberry Shortcake Jam
Cherry Jam: How to Make and Can Cherry Pie Jam
Carrot Cake Jam: How to Make and Can Carrot Cake Jam
Quince Jam: How to Can a Year’s Supply of Quince Jam
Root Beer Float Jelly: How to Make and Can Root Beer Float Jelly
Blessings,
The Off Grid Barefoot Girl


In the recipe ingredients there is no ginger, but in directions(step 2) it’s listed when adding spices…..is it just to taste or optional?
Hi. Thank you for pointing that out! I have added the ginger to the ingredient list.