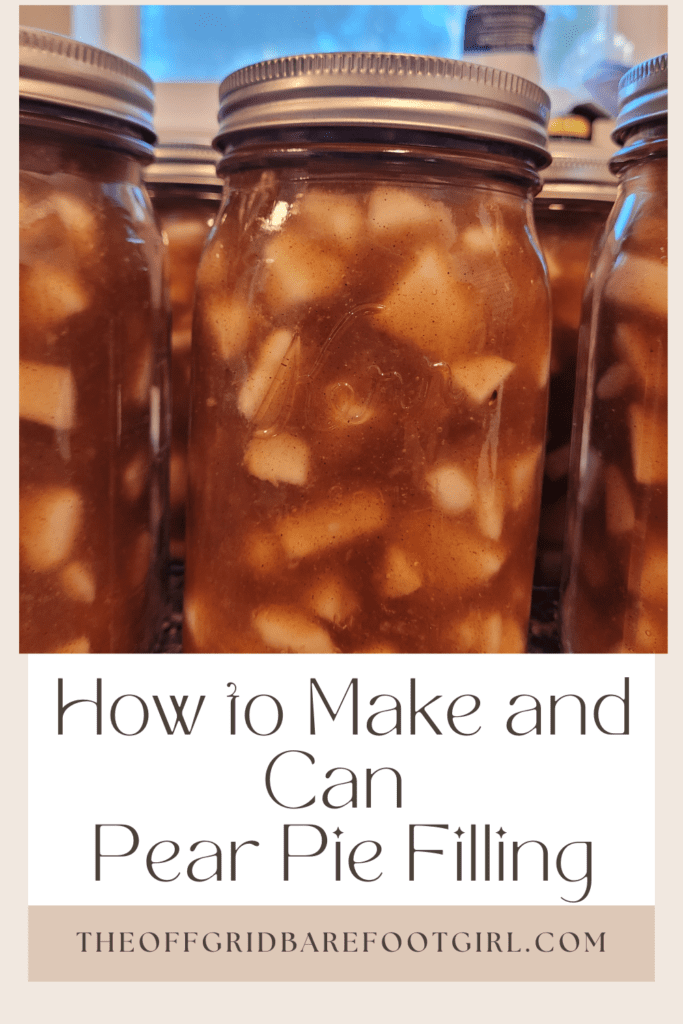
Learn how to make and can your own delicious pear pie filling with this easy step-by-step guide! Perfect for preserving the sweet, juicy flavors of fresh pears, this homemade pie filling lets you enjoy tasty pear pies year-round. Whether you’re a beginner or experienced canner, this recipe ensures safe, flavorful results every time!
Have you ever found yourself with a surplus of pears and wondered what to do with them? Well, I’ve got just the solution for you! Today, I am going to discuss the delightful recipe for homemade pear pie filling. Not only is it a scrumptious way to use up those extra pears, but it’s also a fantastic addition to your canning repertoire.
As someone who loves to be prepared for anything, I’ve found that having a stash of homemade pie fillings is a game-changer. Imagine whipping up a delicious pear pie at a moment’s notice, or surprising your family with a warm, comforting dessert on a chilly evening. Plus, there’s something incredibly satisfying about preserving the fruits of your labor (pun intended!) for future enjoyment. I have a pear tree in my backyard, so I get a ton of free pears just in time for the fall season each year! You can learn more about my backyard pear tree in the post I wrote: All About Pear Trees: Ultimate Guide
In this post, I’ll walk you through the entire process of making and canning pear pie filling, from gathering your ingredients to safely storing your jars. You’ll learn how to prepare the pears, create a perfectly balanced filling, and preserve it for long-term storage. Whether you’re a seasoned canner or a curious beginner, you’ll find valuable tips and tricks to make your pear pie-filling adventure a success. So, let’s roll up our sleeves and get started on this sweet and rewarding project!
This is a pinnable post. Tap or hover over any image in this post to pin to your Pinterest Boards.
Gathering Ingredients and Equipment
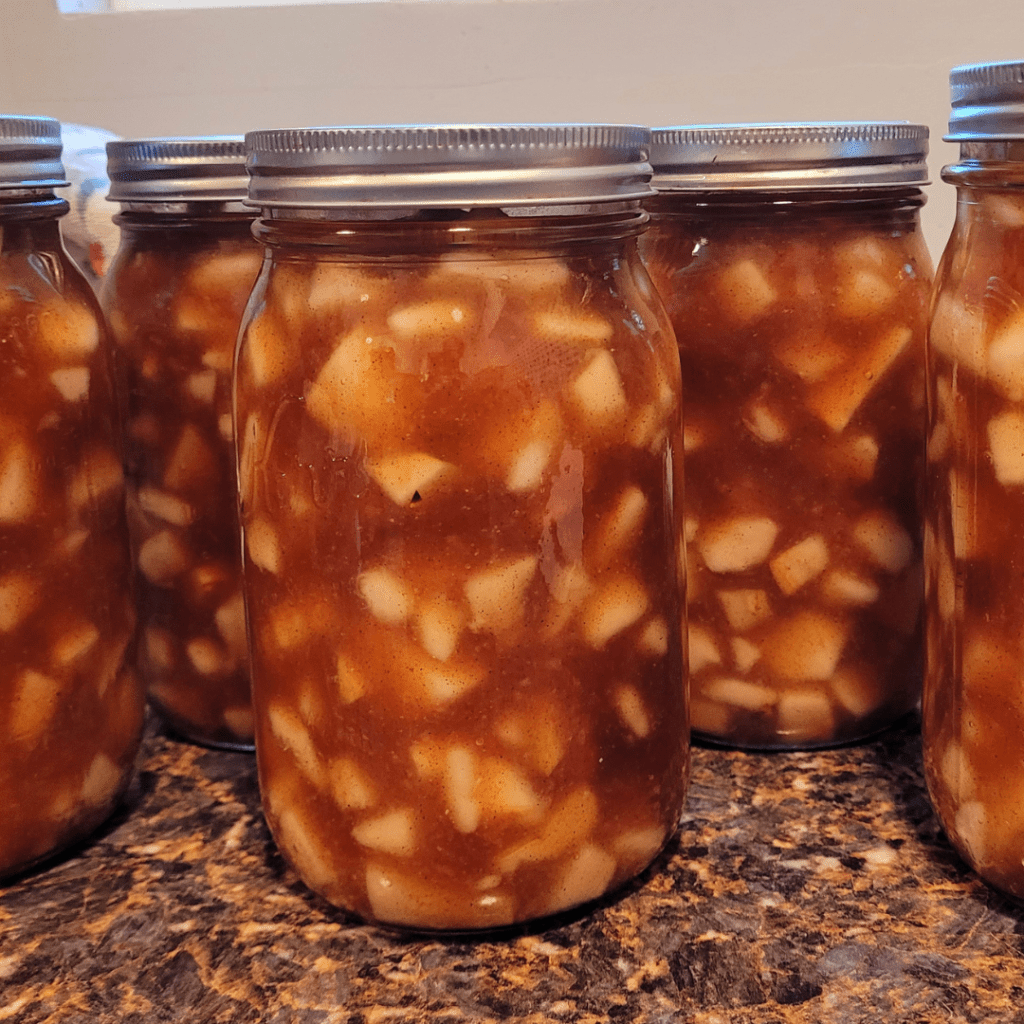
When it comes to making and canning pear pie filling, gathering the right ingredients and equipment is crucial for success. As someone who’s been living off the grid and relying on homemade preserves for years, I can’t stress enough how important it is to be well-prepared before you start. Let’s discuss what you’ll need to create this delicious treat that’ll have you enjoying the taste of summer well into the winter months.
Essential Ingredients
First things first, let’s talk about the star of the show: pears. You’ll want to choose ripe, firm pears for the best results. I prefer Bartlett or Anjou varieties, but feel free to experiment with what’s available in your area or what you’ve grown in your own orchard. You’ll need 6 quarts of diced pears for a batch of this pie filling. Feel
Here’s a list of the other ingredients you’ll need:
- Granulated sugar.
- Clear Jel (a modified cornstarch that’s safe for canning).
- Ground cinnamon.
- Ground nutmeg.
- Ground allspice.
- Salt.
- Lemon juice (to splash on the pears during the chopping process to prevent browning).
Having these on hand ensures you’re ready to go.
Required Equipment
Now, let’s talk about the tools of the trade. Canning might seem intimidating at first, but with the right equipment, it’s a breeze. Here’s what you’ll need:
- Large pot or water bath canner: This is where the magic happens. You’ll use this to process your jars of pie filling.
- Canning jars with lids and bands: Quart-sized jars are ideal for pie filling, but pints work too if you prefer smaller portions. I love opening up a quart jar of pear pie filling in the dead of winter to keep in my fridge to top our oatmeal on snowy mornings!
- Jar lifter: Trust me, you don’t want to try fishing hot jars out of boiling water without one of these!
- Canning funnel: This handy tool helps you fill jars without making a mess.
- Bubble remover and headspace tool: Use this to release air bubbles and measure the correct headspace in your jars.
- Large saucepan or stockpot: You’ll need this to cook your pie filling before canning.
- Peeler and knife: This is for preparing your pears.
- Measuring cups and spoons: Accuracy is key in canning, so make sure you have reliable measuring tools.
- Clean towels: You’ll need these for wiping jar rims and handling hot jars.
- Large bowl: For holding your prepared pears.
- Wooden spoon or silicone spatula: For stirring your pie filling as it cooks.
Having all these items ready before you start will make the process smooth and enjoyable. There’s nothing worse than realizing you’re missing a crucial tool halfway through!
Remember, cleanliness is paramount when canning. Make sure all your equipment is thoroughly washed and sterilized before use. I like to run my jars through the dishwasher just before canning to ensure they’re spotless.
By gathering all your ingredients and equipment beforehand, you’re setting yourself up for a successful canning session. Not only will you save time, but you’ll also minimize stress and reduce the risk of mistakes. So take a deep breath, enjoy the process, and get ready to create some delicious pear pie filling that’ll bring a taste of homemade goodness to your table all year round!
Preparing the Pears
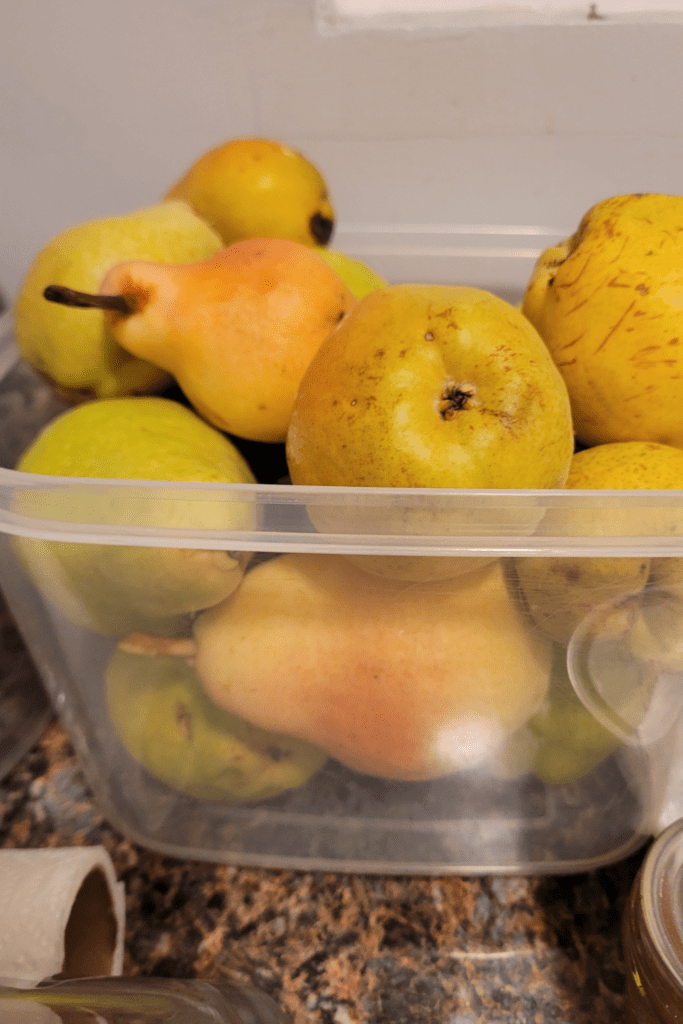
As we begin the art of making pear pie filling, the first step is crucial: preparing the pears. This process sets the foundation for a delicious and visually appealing filling that’ll make your pies shine. Let’s walk through each step to ensure you get the best results.
Selecting and Washing Pears
Choosing the right pears is essential for a perfect pie filling. Look for firm, ripe pears that yield slightly to pressure at the stem end. Bartlett, Anjou, or Bosc varieties work well for canning. Avoid overly ripe or bruised pears, as they can turn mushy during the canning process.
Once you’ve selected your pears, it’s time to give them a thorough wash. Rinse each pear under cool running water, gently rubbing the skin to remove any dirt or residue. If you’re using homegrown pears from your garden, pay extra attention to this step, as they might have more natural debris.
Peeling and Coring Pears
Now comes the part that requires a bit of patience: peeling and coring. While it might be tempting to skip peeling, removing the skin ensures a smoother texture in your final product. Here’s a quick method:
- Start at the stem end and use a sharp vegetable peeler or paring knife to remove the skin in long strips.
- Work your way around the pear, being careful to maintain its shape.
- Once peeled, cut the pear in half from top to bottom.
- Use a melon baller or small spoon to scoop out the core and seeds from each half.
Since we are processing a large batch, you might want to place the peeled pears in a bowl of water with a splash of lemon juice. This prevents browning while you work on the rest. Also, having your favorite podcast available helps keep you sane and occupied during this tedious task!
Slicing Pears
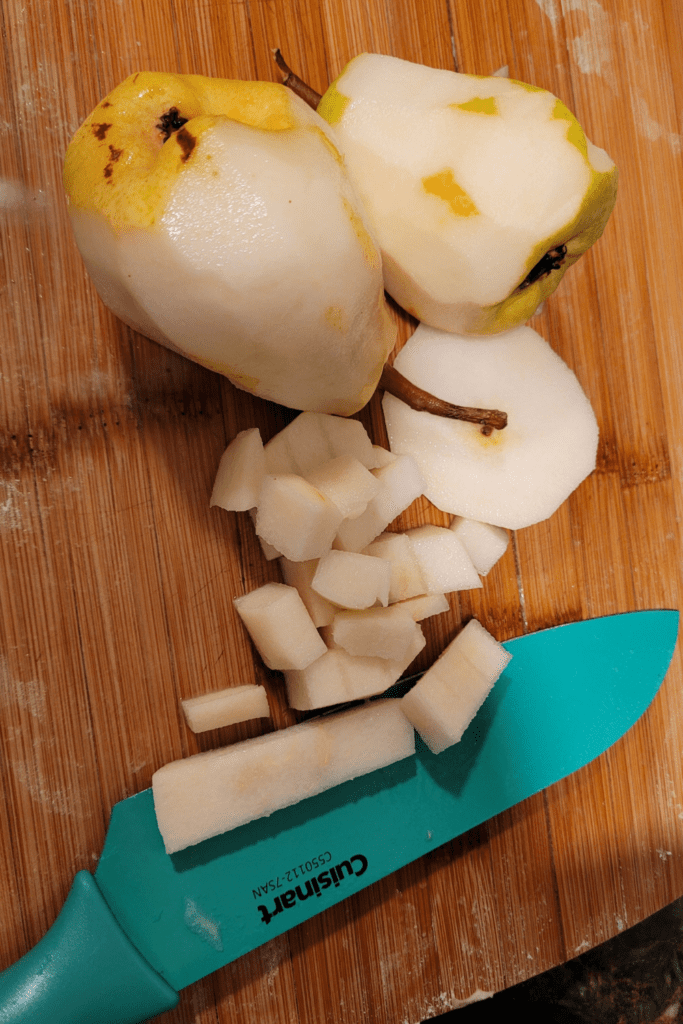
The final step in preparing your pears is slicing them. The size and shape of your slices can affect both the texture and appearance of your pie filling. Here are some tips:
- Aim for uniform slices about 1/4 to 1/2 inch thick. This ensures even cooking and a consistent texture in your filling.
- You can slice the pears lengthwise for longer pieces or crosswise for smaller chunks. Choose based on your preference or the specific recipe you’re following. I like to use diced pears for my pie filling rather than slices. I really do not know why!
- If you’re working with a large quantity, consider using a mandoline slicer for quick and uniform cuts. Just be sure to use the safety guard to protect your fingers!
As you slice, place the pear pieces in a large bowl. If you notice any bruised or overripe sections, set them aside for a quick snack or compost them. Remember, the quality of your pie filling depends on the quality of the fruit you use.
By taking the time to properly prepare your pears, you’re setting yourself up for success with your canned pie filling. Not only will it taste better, but it’ll also have a more appealing texture and appearance when you open that jar months down the road. Plus, there’s something deeply satisfying about working with fresh fruit from your own trees or local orchards. It’s moments like these that remind us of the joy of self-sufficiency and homemade goodness!
As we move on to the next steps in creating our pear pie filling, keep in mind that the care you’ve taken in preparing your fruit will pay off in the delicious pies you’ll enjoy throughout the year!
Making the Pie Filling
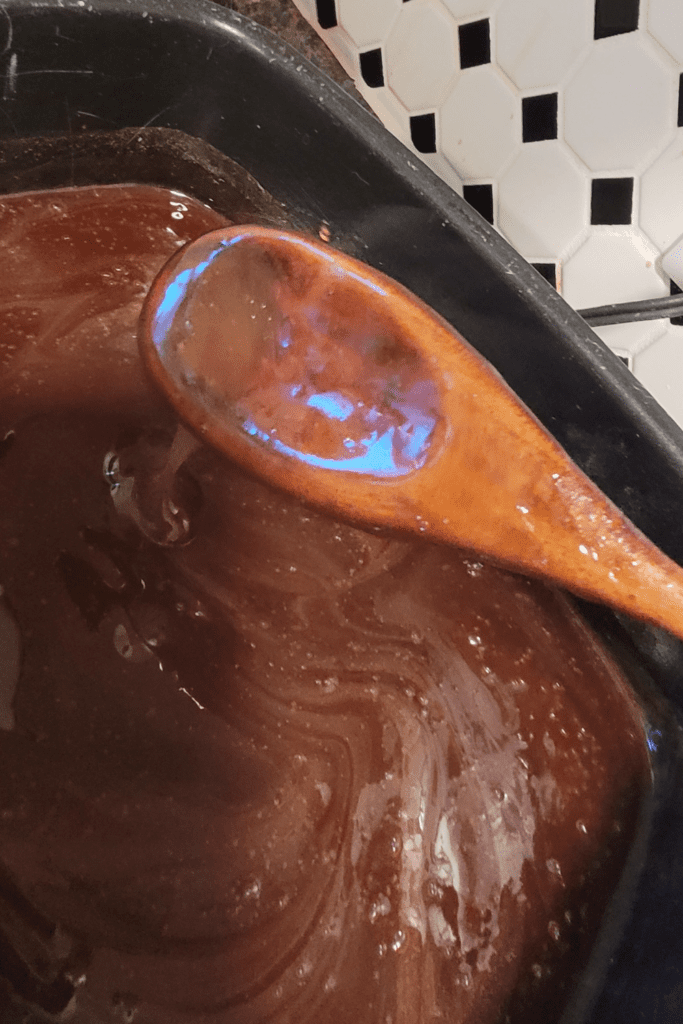
Now that we’ve prepared our pears, it’s time to get started on the heart of our canning adventure: making the pie filling. This process is where the magic happens, transforming simple ingredients into a delectable treat that’ll bring a taste of summer to your table all year round.
Combining Ingredients
Let’s start by gathering our ingredients. You’ll need:
- Sugar.
- Clear Jel.
- Cinnamon and nutmeg (optional, but highly recommended).
- Salt.
- Water.
In a large, non-reactive pot, combine the sugar and water. The amount of sugar can vary depending on the sweetness of your pears and personal preference. A good rule of thumb is about 1 cup of sugar for every 5 cups of pears. Since this recipe calls for 6 quarts of pears, this equals about 24 cups.
For those of us who like to keep things natural, you might be tempted to skip the thickener, but trust me, it’s essential for achieving that perfect pie-filling consistency. Clear Jel is ideal for canning as it holds up well to high temperatures, but cornstarch can work in a pinch if that’s what you have on hand.
While you begin the next step of cooking the filling, place your prepared pears into the fridge in an airtight container.
Cooking the Filling
Now, it’s time to cook our filling. Place your pot over medium heat and stir the sugar and water gently. This is when you’ll want to add your spices – a teaspoon each of cinnamon and nutmeg can work wonders, but feel free to adjust to your taste.
Keep stirring as the mixture comes to a boil. You’ll want to maintain a gentle boil for about 5 minutes.
Adjusting Consistency and Flavor
As your filling cooks, you’ll want to keep an eye on the consistency. If it’s looking too thin, you can mix a bit more Clear Jel or cornstarch with cold water to create a slurry, then slowly stir this into your filling. Be cautious not to add too much – you can always thin it out later if needed, but it’s harder to fix a filling that’s too thick.
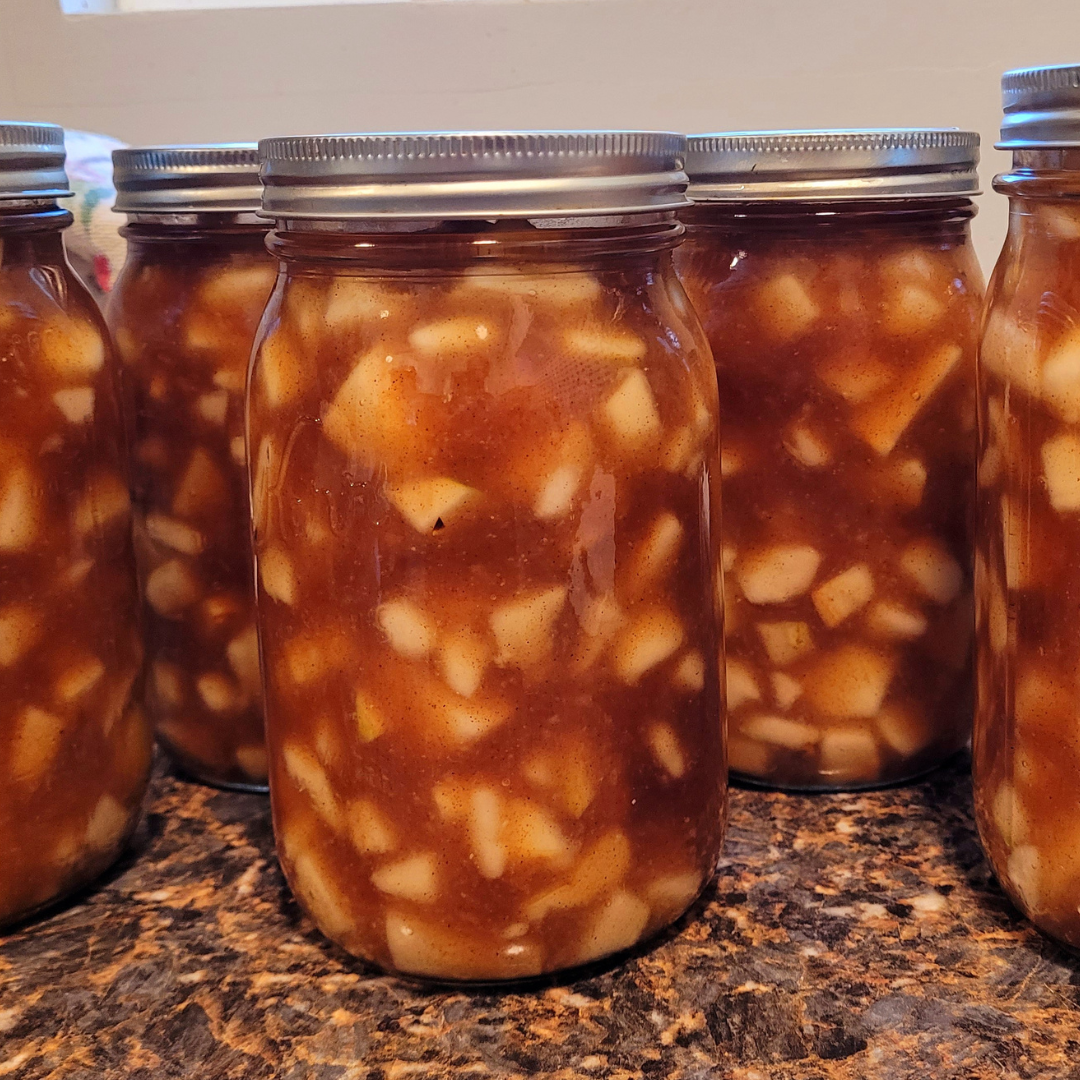
This is also the perfect time to do a taste test. Carefully sample a cooled spoonful of the filling. Is it sweet enough? Do the spices shine through? Don’t be afraid to make adjustments. A pinch more cinnamon, a dash of vanilla extract, or even a splash of bourbon can elevate your filling from good to great. I cook mine until a thick goopy caramelized texture.
As you’re stirring and adjusting, take a moment to appreciate the aromas filling your kitchen! There’s something deeply satisfying about creating something so delicious from scratch, knowing exactly what’s going into your food. It’s moments like these that remind me why I love this self-sufficient lifestyle.
Once you’re happy with the taste and consistency of your filling, it’s ready for canning. Remember to work quickly at this point – you want your filling to be hot when it goes into the jars for proper sealing. With a little patience and care, you’ll soon have jars of homemade pear pie filling ready to brighten up your pantry and your pies all year round!
Combining the Pears to the Filling
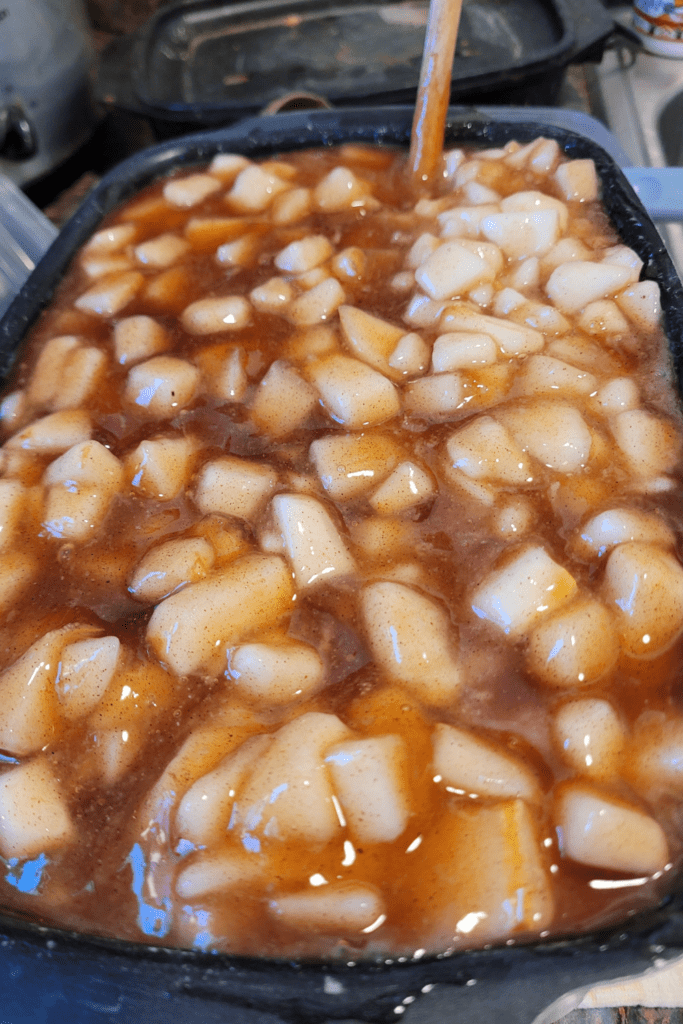
Gently fold the pears into the mixture, ensuring that each slice is evenly coated with the sweet, spiced syrup. This step helps infuse the pears with the rich flavors of the filling, ensuring a consistent taste in every bite. Be careful not to overmix to prevent the pears from breaking apart; you want them to retain their shape for a hearty and delicious pie filling.
Canning the Pear Pie Filling
Now that we’ve prepared our delicious pear pie filling, it’s time to preserve it for future use. Canning is a wonderful way to extend the shelf life of our homemade treats, and with a little know-how, it’s easier than you might think!
Preparing Canning Jars and Lids
Before we begin, it’s crucial to ensure our canning equipment is clean and sterile. Start by washing your jars, lids, and bands in hot, soapy water. Rinse them thoroughly and set them aside. To sterilize the jars, you can either run them through a dishwasher cycle or submerge them in boiling water for 10 minutes. For the lids and bands, simply place them in a bowl of hot water to soften the rubber seals.
Remember, cleanliness is key when it comes to canning. Any contaminants can lead to spoilage or even harmful bacteria growth. I always make sure my workspace is spotless before I begin – it’s a habit that’s served me well over the years.
Filling the Jars
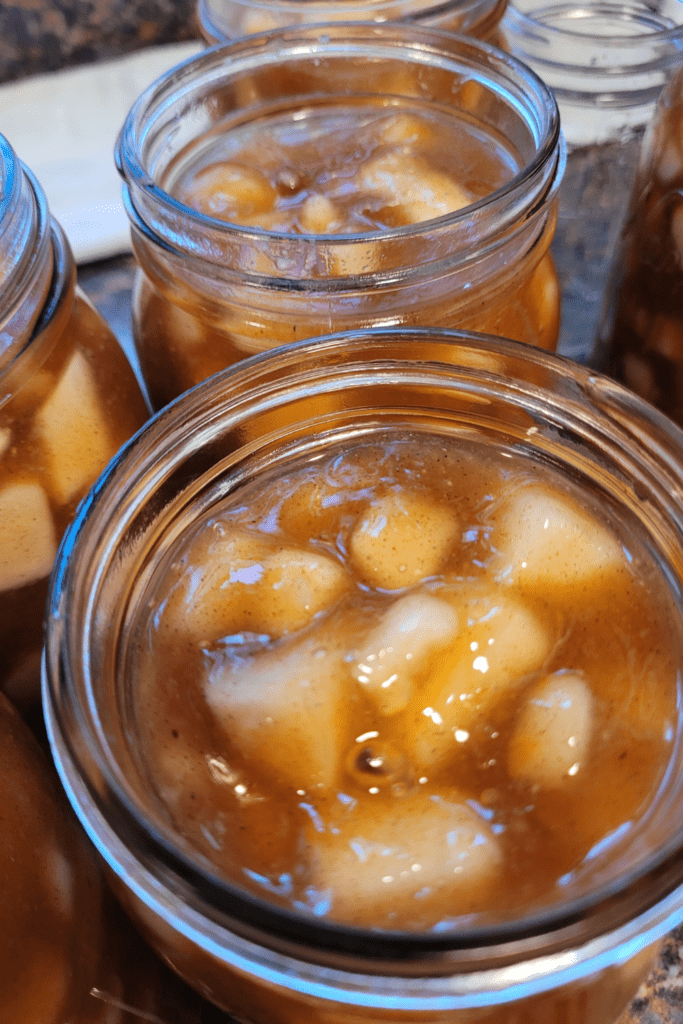
Once your jars are ready, it’s time to fill them with that lovely pear pie filling we’ve made. Using a wide-mouth funnel can make this process much neater and easier. Leave about 1 inch of headspace at the top of each jar. This space is important as it allows for the expansion of the filling during processing.
After filling, run a non-metallic spatula or bubble remover around the inside of the jar to release any trapped air bubbles. This step is often overlooked, but it’s crucial for ensuring a proper seal. Wipe the jar rims clean with a damp cloth to remove any spills or drips that might prevent a good seal.
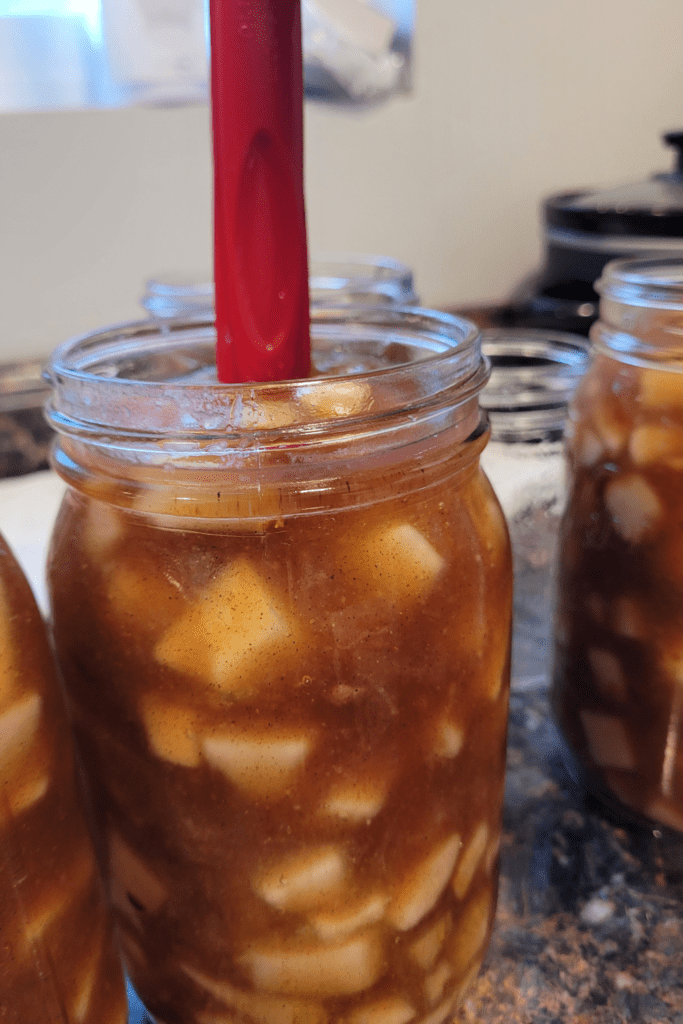
Processing in a Water Bath Canner
Now comes the final step – processing our filled jars to create a vacuum seal. Place the lids on the jars and screw on the bands until they’re fingertip tight. Don’t over-tighten, as air needs to escape during processing.
Lower the jars into your water bath canner, ensuring they’re covered by at least 1-2 inches of water. Bring the water to a full rolling boil and start your timer. For pear pie filling, process pint jars for 20 minutes and quart jars for 25 minutes, adjusting for altitude if necessary.
Once the processing time is up, turn off the heat and let the jars sit in the water for 5 minutes before removing them. This gradual cooling helps prevent thermal shock, which can cause jars to crack or break.
Place the jars on a towel-lined counter, leaving space between them for air circulation. As they cool, you’ll hear the satisfying ping of the lids sealing. After 12-24 hours, check the seals by pressing down on the center of each lid. If it doesn’t flex, you’ve got a good seal!
Canning your own pear pie filling is not only rewarding, but also practical. It allows you to enjoy the fruits of your labor long after the pear season has passed. Plus, there’s something incredibly satisfying about opening a jar of homemade filling on a cold winter’s day to bake a pie that tastes like summer.
Remember, proper canning techniques are essential for food safety. Always follow tested recipes and processing times, and when in doubt, consult reliable canning resources. With practice, you’ll find that canning becomes second nature – a valuable skill in any self-sufficient household.
Storing and Using Canned Pear Pie Filling
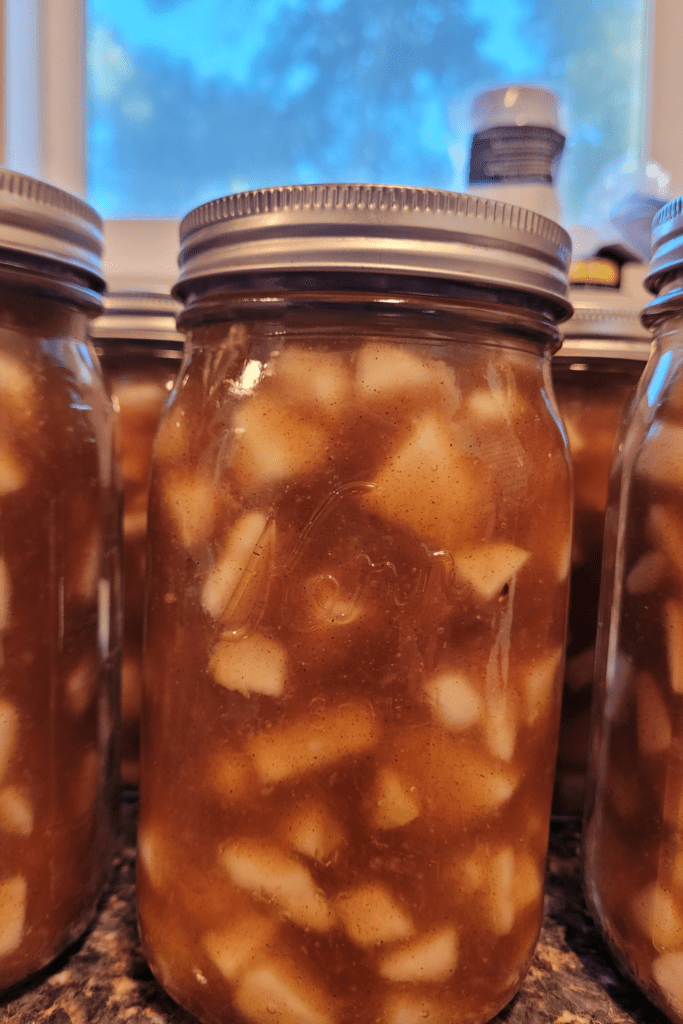
Now that you’ve mastered the art of canning pear pie filling, it’s time to talk about how to properly store and use your delicious creation. As someone who’s been living off of home-grown food for years, I’ve learned a thing or two about preserving food and making the most of my harvests.
Proper Storage Techniques
Storing your canned pear pie filling correctly is crucial for maintaining its quality and safety. Here are some tips to ensure your hard work pays off:
- Store jars in a cool, dark place: A pantry or basement works well, as long as the temperature remains relatively stable.
- Keep jars off the floor: Use shelves to elevate your canned goods, protecting them from potential moisture or pests.
- Label everything: Note the date of canning and contents on each jar. Trust me, you’ll thank yourself later!
- Check seals regularly: Before using, always inspect the jar for any signs of spoilage or broken seals.
Shelf Life
When stored properly, your homemade pear pie filling can last for up to 18 months. However, for the best flavor and texture, I recommend using it within a year. Remember, the clock starts ticking from the day you can the filling, not when you open the jar.
Pro Tip: Rotate your stock by using the oldest jars first. This ensures you’re always enjoying your preserves at their peak quality.
Creative Ways to Use Pear Pie Filling
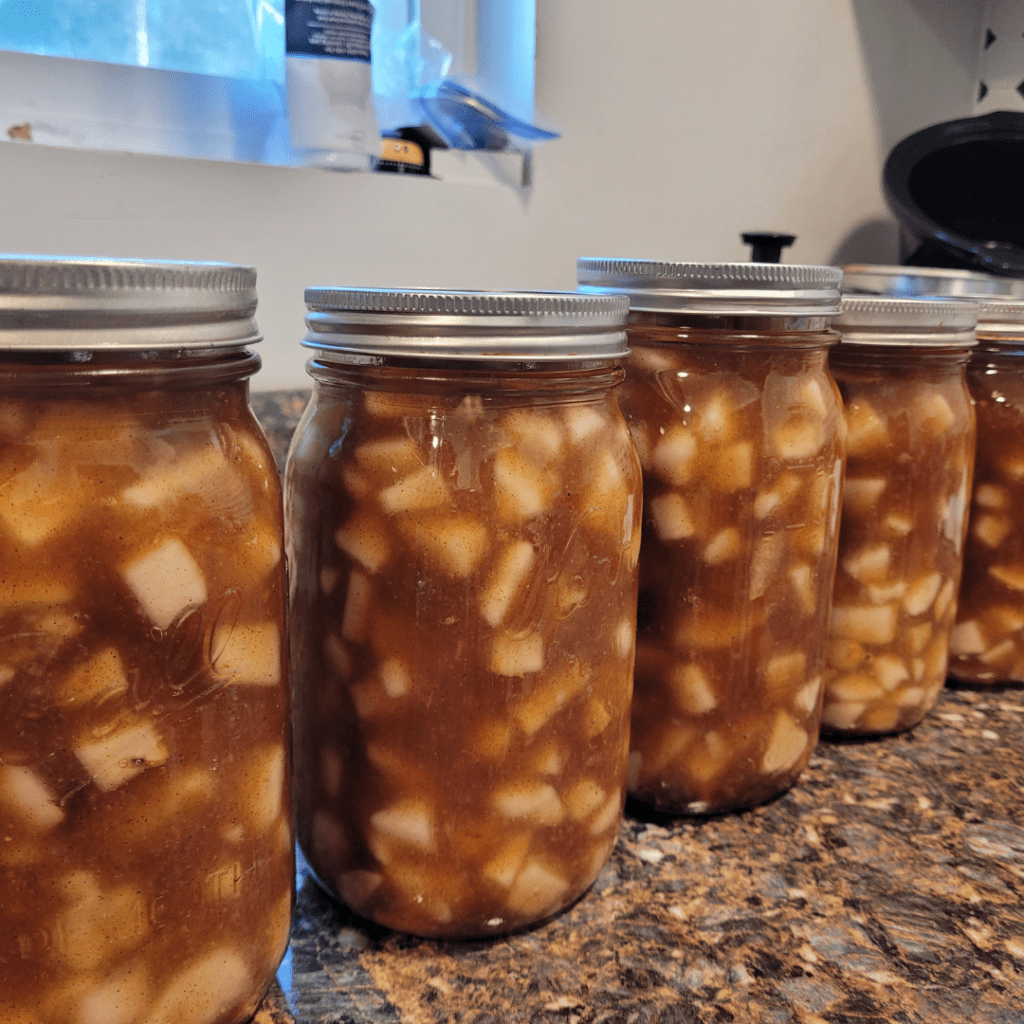
While the obvious choice is to use your canned pear pie filling in a traditional pie, there are so many other delicious ways to enjoy this versatile treat. Here are some ideas to get your culinary creativity flowing:
- Pear Crisp: Top the filling with a mixture of oats, flour, butter, and brown sugar for a quick and easy dessert.
- Breakfast Parfait: Layer the filling with yogurt and granola for a sweet start to your day.
- Ice Cream Topping: Warm the filling slightly and spoon over vanilla ice cream for a decadent dessert.
- Pear Bars: Use as a filling between layers of oatmeal cookie dough for a portable treat.
- Thumbprint Cookies: Fill indentations in your favorite sugar cookie recipe with a dollop of pear filling before baking.
Don’t be afraid to experiment! I’ve found that the subtle sweetness of pears pairs wonderfully with savory dishes too. Try adding a spoonful to your next roast or mixing it into a vinaigrette for a unique salad dressing!
By canning your own pear pie filling, you’re not just preserving fruit – you’re preserving possibilities. Whether you’re stocking up for winter, preparing for unexpected guests, or simply looking to add some homemade goodness to your pantry, this versatile filling is sure to become a staple in your self-sufficient kitchen.
Remember, the joy of homesteading isn’t just in the making, but in the using too. So go ahead, crack open a jar, and let your culinary imagination run wild. Your future self (and lucky dinner guests) will thank you!
Conclusion
As we’ve seen, making and canning pear pie filling is a rewarding process that allows you to enjoy the sweet, comforting flavors of pear pie all year round. From carefully selecting and preparing the pears to creating the perfect filling and safely canning it, each step brings you closer to a delicious homemade treat. By mastering these techniques, you’re not only preserving the harvest, but also embracing a more self-sufficient lifestyle.
Remember, the key to success lies in using fresh, ripe pears and following proper canning procedures to ensure food safety. Don’t be afraid to experiment with spices or add a personal touch to make the recipe your own. Whether you’re an experienced canner or just starting out, this process is a wonderful way to connect with your food and create something truly special.
So, why not give it a try? Your future self will thank you when you’re pulling out a jar of homemade pear pie filling on a cold winter’s day. Happy canning, and enjoy those delicious pies!
Check out some of my other pear recipes!
- The Ultimate Guide to Canning Apple Pear Butter: Step-by-Step Instructions
- How to Make Irresistible Streusel Pear Bread
- Canning Pear Sauce: An Easy Step-by-Step Guide
Resources: Here are some helpful resources for further information.
- How to Make a Simple Fruit Pie Filling – By Lovefoodies
- Homemade Blueberry Pie Filling – By Chocolate with Grace
- Cherry Pie Recipe – By Pillsbury
Frequently Asked Questions
1. Can I use different types of pears for the filling?
Yes, you can use a variety of pears like Bartlett, Anjou, or Bosc. Just make sure they are ripe, but still firm to hold their shape during cooking and canning.
2. How long will canned pear pie filling last?
Properly canned pear pie filling can last up to 12-18 months when stored in a cool, dark place. Ensure the jars are sealed correctly for the best shelf life.
3. Can I reduce the sugar in the recipe?
Yes, you can reduce the sugar, but keep in mind that it acts as a preservative and helps maintain the texture of the pears. Adjustments may affect the taste and shelf life.
4. Do I need to use Clear Jel for canning pear pie filling?
Clear Jel is recommended for canning as it is a safe thickening agent that can withstand the canning process. Regular thickeners like cornstarch are not suitable for canning.
Pear Pie Filling
Equipment
- 1 large heavy-bottomed pot.
- 6 quart jars, lids, and rings.
- 1 large water bath canner.
- 1 set of canning supplies (jar lifter, de-bubbler, funnel, etc.)
Ingredients
- 6 quarts peeled, cored, chopped, or sliced pears.
- 4 ½ cups sugar.
- 1 cup clear jel.
- 2 tbsp salt.
- 1 tbsp cinnamon.
- 1 tsp nutmeg.
- 1 tsp allspice.
- 9 ½ cups water.
Instructions
Peeling and Coring Pears
- Start at the stem end and use a sharp vegetable peeler or paring knife to remove the skin in long strips.
- Work your way around the pear, being careful to maintain its shape.
- Once peeled, cut the pear in half from top to bottom.
- Use a melon baller or small spoon to scoop out the core and seeds from each half.
- Since we are processing a large batch, you might want to place the peeled pears in a bowl of water with a splash of lemon juice. This prevents browning while you work on the rest. Also, having your favorite podcast available helps keep you sane and occupied during this tedious task!
Slicing Pears
- The final step in preparing your pears is slicing them. The size and shape of your slices can affect both the texture and appearance of your pie filling. Here are some tips:Aim for uniform slices about 1/4 to 1/2 inch thick. This ensures even cooking and a consistent texture in your filling.You can slice the pears lengthwise for longer pieces or crosswise for smaller chunks. Choose based on your preference or the specific recipe you're following. I like to use diced pears for my pie filling rather than slices. I really do not know why!If you're working with a large quantity, consider using a mandoline slicer for quick and uniform cuts. Just be sure to use the safety guard to protect your fingers!As you slice, place the pear pieces in a large bowl. If you notice any bruised or overripe sections, set them aside for a quick snack or compost them. Remember, the quality of your pie filling depends on the quality of the fruit you use.
Making the Pie Filling
- In a large, non-reactive pot, combine the sugar and water. The amount of sugar can vary depending on the sweetness of your pears and personal preference. A good rule of thumb is about 1 cup of sugar for every 5 cups of pears. Since this recipe calls for 6 quarts of pears, this equals about 24 cups.
- While you begin the next step of cooking the filling, place your prepared pears into the fridge in an airtight container.
Cooking the Filling
- Place your pot over medium heat and stir the sugar and water gently. This is when you'll want to add your spices – a teaspoon each of cinnamon and nutmeg can work wonders, but feel free to adjust to your taste.
- Keep stirring as the mixture comes to a boil. You'll want to maintain a gentle boil for about 5 minutes.
Adjusting Consistency and Flavor
- As your filling cooks, you'll want to keep an eye on the consistency. If it's looking too thin, you can mix a bit more Clear Jel or cornstarch with cold water to create a slurry, then slowly stir this into your filling. Be cautious not to add too much – you can always thin it out later if needed, but it's harder to fix a filling that's too thick.
- This is also the perfect time to do a taste test. Carefully sample a cooled spoonful of the filling. Is it sweet enough? Do the spices shine through? Don't be afraid to make adjustments. A pinch more cinnamon, a dash of vanilla extract, or even a splash of bourbon can elevate your filling from good to great. I cook mine until a thick goopy caramelized texture.
Combining the Pears to the Filling
- Gently fold the pears into the mixture, ensuring that each slice is evenly coated with the sweet, spiced syrup. This step helps infuse the pears with the rich flavors of the filling, ensuring a consistent taste in every bite. Be careful not to overmix to prevent the pears from breaking apart; you want them to retain their shape for a hearty and delicious pie filling.
Canning the Pear Pie Filling
- Now that we've prepared our delicious pear pie filling, it's time to preserve it for future use. Canning is a wonderful way to extend the shelf life of our homemade treats, and with a little know-how, it's easier than you might think!
Preparing Canning Jars and Lids
- Before we begin, it's crucial to ensure our canning equipment is clean and sterile. Start by washing your jars, lids, and bands in hot, soapy water. Rinse them thoroughly and set them aside. To sterilize the jars, you can either run them through a dishwasher cycle or submerge them in boiling water for 10 minutes. For the lids and bands, simply place them in a bowl of hot water to soften the rubber seals.
Filling the Jars
- Using a wide-mouth funnel can make this process much neater and easier. Leave about 1 inch of headspace at the top of each jar. This space is important as it allows for the expansion of the filling during processing.
- After filling, run a non-metallic spatula or bubble remover around the inside of the jar to release any trapped air bubbles. This step is often overlooked, but it's crucial for ensuring a proper seal. Wipe the jar rims clean with a damp cloth to remove any spills or drips that might prevent a good seal.
Processing in a Water Bath Canner
- Place the lids on the jars and screw on the bands until they're fingertip tight. Don't over-tighten, as air needs to escape during processing.
- Lower the jars into your water bath canner, ensuring they're covered by at least 1-2 inches of water. Bring the water to a full rolling boil and start your timer. For pear pie filling, process pint jars for 20 minutes and quart jars for 25 minutes, adjusting for altitude if necessary.
- Once the processing time is up, turn off the heat and let the jars sit in the water for 5 minutes before removing them. This gradual cooling helps prevent thermal shock, which can cause jars to crack or break.
- Place the jars on a towel-lined counter, leaving space between them for air circulation. As they cool, you'll hear the satisfying ping of the lids sealing. After 12-24 hours, check the seals by pressing down on the center of each lid. If it doesn't flex, you've got a good seal!
Summary
I hope I have inspired you to stockpile your pantry for your survival needs.
If you were encouraged by this post, I invite you to check out my FREE Printables Page for fun free printables, planners, and charts.
ENTER MY FREE Printables Page HERE
Here are some more of my canning inspiration posts to check out!
The Best Winter Pantry Staples to Stockpile Now!
Grapes: How to Make and Can Grape Jam
Apple Cider: How to Make Homemade Apple Cider Vinegar
How to Make and Can Cherry Plum Jam
How to Make and Can Apple Butter In Crockpot
Stockpiling Condiments for Survival: Learn How I Do It!
How to Make and Can Vegetable Pot Pie Filling
Easy Canning Applesauce Recipes to Stalk Your Pantry!
How to Make Peach Jalapeno Jam
Cherries: How to Make Cherry Pie Filling
Cherries: How to Make Cherry Syrup
Salsa: How to Make and Can Cherry Salsa
Peaches: How to Make and Can Peach Salsa
Canning Supplies You Need Now for a Successful Canning Season!
How to Make and Can Balsamic Onion Jam
Cranberry Sauce: How to Make and Can Old Fashioned Cranberry Sauce
How to Make and Can Cranberry Merry Jam
How to Make and Can Strawberry Shortcake Jam
Cherry Jam: How to Make and Can Cherry Pie Jam
Carrot Cake Jam: How to Make and Can Carrot Cake Jam
Quince Jam: How to Can a Year’s Supply of Quince Jam
Root Beer Float Jelly: How to Make and Can Root Beer Float Jelly
Blessings,
The Off Grid Barefoot Girl



6 pints equals 12 cups not 24!
Thank you for pointing this out. After a long day at work and canning in the kitchen after work and making blog posts for how I do this so I remember next time can be tiring and I’m bound to make an error and discovered you were right about it being wrong, only I did mean 24 cups but 6 quarts and not 6 pints. I will edit after work this week. Thank you for visiting!