Don’t toss that stale bread! Learn how to turn leftover or stale bread into irresistible breadcrumbs that add flavor and crunch to all your favorite recipes. From simple steps to storage tips, this guide will show you how to make homemade breadcrumbs that are fresher, tastier, and more versatile than store-bought. Perfect for casseroles, coatings, and more!
We’ve all had that moment—opening the bread bag to find slices that are just a little too dry to enjoy on their own. Instead of throwing them away, why not transform that stale bread into something amazing? Homemade breadcrumbs are a simple, budget-friendly way to reduce waste while adding delicious texture and flavor to your meals. In this guide, I’ll walk you through the easiest ways to turn your leftover bread into perfect breadcrumbs for cooking, baking, and everything in between!
This is a pinnable post. Tap or hover over any image in this post to pin to your Pinterest Boards.
The Value of Repurposing Stale Bread
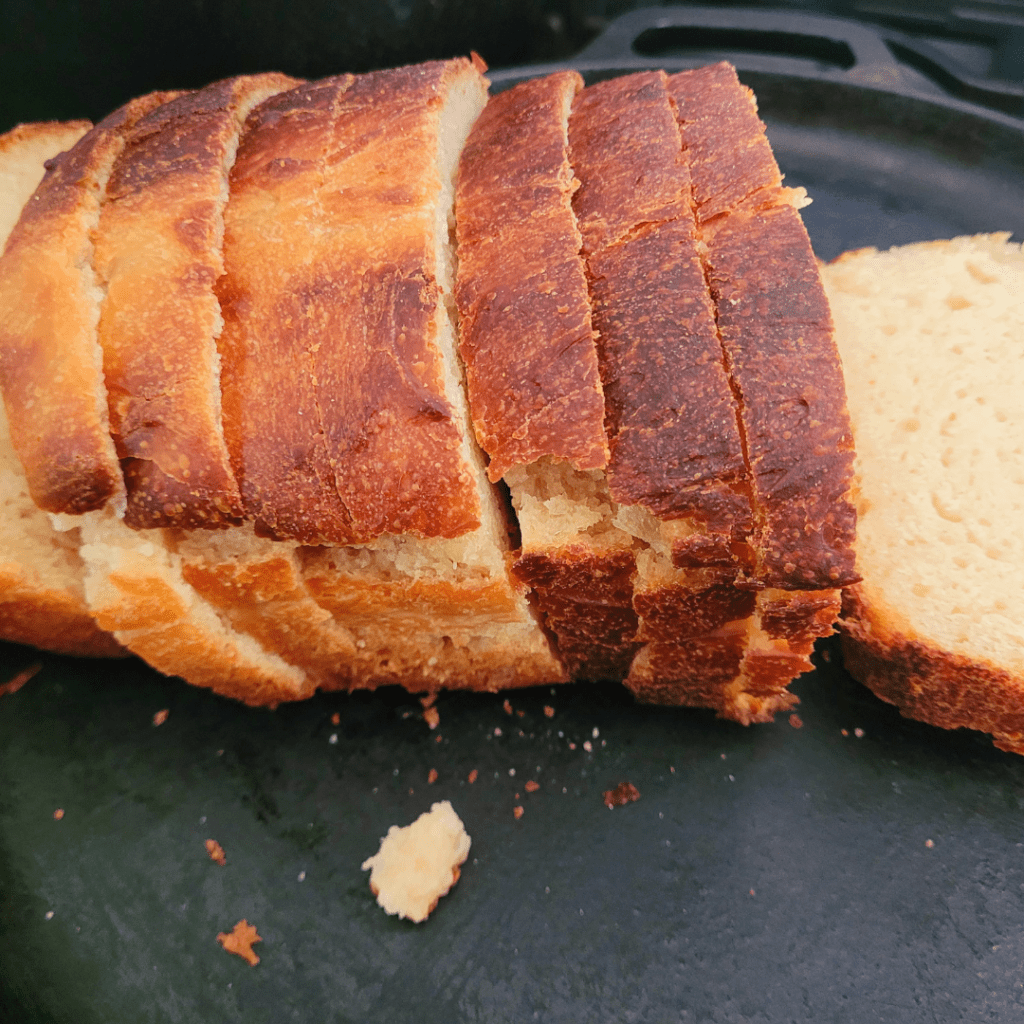
Why Repurpose Stale Bread?
We’ve all been there – a loaf of bread that seemed fresh and inviting just a few days ago, now sits on the counter, hard and unappetizing. But fear not, for stale bread is not necessarily a lost cause. Repurposing stale bread not only helps reduce food waste but also opens up a world of culinary possibilities. By transforming stale bread into flavorful breadcrumbs, you can add a crunchy and delicious twist to your favorite dishes.
I hate wasting food, and if I can salvage my efforts in repurposing my failed or stale bread, then I am in. Especially if breadcrumbs can be so useful in so many different ways. I am sold on using breadcrumbs for casserole toppings or for French toast casseroles!
Benefits of Using Homemade Breadcrumbs
Store-bought breadcrumbs may do the job in a pinch, but nothing compares to the taste and texture of homemade breadcrumbs. When you make your own breadcrumbs from stale bread, you have complete control over the freshness and quality of the ingredients. Plus, you can customize the flavors and seasonings to suit your preferences. With homemade breadcrumbs, you can elevate the taste of your recipes and impress your friends and family with minimal effort.
Preparing the Bread: Techniques for Drying Stale Bread
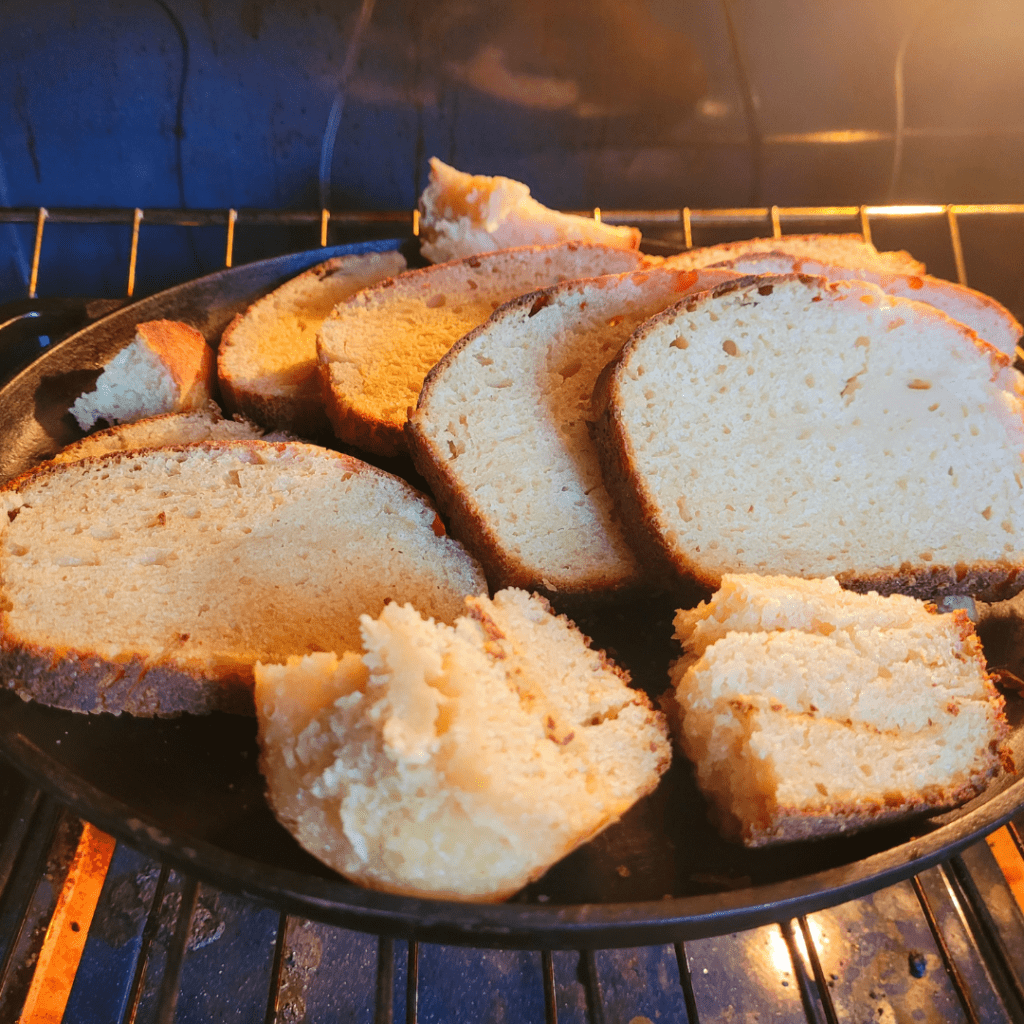
Evaluating the Bread’s Freshness
Before embarking on your breadcrumb-making adventure, it’s important to determine whether the bread is truly stale or just a little firm. Firm bread can be softened with a quick spritz of water and a brief stint in the oven, but truly stale bread will crumble easily and lack moisture.
Whenever I find some stale bread in my kitchen, I still like to toss it on a baking sheet to further their drying process. I do not want to store any breadcrumbs with any remaining moisture since it has the potential for spoilage in storage. Although you will not likely be able to grind up breadcrumbs while still a bit moist. They will just bind together or clump. Be sure to get the slices completely dried before trying to grind them.
Oven Drying Method
If your bread is indeed stale, the oven drying method is a reliable option. Simply preheat your oven to a low temperature (around 200°F or 93°C), slice the bread into smaller pieces, and arrange them on a baking sheet. Leave them in the oven for about 20-30 minutes or until they are completely dry and crisp. Be careful not to let them brown too much, as it can give your breadcrumbs a burnt taste.
Using my oven to dry my breadcrumbs is my preferred method. This method works fast and effectively for me, and I am quickly able to pull them out of the oven and allow them to completely cool before processing them in the food processor.
Air Drying Method
For a more hands-off approach, you can also air-dry your stale bread. Simply place the sliced bread in a single layer on a wire rack or a baking sheet and let it sit at room temperature for a day or two until it becomes hard and dry. This method requires a bit more time, but it’s a great option if you prefer a less intense heat and want to conserve energy.
Other Drying Techniques
If you’re feeling creative or don’t have access to an oven, there are other drying techniques you can experiment with. You can try using a dehydrator, a toaster oven, or even leave the bread out in the sun on a hot day (just make sure no critters get to it!). Find a method that works best for you and your kitchen setup.
Grinding the Bread: Various Methods for Creating Breadcrumbs
Food Processor Method
Once your bread is dry and ready, it’s time to transform it into those coveted breadcrumbs. One of the easiest and most efficient ways is to use a food processor. Break the dried bread into smaller pieces and pulse them in the food processor until you achieve your desired texture. For coarse breadcrumbs, pulse a few times, and for finer crumbs, let the machine run for a bit longer.
Blender Method
If you don’t have a food processor, don’t fret! A blender can work just as well. Similar to the food processor method, break the dried bread into smaller pieces and blend them in batches until you achieve the desired consistency. Just be sure not to overfill the blender and give it a few shakes if necessary to ensure even blending.
Hand-Grinding Method
If you’re feeling a bit old-school or want to get your arm workout in, you can grind your breadcrumbs by hand. Take the dried bread and crumble it into small pieces. Then, place the pieces in a sealed plastic bag and use a rolling pin or a heavy object to crush and grind them until they reach the desired texture. This method may require a bit more effort, but it can be a satisfying and effective way to create breadcrumbs.
Seasoning Options: Adding Flavor to Your Breadcrumbs
Basic Seasoning Recipe: Turn Stale Bread into Breadcrumbs
Once you have your homemade breadcrumbs, it’s time to add some flavor. A simple and versatile seasoning recipe consists of mixing your breadcrumbs with a pinch of salt, a sprinkle of black pepper, and a drizzle of olive oil. Toss all the ingredients together until the breadcrumbs are evenly coated. This basic seasoning will enhance the taste of any dish and provide a delicious foundation for your culinary creations.
I like to store my breadcrumbs without seasoning them and definitely without oil. This gives me the opportunity to use them as I need in any recipe. Keeping the breadcrumbs plain allows me to season them as needed. For instance, if I want to make a French bread casserole, I can add cinnamon to my breadcrumbs. If I had seasoned my breadcrumbs prior with other seasonings, I would not be able to do this unless I keep a variety of differently seasoned breadcrumbs, though not a bad idea!
Herbs and Spices Combinations: Turn Stale Bread into Breadcrumbs
For a more aromatic experience, you can experiment with various herb and spice combinations. Add dried herbs like oregano, thyme, or rosemary to infuse your breadcrumbs with earthy flavors. You can also sprinkle in spices such as paprika, garlic powder, or chili flakes to add a hint of heat and complexity. Don’t be afraid to get creative and find combinations that suit your taste buds.
Sweet and Savory Variations: Turn Stale Bread into Breadcrumbs
Breadcrumbs aren’t just for savory dishes; they can also lend a delightful crunch to sweet treats. Try adding a touch of cinnamon, nutmeg, or cocoa powder to create sweet breadcrumbs perfect for dusting over desserts or adding a unique twist to French toast. The combination of sweet and savory breadcrumbs can surprise and enchant your taste buds, making your dishes truly irresistible.
Storage and Preservation: Keeping Your Breadcrumbs Fresh
When it comes to storing your homemade breadcrumbs, the right container can make all the difference. No, a plastic baggie won’t cut it this time. Opt for an airtight container that will keep those breadcrumbs as fresh as possible. This will prevent moisture and air from getting in and spoiling your crumbs. Additionally, try to keep them in a cool, dry place, like a pantry or cupboard, as this will help prolong their freshness. If you have larger quantities of breadcrumbs that you won’t be using right away, consider freezing them. Simply portion them into smaller resealable bags or containers before popping them in the freezer.
When it’s time to use your frozen breadcrumbs, there is no need to thaw them beforehand – simply sprinkle them directly onto your dish as desired! By following these simple guidelines, you can ensure that your breadcrumbs stay fresh for longer periods of time and add that delicious crispy texture to all of your favorite dishes without worry.
Proper Container Choice
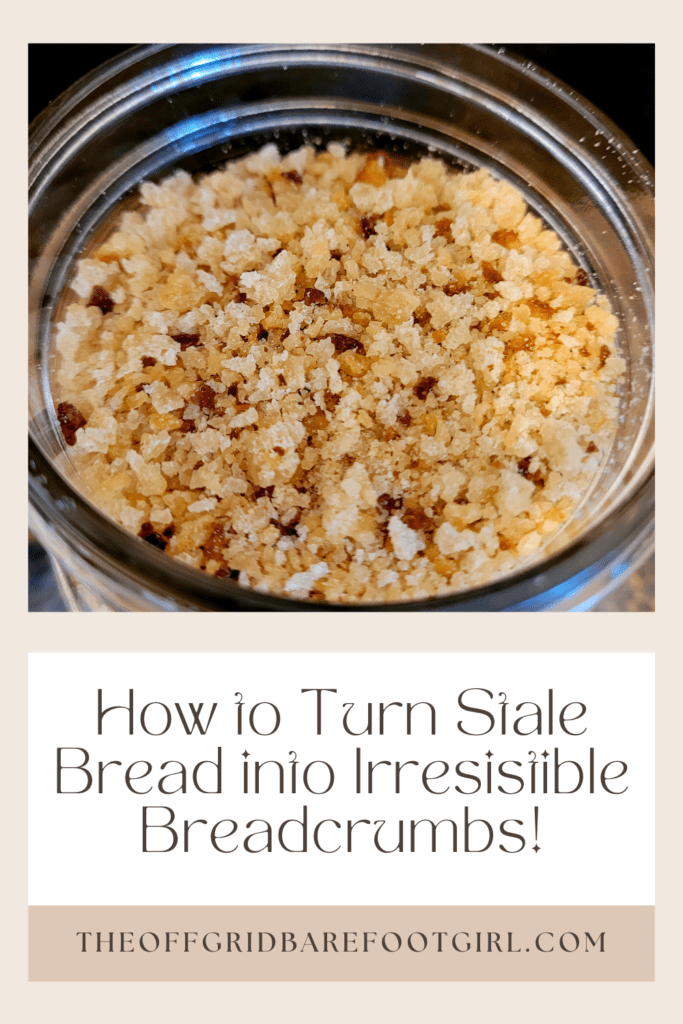
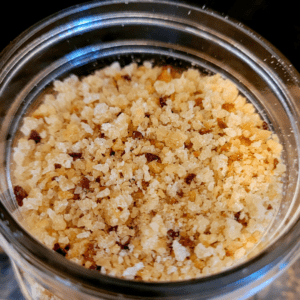
Look for a container with a tight-fitting lid, preferably made of glass or plastic. This will help keep the air out and maintain the crispy texture of your breadcrumbs. Avoid using containers that aren’t airtight, or you might end up with limp and sad breadcrumbs (and nobody wants that). I find that a Mason jar works great for storing my dry breadcrumbs.
Refrigeration and Freezing Techniques
If you’re planning to store your breadcrumbs for an extended period, consider refrigerating or freezing them. Pop them in the fridge if you’ll be using them within a few weeks, or seal them in a freezer-safe bag or container for longer-term storage. Freezing can help preserve the flavor and texture, ensuring your breadcrumbs are ready to be used whenever you need them.
Shelf Life and Expiration Dates
Like all good things in life, breadcrumbs also have an expiration date. Keep an eye on the shelf life of your breadcrumbs to avoid using them past their prime. Generally, homemade breadcrumbs can last up to 6 months in the freezer, a few weeks in the fridge, and 1-2 weeks at room temperature (although we recommend using them up as soon as possible for maximum deliciousness).
Creative Uses: Exploring Unique Ways to Utilize Homemade Breadcrumbs
Congratulations! You’ve successfully transformed your stale bread into flavorful breadcrumbs. But what can you do with them besides the obvious breading for fried foods? Let’s dive into some creative and unusual uses for your newfound breadcrumb treasure.
We all know that breadcrumbs are commonly used for coating and frying, but there’s so much more you can do with them! How about adding a crunchy topping to your mac and cheese? Simply mix breadcrumbs with melted butter, grated cheese, and herbs before sprinkling it over your creamy pasta.
Craving something different for breakfast? Whip up some French toast coated in a sweet breadcrumb mix, which adds an unexpected texture to every bite. And who said salads have to be boring? Give your greens a makeover by tossing them with toasted breadcrumbs, olive oil, lemon zest, and parmesan cheese for an extra crunch factor. So next time you’re looking to amp up the flavor and texture of your dishes, get creative with homemade breadcrumbs – they’ll make anything “breadcrumb-able” absolutely delicious! Keep reading to explore more ways of using up your breadcrumbs.
Breading and Coating for Frying: Turn Stale Bread into Breadcrumbs
Okay, let’s start with the classics. Breadcrumbs are excellent for breading and coating all sorts of delicious fried goodies. Whether it’s crispy chicken tenders, homemade fish sticks, or even fried pickles (trust me, it’s a thing), your breadcrumbs will add the perfect crunch and flavor to your fried creations.
Topping for Casseroles and Gratins: Turn Stale Bread into Breadcrumbs
Breadcrumbs make for an incredible topping for casseroles and gratins, adding a delightful crunch and texture to your dish. Sprinkle them over mac and cheese, vegetable gratins, or even lasagna to take your comfort food game to the next level. Your taste buds will thank you.
Using breadcrumbs for casserole toppings is by far my favorite way to use them. My family loves macaroni and cheese casserole topped with crunchy homemade breadcrumbs!
Binding Agent in Meatballs and Veggie Patties: Turn Stale Bread into Breadcrumbs
Who knew breadcrumbs could be such versatile little creatures? Besides being excellent at adding crunch, they also make a fantastic binding agent for meatballs and veggie patties. Mix them into your favorite meat or veggie mixture, and watch as they work their magic, keeping everything together and adding a nice texture to your creations.
Tips and Tricks: Expert Advice for Perfecting Your Breadcrumb Game
Now that you’re a breadcrumb connoisseur, it’s time to level up your game with some expert tips and tricks. Get ready to take your stale bread transformation skills to the next level!
Toasting Stale Bread Before Drying: Turn Stale Bread into Breadcrumbs
Before turning your stale bread into breadcrumbs, consider giving it a toast. Pop those sad slices into the toaster or oven to bring out their flavor even more. The toasting process will add an extra depth to your breadcrumbs, making them even more irresistible.
Toasting breadcrumbs will provide you with fresh breadcrumbs in a pinch. If you are out of stored breadcrumbs and have none readily preserved or dried out, toasting a slice of bread will do the trick for quick results, so you can get that casserole topped with breadcrumbs and into the oven in time for dinner.
Experimenting with Different Bread Types: Turn Stale Bread into Breadcrumbs
Don’t limit yourself to just one type of bread. Get adventurous and experiment with different bread varieties. Whether it’s a rustic sourdough, a crusty baguette, or a flavorful whole wheat loaf, different breads can bring unique flavors and textures to your breadcrumbs.
I bake a ton of bread in my kitchen, typically a nice variety for my family to enjoy. Sometimes the bread is too much and does not get eaten in time, or I have a failed loaf that I did not pay particularly close attention to during the bulk fermentation process. Using bread that is dense or did not rise, or is too chewy or browned, and just not perfect enough to enjoy, is perfect to turn into breadcrumbs.
Maximizing Freshness and Flavor: Turn Stale Bread into Breadcrumbs
Keep your breadcrumbs fresh and flavorful by following a few simple tricks. Store them in a cool and dry place, away from direct sunlight. If they start to lose their crispness, you can always give them a quick refresh in the oven. Just spread them on a baking sheet and toast them for a few minutes until they regain their crunch.
Now go forth and conquer the world of breadcrumbs with your newfound knowledge. Turn that stale bread into irresistible crumbs, get creative with its uses, and let your taste buds rejoice in the magic of homemade goodness!
In conclusion, don’t let stale bread go to waste ever again. With the knowledge and techniques shared in this article, you can easily transform those forgotten slices into irresistible breadcrumbs. Not only will you be reducing food waste, but you’ll also be adding a burst of flavor and texture to your dishes. So, the next time you find yourself with stale bread, remember the possibilities that lie within. Get creative, experiment with seasonings, and enjoy the satisfaction of turning something mundane into something extraordinary. Embrace the art of repurposing and savor the delicious results that await you in the world of homemade breadcrumbs.
Conclusion
Turning stale bread into homemade breadcrumbs is one of the easiest ways to reduce waste and elevate your cooking. With just a few simple steps, you can create fresh, flavorful breadcrumbs that are perfect for coating, topping, or adding a little extra crunch to your favorite dishes. Not only will you save money, but you’ll also enjoy the satisfaction of transforming something ordinary into something irresistible. Next time you have leftover bread, don’t toss it—turn it into a pantry staple that will make every meal a little more delicious!
Frequently Asked Questions
Yes, absolutely! You can use various types of bread to make breadcrumbs, such as white bread, whole wheat bread, sourdough, or even specialty bread like baguettes or ciabatta. Each type of bread will bring its own unique flavor and texture to the breadcrumbs, so feel free to experiment and find your favorite.
When stored properly in an airtight container, homemade breadcrumbs can stay fresh for up to 2-3 months. It is important to keep them in a cool, dry place away from direct sunlight or moisture. Alternatively, you can extend their shelf life by storing them in the freezer for up to 6 months.
You can season your breadcrumbs in advance to save time and have them readily available for future use. However, if you prefer a stronger and fresher flavor, you can also season them right before using them in your recipes. Both approaches work well, so choose the method that suits your preferences and cooking style.
If you are following a gluten-free diet, you can still make breadcrumbs using gluten-free bread. Look for gluten-free bread options available at your local grocery store, or consider making your own gluten-free bread at home. By using gluten-free bread, you can enjoy the same process of transforming stale bread into irresistible breadcrumbs while catering to your dietary needs.
Homemade Breadcrumbs Recipe
Equipment
- 1 food processor or blender
Ingredients
- 1 loaf stale bread or stale bread ends
- Seasonings of choice (optional)
Instructions
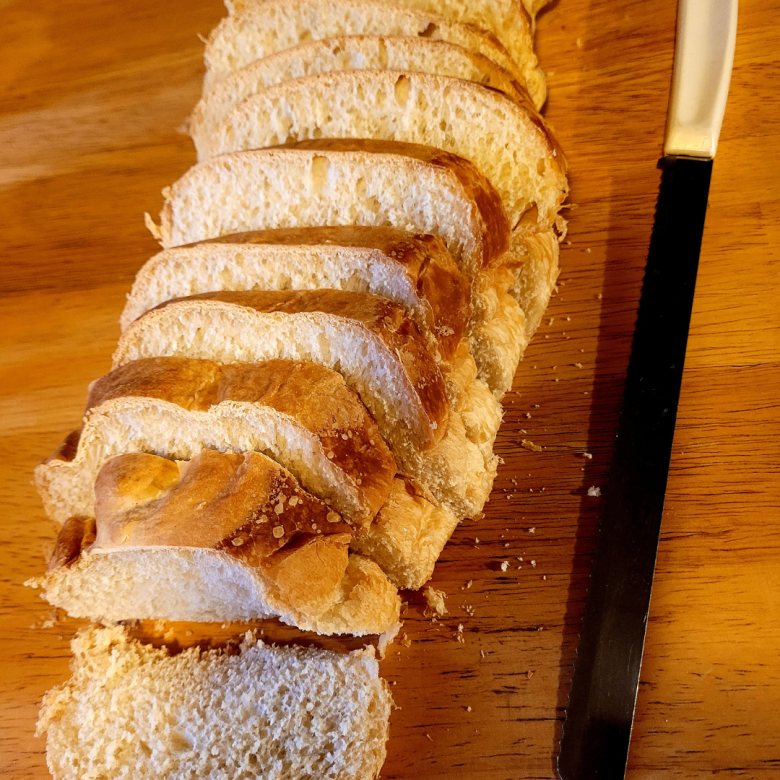
- Cut up slices of bread into small cubes.
- Place the bread cubes on a baking sheet lined with parchment paper.
- Bake for 45 minutes up to 1 hour at 200 degrees until bread pieces are dry, but not burnt.
- Allow the bread pieces to cool completely.
- Add the bread pieces to a food processor or blender in batches and pulse until crumbled.
- Stir in herbs of choice (optional).
Summary
I hope I have inspired you to bake your very own bread loaves to enjoy and share with your friends and family.
If you were encouraged by this post, I invite you to check out my FREE Printables Page for fun free printables, planners, and charts.
ENTER MY FREE Printables Page HERE
Here are some more of my bread-making inspiration posts to check out!
The Best Pumpkin Zucchini Bread
The Only Pumpkin Muffin Recipe You’ll Ever Need!
How to Make Banana Split Quick Bread
How to Make S’mores Quick Bread
How to Make Jelly Donut Quick Bread
Lemon Blueberry: How to Make Lemon Blueberry Sourdough Focaccia
How to Make Sourdough Lemon Supreme Quick Bread
Lemon Supreme: How to Make Sourdough Lemon Supreme Quick Bread
How to Make Sourdough Strawberry Cheesecake Muffins
How to Make Chai-Spiced Sourdough Banana Bread
The Best Old Fashioned Sourdough Banana Muffins
How to Make Honey Sourdough Bread
Blueberry: How to Make Lemon Blueberry Sourdough Quick Bread
Pizza: How to Make Pizza Sourdough Focaccia
Carrot Cake: How to Make Carrot Cake Sourdough Focaccia
Easy and Delicious Hershey’s Kisses Sourdough Bread
How to Make Amish Whoopie Pies!
Lazy Cinnamon Rolls: How to Make Easy Cinnamon Rolls the Lazy Way!
Lembas Bread: How to Make Elven Lembas Bread: A Taste of Rivendell
Gnome Bread: How to Make a Sourdough Gnome Bread
How to Make Sourdough Strawberry Cheesecake Muffins
The Best Hoagie Buns Recipe Made From Scratch!
Pumpkin: How to Make Chocolate Chip Pumpkin Bread
More Recipes!
Sweet Potato Bread: How to Make Sweet Potato Bread
Chocolate Chip Cookies: How to Make Chocolate Chip Cookie Bread
Carrot Cake Quick Bread: How to Make Carrot Cake Quick Bread
How to Make Strawberries and Cream Sourdough Bread
How to Make S’mores Sourdough Bread
July 4th Bread: How to Make a Firecracker Marble Bread Braid
Artisan Bread: How to Make Artisan Bread
Challah Bread: How to Make a 6 Braided Challah Bread
Sweet Bread: How to Make Sweet Bread
Blessings,
The Off Grid Barefoot Girl

