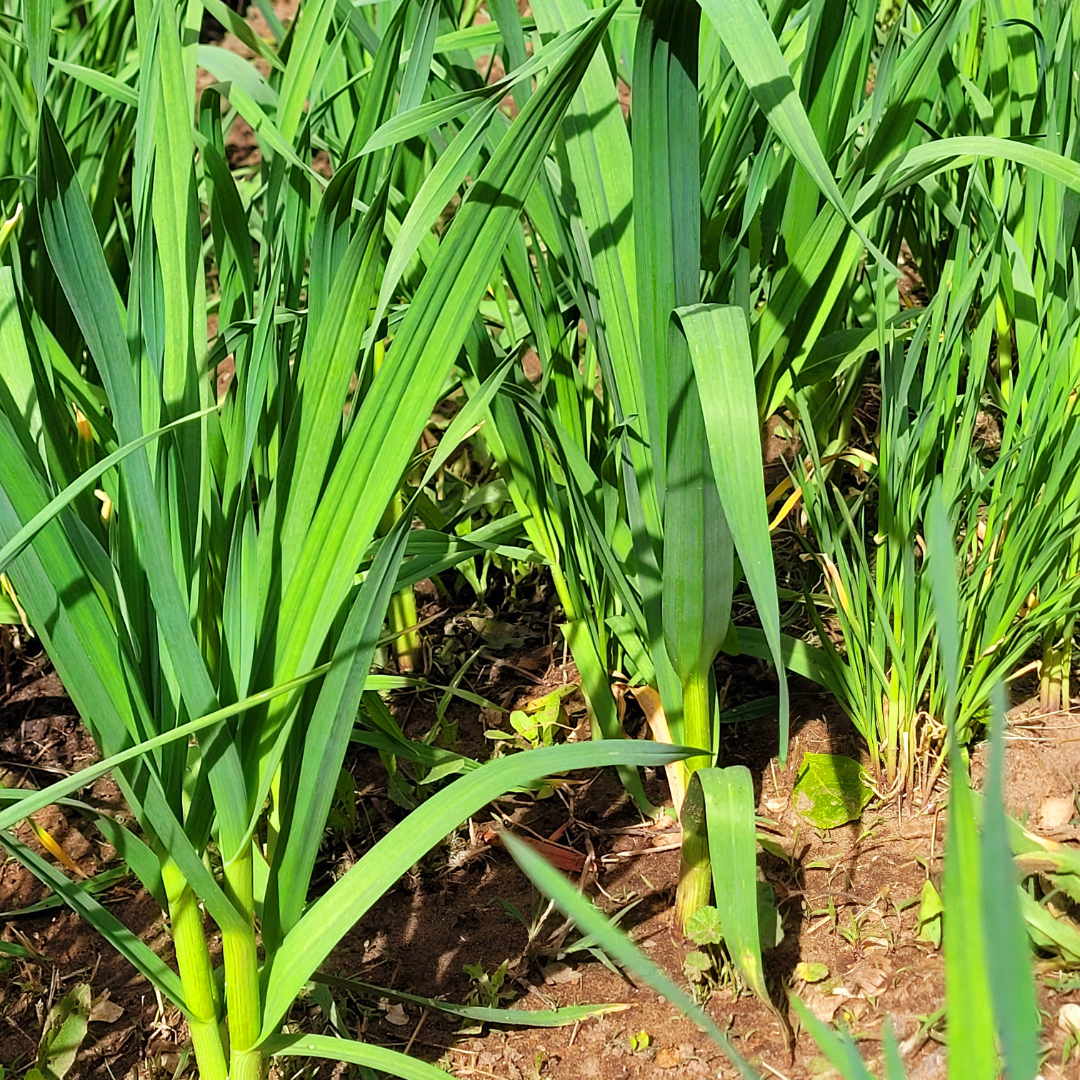
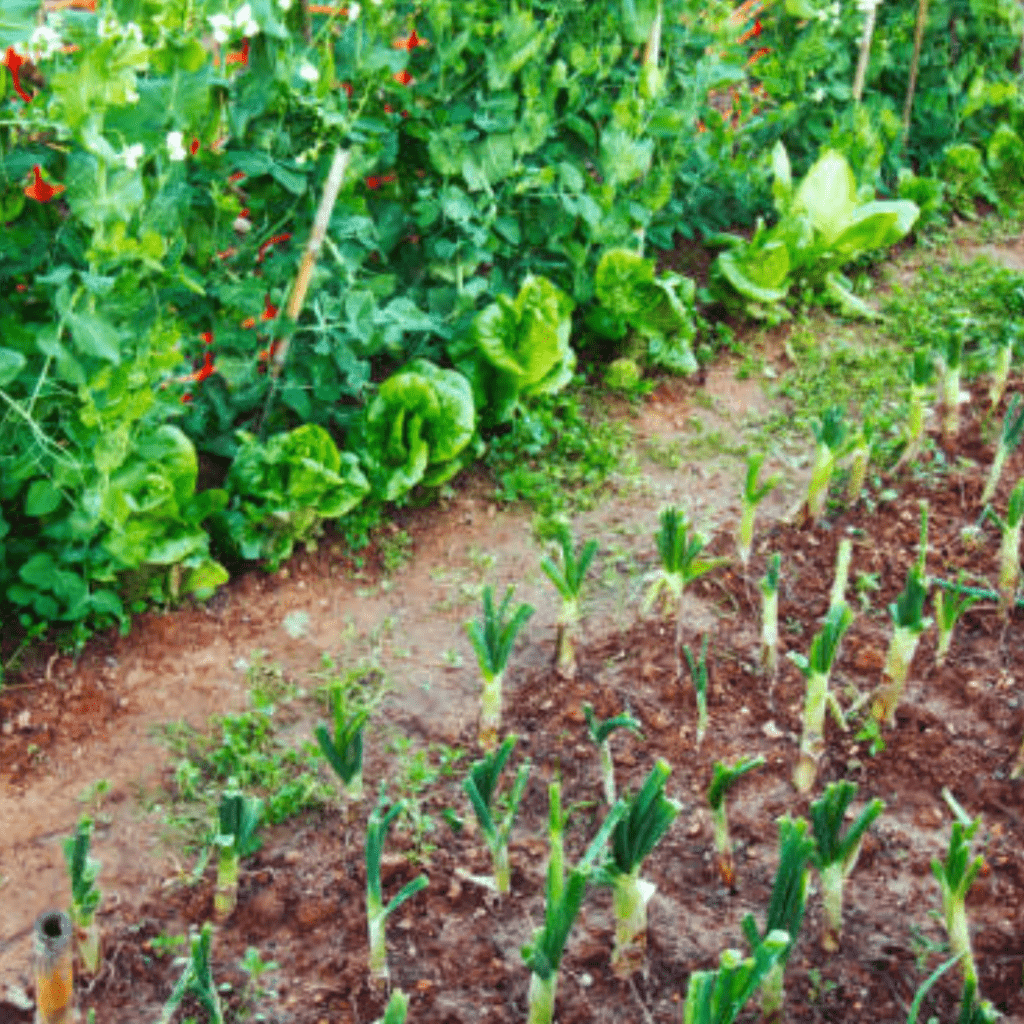
Growing garlic at home is easier than you think, especially when you plant in the fall to ensure a healthy, flavorful harvest the following summer. In this guide, you’ll learn the best methods for planting garlic cloves, caring for your plants throughout the season, and identifying the key signs that indicate it’s time to harvest. Whether you’re a beginner gardener or an experienced homesteader, these practical tips will help you grow robust garlic bulbs and enjoy fresh, homegrown garlic all year long.
Have you ever harvested garlic from your own garden? If not, you’re missing out on one of the most rewarding experiences. There’s nothing quite like plucking those pungent bulbs from the soil and savoring their fresh, earthy aroma. But how do you know when your garlic is ready for harvest? Timing is everything, and missing that perfect window can lead to disappointment.
Whether you’re a seasoned gardener or a newcomer to the world of garlic cultivation, this blog post has you covered. I’ll discuss the telltale signs that your garlic is ripe for the picking, exploring various methods to determine harvest readiness. From the appearance of the leaves to the size of the bulbs, I’ll leave no stone unturned.
But that’s not all – I’ll also talk about the art of harvesting garlic, sharing tips and tricks to ensure you don’t damage those precious bulbs. And for those who can’t get enough of this flavorful allium, I’ll even cover harvesting garlic scapes and spring garlic. Whether you prefer hardneck or softneck varieties, this post will equip you with the knowledge to maximize your garlic harvest.
So, get ready to roll up your sleeves and embrace the earthy delights of homegrown garlic. By the end of this post, you’ll be a harvesting pro, ready to impress your friends and family with your garlic-growing prowess. Let’s dig in!
Psst! Plus, garlic is so simple to grow!
This is a pinnable post. Tap or hover over any image in this post to pin to your Pinterest Boards.
How to Plant Garlic
Plant garlic in the fall in October or November. Planting and growing garlic using your thumb and hand as a seed spacer is a clever and practical technique that simplifies the planting process while ensuring proper spacing between each clove.
To begin, select healthy garlic bulbs with large cloves to plant in your garden. With your thumb and hand as natural spacers, gently separate the cloves from the bulb, taking care to leave the papery skin intact.
Next, create furrows in the soil at the recommended depth and spacing for garlic cloves by sticking your thumb in the soil to create a hole, typically around 4-6 inches apart. Using your thumb, press each individual clove into the soil, ensuring they are planted upright with the pointed end facing upwards.
As the garlic cloves begin to sprout and grow, the thumb and hand seed-spacing method proves invaluable in maintaining adequate airflow and sunlight distribution between each plant. This technique not only facilitates proper spacing for optimal growth but also helps prevent overcrowding, which can lead to increased moisture retention and potential disease issues. By utilizing your thumb and hand as a natural guide for spacing, you can promote healthier root development and nutrient absorption in each garlic plant, ultimately enhancing their overall vigor and yield.
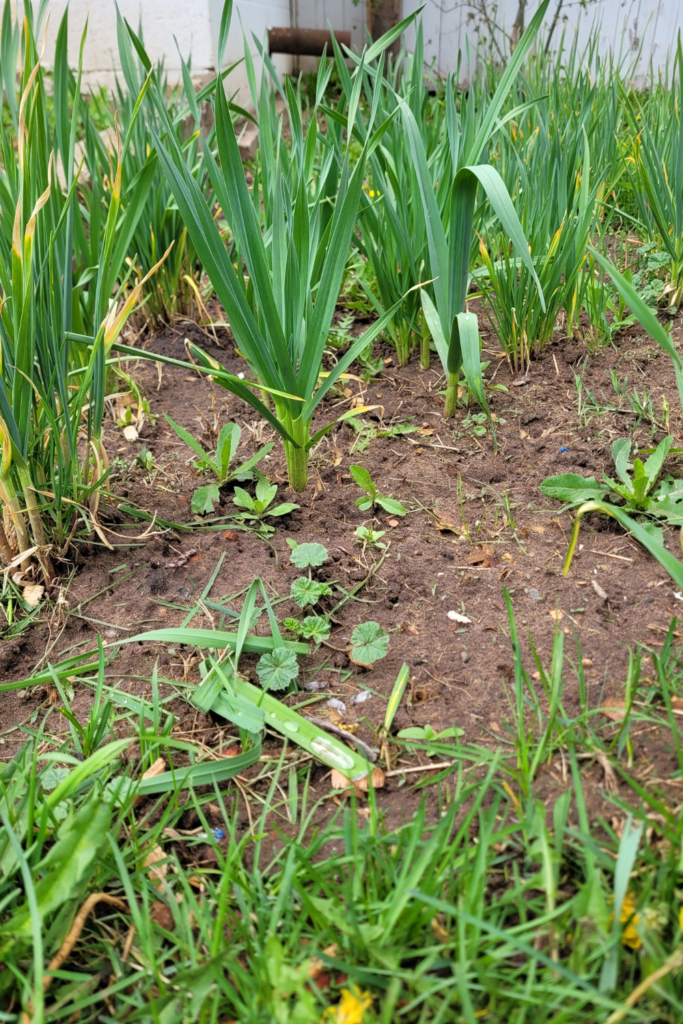
Throughout the growing season, continue to monitor the progress of your garlic crop, providing regular watering, mulching, and necessary care. As the plants mature and the bulbs begin to form, the benefits of using your thumb and hand as a seed spacer become evident in the organized and evenly spaced arrangement of your garlic patch.
With this method, you can enjoy a successful harvest of robust garlic bulbs that have thrived in well-structured rows, thanks to the simple yet effective technique of utilizing your thumb and hand for precise seed spacing. Give the garlic seeds a layer of mulch for protection over the winter. They will sprout in the following spring.
Signs of Garlic Readiness for Harvest
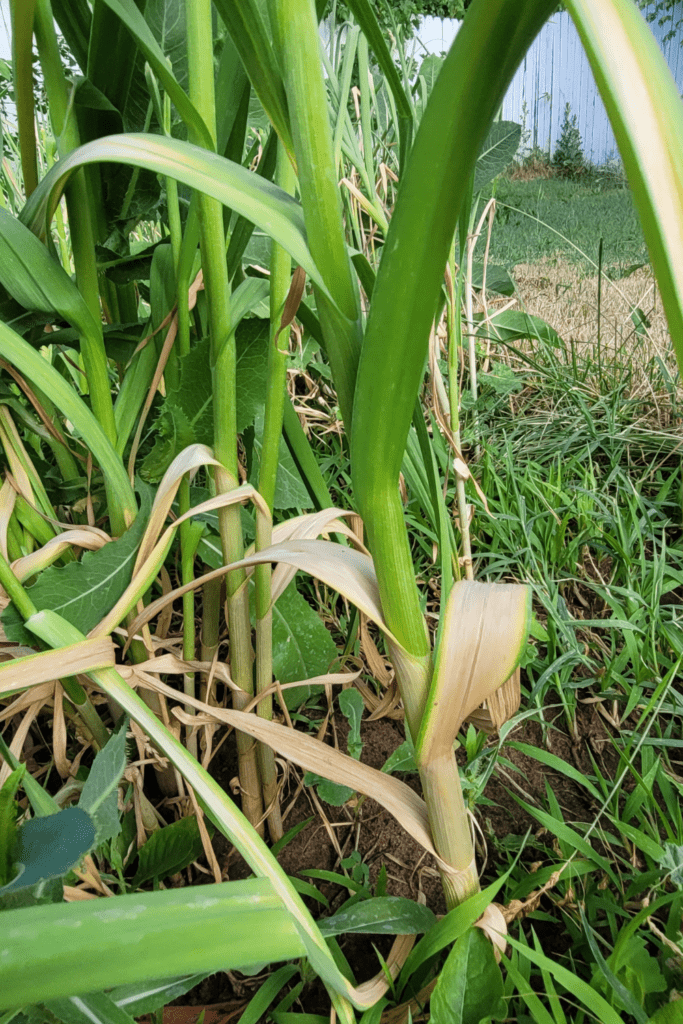
As an avid garlic grower, recognizing the signs that your garlic is ready for harvest is crucial. Over the years, I’ve learned to pay close attention to the subtle changes in the plant’s appearance. Let me walk you through the key indicators that signal it’s time to dig up those delicious bulbs.
Yellowing and Browning of Leaves
One of the first signs that garlic is nearing maturity is the yellowing and browning of the leaves. As the plant enters its final growth stage, the green foliage gradually loses its vibrant color, starting from the tips and working its way down. This natural process signals that the bulb has stopped growing and is ready to be harvested.
In my experience, it’s best to wait until at least half of the leaves have turned yellow or brown before considering harvesting. If you pull the garlic too early, the bulbs may be undersized or lack the full flavor you’re after.
Signs In the Garlic Scapes for Hardneck Varieties
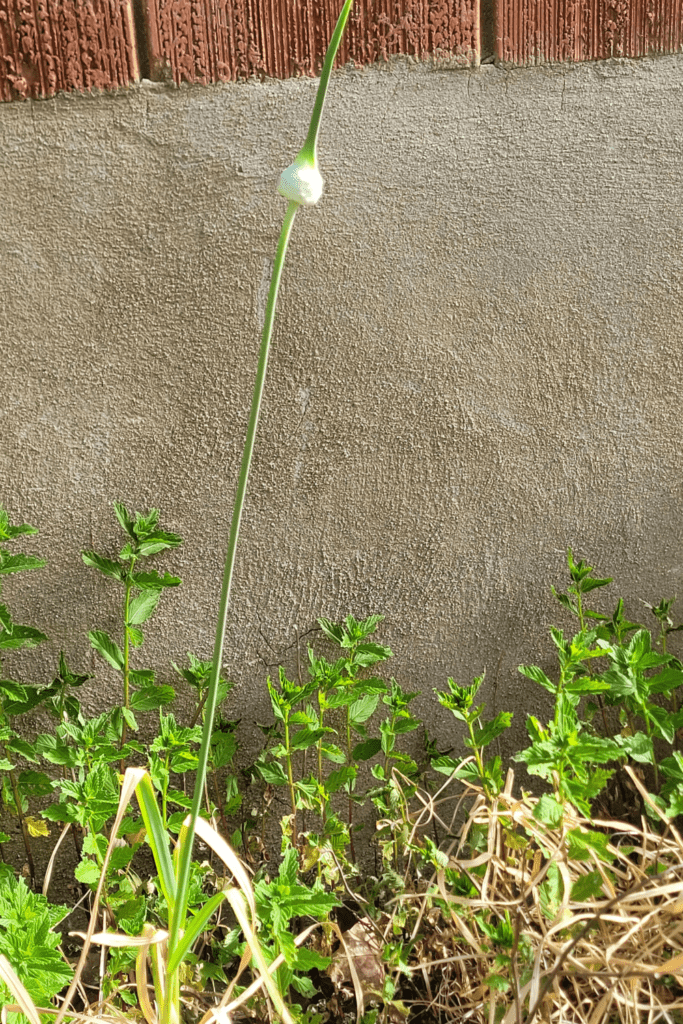
For hardneck garlic varieties, observing the signs in the garlic scapes when they point straight up is a crucial indicator of the plant’s growth stage and readiness for harvest. When the garlic scapes, the curly shoots that emerge from the garlic plant, begin to straighten and point upwards, it signifies a significant developmental milestone.
This change in posture indicates that the garlic plant is diverting its energy from scape growth to bulb development, signaling that the bulbs are nearing maturity. At this stage, it is essential to monitor the scapes closely as they reach their upright position, as harvesting the scapes at the right time ensures optimal bulb size and flavor in hardneck garlic varieties.
Drying and Wilting of Stems
As the garlic plant approaches maturity, the stems will also start to dry out and wilt. This is a natural part of the process and an indication that the plant is diverting its energy away from the foliage and into the bulb.
When you notice that the stems are drying and wilting, gently pull back the soil around the base of the plant. If the stem snaps off easily, it’s a good sign that the garlic is ready for harvest. However, if the stem is still firmly attached and green, you may need to wait a bit longer.
Softening of Bulb Cloves
One of the most reliable ways to determine if your garlic is ready for harvest is to carefully dig around the base of the plant and feel the bulb scales. As the bulb matures, the individual cloves will become tighter and firmer.
When you gently squeeze the bulb, it should feel solid and slightly hard, but not rock-hard. If the scales are still soft and pliable, it’s an indication that the garlic needs more time to fully develop.
Formation of Papery Skin
As the garlic reaches full maturity, a papery skin will form around the bulb. This protective layer helps to preserve the garlic and extend its shelf life after harvesting.
When you can clearly see the papery skin forming around the bulb, it’s a surefire sign that your garlic is ready to be pulled from the ground. The skin should be dry and papery, not thin and pliable.
Remember, timing is everything when it comes to harvesting garlic. Pay close attention to these signs, and don’t be afraid to dig around and inspect the bulbs. With a little practice, you’ll develop an eye for when your garlic is at its peak and ready to be enjoyed in all your favorite dishes.
Methods and Tests to Determine Harvest Readiness
As a passionate garlic grower, determining the perfect time to harvest is crucial for obtaining the best flavor and longest storage life. Over the years, I’ve developed a few tried-and-true methods to ensure I never miss the optimal harvesting window. Let me share these techniques with you.
Digging Test
One of the most reliable ways to check if your garlic is ready for harvest is the digging test. Simply use a garden fork or trowel to carefully dig around the base of a few plants, exposing the top portion of the bulbs. If the bulbs have developed a thick, protective outer skin and appear well-formed, it’s a good indication that they’re ready to be pulled.
However, if the bulbs still look immature, with a soft or thin outer layer, it’s best to leave them in the ground for a bit longer. Gently cover the exposed bulbs with soil and check again in a week or two. This hands-on approach gives you a direct glimpse into the development stage of your garlic crop, but try your best to be gentle.
Leaf Browning Test
Another telltale sign of garlic’s readiness is the browning of the leaves. As the bulbs mature, the plant’s energy shifts from leaf growth to bulb development. You’ll notice the lower leaves gradually turning brown and drying up, working their way up the stem.
When the majority of the leaves have turned brown, but the top few are still green, it’s time to start checking the bulbs. This leaf browning process typically occurs over a couple of weeks, giving you a convenient visual cue to start monitoring your crop closely.
Bulb Clove Separation Test
One of my favorite techniques is the bulb clove separation test. Carefully dig up a couple of bulbs and gently break apart the outer skin. If the individual cloves are starting to separate from the stem base, it’s a strong indication that the bulbs are reaching maturity. I will plant a few extra garlic plants just for this cause in the corner patches of the garlic bed in different areas as my testers.
However, if the cloves are still tightly clustered together, with no signs of separating, it’s best to leave them in the ground for a little longer. This method not only checks for overall bulb development, but also ensures that the individual cloves have reached their full size and flavor potential.
Tip: Whichever method you choose, it’s always a good idea to check a few different plants across your garlic patch. Growth rates can vary slightly, and you want to harvest when the majority of the crop is ready.
By combining these three techniques, you’ll develop a keen eye for spotting the signs of garlic’s peak readiness. Trust your observations and your garlic will reward you with a bountiful harvest of flavorful, long-lasting bulbs that will elevate your culinary creations to new heights.
Harvesting Garlic
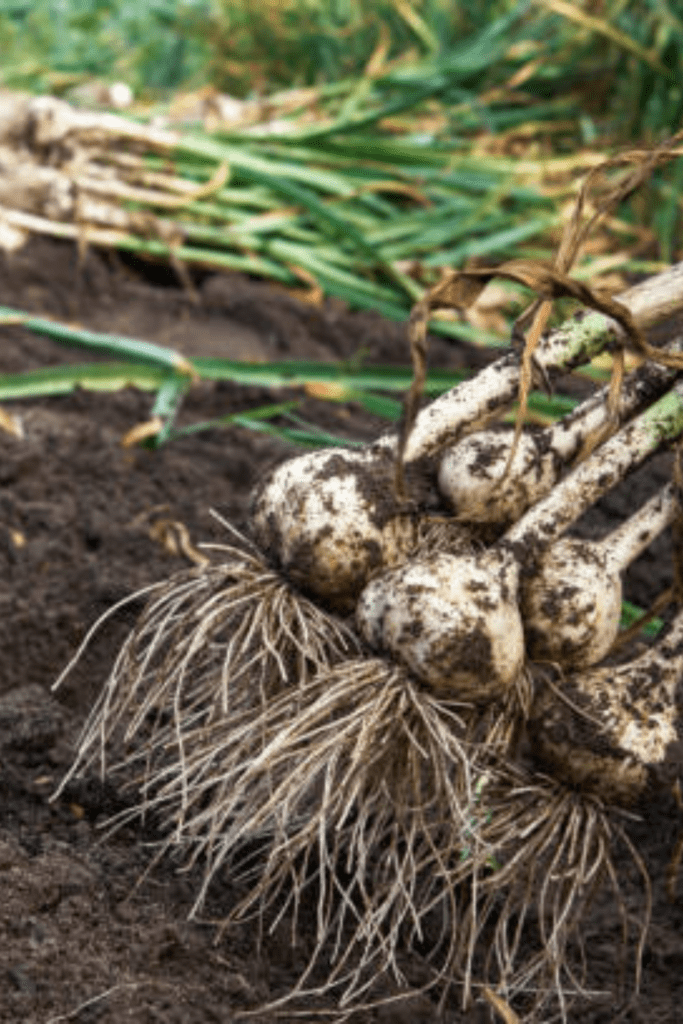
Harvesting garlic is an exciting part of the growing process, and timing it just right is crucial for the best flavor and storage life. Over the years, I’ve learned a few tricks to ensure a successful harvest every time.
Tools and Techniques
When those green garlic tops start turning brown, it’s time to grab your gardening fork and get ready for harvesting. Gently insert the fork into the soil a few inches away from the base of the plant, and rock it back and forth to loosen the soil and lift the bulb out. Be careful not to bruise or damage the garlic.
Hardneck Varieties: Watch for the formation of a woody stem called a scape. Once it appears, you have about 4-6 weeks before harvesting. You can harvest and use the garlic scapes in the spring, but leave one or two on the plant. As mentioned above, the scape will curl, which is a sign you can harvest and eat the scapes, but the ones you leave alone will stand straight up, telling you the bulb below the surface is ready at a later time.
Softneck Varieties: Garlic doesn’t produce scapes, so keep an eye on the leaves instead – when about half have turned brown, it’s harvest time.
I like to cure my garlic by laying the bulbs out in a dry, well-ventilated area for a few weeks. This helps the outer skins dry and tighten around the cloves, extending their shelf life.
Handling and Storage Tips
After curing, it’s time to trim off the roots and tops, leaving just an inch or two of stem or longer if braiding is your desire. This makes for easier handling and braiding if you choose to store your garlic that way.
When storing garlic, the key is to keep it cool, dry, and dark. I’ve had the best luck hanging my garlic braids in my cool dark basement pantry or using mesh bags in a dark cabinet. Avoid moisture or humidity, which can lead to sprouting or rotting.
If you notice any soft, damaged, or sprouting cloves, use those first and store the firmer ones for later. With proper handling and storage, your homegrown garlic can last for months, providing a delicious flavor boost to all your favorite dishes.
Different Varieties and Harvest Timing
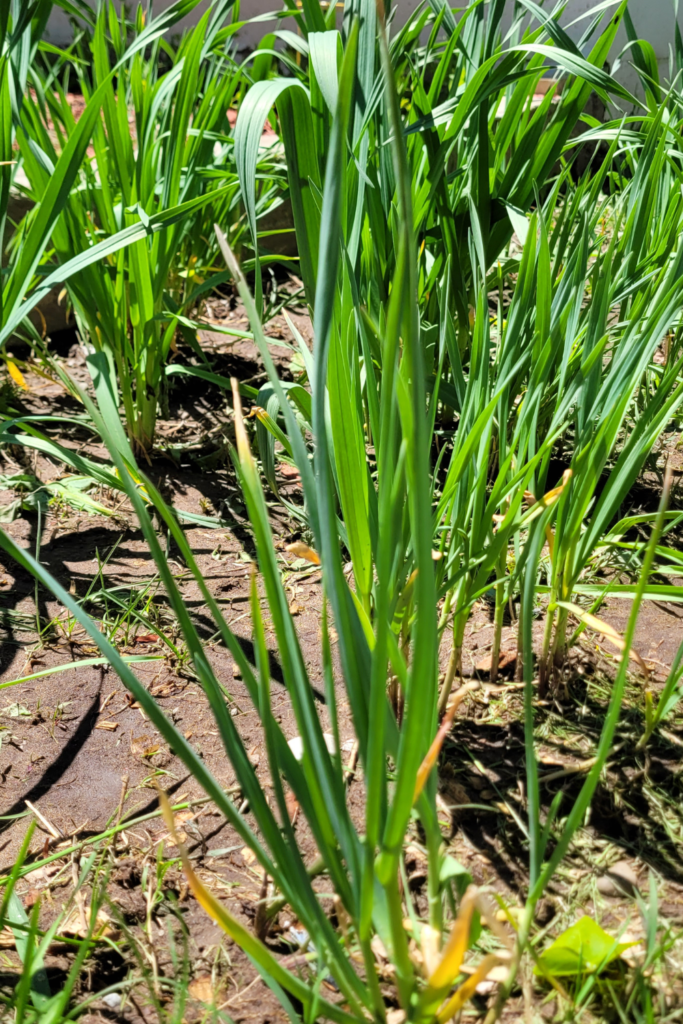
Growing garlic is a rewarding experience, but understanding the different varieties and their harvest timing is crucial for a bountiful yield. Let me share my personal insights on this topic.
Softneck vs. Hardneck
As a garlic enthusiast, I’ve come to appreciate the distinct characteristics of softneck and hardneck varieties. Softnecks, like the popular Artichoke variety, are known for their pliable stems, making them ideal for braiding. Their flavor is generally milder, and they tend to have a longer shelf life.
On the other hand, hardnecks, such as the robust Rocambole, boast a more complex, robust flavor. They produce edible flower stalks called “scapes,” which add an extra dimension to your garlic harvest. My favorite to grow!
One thing I’ve learned is that hardnecks are better suited for colder climates, while softnecks thrive in milder regions. Regardless of the variety, I always ensure proper spacing and soil preparation for optimal growth.
Garlic Maturity Chart
Knowing when to harvest your garlic is an art, and a maturity chart can be a valuable tool. As a general rule, softnecks mature earlier than hardnecks. For instance, in my region, I typically harvest softnecks in late spring or early summer, while hardnecks are ready in mid to late summer.
To determine the perfect harvest time, I closely monitor the plant’s appearance. When the lower leaves start to yellow and the tops begin to fall over, it’s a sign that the bulbs are nearing maturity. However, I’ve found that leaving them in the ground for a week or two after these signs appear can increase their storage life.
Free Garlic Maturity Chart Printable
Enhance your garlic-growing experience with my free Garlic Maturity Chart Printable, designed for both hardneck and softneck varieties. This printable guide provides essential information on planting times, harvest periods, and days to maturity for popular garlic types like Rocambole, Purple Stripe, Artichoke, and Silverskin. With detailed notes on each variety and general harvest indicators, my chart is an invaluable tool for both novice and experienced gardeners.
Download your free Garlic Maturity Chart Printable now to ensure a bountiful and flavorful garlic harvest every season!
Considering Time of Year
Timing is everything when it comes to garlic cultivation. In my experience, fall planting is the way to go. By planting cloves in late autumn, usually around October or November, you’re giving the garlic a head start for the following growing season.
However, if you miss the fall planting window, don’t fret. There’s still an opportunity for a successful crop with spring planting, typically in late March or April. Just keep in mind that spring-planted garlic may produce smaller bulbs and have a shorter storage life.
I’ve found that paying attention to the time of year and adjusting my planting and harvesting schedules accordingly can make a significant difference in the quality and quantity of my garlic yield.
No matter which variety you choose or when you plant, the key is to keep a close eye on your garlic plants and trust your instincts. With experience and a little patience, you’ll develop a keen sense of when to harvest your flavorful bounty.
Curing and Storing Garlic
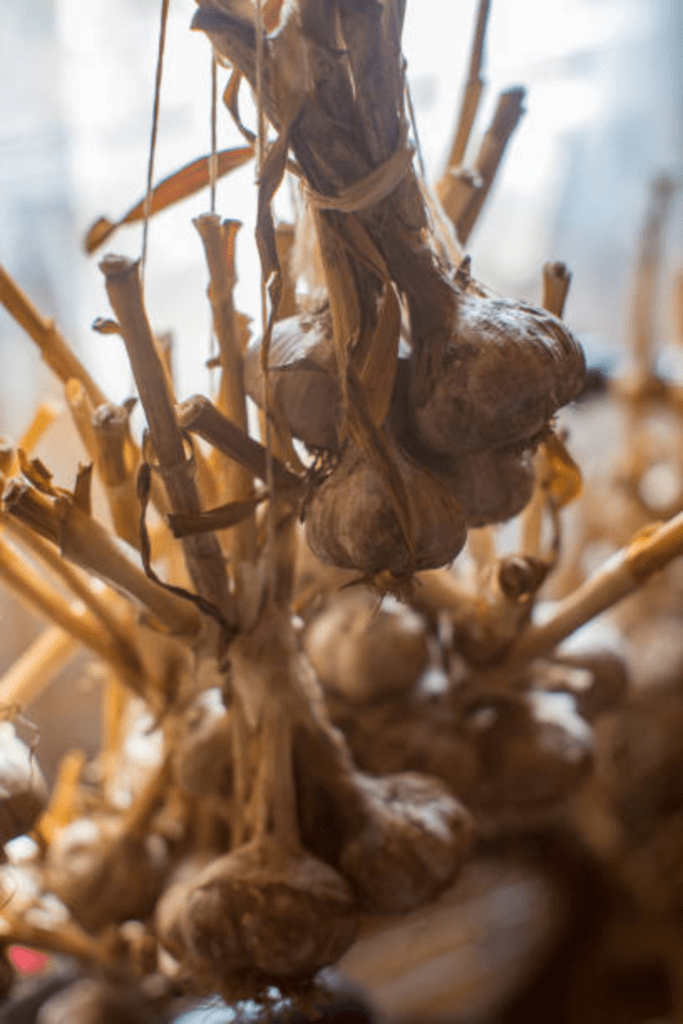
Curing and storing garlic correctly is essential to ensure your harvest lasts as long as possible. I learned this the hard way when I first started growing garlic and ended up with a disappointing batch that sprouted and spoiled too quickly. Over the years, I’ve fine-tuned my techniques to maximize the shelf life of my garlic.
Curing Process
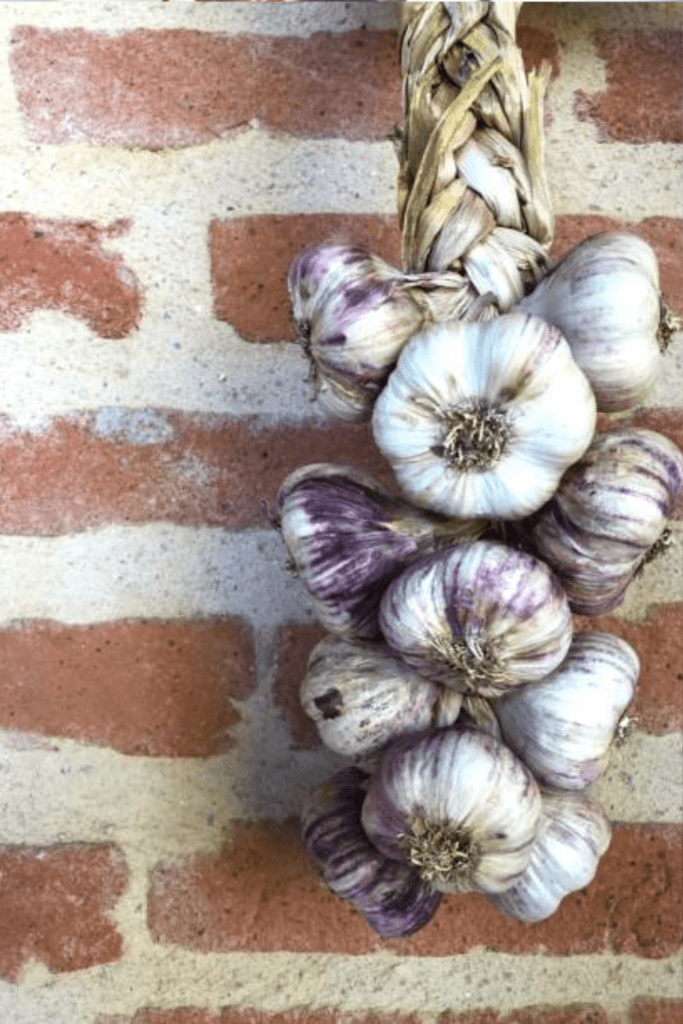
Curing is a crucial step that helps garlic develop its signature flavor and helps the outer layers become papery and protective. After harvesting, I leave the garlic plants in the garden in a shaded area for a week or two to allow the tops to brown and dry out. This process is called “curing in the field.”
Once the tops are dry, I gently brush off any loose dirt and move the garlic to a cool, shady spot with good airflow, like a garage or shed. I hang the garlic in bundles or lay it out on screens or racks, ensuring the bulbs don’t touch each other. For the next two to four weeks, I monitor the garlic closely, rotating the bulbs and ensuring proper ventilation to prevent mold or rot.
By the end of the curing period, the outer skins should be thin and papery, the roots dry and brittle, and the tops completely brown. Only then is the garlic truly cured and ready for long-term storage.
Storage Methods
Once cured, there are a few options for storing garlic. My preferred method is to braid the garlic stems into tight braids, which can be hung in a cool, dark, and well-ventilated area like a basement or root cellar. The ideal storage temperature is between 55°F and 65°F, with low humidity to prevent sprouting or molding.
Alternatively, you can trim the roots and tops off the garlic bulbs and store them in mesh bags or crates in the same cool, dark environment. This method works well if you don’t have enough stems for braiding or prefer easier access to individual bulbs.
For larger harvests, I sometimes create a simple garlic storage rack using wooden slats or wire mesh, allowing air to circulate around the bulbs. Whatever method you choose, be sure to check your garlic periodically and remove any bulbs that show signs of sprouting or decay.
Properly cured and stored, your garlic can last six to eight months, providing a steady supply for cooking and planting the next season’s crop.
Harvesting Garlic Scapes and Spring Garlic
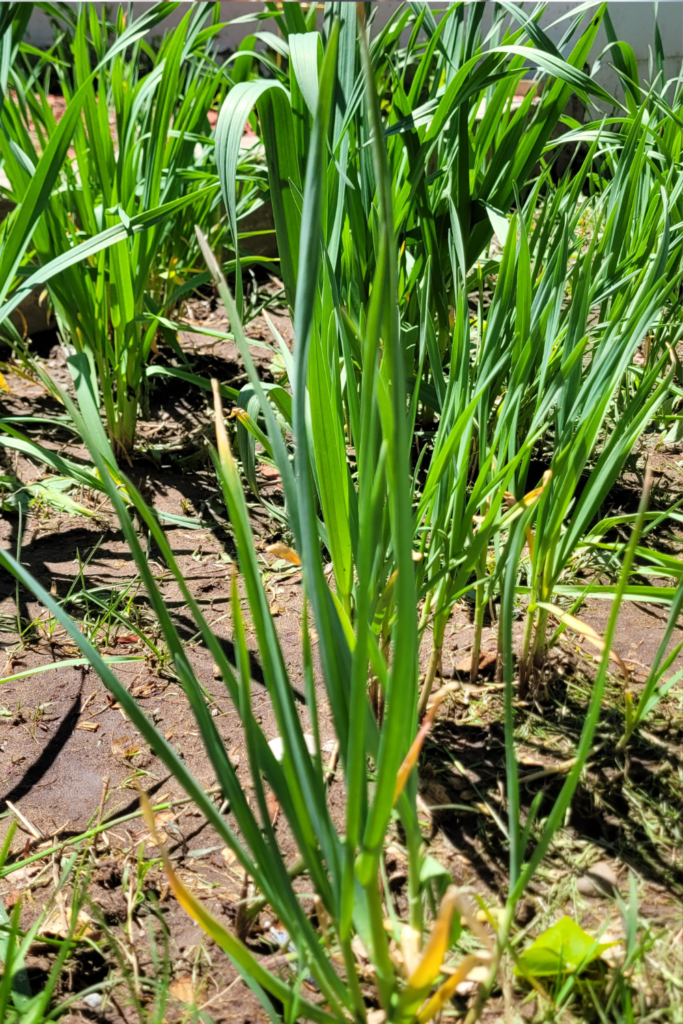
As an avid garlic grower, one of the most exciting times of the year is when the garlic scapes start to emerge. Garlic scapes are the flowering stems that shoot up from the center of the garlic plant, and they’re not only a delicious treat, but their removal also helps the garlic bulbs grow bigger and better.
Harvesting Garlic Scapes
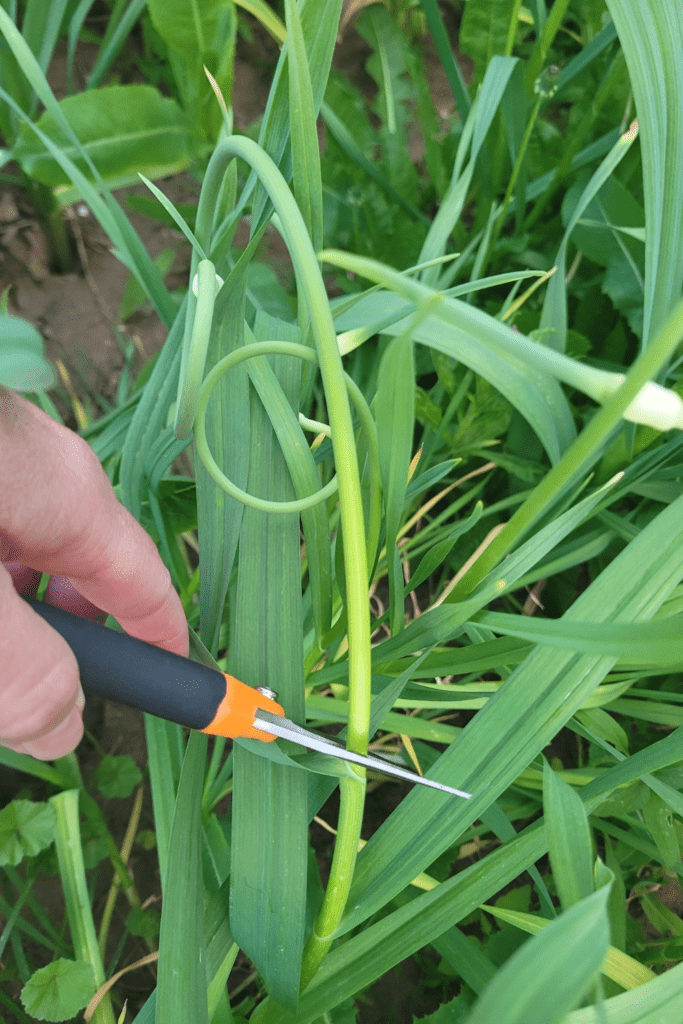
When the scapes start to curl and form their distinctive loop, that’s your signal to get out there and snip them off. I like to use a pair of sharp scissors or pruners and cut the scape about an inch or two above the plant. Don’t wait too long, or the scapes will become woody and tough.
Once you’ve harvested the scapes, you can use them in all sorts of recipes. They have a mild garlic flavor that’s perfect for pesto, stir-fries, or even pickled as a tangy snack. I love to sauté them with a bit of olive oil and toss them with pasta or scrambled eggs.
Removing the scapes isn’t just about enjoying their flavor – it also helps the garlic plant redirect its energy into growing a bigger, better bulb. So, by harvesting the scapes, you’re essentially giving your garlic crop a boost. Again, as mentioned earlier, just remember to leave one garlic scape on the plant for signs of harvesting when the scape points straight up, which is a sign to dig it out.
How to Harvest and Pickle Garlic Scapes
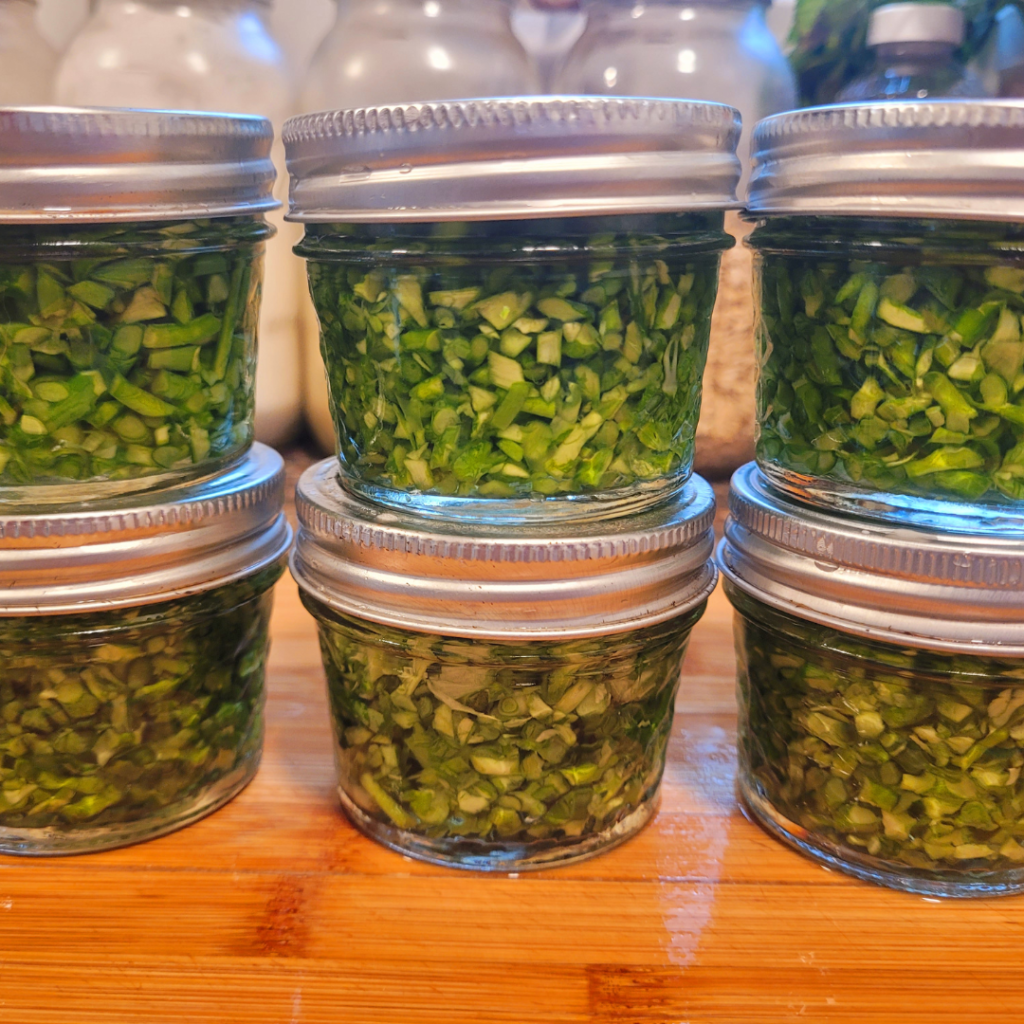
In this detailed blog post, I discuss the art of harvesting and pickling garlic scapes, a delicious and versatile ingredient that often goes overlooked. Discover the best time to harvest these curly green shoots from your garlic plants to capture their optimal flavor and texture.
Learn step-by-step instructions on how to pickle garlic scapes to preserve their unique taste for months to come. From selecting the freshest scapes to creating flavorful brines, this post offers a comprehensive guide for turning these garden treasures into a delightful addition to your culinary creations. See my full recipe tutorial in the following link.
How to Harvest and Pickle Garlic Scapes
Surprising Benefits of Growing Garlic Around Your Fruit Trees
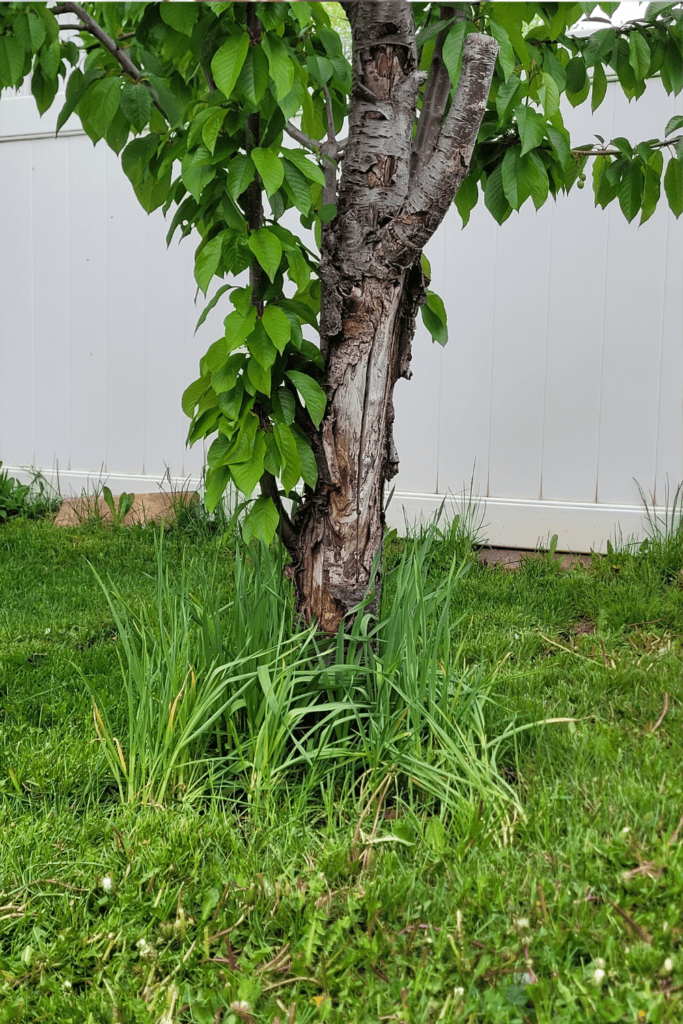
In this intriguing blog post, I uncover the surprising benefits of growing garlic around your fruit trees, showcasing the symbiotic relationship between these two elements of a thriving garden. Explore how planting garlic can act as a natural pest deterrent, protecting your fruit trees from common insects and pests while promoting a healthier ecosystem.
Discover the ways in which garlic’s natural compounds can enhance soil fertility and nutrient absorption for neighboring fruit trees, resulting in improved growth and fruit production. With insightful tips on companion planting and sustainable gardening practices, this post highlights the immense value of integrating garlic into your orchard for a bountiful harvest and overall plant health. See my post in the following link on how I use garlic as pest control in my orchard.
Surprising Benefits of Growing Garlic Around Your Fruit Trees
Harvesting Spring Garlic
If you’re really eager for some fresh garlic, you can also harvest what’s called “spring garlic” or “green garlic.” This is the immature garlic plant, pulled up before the bulb has fully formed.
To harvest spring garlic, carefully dig up the plants, being careful not to damage the tender white stems and green tops. You can use the entire plant – the stems, leaves, and the small, undeveloped bulb at the base.
Spring garlic has a milder, more delicate flavor than mature garlic bulbs, and it’s fantastic in stir-fries, soups, or even as a flavorful addition to salads. I love to chop up the whole plant and sauté it with a bit of butter or olive oil as a simple side dish.
Just remember, if you harvest too much spring garlic, you won’t have as many mature bulbs later in the season. So, it’s best to only take what you need and leave the rest to grow into full-sized garlic heads. If you love spring garlic, plant a separate garden bed just for this purpose.
Whether you’re harvesting garlic scapes or spring garlic, it’s all part of the joy and anticipation of growing your own garlic. There’s nothing quite like the flavor of fresh, homegrown garlic, and these early harvests are just a taste of what’s to come.
Conclusion
Growing your own garlic is an incredibly rewarding experience, and understanding the signs of when to harvest is crucial for ensuring a bountiful and flavorful crop. From observing the leaves and stems to monitoring the weather patterns, I’ve explored various methods to determine the perfect time for harvesting. Whether you’re cultivating hardneck or softneck varieties, curing and storing your garlic properly will extend its shelf life, allowing you to enjoy its pungent aroma and robust flavor for months to come. And let’s not forget the delightful garlic scapes – a true treat for any garlic enthusiast!
As you begin on your garlic-growing journey, remember to embrace patience, observe closely, and trust your instincts. Experiment with different varieties, document your findings, and share your experiences with fellow gardeners. Who knows, you might even discover a new favorite variety or technique along the way!
Gardening is a continuous learning process, and with each harvest, you’ll gain invaluable knowledge to refine your skills. So, roll up your sleeves, get your hands dirty, and enjoy the incredible satisfaction of growing and harvesting your own garlic. Happy gardening, and may your garlic crop be abundant and flavorful!
Resources: Here are some helpful resources for further information.
- How to Grow Vegetables – By Gardener’s World
- How to Grow Garlic – By The Woks of Life
- How to Plant, Grow, and Harvest Garlic – By Garden Tech
Frequently Asked Questions
1. When is the best time to plant garlic?
The ideal time to plant garlic is in the fall, typically around 4-6 weeks before the ground freezes. This allows the cloves to establish roots before winter.
2. How do I know when garlic is ready to harvest?
Garlic is usually ready to harvest when the lower leaves start to turn yellow and dry out. You can also gently dig up a bulb to check for mature cloves.
3. What are some common pests and diseases that affect garlic plants?
Common pests that may affect garlic include aphids, nematodes, and thrips. Diseases like white rot and garlic rust can also impact plant health.
4. Can I replant garlic cloves for the next growing season?
Yes, you can save the largest and healthiest cloves from your harvest to replant in the following season. This helps maintain genetic diversity and ensures a continuous garlic supply.
Summary
I hope I have inspired you to plant garlic in your garden with these tips and products.
If you were encouraged by this post, I invite you to check out my FREE Printables Page for fun free printables, planners, and charts.
ENTER MY FREE Printables Page HERE
Here are some more of my gardening inspiration posts to check out!
The Best Essential Oils for Plants That Repel Garden Bugs
How to Grow Green Garden Peas: Perfect Plump Peas!
Hugelkultur: Does This Epic Pioneering Method Actually Work?
9 Ways to Celebrate Earthing Day in Your Garden!
Gardening Indoors: Secrets of Growing Your Food Inside!
How to DIY a Milk Jug Drip Irrigation System!
Why Cedar Mulch Is The Perfect Natural Weed Barrier
Onions: How to Grow Onions for Storage
Peas: How to Grow Garden Peas for a Bumper Crop
Carrots: How to Grow Carrots for a Bountiful Harvest
Prep Your Garden for Spring Planting with These Expert Tips!
How to Grow a Prepper Garden to Survive and Thrive
The Best Garden Tools You Need for a Productive Season
Fastest Growing Vegetables for Your Survival Garden
How to Grow Marigolds As Pest Control In Your Vegetable Garden
Must-Have Tools for a Successful Balcony Vegetable Garden
How to Effectively Combat Powdery Mildew in Your Garden
The Best Tips for Organic Gardening
How to Release Ladybugs In Your Garden for Organic Pest Control
The Best Garden Snail Control Strategies
The Best Spring Vegetables to Grow in Your Garden
Seed Starter Mix: How To Make Your Organic Seed Starter Mix At Home
How to Grow a Productive Canning Garden
How to Plant and Grow a Salsa Garden
Easiest Heirloom Vegetable Seeds to Grow Now
How to Use the Hand Twist Claw Tiller: Tackling Tough Soil
More Fun Gardening Posts to Check Out!
Planning Your Garden: How to Plan a Vegetable Garden: Expert Green Thumb Tips!
Winterizing the Garden: How to Winterize Your Vegetable Garden: Step-by-Step Checklist
Mulching the Garden: How to Make Leaf Litter Mulch
Grow a Pumpkin Patch: How to Grow a Pumpkin Patch in Your Backyard
How to Grow a Fall Garden: 9 Best Fall Crops
Clever Ways to Incorporate Indoor Composting into Your Home
How to Start Composting for the Garden: A Step-by-Step Guide
The Ultimate Guide to Composting in Your Suburban Backyard
Why I Built A Survival Garden in My Backyard
16 Best Medicinal Herbs to Grow in Your Garden Now
Blessings,
The Off Grid Barefoot Girl

