Discover how to make the best hoagie buns from scratch with this easy, foolproof recipe. Perfectly soft, fluffy, and golden brown, these homemade buns elevate any sandwich or sub. With simple ingredients and step-by-step instructions, you’ll bake bakery-quality hoagie buns right in your kitchen. Ideal for game day, family dinners, or anytime you want fresh, delicious bread without the store-bought preservatives!
Who doesn’t love a delicious hoagie stacked high with their favorite fillings? Whether you prefer classic Italian cold cuts or a veggie-packed delight, the sandwich is only as good as the bread it’s built upon. Tired of settling for subpar store-bought hoagie rolls that just don’t hit the spot? Well, my friend, it’s time to level up your sandwich game with the ultimate homemade hoagie buns recipe!
Imagine biting into a freshly baked roll with a perfectly crisp crust and a pillowy soft interior. The aroma of homemade baked bread wafting through your kitchen as you pull these golden beauties from the oven. It’s a sandwich lover’s dream come true, and the best part? You made them from scratch with your own two hands!
In this step-by-step guide, I’ll walk through everything you need to know to bake the most incredible hoagie buns right in your own home. From the essential ingredients to pro tips for achieving that coveted texture, you’ll soon be a hoagie bun master. And don’t worry, I’ve also got you covered with mouthwatering filling ideas to take your creations to new heights of deliciousness. So roll up your sleeves, and let’s get baking!
This is a pinnable post. Tap or hover over any image in this post to pin to your Pinterest Boards.

What are Hoagie Buns?
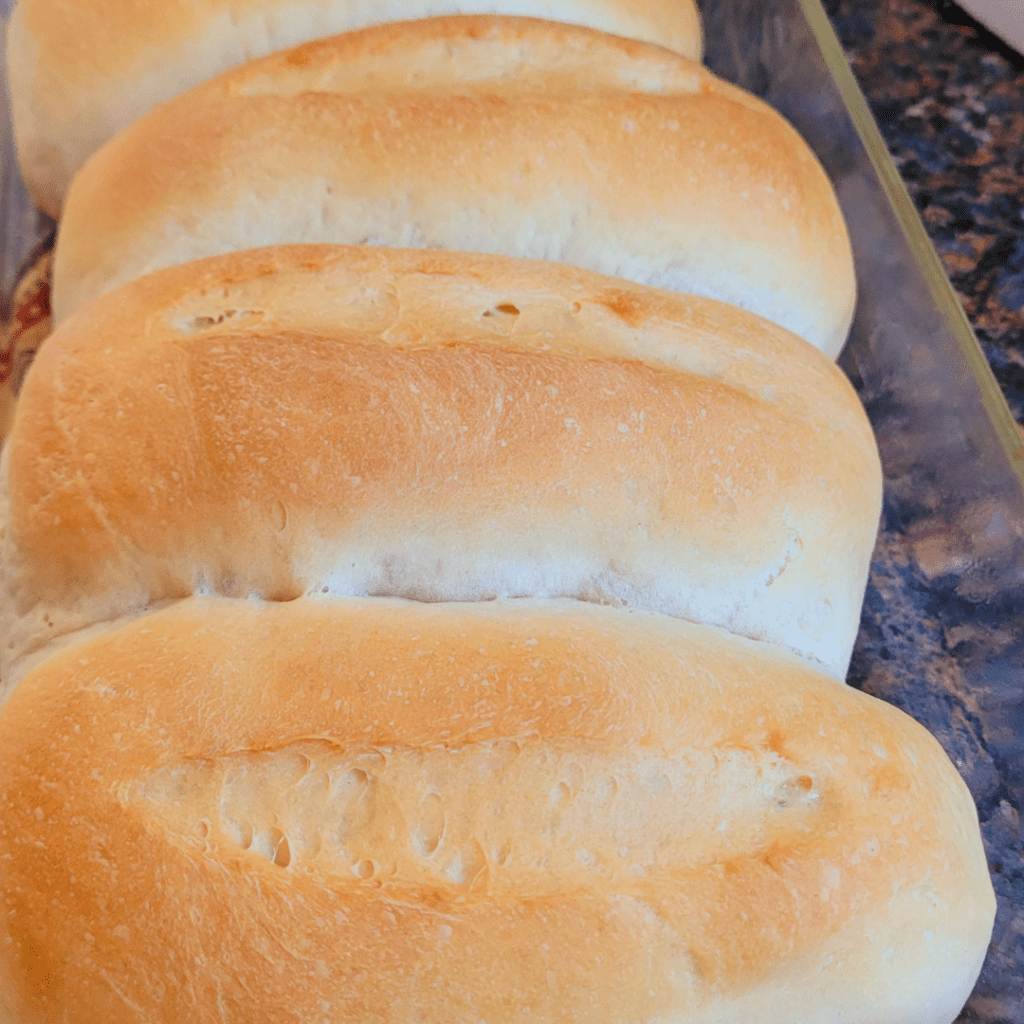
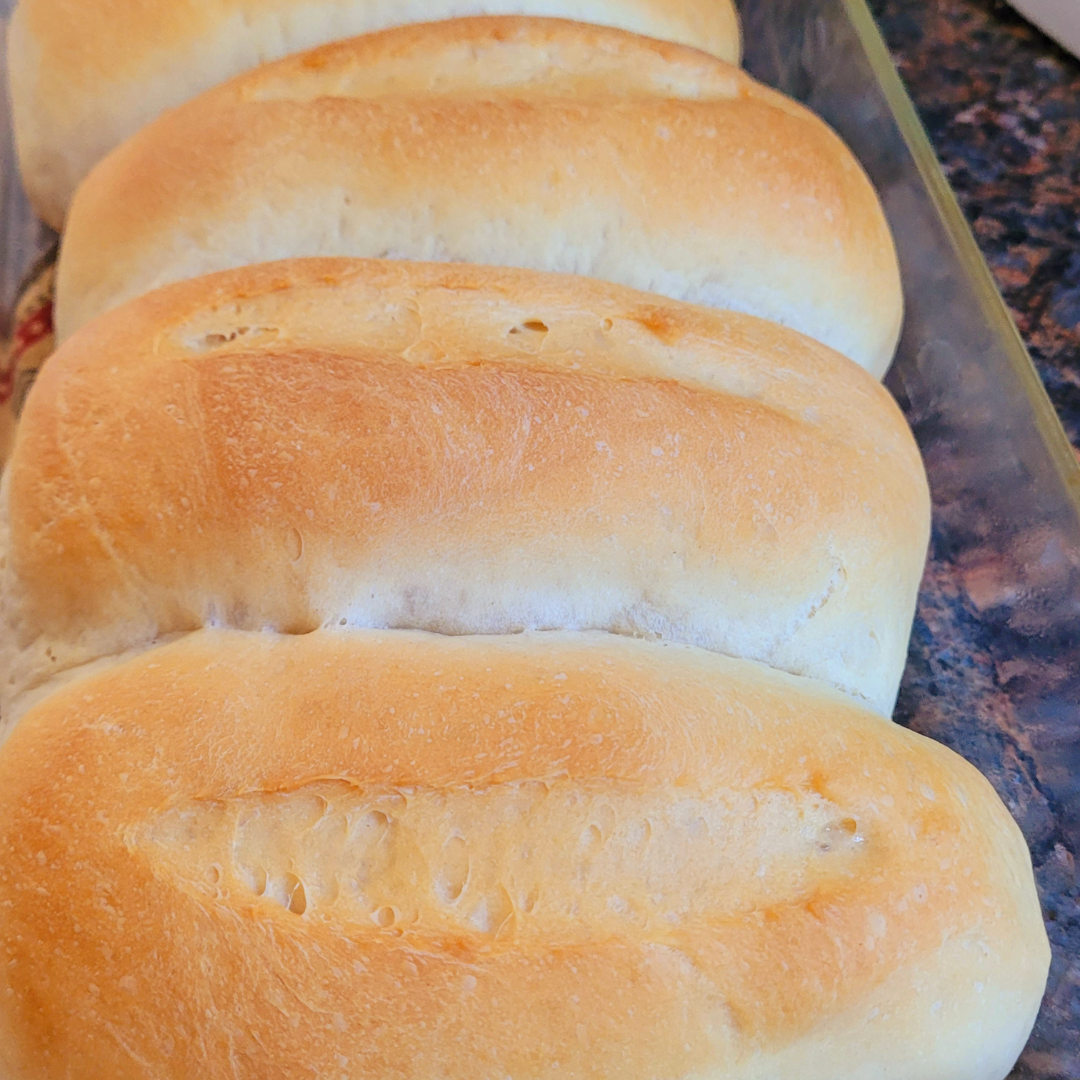
Hoagie buns, also known as submarine or sub rolls, are a type of bread roll that has become a staple in American cuisine. These long, cylindrical rolls are the perfect vessel for creating delicious sandwiches, from classic hoagies to mouthwatering subs.
Definition and Origins
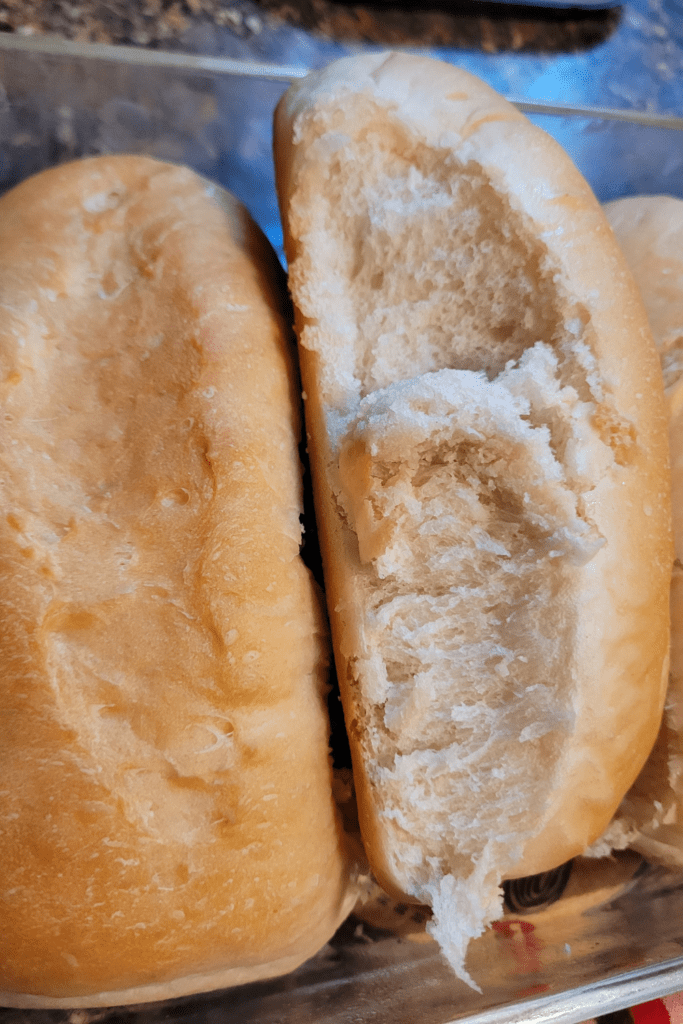
A hoagie bun is a soft, slightly dense bread roll with a chewy crust. It typically measures between 6 and 12 inches in length, with a cylindrical shape that’s wider in the middle and tapered at the ends. The name “hoagie” is believed to have originated in Philadelphia, although the exact etymology is disputed.
Differences from Other Bread Rolls
While hoagie buns share similarities with other bread rolls, they have distinct characteristics that set them apart. Unlike hamburger buns, which are softer and more pillowy, hoagie buns have a chewier texture and a crustier exterior. They are also longer and narrower than most rolls, designed to accommodate a variety of fillings without becoming overstuffed.
Why Make Them From Scratch?
There are several compelling reasons to make hoagie buns from scratch:
- Superior Flavor: Homemade bread has a richer, more complex flavor than store-bought varieties, thanks to the quality of ingredients and the fermentation process.
- Customization: When you make your own hoagie buns, you can tailor the recipe to your preferences, adjusting the level of sweetness and chewiness, or even adding unique flavors like herbs or cheese.
- Freshness: Nothing beats the taste and texture of a freshly baked hoagie bun straight from your oven.
- Cost-Effective: Making your own bread can be more economical than purchasing pre-made rolls, especially if you bake in bulk.
- Sense of Accomplishment: There’s a certain satisfaction that comes from crafting your own bread from scratch, and the pride of serving homemade hoagie buns to your family and friends.
By understanding the definition, origins, and unique qualities of hoagie buns, you’ll be well-prepared to begin making your own from scratch. Stay tuned for the full recipe and step-by-step instructions!
Ingredients Needed
Whether you’re a seasoned baker or a first-time hoagie enthusiast, having the right ingredients is key to crafting the perfect hoagie buns from scratch. Let’s discuss the essential components that will make your homemade buns truly shine.
Flour and Yeast
The foundation of any good bread lies in the right combination of flour and yeast. For hoagie buns, I recommend using bread flour or all-purpose flour. Bread flour has a higher protein content, which translates to a chewier texture, while all-purpose flour yields a slightly softer crumb. As for the yeast, active dry yeast or instant yeast will work wonders in helping your dough rise to perfection.
Liquids and Fats
To achieve the perfect texture and moistness, you’ll need to incorporate the right liquids and fats. Water or milk (or even a combination of both) will hydrate the dough, while the addition of butter, oil, or even eggs will contribute to the richness and tenderness of the hoagie buns. These ingredients work together to create a soft, pillowy interior while maintaining a slightly crisp exterior.
Seasonings and Additions
What sets a great hoagie bun apart from the rest? The answer lies in the seasonings and additions you choose to incorporate. A touch of sugar not only enhances the flavor but also helps with browning. Salt is a must for balancing the sweetness and adding depth. For an extra kick, you can experiment with herbs, spices, or even cheese for a more flavorful twist on the classic hoagie bun.
Remember, the key to achieving the best hoagie buns is to strike the perfect balance between these essential ingredients. Start with a solid foundation and then let your creativity shine through with your choice of seasonings and additions. Trust me, the result will be a hoagie bun that’s not only delicious but also a true homemade masterpiece.
Step-by-Step Instructions
Making the perfect hoagie buns from scratch might seem daunting, but with these easy-to-follow instructions, you’ll be a pro in no time. Let’s begin the step-by-step process.
Ingredients I Use
- All-purpose flour.
- Dry active yeast.
- Sugar.
- Salt.
- Warm water.
- Vegetable oil.
- Egg whites.
- Milk.
Proofing the Yeast
The dough is the foundation of our delicious hoagie buns. Start by combining warm water, yeast, and sugar in a large bowl.
Preparing the Dough
Once the yeast is activated and bubbly, add the warm water, sugar, flour, salt, and vegetable oil. Using your hands or a stand mixer, knead the dough until it becomes smooth and elastic. This process helps develop the gluten structure, ensuring your buns have the perfect chew. Cover and allow it to rise for 30 minutes.
The KitchenAid Artisan Stand Mixer: Perfect for Homemade Hoagies
I love my KitchenAid Artisan 5-Qt Tilt-Head Stand Mixer (KSM150PS) in white—it even comes in a bunch of gorgeous colors! This mixer makes kneading dough for soft, pillowy hoagie rolls so easy. The removable bowl and pouring shield mean less mess, and the powerful motor does all the hard work for you. Whether I’m making sandwiches for a quick lunch or prepping for a family dinner, this mixer takes the stress out of homemade bread and makes it actually fun. It is great for making homemade butter, too! You can tell from the photo of mine that I have had it for years and have put it to good use!

Shaping and Proofing

After the dough has risen, it’s time to shape it into individual buns. Divide the dough into equal portions and roll each piece into a cylindrical shape. Place the shaped buns onto a parchment-lined baking sheet, cover them with a damp towel, and let them proof for another hour or until doubled in size. This crucial step ensures your hoagie buns will be light and airy.
Baking to Perfection
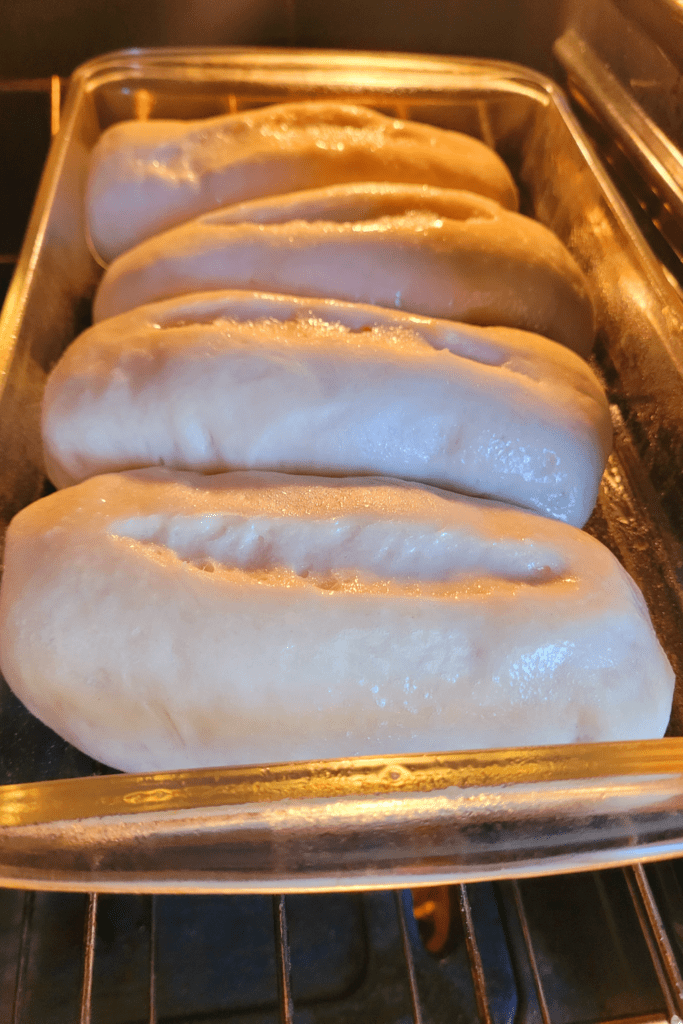
Preheat your oven to 350 degrees and make a slit with a bread blade down the center of each hoagie bun. Bake until they’re golden brown and sound hollow when tapped on the bottom.
Once they’re out of the oven, resist the temptation to dive in immediately. Let the buns cool on a wire rack for at least 15 minutes. This resting period allows the interior to set and ensures your hoagie buns are perfectly baked through.
With a little patience and these step-by-step instructions, you’ll be able to enjoy the most delicious, bakery-fresh hoagie buns right in the comfort of your own home!
Tips for the Best Hoagie Buns
Making homemade hoagie buns can be a rewarding experience, but achieving the perfect texture, flavor, and longevity requires some extra attention. Here are some tips to help you bake the best hoagie buns from scratch.
Achieving the Perfect Texture
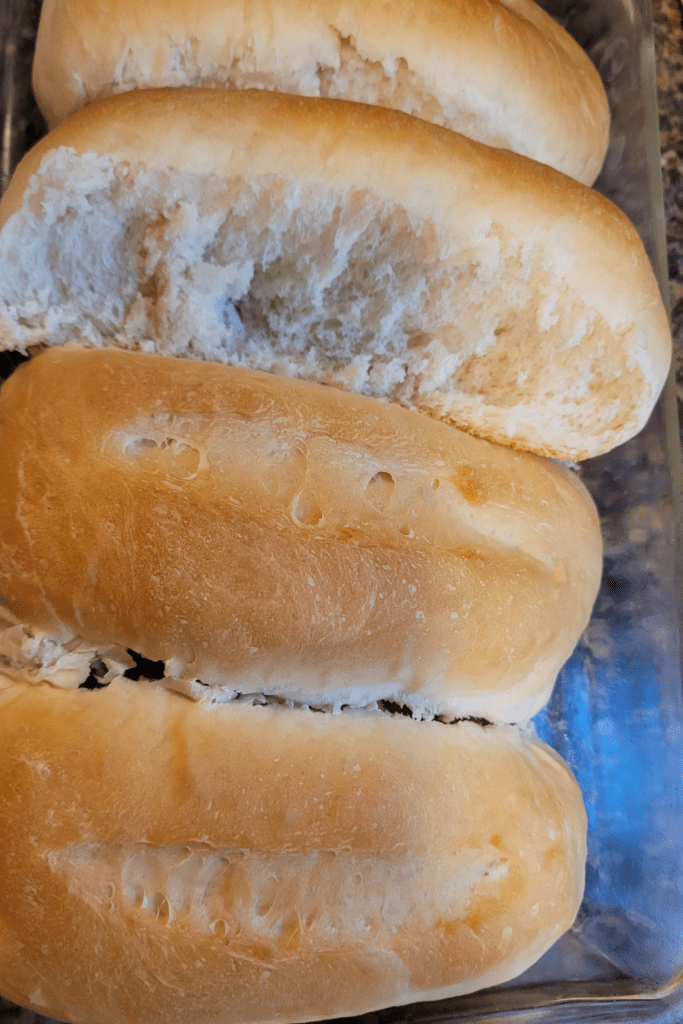
The ideal hoagie bun should have a soft, pillowy interior with a slightly crisp exterior. To achieve this texture, it’s essential to use the right ingredients and techniques. Start by using high-quality bread flour, which contains more protein and will give your buns a better structure. Additionally, incorporating a small amount of milk or buttermilk into the dough can add tenderness and moisture.
During the kneading process, be sure to knead the dough until it becomes smooth and elastic, allowing the gluten to develop properly. Finally, let the dough rise in a warm, draft-free environment until it has doubled in size before baking.
Customizing Flavors
While a classic hoagie bun is delicious on its own, you can customize the flavors to suit your preferences. Try adding herbs like rosemary or thyme to the dough for an aromatic twist. Or, incorporate ingredients like shredded cheese, garlic, or onions for a savory kick.
For a touch of sweetness, consider adding a tablespoon or two of honey or sugar to the dough. You can also experiment with different types of flour, such as whole wheat or rye, to introduce new flavors and textures.
Storing and Reheating
Freshly baked hoagie buns are best enjoyed on the same day, but proper storage can help extend their shelf life. Once cooled, store the buns in an airtight container or bread bag at room temperature for up to three days.
If you need to revive stale buns, place them in a preheated 300°F (150°C) oven for 5-10 minutes, or wrap them in a damp paper towel and microwave for 10-15 seconds. This will help restore their soft, fresh texture.
For longer storage, you can freeze the buns in an airtight container or freezer bag for up to three months. When ready to enjoy, simply thaw them at room temperature or reheat them in the oven or microwave.
Remember, homemade hoagie buns are a labor of love, but with these tips and a little practice, you’ll be able to bake delicious, bakery-quality buns that will elevate any sandwich or hoagie to new heights.
Delicious Hoagie Filling Ideas
When it comes to creating the perfect hoagie, the possibilities for fillings are endless! Whether you’re a fan of classic combinations or looking to spice things up with creative twists, there’s a hoagie filling out there to satisfy every craving.
Classic Combinations
Let’s start with the tried-and-true classics that have stood the test of time. An Italian hoagie, packed with salami, capicola, and provolone, is a crowd-pleaser that never disappoints. For a twist on the traditional, try adding some spicy giardiniera or roasted red peppers for an extra kick of flavor. If you’re in the mood for something a little heartier, a Philly cheesesteak hoagie, loaded with thinly sliced ribeye, sautéed onions, and gooey cheese, is sure to hit the spot.
Vegetarian Options
Meat-free doesn’t mean flavor-free when it comes to hoagie fillings! A Mediterranean-inspired veggie hoagie, stuffed with hummus, roasted red peppers, feta, and pickled onions, is a delightful combination of flavors and textures. Or, for a taste of summer, try a caprese hoagie with fresh mozzarella, juicy tomatoes, basil, and a drizzle of balsamic glaze.
Creative Twists

If you’re feeling adventurous, why not put a unique spin on your hoagie? A breakfast-inspired filling, with scrambled eggs, bacon, and cheddar cheese, is a delicious way to start your day. Or, for a taste of the tropics, try a Hawaiian hoagie with sliced chicken, pineapple, and a tangy teriyaki sauce. The possibilities are endless when you let your creativity run wild!
No matter your preference, the perfect hoagie filling is just a few ingredients away. So, gather your favorite toppings, fire up the grill or oven, and get ready to create a sandwich masterpiece that will have your taste buds dancing with delight!
Conclusion
Following these simple steps and tips, you’ll be able to whip up a batch of delicious, homemade hoagie buns that put the store-bought ones to shame. With their soft, pillowy texture and incredible flavor, these buns are the perfect canvas for all your favorite sandwich fillings.
Whether you’re a fan of classic Italian hoagies loaded with cured meats and veggies or prefer a heartier option like a Philly cheesesteak, these buns will take your sandwich game to new heights. And let’s not forget about the endless possibilities for breakfast sandwiches, burgers, and more!
So why settle for bland, mass-produced buns when you can easily make your own at home? Gather your ingredients, roll up your sleeves, and get ready to impress your friends and family with your newfound bread-baking skills. Who knows, you might just become the neighborhood’s go-to hoagie bun supplier!
Remember, the key to success is practice and experimentation. Don’t be afraid to tweak the recipe to suit your taste preferences or dietary needs. And most importantly, have fun with it! Baking is an art, and these hoagie buns are your canvas. Happy baking, and may your sandwiches always be delicious!
If you want an easy-from-scratch bread, try my sourdough discard fry bread.
Resources: Here are some helpful resources for further information.
- Easy Hoagie Roll Recipe – By Oh Sweet Basil
- The Best Homemade Hoagie Rolls – By Handmade Farmhouse
- The Best Super Soft and Chewy Hoagie Bread Rolls – By The Kitchen Whisperer
Frequently Asked Questions
1. Can I use all-purpose flour instead of bread flour for hoagie buns?
Yes, you can use all-purpose flour, but bread flour is recommended because it has a higher protein content, which gives the buns a chewier texture and better structure.
2. How do I make my hoagie buns soft and fluffy?
To achieve soft and fluffy hoagie buns, make sure to knead the dough well and allow it to rise properly. Adding a little milk or butter to the dough can also enhance the softness.
3. Can I freeze the hoagie buns after baking?
Absolutely! After the buns have cooled completely, wrap them tightly in plastic wrap and store them in a freezer bag. They can be frozen for up to 3 months. To use, thaw at room temperature or reheat in the oven.
4. What is the best way to shape hoagie buns?
To shape hoagie buns, divide the dough into equal portions, then roll each piece into a ball. Flatten slightly and shape into an oblong or torpedo shape by gently rolling the dough back and forth. Make sure the buns are evenly shaped for uniform baking.
Hoagie Buns
Equipment
- 1 mixing bowl
- 1 baking dish.
Ingredients
Proofing the Yeast
- 1 cup warm water.
- 2 ¼ tsp dry active yeast.
- 2 tbsp sugar.
Dough
- Proofed yeast mixture.
- ½ cup warm water.
- 2 tbsp sugar.
- 1 tsp salt.
- 2 tbsp vegetable oil.
- 4 ½ cups all-purpose flour or bread flour.
Milk and Egg Wash
- 2 tbsp milk.
- 1 small egg white.
Instructions
Preparing the Yeast
- Start by combining warm water, yeast, and sugar in a large bowl. Once the yeast is activated and bubbly, it's time for the next step.
Preparing the Dough
- Mix the proofed yeast with the dough ingredients: warm water, salt, sugar, vegetable oil, and flour.
- Using your hands or a stand mixer, knead the dough until it becomes smooth and elastic. This process helps develop the gluten structure, ensuring your buns have the perfect chew. Cover and allow it to rise for 30 minutes.
Shaping and Proofing
- After the dough has risen, it's time to shape it into individual buns. Divide the dough into equal portions and roll each piece into a cylindrical shape.
- Place the shaped buns onto a parchment-lined baking sheet, cover them with a damp towel, and let them proof for another hour or until doubled in size. This crucial step ensures your hoagie buns will be light and airy.
Baking to Perfection
- Preheat your oven to 350 degrees and make a slit with a bread blade down the center of each hoagie bun.
- Mix together the milk and egg white and brush on top of each hoagie bun.
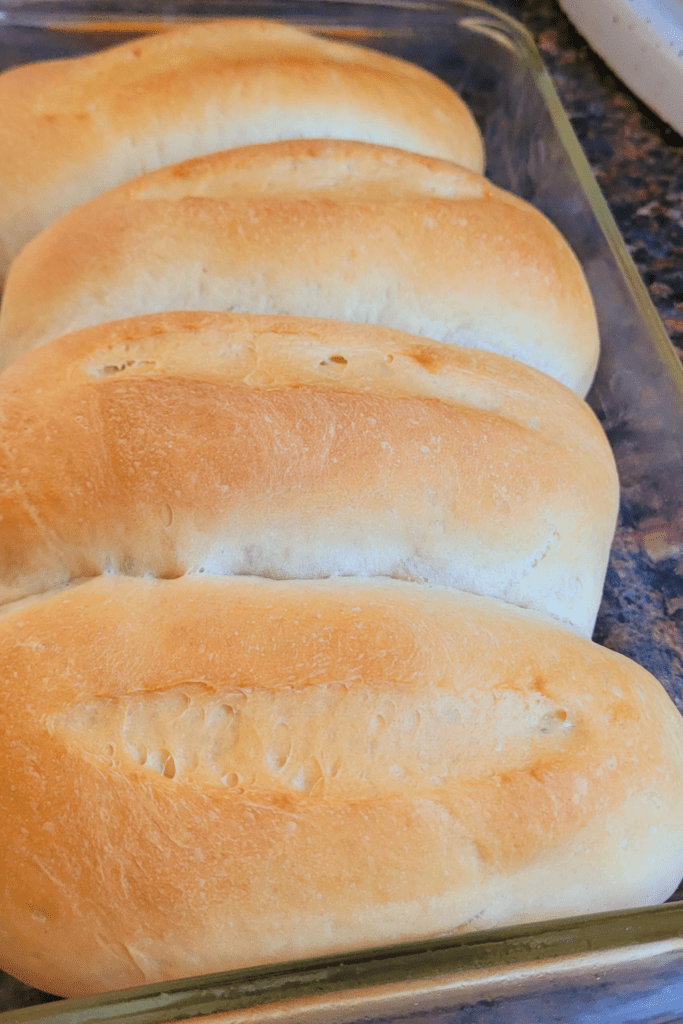
- Bake until they're golden brown and sound hollow when tapped on the bottom, about 30 minutes.
- Once they're out of the oven, resist the temptation to dive in immediately. Let the buns cool on a wire rack for at least 15 minutes. This resting period allows the interior to set and ensures your hoagie buns are perfectly baked through.
- Enjoy!
See What Others Are Saying on Pinterest!
Summary
I hope I have inspired you to bake your very own bread loaves to enjoy and share with your friends and family.
If you were encouraged by this post, I invite you to check out my FREE Printables Page for fun free printables, planners, and charts.
ENTER MY FREE Printables Page HERE
Here are some more of my bread-making inspiration posts to check out!
Pumpkin: How to Make Chocolate Chip Pumpkin Bread
Sweet Potato Bread: How to Make Sweet Potato Bread
Chocolate Chip Cookies: How to Make Chocolate Chip Cookie Bread
Carrot Cake Quick Bread: How to Make Carrot Cake Quick Bread
How to Make Strawberries and Cream Sourdough Bread
How to Make S’mores Sourdough Bread
July 4th Bread: How to Make a Firecracker Marble Bread Braid
Artisan Bread: How to Make Artisan Bread
Challah Bread: How to Make a 6 Braided Challah Bread
Sweet Bread: How to Make Sweet Bread
Blessings,
The Off Grid Barefoot Girl

