Discover how to make the perfect pumpkin-shaped sourdough bread from scratch with this fun and festive fall recipe! Using simple ingredients and a few clever shaping tricks, you’ll learn how to turn your homemade sourdough into a beautiful pumpkin loaf that’s as delicious as it is decorative. This is the ultimate autumn showstopper for your table—perfect for Thanksgiving, harvest dinners, or cozy weekend baking.
Making homemade bread is a rewarding and satisfying endeavor, and when it comes to adding a festive twist, pumpkin-shaped sourdough bread steals the show. This article will guide you through the process of creating the perfect pumpkin-shaped sourdough bread from scratch. With its charming appearance and delightful flavor, this bread is not only a treat for the taste buds, but also a feast for the eyes.
Whether you’re an experienced bread baker or a novice looking for a creative project, this step-by-step guide will equip you with the knowledge and techniques needed to craft a stunning loaf that will impress family and friends. Get ready to embark on a culinary adventure that combines the artistry of bread-making with the warmth of autumn flavors.
This is a pinnable post. Tap or hover over any image in this post to pin to your Pinterest Boards.
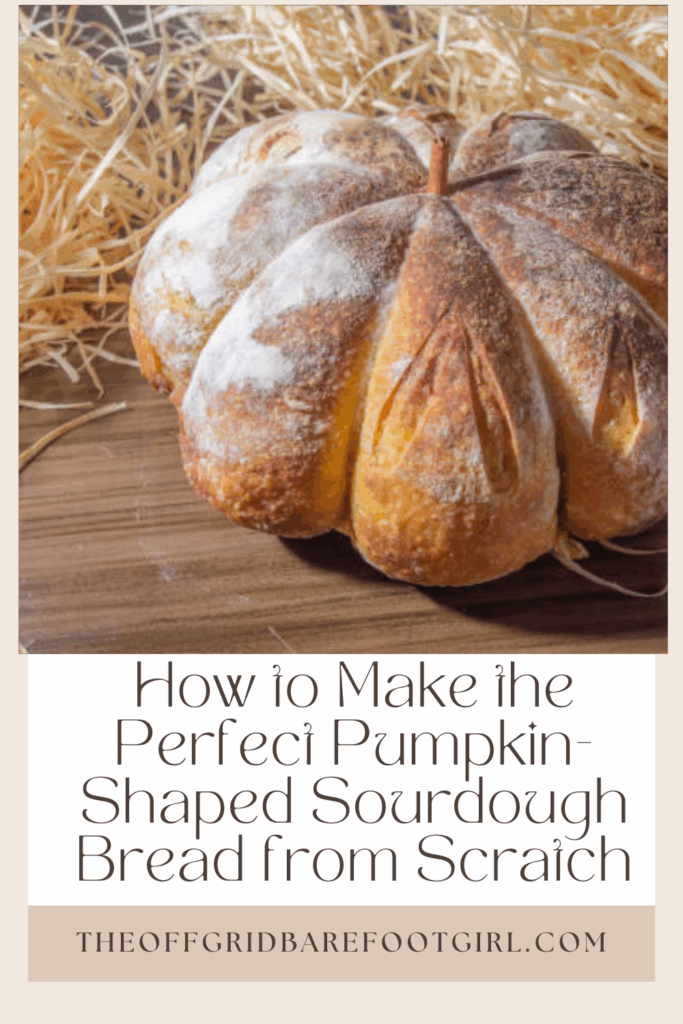
Introduction: The Allure of Homemade Pumpkin-Shaped Sourdough Bread
There’s something undeniably magical about the aroma of freshly baked bread wafting through the air. And if that bread happens to be a gorgeous pumpkin-shaped sourdough loaf, well, that takes the enchantment to a whole new level.
Making your own bread from scratch is not only satisfying but also allows you to customize the flavors and shapes to suit your fancy. And what could be more fitting for the season than a pumpkin-shaped loaf that’s perfect for autumn feasts and Halloween celebrations?
In this guide, I’ll walk you through the process of creating the perfect pumpkin-shaped sourdough bread. With a little bit of patience and a whole lot of love, you’ll soon have a stunning centerpiece for your table that’s as delicious as it is impressive.
What I Love About This Pumpkin-Shaped Sourdough Bread
This pumpkin-shaped sourdough bread is spiced with real pumpkin puree and pumpkin pie spices, making it a delicious treat with the flavors of fall. It is rich with the delicate taste of farm fresh buttermilk that enhances the tanginess of the sourdough, creating a delectable pumpkin-flavored sourdough loaf!
Not only is it delicious, but the beauty of this pumpkin-shaped loaf touched with a hint of automn orange hue to resemble a gorgeous edible garden pumpkin bread will delight any fall table gathering. This would even be stunning on a charcuterie board surrounded by delicate cheese and fruit spreads, enhancing the delightful fall display.
Gathering the Ingredients: A List of Essential Components
Before we dive into the nitty-gritty of bread-making, let’s gather all the ingredients you’ll need to make this magical pumpkin-shaped sourdough bread:
- Flour: Opt for high-quality bread flour, all-purpose, or a mix of bread flour and whole wheat flour for added depth of flavor.
- Buttermilk: The elixir of life for your sourdough starter and bread with a tangy, rich flavor.
- Sourdough Starter: The secret ingredient that gives sourdough bread its unique tangy flavor and helps with leavening.
- Pumpkin Puree: To infuse your bread with the delightful taste of pumpkin.
- Salt: Essential for enhancing the flavor profile of your bread.
- Spices (optional): Get creative and add a pinch of cinnamon, nutmeg, or allspice for that warm and comforting autumn touch.
Preparing the Sourdough Starter: Step-by-step Instructions for a Robust Starter
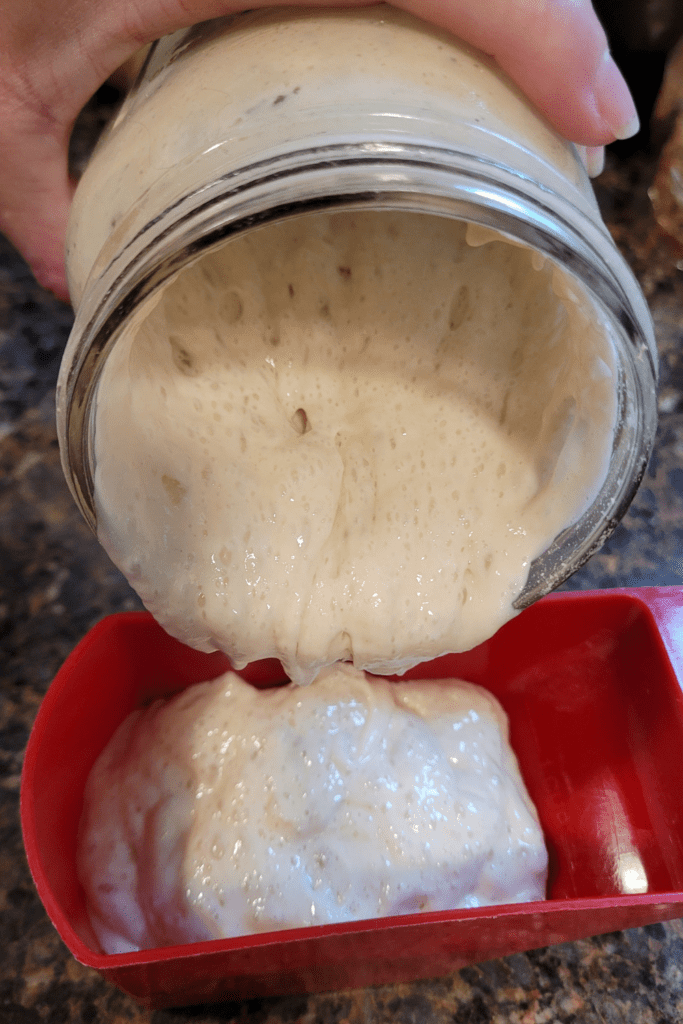
Now that we have our ingredients in place, let’s focus on nurturing a robust sourdough starter. Don’t worry; it’s not as daunting as it sounds. Just follow these steps:
Feeding and Maintaining the Starter: Pumpkin-Shaped Sourdough Bread
Begin with a small amount of mature starter and gradually feed it equal parts flour and water. Regularly discard a portion of the starter to maintain a manageable size. To learn more about how to craft your own sourdough starter, visit my other post, which discusses this in further detail.
The Ultimate Guide to Crafting a Perfectly Tangy Wild Sourdough Starter
Achieving Proper Hydration: Pumpkin-Shaped Sourdough Bread
Adjust the hydration of your starter by adding more or less water to achieve the desired consistency. A wetter starter will yield a more open crumb, while a drier one will result in a denser texture.
Establishing a Feeding Schedule
Consistency is key when it comes to maintaining a healthy sourdough starter. Establish a feeding schedule that works for you, typically every 12-24 hours, to keep your starter vibrant and active.
Mixing and Kneading the Dough: Techniques for Achieving the Ideal Texture
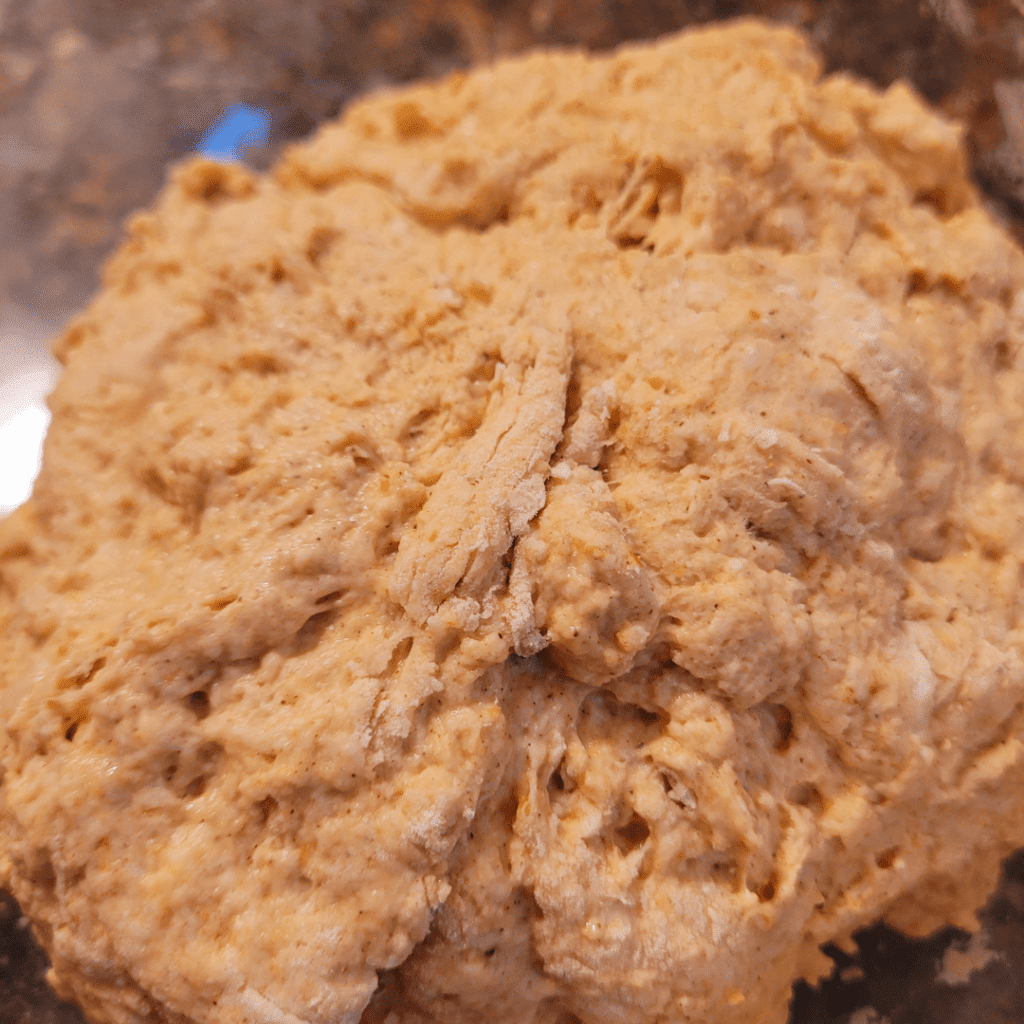
Now that you have a robust starter ready, it’s time to mix and knead your dough. Follow these techniques to achieve the ideal texture in your pumpkin-shaped loaf.
Combining the Ingredients
In a large bowl, mix your flour, buttermilk, sourdough starter, salt, and any spices you’d like to incorporate until they come together into a shaggy mass.
Autolyse Method: Pumpkin-Shaped Sourdough Bread
Allow the dough to rest for a while to encourage gluten development. Cover it and let it sit for 30 minutes to an hour before proceeding to the next step.
Incorporating the Pumpkin Puree
Add the pumpkin puree to the dough and gently fold it in until fully incorporated. Be careful not to overmix, as you don’t want to deflate the dough.
Kneading Techniques for Gluten Development
Use the stretch and fold method to develop the gluten in the dough. This will give your bread structure and a delightful chewy texture.
Bulk Fermenting Overnight
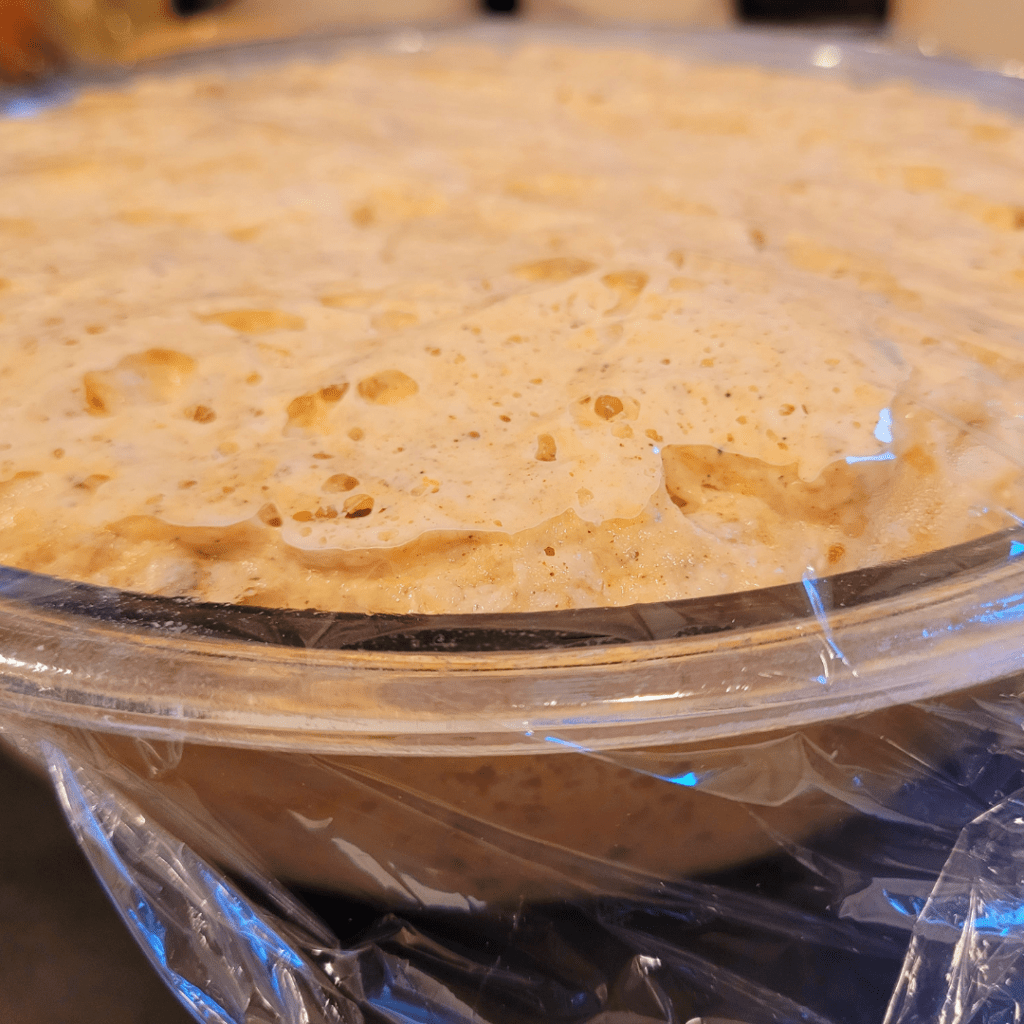
After a series of stretching and folding techniques, it is time to put the dough away for the bulk fermentation process. Cover the dough with plastic wrap and place it in a warm area for 8 to 12 hours. I typically will bulk ferment my dough overnight so it will be ready for shaping and proofing the following morning.
Shaping the Pumpkin Loaf: Creative Tips for Crafting a Realistic Pumpkin Shape
Shaping the Dough
To create the perfect pumpkin-shaped sourdough bread, it’s essential to start with well-fermented dough that is ready to be proofed.
Do not be hard on yourself if you find yourself redoing the shaping of this dough for your very first time. It took me three different times to get it perfect. Meaning, I had to take the dough out of the strings over and over again until I got all of the ends evenly tied around my dough. After a few tries of practicing, I was able to finally get the string in the right areas to tie the dough into a pumpkin shape. It was then time to recover with plastic for the proofing stage.
It was during this time that I realized how important spraying the strings with cooking spray can be! Once you have the strings spread out over the baking dish, go ahead and give them a quick spritz of cooking oil to make the removal process easier after baking.
Also, do not worry about perfection. You can always showcase a gorgeous rustic-style pumpkin-shaped sourdough bread if it ends up looking a bit on the rough side. It will still be delicious and beautiful with that perfect rustic fall display.
Pumpkin Shaping Techniques: Pumpkin-Shaped Sourdough Bread
Using 100% Cotton String for Baking

It is important to use only 100% cotton string for baking to prevent any particles from the string from getting stuck in the dough. Years ago, I was making some cute tiny pumpkin rolls, and I decided to use twine. Do you know that rough string that has loose particle hairs hanging from it? Those got stuck in my rolls when I tried to remove the twine after baking, and it was disgusting. Using 100% cotton is a smoother string and will not leave any lingering pieces in your dough.
Preparing the Strings
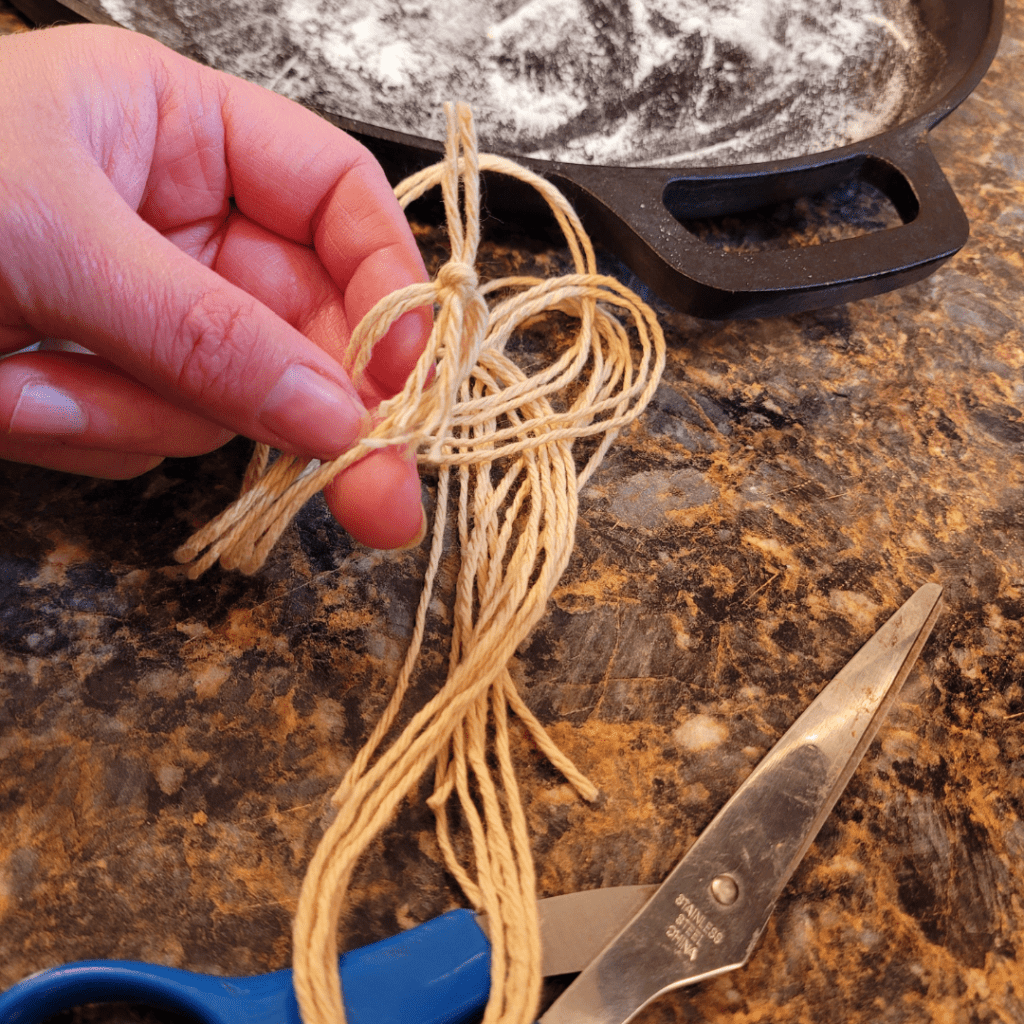
Cut 8 pieces of string long enough to wrap around your dough. Tie all of the 8 pieces of string together in a knot at one end.
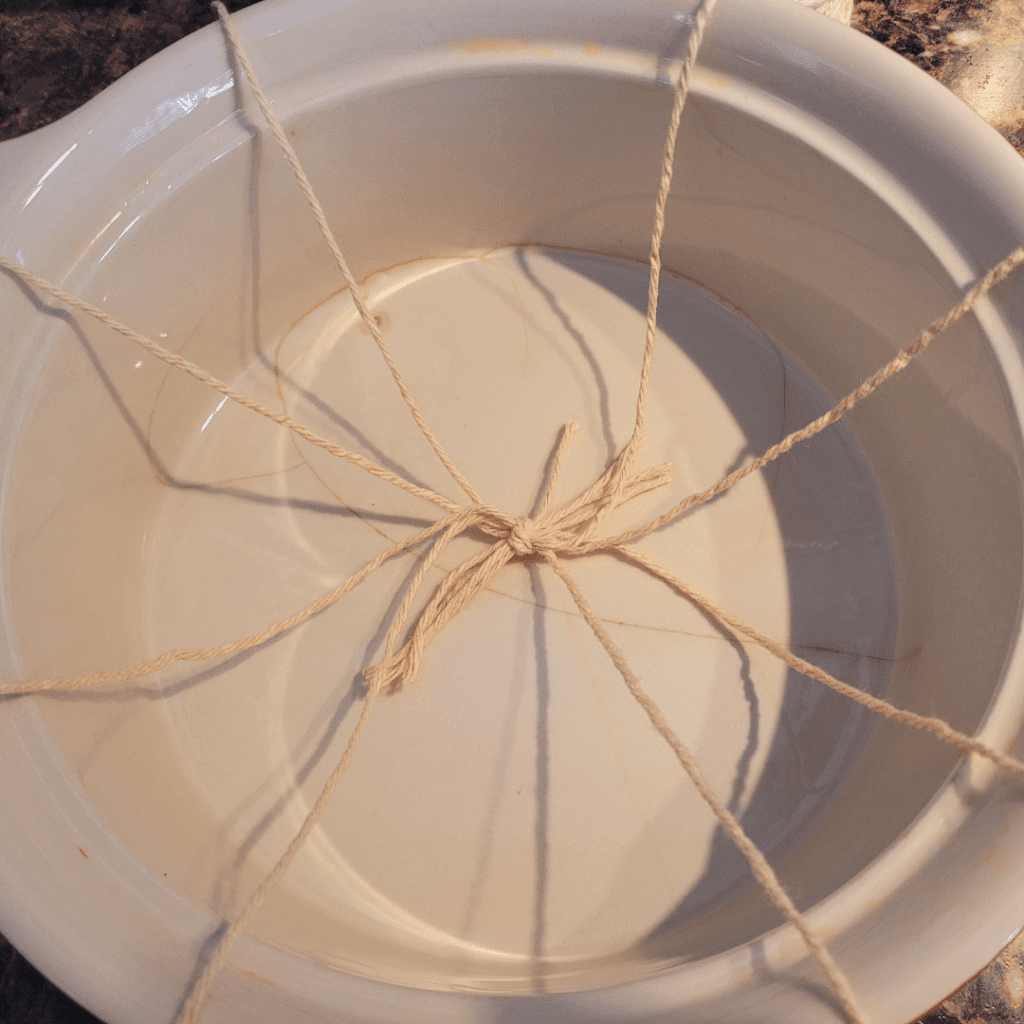
Spread the string out on a prepared baking pan; you can use parchment paper if you desire. Spread out all of the pieces evenly, leaving the knot in the center of the baking pan. I am using my round Dutch oven for this step. Having the string prepared with the knot in the middle and the strings evenly spaced out, will help prepare you for the next step. Again, don’t forget to spray the strings with cooking spray!
Flipping the Dough Onto the Prepared String
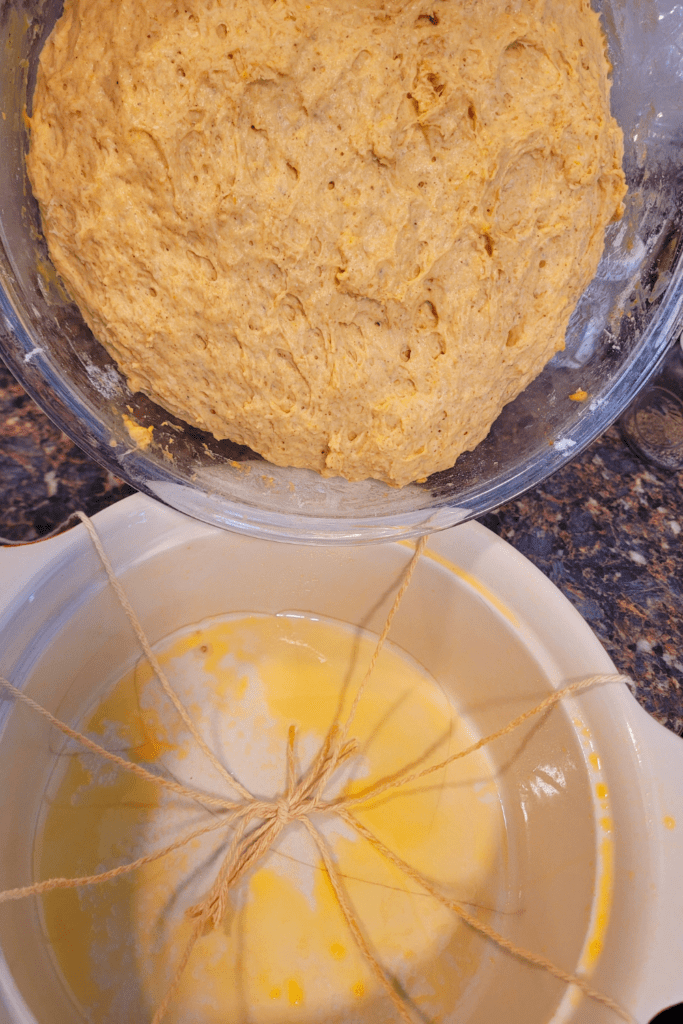
Carefully scrape the dough out of the bowl and flip it onto the tied knot in the middle of your baking pan.
I may have gone a little overboard on my cooking spray! It was butter spray, and it puddled in the bottom of my Dutch oven, which I had to tip over to drain before I plopped the dough in it.
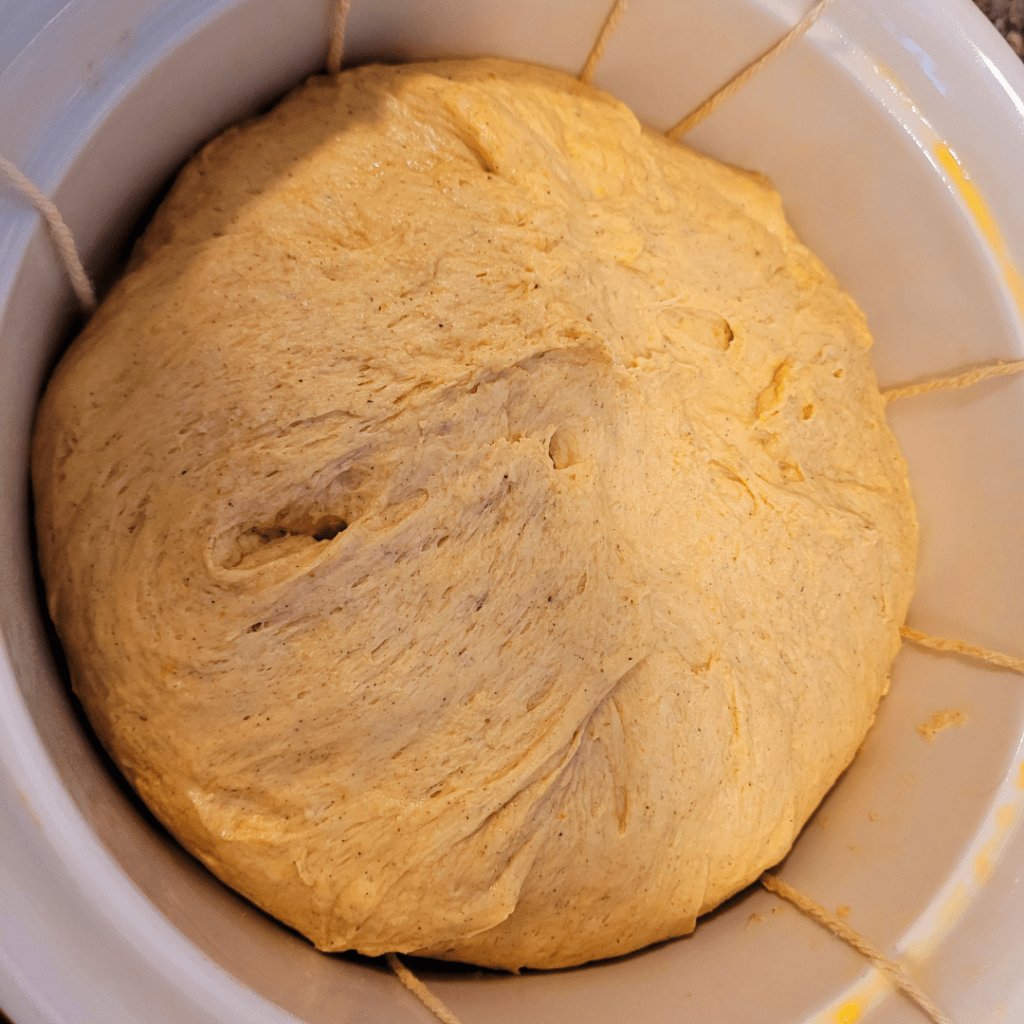
Next, I plopped the dough inside my Dutch oven, prepared with the strings. I found that using a spatula worked well for this successful transfer. Then I was able to adjust the spacing of the strings as necessary around the dough before gathering the pieces together and tying them together.
Tying the Strings to the Dough to Create a Pumpkin Shape
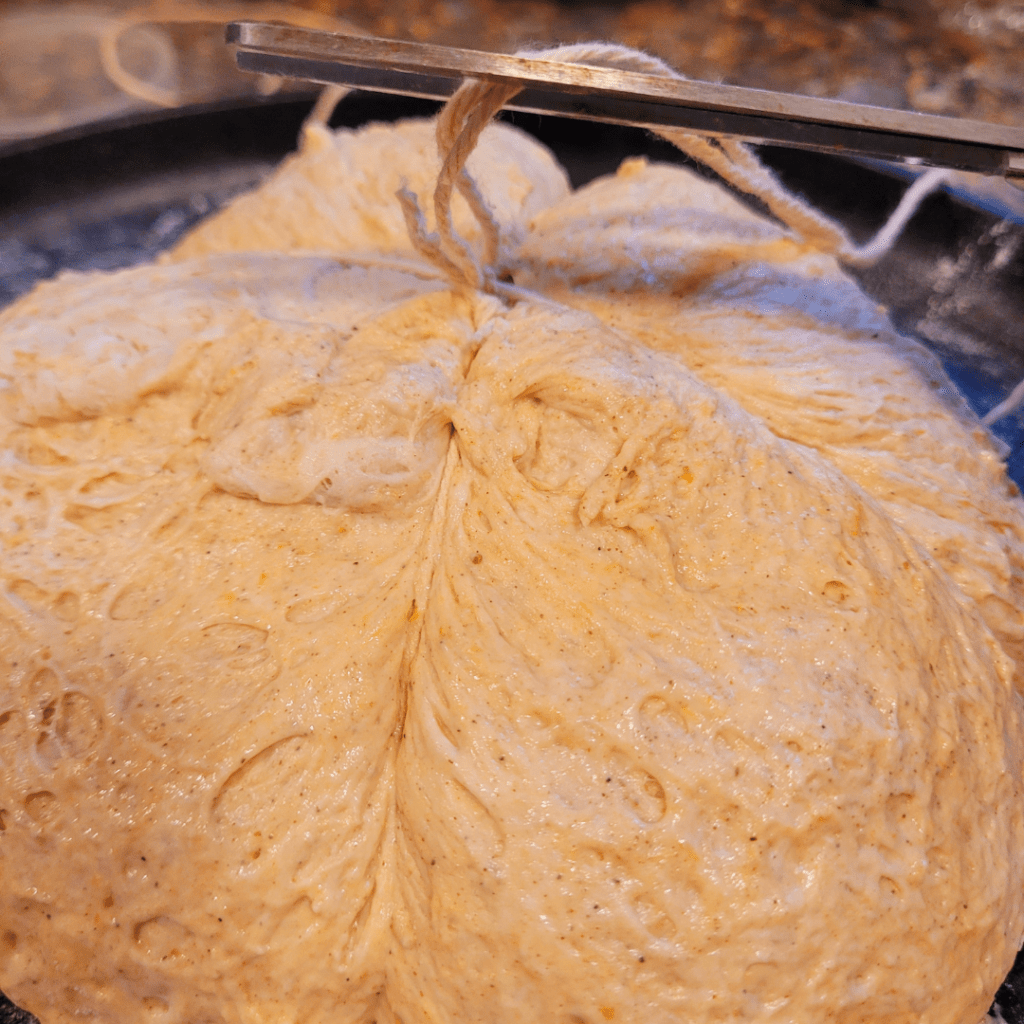
Gather the ends opposite from each other and tie them together in the center at the top of the dough. Do this until all 8 pieces of string have been tied together at the top. Cut off any remaining string.
You can see that this dough is in a different pan, which is on my black cast iron griddle. I made two separate loaves and just happened to take the photo of snipping the string on this one rather than other loaf I have been showcasting.
Final Proofing and Baking: Ensuring the Perfect Rise and Golden Crust
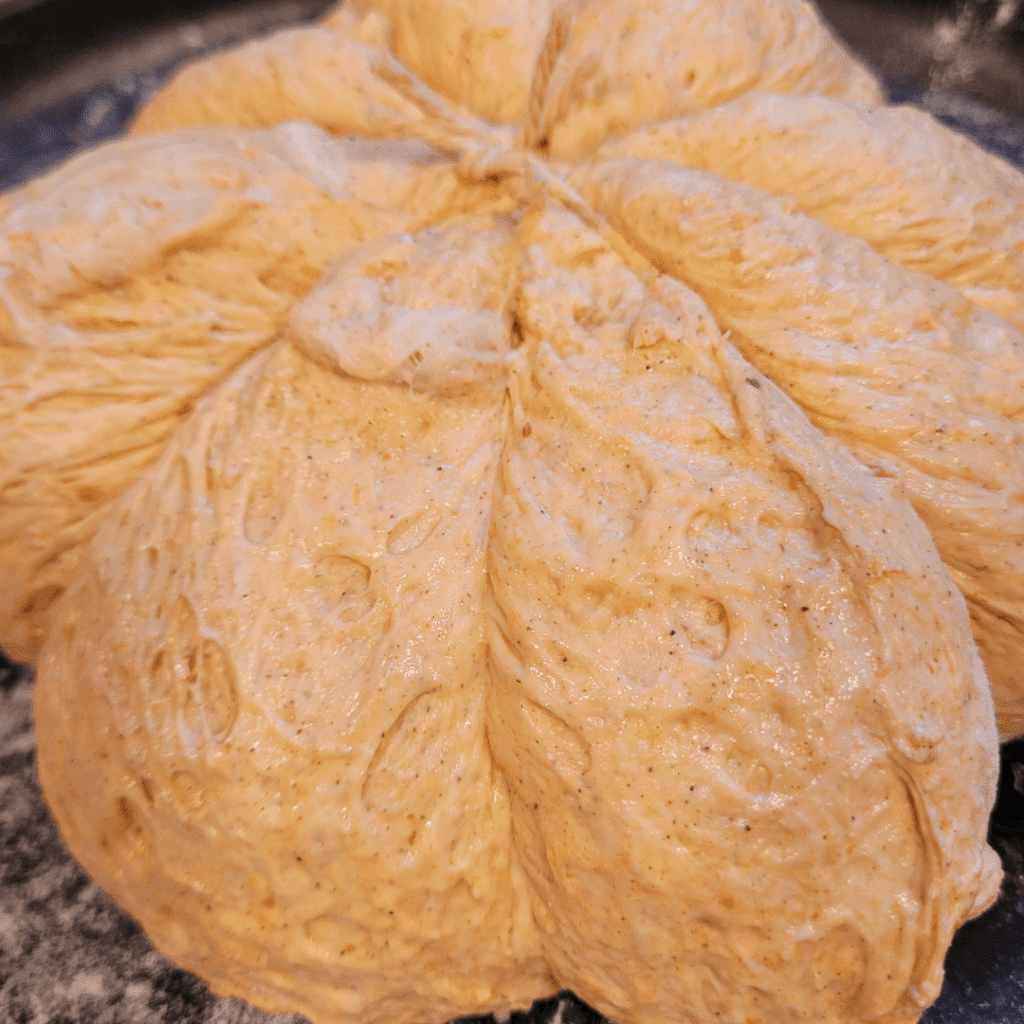
Proofing the Pumpkin-Shaped Sourdough Bread
After shaping your bread, it’s crucial to give it a final proofing to allow for proper fermentation and rise. Now that your dough has been placed on a baking pan lined with parchment paper, cover it loosely with a clean kitchen towel or plastic wrap. Let it proof at room temperature until it has visibly increased in size. This can take anywhere from 1 to 2 hours, depending on the temperature and humidity of your kitchen.
Determining the Ideal Proofing Time
To determine if your pumpkin-shaped bread is ready for the oven, gently press the dough with your fingertip. If the indentation slowly fills back in, it is adequately proofed. If it bounces back quickly, it needs more time to proof. Be patient and allow the dough to rise fully for a light and airy texture.
Adding Details for a Realistic Appearance: Scoring the Loaf
To add more realism to your pumpkin-shaped sourdough bread, use a paring knife or a dough scraper to create vertical lines on the sides of the loaf. These lines will mimic the natural ridges found on a pumpkin. Be creative and experiment with different patterns to achieve your desired look. Remember, imperfections only add to the charm!
Just before baking, score your pumpkin-shaped bread with a sharp knife or a bread razor. This helps the dough expand evenly during baking, creating a beautiful shape and texture. For a pumpkin-like effect, you can make a crisscross pattern on the top of the loaf, resembling the lines typically found on the surface of a pumpkin.
Baking Temperature and Time: Pumpkin-Shaped Sourdough Bread
Preheat your oven to around 450°F (230°C) with a baking stone or a baking tray inside. Once fully heated, carefully transfer your proofed pumpkin-shaped bread onto the hot surface. Bake it for approximately 40-45 minutes or until it develops a golden brown crust. The internal temperature should reach around 200°F (93°C) to ensure the bread is fully cooked.
Decorative Touches: Adding the Finishing Details for an Eye-Catching Loaf
Creating a Pumpkin Stem
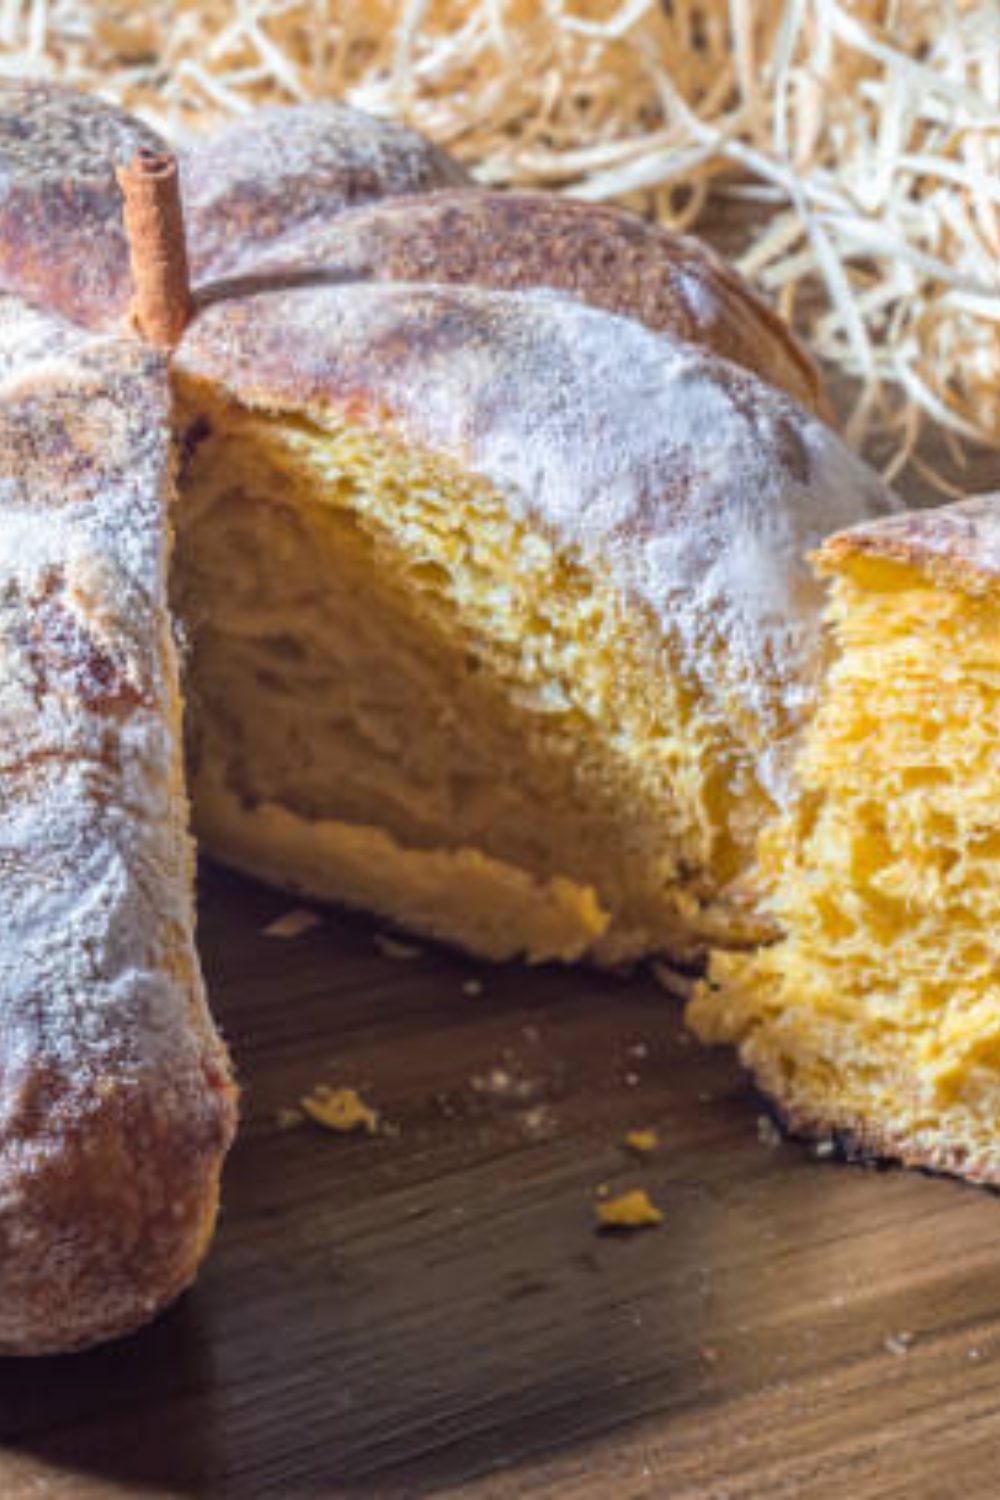
To complete the pumpkin look, create a stem for your sourdough bread. You can use a small piece of a cinnamon stick. Attach it to the top center of the loaf after baking, gently pressing it down to secure it in place. This will give your bread an authentic pumpkin appearance.
Dusting with Flour for a Rustic Touch
For a more rustic look, lightly dust your pumpkin-shaped bread with flour before serving. This will lend it an earthy and artisanal charm, reminiscent of a traditional farmhouse loaf. It’s the perfect finishing touch to give your bread an extra dose of character and texture.
Serving and Enjoying: Tips for Serving and Preserving the Homemade Pumpkin Bread
Cooling and Storing the Baked Loaf
Once your pumpkin-shaped bread has fully cooled, transfer it to a wire rack to prevent condensation buildup. Allow it to cool completely before slicing or serving. To keep your bread fresh and moist, store it in a bread box or in a loosely closed paper bag at room temperature.
If you are impatient and slice into it before it has a chance to cool down, you risk presenting a dense crumb, and nobody wants a dense crumb! So be patient, as good things come to those who wait! Besides, the wait is well worth the taste of the perfect soft crumb that will make your bread perfect.
Serving Suggestions and Accompaniments
Serve your homemade pumpkin-shaped sourdough bread as a centerpiece at a fall gathering or as a delightful addition to your everyday meals. It pairs wonderfully with pumpkin soup, cheese platters, or simply slathered with butter. Get creative and enjoy it any way you like!
Preserving the Freshness of the Bread
To extend the shelf life of your pumpkin-shaped bread, you can freeze it once it has cooled completely. Slice it before freezing and place parchment paper between the slices to prevent sticking. Whenever you are ready to enjoy a slice, thaw it at room temperature or lightly toast it for a warm and comforting treat.
Check Out My Good Friend’s Tutorial
Head on over to check out a great tutorial over at my good friend’s blog at Homestead and Chill where they have beautiful photos showcasing their gorgeous pumpkin-shaped sourdough bread. However, their recipe is not infused with pumpkin flavor, but it sure is a beautiful pumpkin-shaped loaf of bread!
Conclusion
In conclusion, mastering the art of making the perfect pumpkin-shaped sourdough bread from scratch is a gratifying experience that allows you to unleash your creativity in the kitchen. From gathering the ingredients to shaping and baking the loaf, each step in the process contributes to the final masterpiece.
With this gorgeous pumpkin-shaped sourdough bread, you really cannot go wrong when gifting it as a hostess gift or displaying it on your charcuterie board for the fall season. Not only does it showcase a gorgeous fall display, but this bread is packed with the flavors of fall with the infused pumpkin puree and pumpkin pie spices for that warm autumn taste that is sure to put a warm spot in your and your family’s hearts.
With the knowledge and techniques shared in this article, you can confidently embark on your bread-making journey and create a loaf that not only tastes delicious but also captures the essence of the season. Whether you’re planning to impress guests at a gathering or simply indulge in a homemade treat, this pumpkin-shaped sourdough bread will be the star of the table. So go ahead, roll up your sleeves, and enjoy the process of creating a bread that is as delightful to make as it is to savor.
Resources: Here are some helpful resources for further information.
- How to Make Pumpkin Shaped Sourdough Bread – By Amy Bakes Bread (These are so adorable!)
- How to Make Pumpkin Shaped Sourdough Bread Loaf – By Homestead and Chill
- Pumpkin Shaped Bread – By Country Roads Sourdough
Frequently Asked Questions
1. Can I use canned pumpkin puree for this recipe?
Yes, you can use canned pumpkin puree for convenience. However, make sure to choose 100% pure pumpkin puree without any added spices or sugar. Alternatively, you can make your own pumpkin puree by roasting and blending fresh pumpkin.
2. How long does it take to make the sourdough starter?
The time required to make a sourdough starter can vary depending on various factors such as temperature and hydration. Generally, it can take anywhere from 5 to 10 days to develop a robust starter. Patience is key during this process as the natural fermentation takes time to establish a stable and flavorful starter.
3. Can I customize the spices in the bread?
Absolutely! While the recipe provides a basic outline, you can customize the spices according to your preferences. Traditional pumpkin pie spices like cinnamon, nutmeg, ginger, and cloves work well, but feel free to experiment with other flavors to create a unique blend that suits your taste.
4. How should I store the baked pumpkin-shaped sourdough bread?
To maintain freshness, store the baked bread in a paper bag or wrap it loosely in a clean kitchen towel. Avoid storing it in a plastic bag as it can make the crust soggy. Keep the bread at room temperature for up to 2 days. If you want to prolong its shelf life, slice the bread and store it in an airtight container in the refrigerator for up to a week. It can also be frozen for up to 3 months, but make sure to wrap it tightly to prevent freezer burn.
Pumpkin-Shaped Sourdough Bread Recipe
Equipment
- 1 large mixing bowl
- 1 small Dutch oven
Ingredients
- ½ cup active sourdough starter
- 1 cup buttermilk
- 1 tbsp salt
- 1 tbsp sugar
- 1 tbsp pumpkin pie spice
- ½ cup pumpkin puree
- 3 ½ cups all-purpose flour
Instructions
Combining the Ingredients
- In a large bowl, mix your flour, water, sourdough starter, salt, and any spices you'd like to incorporate until they come together into a shaggy mass.
Autolyse Method
- Allow the dough to rest for a while to encourage gluten development. Cover it and let it sit for 30 minutes to an hour before proceeding to the next step.
Incorporating the Pumpkin Puree
- Add the pumpkin puree to the dough and gently fold it in until fully incorporated. Be careful not to overmix, as you don't want to deflate the dough.
Kneading Techniques for Gluten Development
- Use the stretch and fold method to develop the gluten in the dough. This will give your bread structure and a delightful chewy texture.
Bulk Fermenting Overnight
- After a series of stretching and folding techniques, it is time to put the dough away for the bulk fermentation process. Cover the dough with plastic wrap and place it in a warm area for 8 to 12 hours.
Shaping the Pumpkin Loaf
- To create the perfect pumpkin-shaped sourdough bread, it's essential to start with well-fermented dough that is ready to be proofed.
Using 100% Cotton String for Baking
- It is important to use only 100% cotton string for baking to prevent any particles from the string from getting stuck in the dough.
Preparing the Strings
- Cut 8 pieces of string long enough to wrap around your dough. Tie all of the 8 pieces of string together in a knot at one end.
- Spread the string out on a prepared baking pan, you can use parchment paper if you desire. Spread out all of the pieces evenly leaving the knot in the center of the baking pan. I am using my round Dutch oven for this step. Having the string prepared with the knot in the middle and the strings evenly spaced out, will help prepare you for the next step.
Flipping the Dough Onto the Prepared String
- Carefully scrape the dough out of the bowl and flip it onto the tied knot in the middle of your baking pan.
Tying the Strings to the Dough to Create a Pumpkin Shape
- Gather the ends opposite from each other and tie them together in the center at the top of the dough. Do this until all 8 pieces of string have been tied together at the top. Cut off any remaining string.
Proofing the Pumpkin-Shaped Sourdough Bread
- After shaping your bread, it's crucial to give it a final proofing to allow for proper fermentation and rise. Now that your dough has been placed on a baking pan lined with parchment paper, cover it loosely with a clean kitchen towel or plastic wrap. Let it proof at room temperature until it has visibly increased in size. This can take anywhere from 1 to 2 hours, depending on the temperature and humidity of your kitchen.
Determining the Ideal Proofing Time
- To determine if your pumpkin-shaped bread is ready for the oven, gently press the dough with your fingertip. If the indentation slowly fills back in, it is adequately proofed. If it bounces back quickly, it needs more time to proof. Be patient and allow the dough to rise fully for a light and airy texture.
Adding Details for a Realistic Appearance: Scoring the Loaf
- To add more realism to your pumpkin-shaped sourdough bread, use a paring knife or a dough scraper to create vertical lines on the sides of the loaf. These lines will mimic the natural ridges found on a pumpkin. Be creative and experiment with different patterns to achieve your desired look. Remember, imperfections only add to the charm!
- Just before baking, score your pumpkin-shaped bread with a sharp knife or a bread lame. This helps the dough expand evenly during baking, creating a beautiful shape and texture. For a pumpkin-like effect, you can make a crisscross pattern on the top of the loaf, resembling the lines typically found on the surface of a pumpkin.
Baking Temperature and Time: Pumpkin-Shaped Sourdough Bread
- Preheat your oven to around 450°F (230°C) with a baking stone or a baking tray inside. Once fully heated, carefully transfer your proofed pumpkin-shaped bread onto the hot surface. Bake it for approximately 40-45 minutes or until it develops a golden brown crust. The internal temperature should reach around 200°F (93°C) to ensure the bread is fully cooked.
Creating a Pumpkin Stem
- To complete the pumpkin look, create a stem for your sourdough bread. You can use a small piece of cinnamon stick. Attach it to the top center of the loaf after baking, gently pressing it down to secure it in place. This will give your bread an authentic pumpkin appearance.
Dusting with Flour for a Rustic Touch
- For a more rustic look, lightly dust your pumpkin-shaped bread with flour before serving. This will lend it an earthy and artisanal charm, reminiscent of a traditional farmhouse loaf. It's the perfect finishing touch to give your bread an extra dose of character and texture.
Cooling and Storing the Baked Loaf
- Once your pumpkin-shaped bread has fully cooled, transfer it to a wire rack to prevent condensation buildup. Allow it to cool completely before slicing or serving. To keep your bread fresh and moist, store it in a bread box or in a loosely closed paper bag at room temperature.
Summary
I hope I have inspired you to bake your very own bread loaves to enjoy and share with your friends and family
If you were encouraged by this post, I invite you to check out my FREE Printables Page for fun free printables, planners, and charts.
ENTER MY FREE Printables Page HERE
Here are some more of my bread-making inspiration posts to check out!
How to Make S’mores Quick Bread
How to Make Jelly Donut Quick Bread
Lemon Blueberry: How to Make Lemon Blueberry Sourdough Focaccia
How to Make Sourdough Lemon Supreme Quick Bread
Lemon Supreme: How to Make Sourdough Lemon Supreme Quick Bread
How to Make Sourdough Strawberry Cheesecake Muffins
How to Make Chai-Spiced Sourdough Banana Bread
The Best Old Fashioned Sourdough Banana Muffins
How to Make Honey Sourdough Bread
Blueberry: How to Make Lemon Blueberry Sourdough Quick Bread
Pizza: How to Make Pizza Sourdough Focaccia
Carrot Cake: How to Make Carrot Cake Sourdough Focaccia
Easy and Delicious Hershey’s Kisses Sourdough Bread
How to Make Amish Whoopie Pies!
Lazy Cinnamon Rolls: How to Make Easy Cinnamon Rolls the Lazy Way!
Lembas Bread: How to Make Elven Lembas Bread: A Taste of Rivendell
Gnome Bread: How to Make a Sourdough Gnome Bread
How to Make Sourdough Strawberry Cheesecake Muffins
The Best Hoagie Buns Recipe Made From Scratch!
Pumpkin: How to Make Chocolate Chip Pumpkin Bread
More Recipes!
Sweet Potato Bread: How to Make Sweet Potato Bread
Chocolate Chip Cookies: How to Make Chocolate Chip Cookie Bread
Carrot Cake Quick Bread: How to Make Carrot Cake Quick Bread
How to Make Strawberries and Cream Sourdough Bread
How to Make S’mores Sourdough Bread
July 4th Bread: How to Make a Firecracker Marble Bread Braid
Artisan Bread: How to Make Artisan Bread
Challah Bread: How to Make a 6 Braided Challah Bread
Sweet Bread: How to Make Sweet Bread
Blessings,
The Off Grid Barefoot Girl


