There’s nothing quite like the comforting aroma of fresh-baked sourdough, and when you add a touch of honey, it takes that rustic loaf to a whole new level. This honey sourdough bread is naturally leavened, gently sweet, and perfect for everything from morning toast to hearty sandwiches. This recipe brings old-fashioned goodness straight to your kitchen!
Honey Sourdough Bread Recipe Tutorial
Why is Honey the Perfect Addition to Sourdough Bread?
Baking bread in my off-grid kitchen is always a special experience. There’s something so cozy about mixing simple ingredients with the scent of fresh sourdough filling the air. When I add honey to my sourdough recipe, it’s like giving the dough a little hug of sweetness.
Honey not only enhances the flavor but also adds moisture, resulting in a soft, tender crumb. The subtle sweetness perfectly balances the tang of the natural fermentation process in the sourdough. Plus, using local raw honey brings an earthy richness that elevates the entire loaf. If you’re craving a loaf with more complexity and a touch of sweetness, honey is the perfect ingredient to try.
This is a pinnable post. Tap or hover over any image in this post to pin to your Pinterest Boards.
Can I Make Honey Sourdough Bread if I’m a Beginner?
Absolutely! This honey sourdough bread is an ideal recipe for beginners, even if you’re just starting your sourdough journey. The process of making this bread is straightforward and doesn’t require complex techniques. You only need a few simple ingredients—active sourdough starter, honey, flour, water, and salt. The dough doesn’t require a lot of attention, aside from a few stretches and folds to build strength.
With a bit of patience during the fermentation process, you’ll end up with a delicious, rustic loaf. And if you’re a seasoned baker, this recipe offers a lovely twist on the traditional sourdough, giving you a flavorful loaf that’s just as fun to make!
What Makes This Honey Sourdough Bread Special?

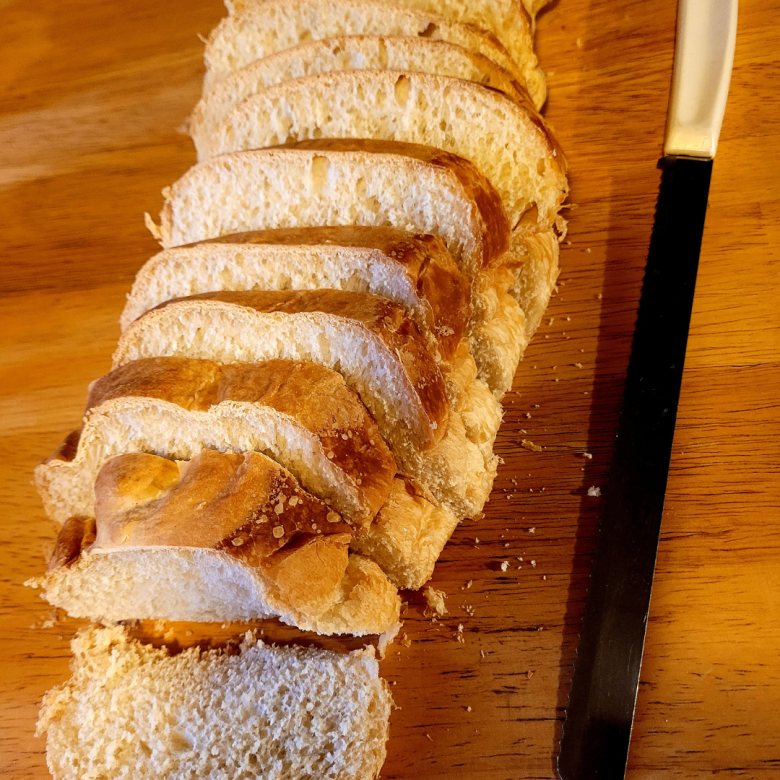
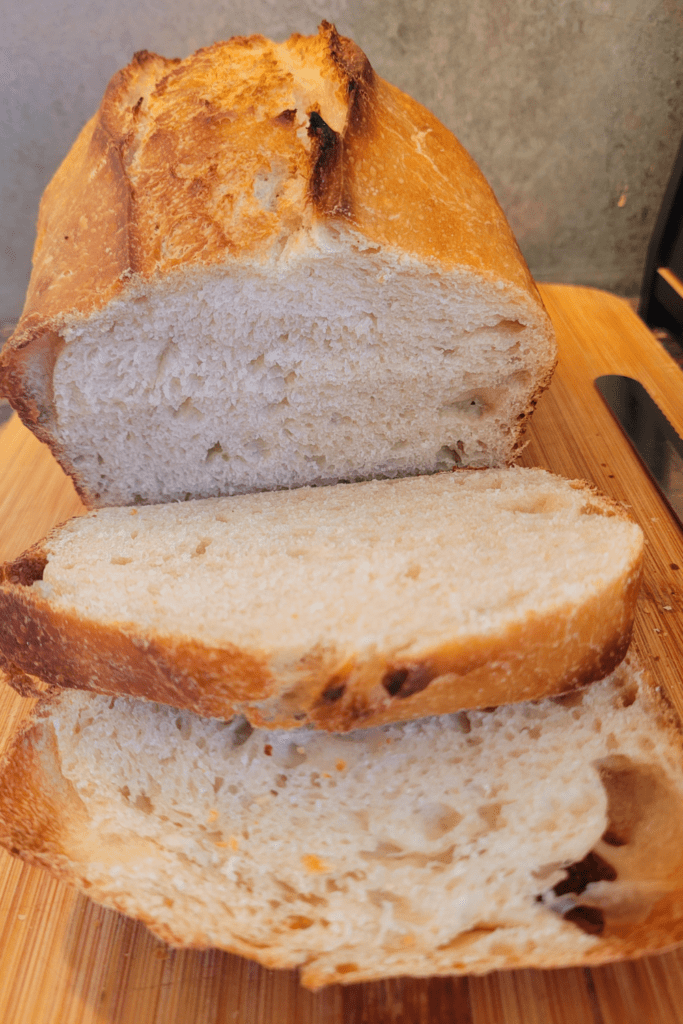
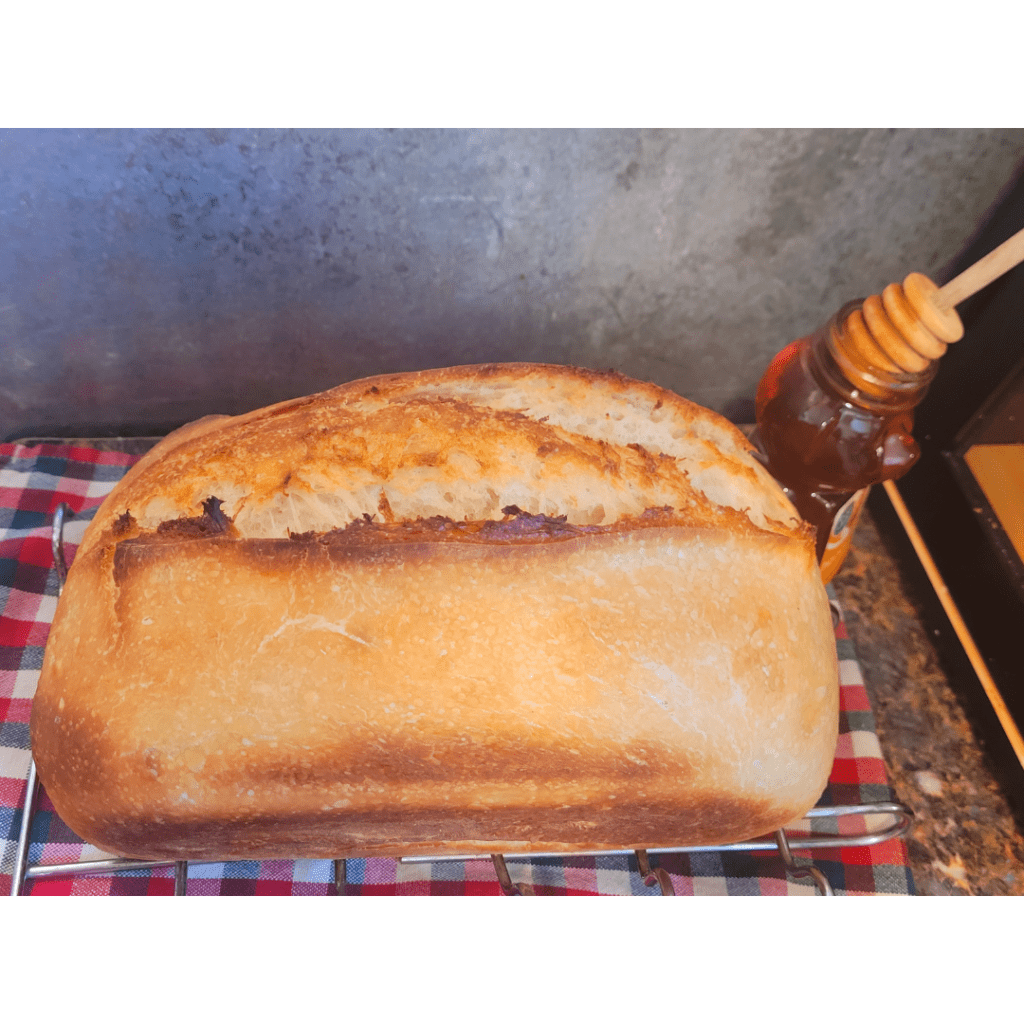
What really makes this honey sourdough bread stand out is the combination of the tangy sourdough and the natural sweetness of honey. Each bite is a balance of hearty, earthy flavors with a slight sweetness that lingers. The dough is soft, yet the crust has a beautiful golden brown finish.
Whether you enjoy it toasted with butter, as the base for your favorite sandwich, or simply on its own, this bread offers the perfect texture and flavor for any occasion. It’s a great way to bring a bit of comfort and warmth to your kitchen—especially if you’re like me and love the simple, wholesome joys of homemade bread.
Why Add Honey to Sourdough Bread?
What Are the Benefits of Adding Honey to Sourdough Bread?
When I bake with honey, it’s not just for the sweetness—though that’s a big bonus! Honey does wonders for the flavor and texture of bread. It adds a subtle, natural sweetness that perfectly complements the tanginess of sourdough. But beyond flavor, honey also helps create a softer crumb, making the bread delightfully tender.
Plus, it contributes to a longer shelf life! Thanks to honey’s natural moisture-retaining properties, your homemade bread will stay fresher for longer. I love knowing that a loaf made with honey lasts a bit longer without drying out, making it the perfect bread to enjoy throughout the week.
What Are the Nutritional Benefits of Using Natural Sweeteners Like Honey?
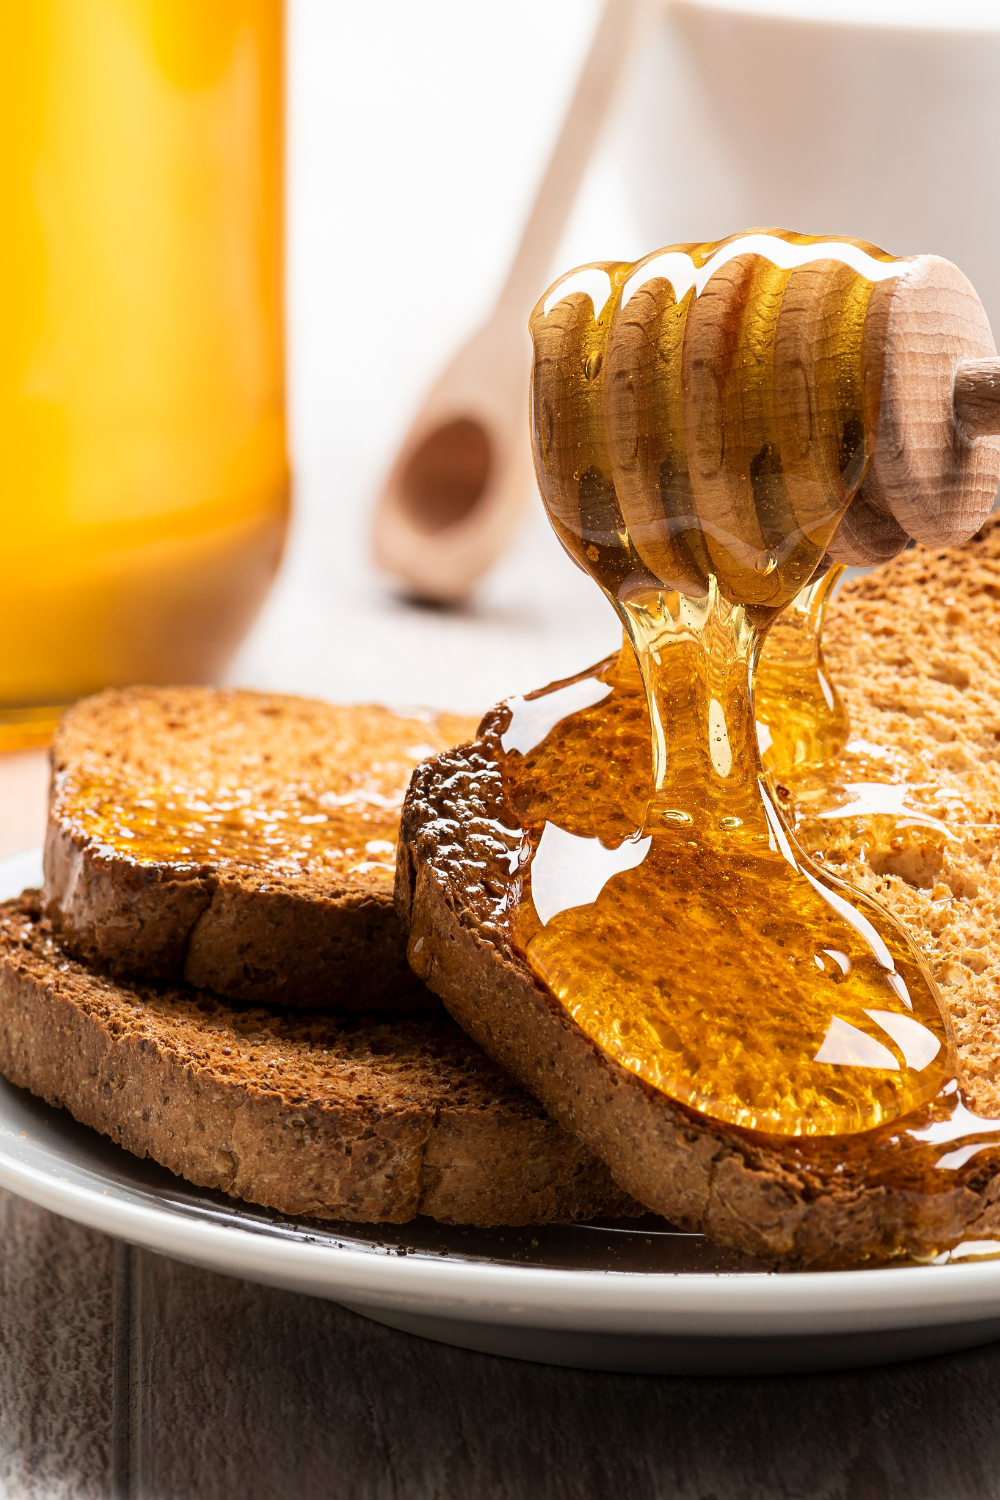
Using natural sweeteners like honey in bread gives the loaf a nutritional edge over refined sugars. Honey contains trace amounts of vitamins and minerals, such as antioxidants, which are beneficial for overall health. It’s a great source of natural energy too, thanks to its mix of glucose and fructose.
Unlike white sugar, honey is metabolized more slowly, giving you a steady release of energy without the crash. I personally love the idea of using honey to sweeten my bread, knowing that I’m adding a little something extra to my loaf that’s both tasty and nourishing.
How Do I Choose the Best Honey for My Sourdough Bread?
Choosing the right honey for your bread can make a big difference in flavor! I always opt for local, raw honey because it retains all the natural enzymes, antioxidants, and flavors that make it so special. Local honey also supports local beekeepers, and it often contains pollen from nearby flowers, which can help with allergies.
When it comes to flavor, you can choose between floral or mild honey, depending on your taste. Floral honey, like lavender or clover, offers a more aromatic, complex sweetness, while milder honey, like acacia, provides a gentler flavor that blends beautifully with the tang of sourdough. Whichever type you choose, always look for raw, unfiltered honey to get the full benefits!
Tools & Ingredients You’ll Need
Basic Tools
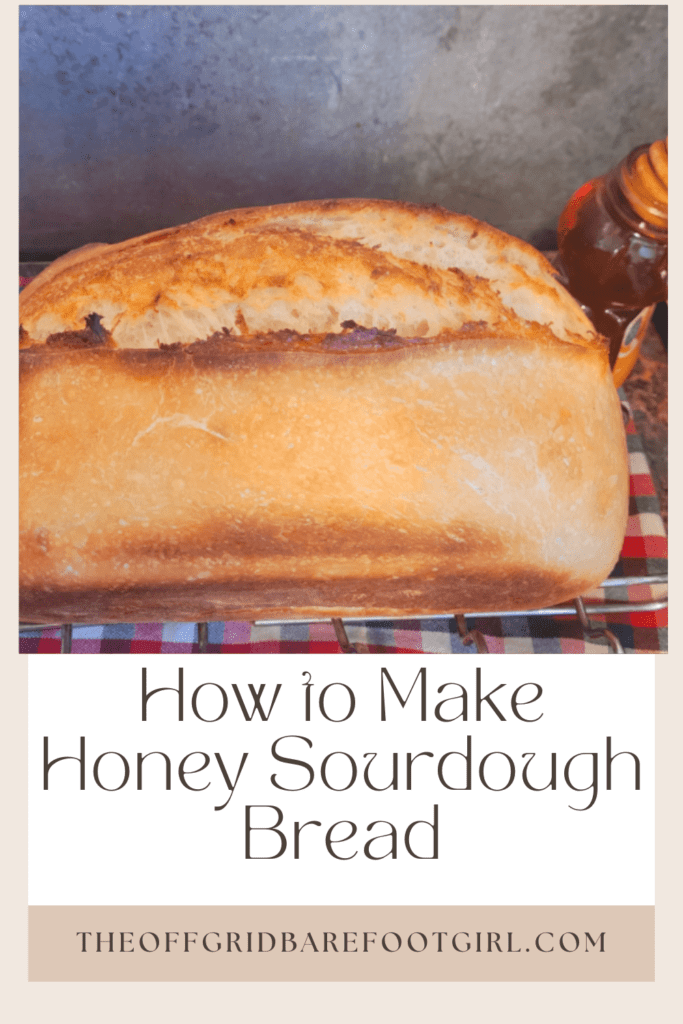
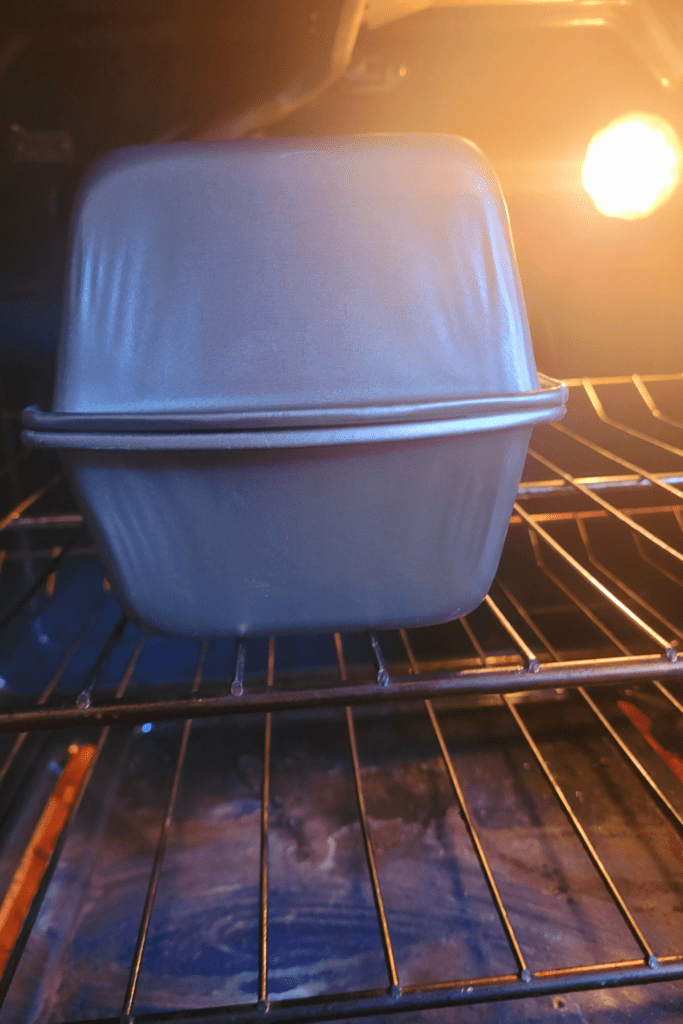
- Dutch oven or baking stone. If you want yours to look like mine in the photo, use 2 identical loaf pans. You will need to grease both pans and use one as a cover to prevent the bread from spilling over during the rise. Ask me how I know this!
- Banneton or bowl with a towel
- Dough scraper, digital scale, jar for starter, etc.
Ingredients
- Sourdough starter (active and bubbly)
- All-purpose or bread flour
- Water
- Salt
- Honey (specific amount + a note about taste adjustments)
Step-by-Step Instructions
1. Feed Your Starter (Morning or Night Before)
How Do I Get My Sourdough Starter Active and Bubbly?
Getting your sourdough starter active and bubbly is one of the most rewarding parts of baking homemade sourdough bread. It starts with a mix of equal parts flour and water, which creates the perfect environment for wild yeast and bacteria to grow. To get it going, combine 1/2 cup of flour and 1/4 cup of water in a jar, stirring until you have a thick, sticky paste that resembles pancake batter.
Over the next few days, feed your starter daily by discarding half of it and adding fresh flour and water in the same ratio. Make sure to keep it in a warm spot—around 70°F is perfect. After a few days of consistent feeding, you’ll start seeing bubbles and the starter will begin to smell pleasantly sour. This is when you’ll know it’s on its way to being ready for baking!
How Do I Know When My Sourdough Starter Is Ready to Use?
It’s important to make sure your sourdough starter is fully active before using it in your bread recipe. The best way to tell is by performing the “float test.” Take a small spoonful of your starter and drop it into a glass of water. If it floats, it’s ready to use! The bubbles inside the starter indicate that it’s full of active yeast, which means it will work to help your dough rise.
Another sign that your starter is ready is its doubling in size within 4-6 hours after feeding. It should have a pleasant, slightly tangy aroma, not overly sour or unpleasant. Trust me, once you see it bubbling and floating, you’ll feel like a sourdough pro!
2. Mix the Dough
How Do I Combine Flour, Water, Starter, and Honey for My Sourdough Dough?
To start making your honey sourdough bread, begin by combining your ingredients in a large mixing bowl.
- First, add 1 ½ cups of warm water and ½ cup of your active sourdough starter.
- Then, stir in 1 ½ tablespoons of honey. The honey will dissolve into the warm water, creating a sweet base that complements the tang of the sourdough.
- Next, slowly incorporate 4 cups of all-purpose flour, mixing until there are no dry spots left.
- The dough will be somewhat shaggy and sticky at first, but that’s perfectly fine!
This combination of ingredients forms the base for your bread, and it’s where the magic of fermentation begins to happen.
Why Is It Important to Let the Dough Rest for Autolyse?
After mixing the dough, it’s important to let it rest during the autolyse phase. Autolyse is a French baking technique where you allow the flour and water to rest together for 30-45 minutes before adding the salt. This short resting period helps hydrate the flour fully and allows the gluten to start developing naturally.
When I let the dough rest, I notice that it becomes easier to handle, with a softer and more elastic texture. The dough will also start to feel slightly less sticky after this rest, which makes the next steps—stretching, folding, and shaping—much smoother. This is a simple but crucial step that gives your sourdough bread the perfect crumb and texture.
Why Do I Add Salt After the Autolyse Rest?
After the dough has rested and you’ve allowed the flour and water to hydrate, it’s time to add the salt. I always add salt last, because if you add it too early, it can interfere with the gluten development process. Salt is a powerful ingredient that strengthens the dough, but if mixed in too soon, it can hinder the starter’s ability to ferment properly.
Sprinkle 1 ½ teaspoons of salt over the dough and mix it in well. The dough will feel a bit firmer at this point, and you’ll notice that the salt helps balance the sweetness of the honey. This step is crucial for achieving a well-seasoned, flavorful loaf with the right texture and rise.
3. Stretch and Fold
Why Should I Perform Stretch and Folds Every 30 Minutes for a Few Hours?
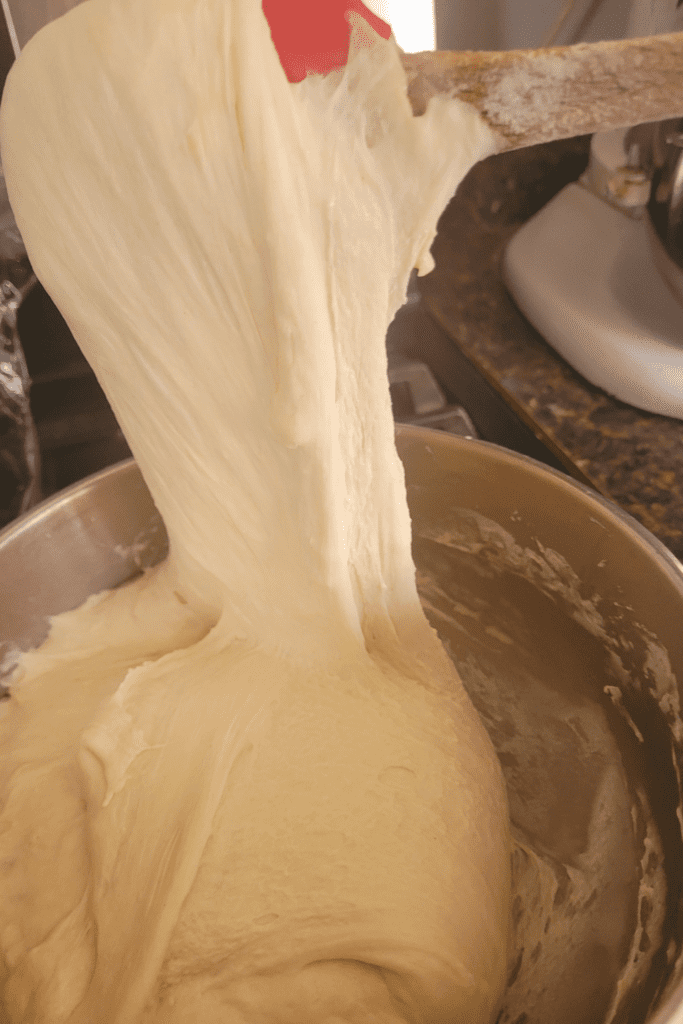
One of the key steps in making honey sourdough bread is the stretch and fold technique. Instead of kneading the dough as you might with traditional bread recipes, I recommend performing stretch and folds every 30 minutes for about 2 hours. This method helps develop the dough’s structure without overworking it.
To do this, wet your hands slightly, grab a portion of the dough, and stretch it up before folding it back over the rest of the dough. Repeat this process around the bowl, turning the dough as you go. Over the course of several sets, you’ll notice the dough becoming stronger, smoother, and more elastic. This gentle, hands-off technique helps create the perfect texture for your bread, with a nice open crumb.
How Do Stretch and Folds Build Dough Strength Without Kneading?
What’s great about stretch and folds is that they allow the dough to build strength gradually, which is key for achieving that wonderful chewy texture in sourdough bread. Instead of kneading the dough for a long period, which can sometimes make it dense, the stretch and fold method lets the gluten develop slowly, making it more resilient.
Each time you stretch and fold the dough, you’re aligning the gluten strands, helping them form a strong network that will trap air and allow the bread to rise. I love how this method gives my dough a light yet sturdy structure without the need for heavy kneading. By the time you’re finished, your dough will be well-developed and ready for the next steps, with a soft, airy texture that’s perfect for sourdough bread.
4. Bulk Fermentation
How Long Should I Let My Sourdough Dough Rise, and What Are the Visual Cues?
After performing the stretch and folds, it’s time to let your dough rise. I typically let my dough rise until it has doubled in size, which usually takes between 4 to 6 hours, depending on the temperature of your kitchen. During this time, you’ll see the dough begin to expand and puff up. A great visual cue is when the dough becomes visibly inflated and slightly domed.
If you gently poke the dough with your finger, it should leave an indentation that slowly springs back, but not completely. This means the dough is filled with air bubbles and is ready for the next step. Keep an eye on it, as warmer temperatures can speed up the rise, while cooler temperatures may slow it down. Patience is key here, as a well-risen dough will give you the perfect texture and flavor in your final loaf.
Can I Add Mix-Ins Like Oats or Seeds for Extra Texture?
If you’re looking to add a bit more texture and flavor to your honey sourdough bread, I absolutely recommend mixing in some oats, seeds, or even nuts. These additions not only enhance the bread’s texture but also give it a unique twist. You can add about 1/2 cup of rolled oats or a combination of sunflower seeds, pumpkin seeds, or even flaxseeds into your dough once it has completed the stretch and fold process.
Just gently mix them in before you let the dough rise. The oats will add a hearty, rustic feel to your bread, while the seeds will give it a crunchy bite. I love experimenting with different mix-ins, and these small touches really make the bread special. Just remember to adjust the hydration slightly if you add a lot of dry ingredients, as oats and seeds can absorb extra moisture.
5. Shape and Cold Proof
How Can I Shape My Sourdough Dough Lightly as a Beginner?
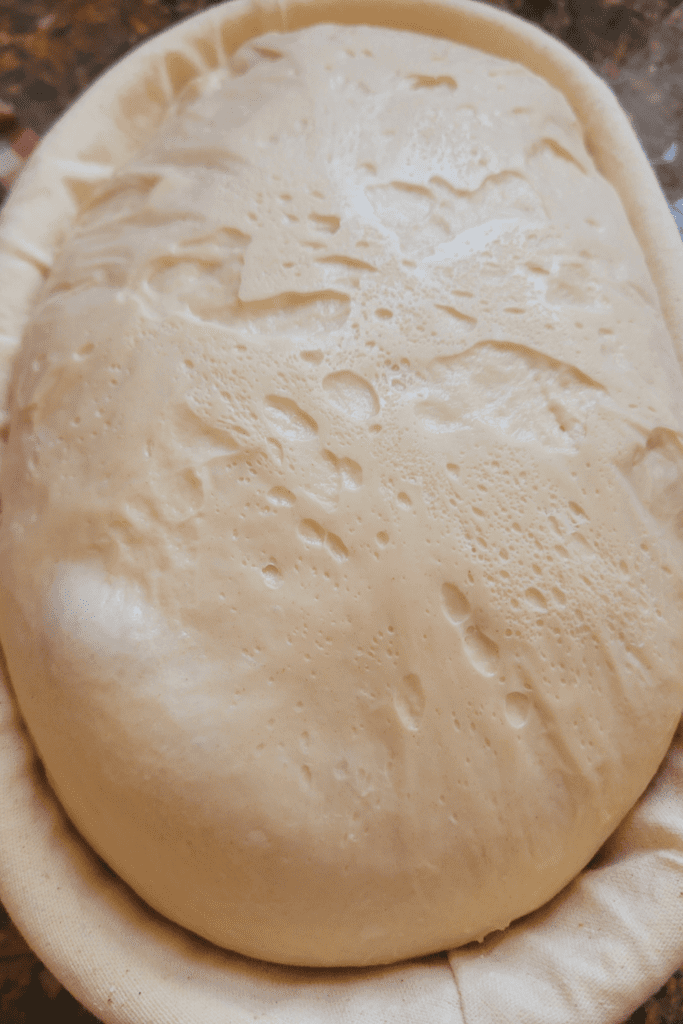
Shaping your sourdough dough doesn’t have to be intimidating, especially if you’re new to baking! The key is to be gentle. After the dough has completed its rise and you’re ready to shape it, turn it out onto a lightly floured surface. Instead of aggressively kneading it, use your hands to gently fold the dough in from the edges towards the center, creating a round or oval shape.
This process is called “pre-shaping.” Once it’s roughly shaped, let it rest for about 20 minutes to allow the dough to relax. Then, you can shape it into a final loaf by pulling the dough towards the center again, but this time giving it a little more tension on the surface. I always find that a gentle touch helps keep the dough airy and light. The more you practice, the easier it gets, and soon you’ll be shaping your bread like a pro!
Why Should I Refrigerate My Sourdough Dough Overnight or Up to 24 Hours?
Refrigerating your shaped dough overnight or for up to 24 hours is an optional but highly recommended step in sourdough bread-making. This slow, cold fermentation allows the flavors of your bread to deepen and develop, creating a more complex, tangy taste. I love letting my dough rest in the fridge because it also helps with the dough’s structure, making it easier to score and bake the next day.
When you refrigerate the dough, cover it with a clean towel or plastic wrap to prevent it from drying out. The dough will rise slowly, continuing to develop its texture and flavor without over-proofing. I find that giving the dough this extra time in the fridge really enhances the final loaf, leaving me with a beautifully airy crumb and a rich, well-rounded flavor.
6. Baking the Bread
How Do I Preheat My Dutch Oven for Sourdough Baking?
Preheating your Dutch oven is a crucial step in baking perfect honey sourdough bread. I recommend placing your Dutch oven in the oven while it’s preheating to 450°F. The Dutch oven needs to be thoroughly heated to create the steamy environment that helps the bread rise and form a beautiful crust. This process usually takes about 30 minutes, so I like to set a timer so I don’t forget!
The hot Dutch oven traps steam around the dough as it bakes, giving the bread that signature crispy crust and soft, airy interior. Once the oven reaches the desired temperature and the Dutch oven is hot, you can carefully transfer your dough into the pot for the baking process. This extra step of preheating ensures that your bread bakes evenly and gets the perfect texture.
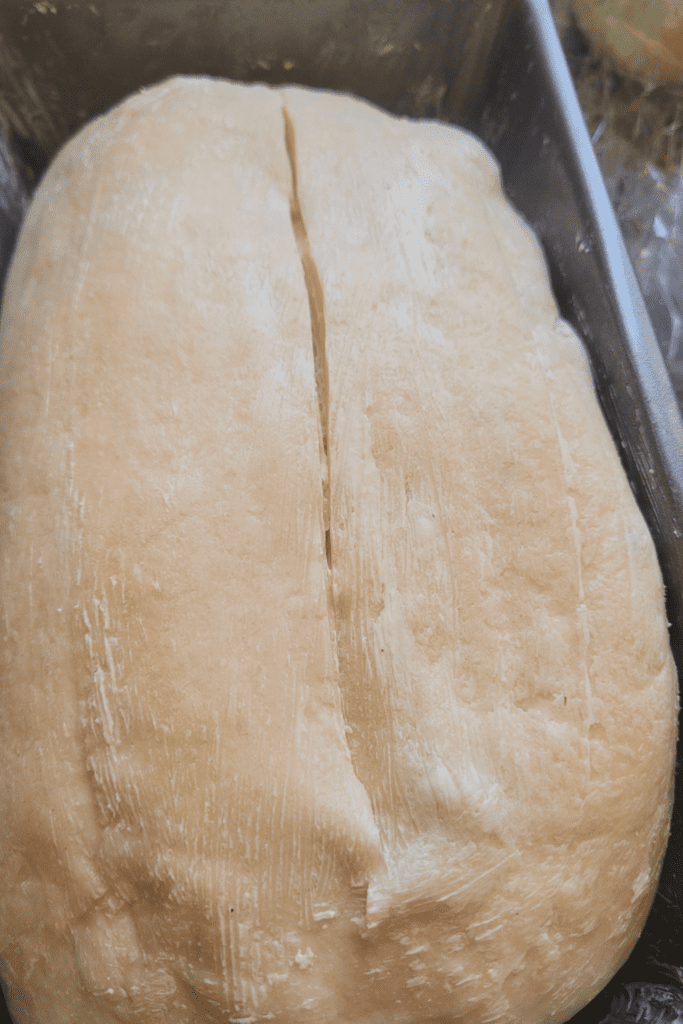
For a loaf-shaped bread like mine, place your dough in the loaf pan and add another greased loaf pan as a lid. Both pans need to be greased to prevent sticking. You will remove the lid after 15 minutes of baking and after the rise has taken place. This will prevent the bread from spilling over during the rising process. Again, ask me know I know this!
I did one long score down the middle for my honey sourdough bread. This helped expand the bread during the first 20-minute rise which is why having a supported loaf pan on top as a lid is important.
How Should I Bake My Sourdough Bread at 450°F?
Baking your sourdough bread at 450°F creates the ideal conditions for a beautifully crisp crust and soft, chewy crumb. After preheating the Dutch oven, carefully remove it from the oven, and gently place your shaped dough inside. Cover the Dutch oven with its lid and bake it for 20 minutes. The steam trapped inside the pot helps the bread rise and achieve a golden-brown, rustic crust.
After 20 minutes, remove the lid to allow the bread to bake uncovered for another 20-25 minutes. This step helps the crust get even more golden and crunchy. Keep an eye on the bread as it bakes; you’ll know it’s done when the crust is deep brown, and it sounds hollow when tapped on the bottom. This simple two-phase baking process ensures that your sourdough loaf has the perfect balance of softness inside and a crisp, crackly exterior.
Why Should I Let My Sourdough Cool for at Least an Hour?

Once your bread is baked to perfection, it’s important to let it cool before slicing. I know it’s tempting to cut into that fresh, hot loaf, but I always remind myself to resist the urge. Letting your honey sourdough bread cool on a wire rack for at least one hour is essential for the best texture and flavor. As the bread cools, the interior continues to set, and the moisture inside redistributes evenly.
If you cut into it too soon, the crumb may be gummy or overly soft. Cooling the bread also allows the crust to firm up, making it easier to slice without compressing the bread. I find that after this resting period, the bread is not only easier to slice but also has the perfect combination of chewy interior and crunchy crust. Plus, the waiting time makes the first bite even more satisfying!
Tips for the Best Honey Sourdough
Why Should I Use Filtered Water for Sourdough?
When making sourdough bread, the quality of water you use can make a big difference. I always use filtered water in my sourdough recipes to ensure that no chlorine or other chemicals are affecting the natural fermentation process. Tap water often contains chlorine or chloramine, which can kill or slow down the wild yeast in your sourdough starter.
If you don’t have a filter, letting water sit for 24 hours before using it can help dissipate some of the chlorine. Using clean, filtered water allows the natural flavors and the yeast to thrive, helping you bake a better loaf with the right texture and rise.
Can I Adjust the Amount of Honey for Sweeter or More Savory Loaves?
One of the things I love about making honey sourdough bread is how customizable it is. If you want a sweeter loaf, you can easily adjust the amount of honey you use. I typically use 1 ½ tablespoons, but if you’re looking for a more pronounced sweetness, you can increase it to 2 tablespoons. On the flip side, if you prefer a more savory loaf with just a hint of honey, feel free to reduce the amount of honey.
The beauty of this recipe is that you have the flexibility to create the flavor profile that suits you best. A sweeter loaf is perfect for toast with jam or a cozy breakfast, while a more savory version makes a great accompaniment to soups or hearty sandwiches. It’s all about finding that balance that works for you!
How Can I Make Honey Sourdough Bread My Own?
One of the best things about baking your own bread is the opportunity to get creative and make it your own. There are so many ways you can tweak this honey sourdough recipe! For example, if you want to experiment with different textures, try swapping out some of the all-purpose flour for whole wheat or spelt flour to add more depth and nuttiness.
If you enjoy a little extra honey flavor, drizzle some honey on the crust right after baking while it’s still warm; this will add a gorgeous glossy finish and a sweet aroma. You can also mix in oats, seeds, or herbs to give the bread a unique twist. The possibilities are endless—don’t be afraid to experiment and find your perfect version of honey sourdough bread that suits your taste and lifestyle!
How to Store & Enjoy Your Honey Sourdough
How Do I Store Honey Sourdough Bread on the Counter vs. Freezing It?
Storing your honey sourdough bread properly is key to maintaining its freshness and flavor. If you’re planning to eat it within a few days, storing it on the counter is the way to go. Simply place it in a bread box, or a cloth bag, or wrap it in a clean kitchen towel. This keeps the crust crispy while helping the bread stay soft on the inside. Just be sure to avoid plastic bags as they can trap moisture, which can make the bread soggy.
If you’re not going to finish the loaf within a few days, freezing it is a great option. I love slicing the bread first, then wrapping the slices tightly in plastic wrap or foil, and placing them in a freezer bag. This way, I can pull out just what I need without having to defrost the whole loaf. Frozen bread will stay fresh for up to three months, so you’ll always have homemade sourdough on hand!
What Are the Best Ways to Serve Honey Sourdough Bread?
Honey sourdough bread is incredibly versatile, and there are so many ways to serve it! For a simple and cozy option, I love to toast a slice and spread a generous pat of butter on top. The buttery goodness melts into the warm bread, making it the perfect breakfast or snack. If you’re looking to elevate it, try topping your toasted honey sourdough with a dollop of goat cheese.
The tangy, creamy cheese pairs wonderfully with the subtle sweetness of the honey. For a savory twist, you can add avocado, herbs, or even some smoked salmon for a light lunch or appetizer. Honey sourdough also makes a fantastic base for sandwiches, whether you’re layering it with veggies or making a classic turkey and cheese. The possibilities are endless—get creative and serve it however your heart desires!
My Favorite Way to Eat Honey Sourdough Bread
My favorite way to enjoy honey sourdough bread is by simply toasting it, spreading a thin layer of butter, and drizzling a little extra honey on top. The warmth of the bread combined with the creamy butter and the natural sweetness of the honey is a perfect treat for breakfast or as a mid-afternoon snack. I also love serving it with a small bowl of homemade jam or a bit of whipped cream cheese for a more indulgent option. It’s such a comforting, simple way to enjoy homemade bread.
Conclusion
Why Do I Love Baking Sourdough Bread at Home?
There’s just something deeply satisfying about baking sourdough bread from scratch—especially here in my cozy kitchen with the smell of honey and wild yeast wafting through the air. For me, it’s more than just making food. It’s a ritual that connects me to generations of bakers who lived simply and made do with what they had. Baking sourdough helps me slow down and appreciate the process—from feeding my starter to pulling that golden loaf from the oven.
I love knowing exactly what goes into my food, and there’s a special kind of peace that comes from creating something so nourishing with just flour, water, salt, and honey. It grounds me in a way nothing store-bought ever could. This honey sourdough in particular reminds me that sweet moments can come from the simplest ingredients.
If this honey sourdough recipe speaks to your heart (or your tastebuds!), I’d love for you to give it a try. Whether you’re a seasoned sourdough baker or just dipping your toes in for the first time, this loaf is forgiving, flavorful, and full of charm. When you do bake it, come back and let me know how it went—what tweaks you made, what you loved, and how your kitchen smelled while it was baking.
Did your family gobble it up warm with butter? Did you sneak the first slice all to yourself like I sometimes do? Leave a comment below or share your story—I’d love to hear how this simple loaf made its way into your home.
Resources: Here are some helpful resources for further information.
- Sourdough Bread: A Beginner’s Guide – By The Clever Carrot
- Easy Sourdough Bread Recipe – By Amy Bakes Bread
- Beginner’s Sourdough Bread Recipe – By Little Spoon Farm

Frequently Asked Questions
1. Can I use store-bought sourdough starter for this recipe?
Yes! If you don’t have a homemade starter, you can use a store-bought active sourdough starter. Just make sure it’s well-fed and bubbly before using it in the recipe.
2. How long does the dough need to rise during bulk fermentation?
The dough should rise at room temperature for 4–6 hours until it has doubled in size. The exact time will depend on the temperature in your kitchen, so keep an eye on it!
3. What’s the purpose of cold proofing the dough overnight?
Cold proofing enhances the flavor and texture of the bread by allowing the dough to ferment slowly. It also helps develop a better crumb and a crispier crust.
4. Can I skip the Dutch oven for baking?
While a Dutch oven creates the perfect steam for a crispy crust, you can still bake the bread on a baking sheet. If you don’t have a Dutch oven, you can cover the bread with a large baking bowl or baking dish to trap steam during the first part of baking.
Honey Sourdough Bread
Equipment
- 1 mixing bowl
- 2 Identical oaf pans
Ingredients
- ½ cup (100g) active sourdough starter
- 1 ½ cups (350g) warm water
- 1 ½ tbsp (25g) honey
- 4 cups (500g) all-purpose flour
- 1 ½ tsp (10g) salt
Instructions
Mix the Dough
- In a large bowl, mix the sourdough starter, warm water, and honey. Stir in the flour until no dry bits remain.
- Cover and let rest (autolyse) for 30–45 minutes.
Adding Salt and Doing Stretch & Folds
- Sprinkle salt over the dough and mix well.
- Perform 3–4 sets of stretch and folds every 30 minutes over 2 hours to build strength.
Bulk Fermentation
- Cover and let the dough rise at room temperature until doubled in size (about 4–6 hours, depending on room temp).
Shape the Dough
- Turn the dough out onto a lightly floured surface, gently shape it into a round or oval loaf.
- Place into a floured banneton or bowl lined with a towel.
Cold Proof
- Cover and refrigerate for 8–12 hours (or overnight) to develop flavor and structure.
Baking the Bread
- Preheat your oven to 450°F (230°C) with a Dutch oven inside.
- When ready, score the loaf and bake covered for 20 minutes, then uncovered for 20–25 minutes until golden brown.
Cool and Enjoy
- Let the bread cool completely on a wire rack before slicing.
Notes
🥖Tips:
- Raw, local honey adds the best flavor.
- Don’t skip the cold proof—it really enhances the crust and crumb.
- Store at room temp for 2–3 days, or slice and freeze.
Summary
I hope I have inspired you to bake your very own bread loaves to enjoy and share with your friends and family.
If you were encouraged by this post, I invite you to check out my FREE Printables Page for fun free printables, planners, and charts.
ENTER MY FREE Printables Page HERE
Here are some more of my bread-making inspiration posts to check out!
Blueberry: How to Make Lemon Blueberry Sourdough Quick Bread
Pizza: How to Make Pizza Sourdough Focaccia
Carrot Cake: How to Make Carrot Cake Sourdough Focaccia
Easy and Delicious Hershey’s Kisses Sourdough Bread
How to Make Amish Whoopie Pies!
Lazy Cinnamon Rolls: How to Make Easy Cinnamon Rolls the Lazy Way!
Lembas Bread: How to Make Elven Lembas Bread: A Taste of Rivendell
Gnome Bread: How to Make a Sourdough Gnome Bread
The Best Hoagie Buns Recipe Made From Scratch!
Pumpkin: How to Make Chocolate Chip Pumpkin Bread
Sweet Potato Bread: How to Make Sweet Potato Bread
Chocolate Chip Cookies: How to Make Chocolate Chip Cookie Bread
Carrot Cake Quick Bread: How to Make Carrot Cake Quick Bread
How to Make Strawberries and Cream Sourdough Bread
How to Make S’mores Sourdough Bread
July 4th Bread: How to Make a Firecracker Marble Bread Braid
Artisan Bread: How to Make Artisan Bread
Challah Bread: How to Make a 6 Braided Challah Bread
Sweet Bread: How to Make Sweet Bread
Blessings,
The Off Grid Barefoot Girl

