Learn how to make delicious sourdough peanut butter and jelly rolls that are soft, fluffy, and packed with flavor. Using tangy sourdough bread, creamy peanut butter, and your favorite jelly, these rolls are perfect for breakfast, snacks, or lunchboxes. Ideal for homestead kitchens, family-friendly meals, and anyone who loves easy, comforting baked goods.
There’s something so comforting about a warm, soft roll filled with peanut butter and jelly, and making them with sourdough bread takes them to the next level. I love how the tangy sourdough adds depth while the peanut butter and sweet jelly create a nostalgic, cozy treat. These rolls are easy to make, perfect for family breakfasts, lunchboxes, or just a little indulgence on a quiet morning at home. Peanut butter and jelly are the classic duo you cannot go wrong with!
This is a pinnable post. Tap or hover over any image in this post to pin to your Pinterest Boards.
Introduction: Exploring the Classic Combination of Peanut Butter and Jelly
Why Peanut Butter and Jelly is a Beloved Combination
Peanut butter and jelly—it’s a match made in sandwich heaven. The creamy, nutty flavor of peanut butter combined with the sweet tanginess of jelly creates a delightful taste experience that has won the hearts (and taste buds) of people of all ages. Now, to combine those flavors with sourdough? What? This just brings peanut butter and jelly to a whole new level!
Whether you’re five or fifty-five, chances are you’ve enjoyed this classic combination at some point in your life. But why is it so beloved? Well, the smoothness of the peanut butter perfectly complements the fruity, gooey consistency of the jelly, creating a satisfying contrast of textures. And let’s not forget the nostalgia factor; peanut butter and jelly sandwiches have been a lunchbox staple for generations. It’s a simple pleasure that brings comfort and joy with every bite that you can also get in rolls!
The History and Popularity of Peanut Butter and Jelly Rolls
While the classic peanut butter and jelly sandwich has been a go-to snack for years, the idea of transforming it into a roll has taken the world by storm. It’s like a jelly roll, but with a twist! The origins of these delightful treats can be traced back to the 1950s when bakers started experimenting with different ways to incorporate peanut butter and jelly into baked goods. Since then, peanut butter and jelly rolls have become a beloved dessert, perfect for parties, picnics, or simply as a scrumptious indulgence. The combination of the fluffy roll, creamy peanut butter, and fruity jelly is simply irresistible. So, if you’re looking to take your love for peanut butter and jelly to the next level, these rolls are the perfect way to satisfy your cravings.
Gathering the Ingredients: What You Need for Homemade Peanut Butter and Jelly Rolls
List of Essential Ingredients
To embark on your peanut butter and jelly roll adventure, you’ll need a few key ingredients. Here’s what you’ll need to gather:
- All-purpose flour: The foundation of the dough that will give your rolls their soft and fluffy texture.
- Sourdough starter or discard: This magical ingredient will help your dough rise to perfection.
- Sugar: A touch of sweetness to balance out the flavors.
- Salt: Just a pinch to enhance the overall taste.
- Butter: Adds richness and a hint of flavor to the dough.
- Milk: Provides moisture and helps create a tender crumb.
- Peanut butter: The star of the show, so choose your favorite brand or make your own if you’re feeling adventurous.
- Jelly or jam: Select your preferred flavor, whether it’s classic grape, strawberry, or something more fascinating.
Optional Ingredients for Customizing Your Rolls
While the classic combination is always a winner, don’t be afraid to get creative and customize your rolls with additional ingredients. Here are a few ideas to consider:
- Chocolate chips: Add a touch of decadence by incorporating some chocolatey goodness into your rolls.
- Nuts: For an extra crunch and nutty flavor, sprinkle some chopped nuts on top of the peanut butter filling.
- Cinnamon: If you’re a fan of warm and cozy flavors, a sprinkle of cinnamon will add a delightful twist.
- Honey: Drizzle a bit of honey over the filling for a touch of natural sweetness.
- Marshmallow fluff: Take your rolls to a whole new level of indulgence by swirling some marshmallow fluff into the peanut butter.
Making the Dough: Step-by-Step Instructions for Preparing the Perfect Roll
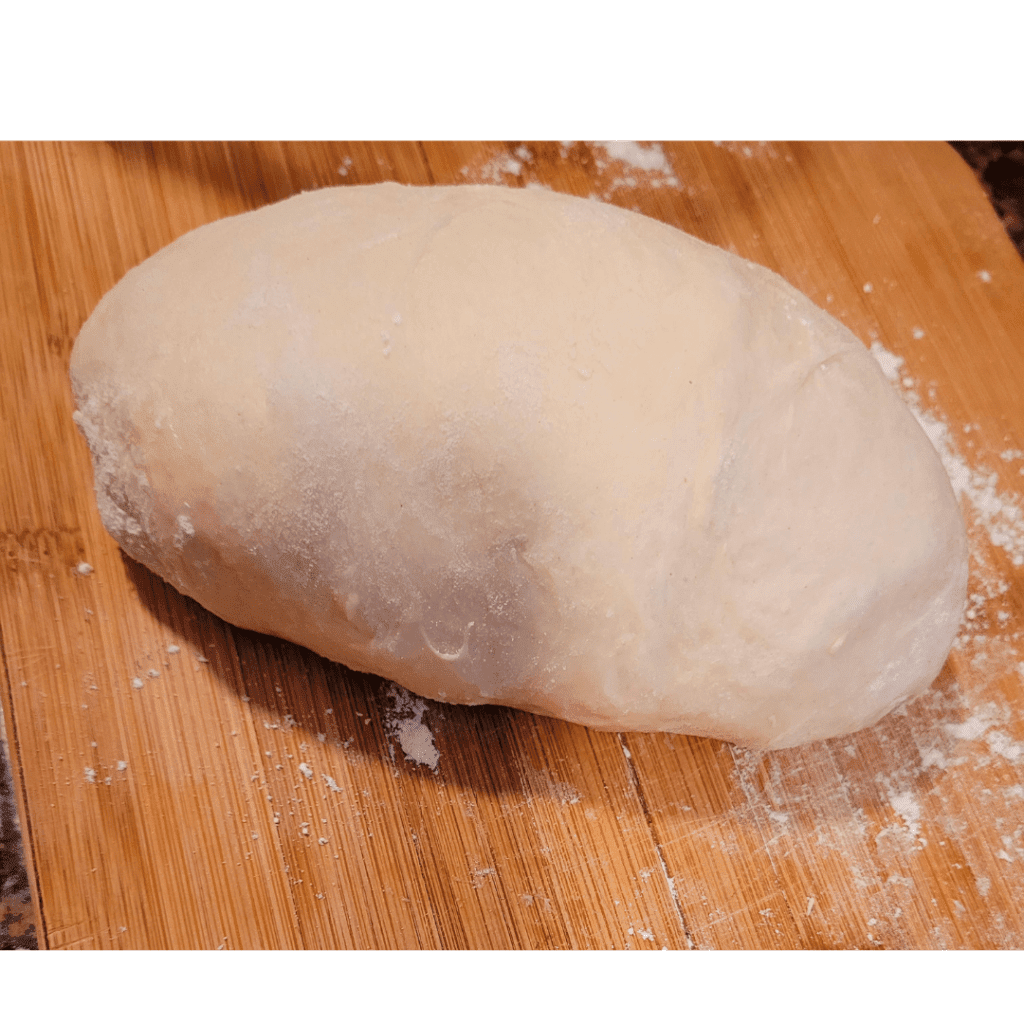
Choosing the Right Flour for the Dough
Before you dive into making the dough for your peanut butter and jelly rolls, it’s important to select the right flour. All-purpose flour is the most commonly used type, offering a good balance of protein and starch. This will help ensure your rolls have the right texture and structure. However, if you prefer a softer and more tender roll, you can also use bread flour or a combination of all-purpose flour and pastry flour.
Feeding Your Sourdough Starter
First off, you want to discard about half of it before each feed. I know it sounds cruel, but trust me on this one. However, you can use it in many discard recipes! Discarding it helps maintain a good balance of yeast and bacteria. Then, add equal parts of flour and water to the remaining starter and give it a good mix. Now comes the waiting game – let it sit at room temperature for about 6-8 hours or until it doubles in size. Usually doing this the night before is best in order to have an active dough by morning.
If you do not already have a sourdough starter, don’t worry, I have an easy recipe tutorial for you to help you get started.
The Ultimate Guide to Crafting a Perfectly Tangy Wild Sourdough Starter
Mixing and Kneading the Dough
Mix everything together until you have a shaggy dough. Then turn it out onto a lightly floured surface and knead until smooth and elastic. This usually takes about 5-7 minutes of kneading by hand or 3-4 minutes with a stand mixer fitted with a dough hook.
Allowing the Dough to Rise
Once you’ve achieved a smooth dough, place it in a greased bowl and cover it with a clean kitchen towel or plastic wrap. Let it rise in a warm, draft-free place for about 8 to 12 hours, or until it has doubled in size. This step is crucial for achieving soft, pillowy rolls that will make you crave seconds. If you mix this up in the morning before you head to work or to do your daily chores, you can have it rising all this time for the bulk fermentation process. It will be ready when you are done working!
Preparing the Peanut Butter Filling: Tips and Tricks for a Creamy and Flavorful Texture
Choosing the Right Peanut Butter
When it comes to selecting the perfect peanut butter for your rolls, it’s all about personal preference. Whether you prefer smooth or crunchy, natural or commercial, the choice is yours. Keep in mind that natural peanut butter tends to be less sweet and more flavorful, while commercial brands often have a sweeter and more consistent texture. Whichever you choose, make sure it spreads easily and complements the other flavors in the roll.
Enhancing the Flavor with Sweeteners and Spices
To enhance the flavor of your peanut butter filling, consider adding a touch of sweetness and some spices. A tablespoon or two of powdered sugar or honey can elevate the sweetness, while a pinch of cinnamon or nutmeg can add warmth and depth. Feel free to experiment and find the perfect balance of flavors that tickles your taste buds.
Techniques for Achieving a Smooth and Spreadable Filling
Nothing ruins the joy of biting into a peanut butter and jelly roll like a clumpy or uneven filling. To ensure a smooth and spreadable consistency, try warming up your peanut butter slightly before spreading it onto the dough. You can do this by gently heating it in the microwave for a few seconds or by stirring it over low heat on the stovetop. This will make it easier to spread evenly and create a luscious layer of peanut butter goodness throughout your rolls. Just make sure it is not hot when it is ready to spread onto the dough or it will melt the dough and make it soggy.
Adding the Jelly: Choosing the Right Fruit Spread and Techniques for Optimal Taste
Exploring Different Jelly and Jam Varieties
When it comes to adding jelly to your homemade peanut butter and jelly rolls, the possibilities are endless. From classic grape jelly to strawberry, raspberry, or even flavors like mango or blackberry, there’s a jelly or jam variety for every taste bud. Experiment with different flavors to find your perfect match!
Combining Flavors: Mixing and Matching Jellies
Why settle for just one flavor when you can combine them? Mixing and matching different jellies can take your peanut butter and jelly rolls to a whole new level. Try layering strawberry and blueberry jams for a burst of fruity goodness or mix grape jelly with orange marmalade for a sweet and tangy twist. Get creative and let your taste buds guide you!
Methods for Spreading Jelly Evenly on the Dough
Spreading jelly on the dough can be a bit tricky, as it tends to be sticky. To ensure an even distribution, warm up your jelly slightly to make it more spreadable. You can microwave it for a few seconds or place the jar in warm water. Use an offset spatula or the back of a spoon to gently spread the jelly, starting from the center and working your way toward the edges. This way, you’ll avoid any clumps or uneven distribution of jelly in your rolls.
Rolling and Baking: Crafting Beautiful and Golden Peanut Butter and Jelly Rolls
Rolling Out the Dough

Now that you have your dough ready, it’s time to get rolling! It should be doubled in size by now. Dust your work surface and rolling pin with flour to prevent sticking. Gently roll the dough into a rectangular shape, about a quarter-inch thick. Don’t worry about achieving perfection – a rustic look adds charm to your rolls!
Spreading the Peanut Butter Filling
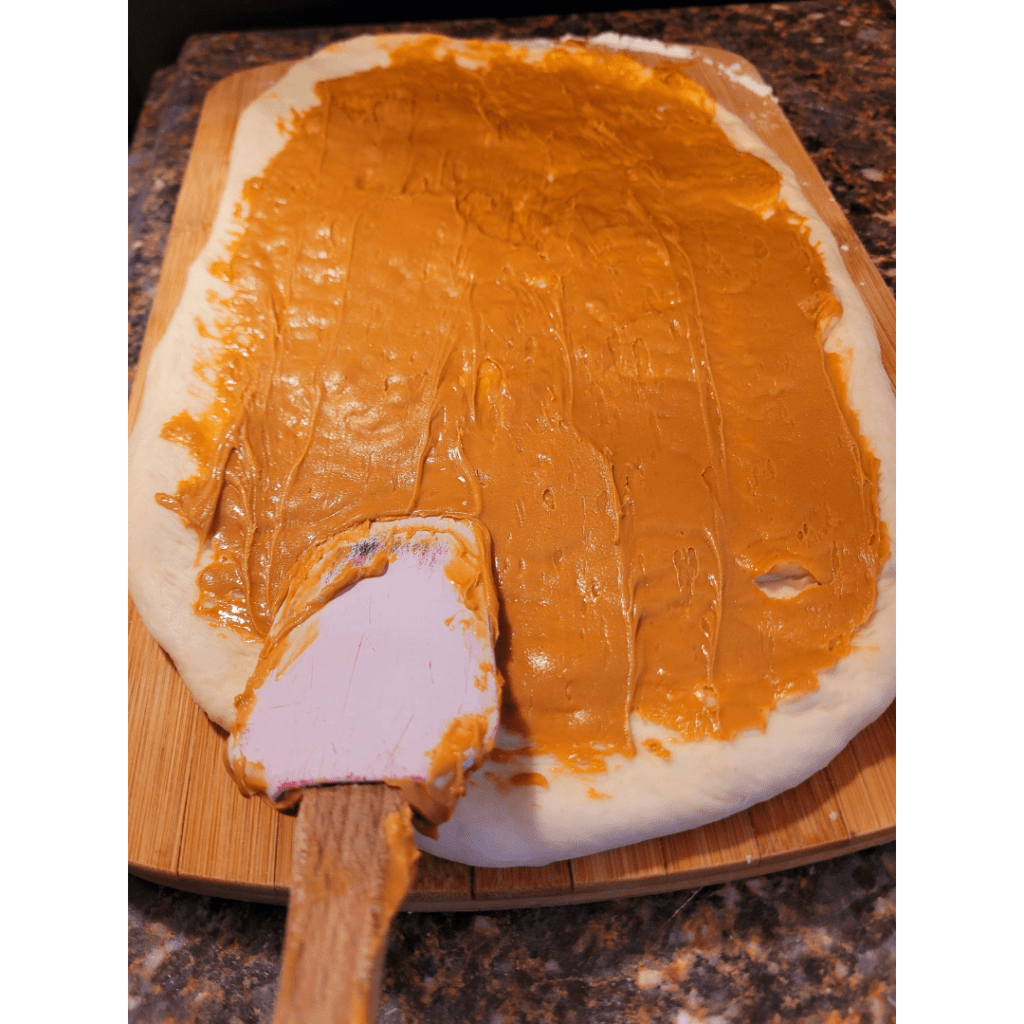
Spread a generous layer of creamy or crunchy peanut butter over the rolled-out dough. Ensure the peanut butter covers the entire surface, reaching all the corners. This will give each bite a delightful peanut-ty taste.
Layering the Jelly
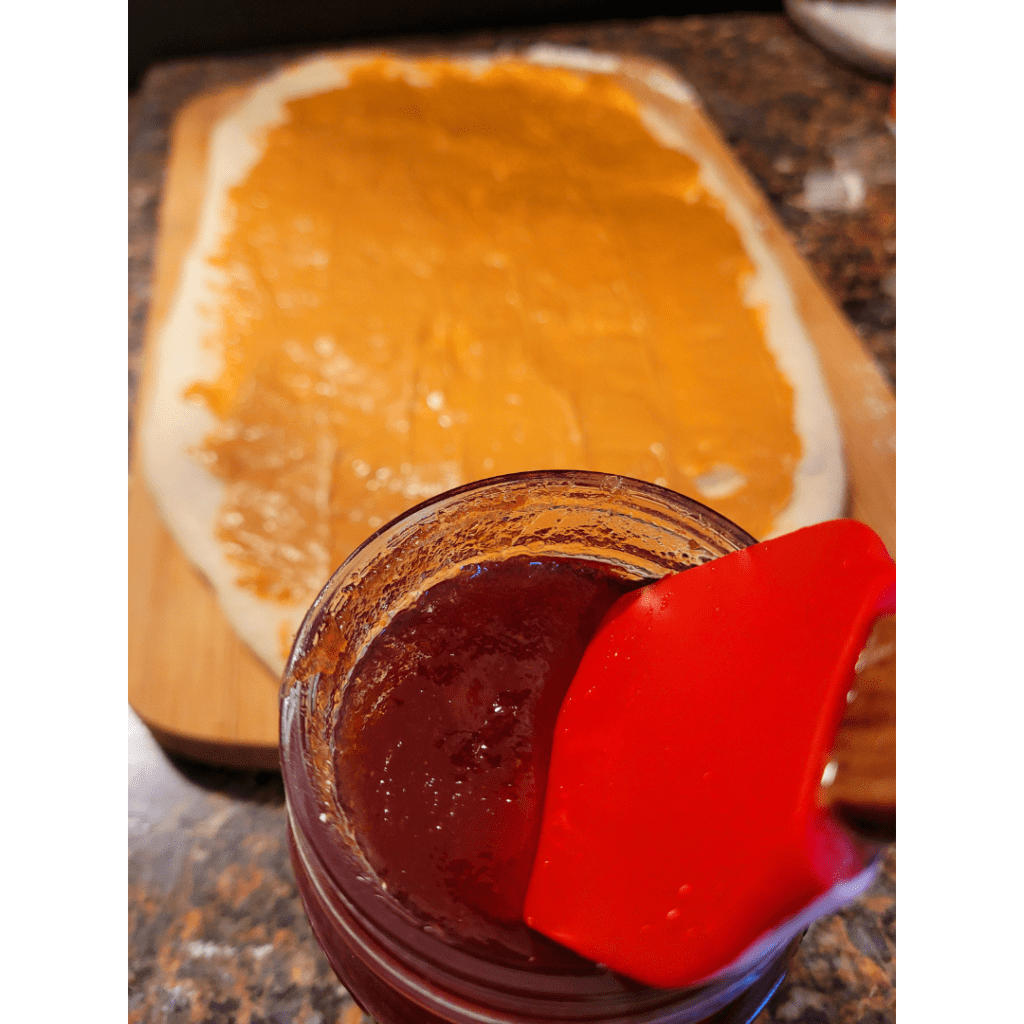
Once the peanut butter is evenly spread, it’s time to add the star of the show – the jelly. Take your evenly spread jelly and carefully spoon it over the peanut butter layer, leaving a small border around the edges. This will prevent any overflow during baking. Starting from the longer side, gently roll the dough into a tight log. Seal the edges by pressing them together with your fingers.
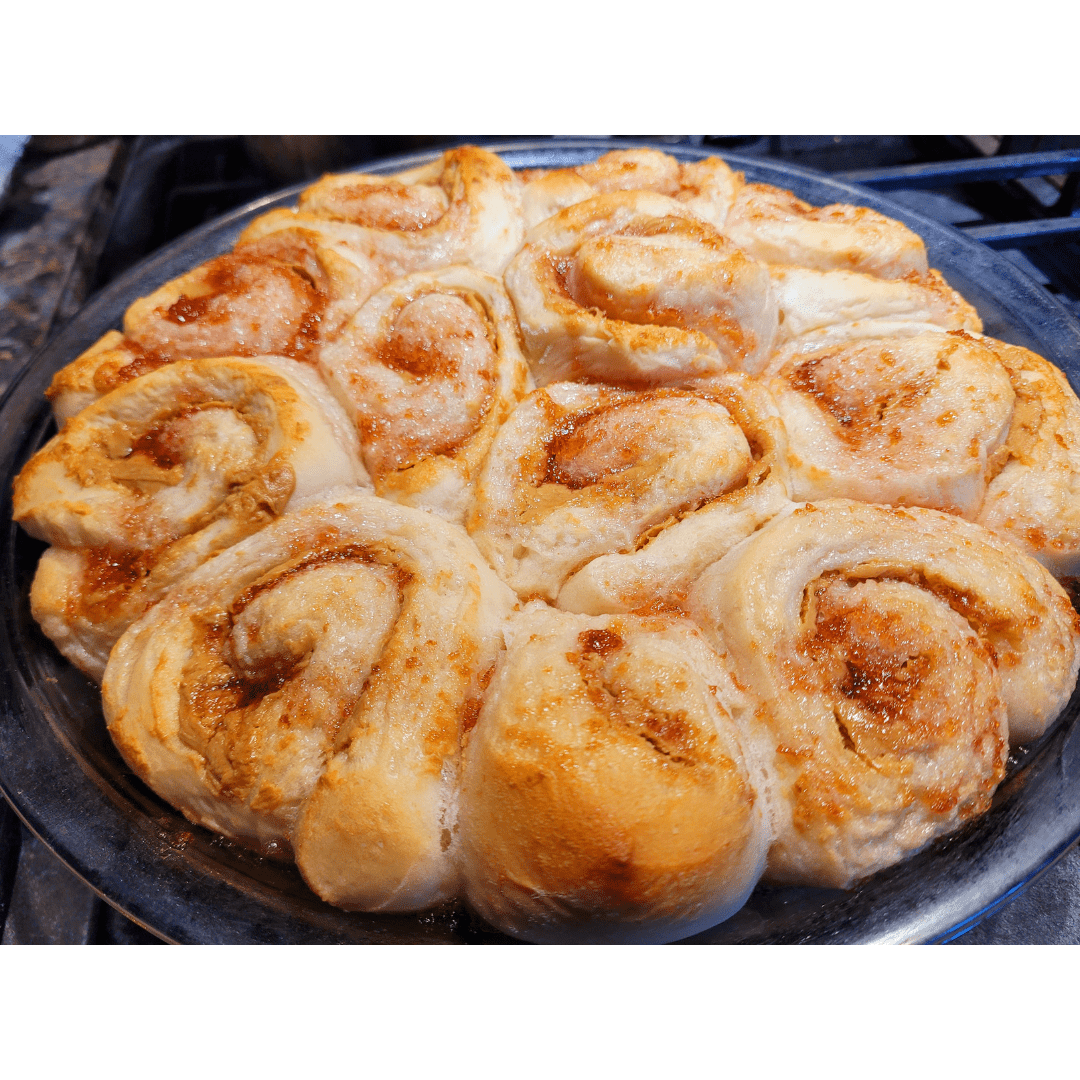
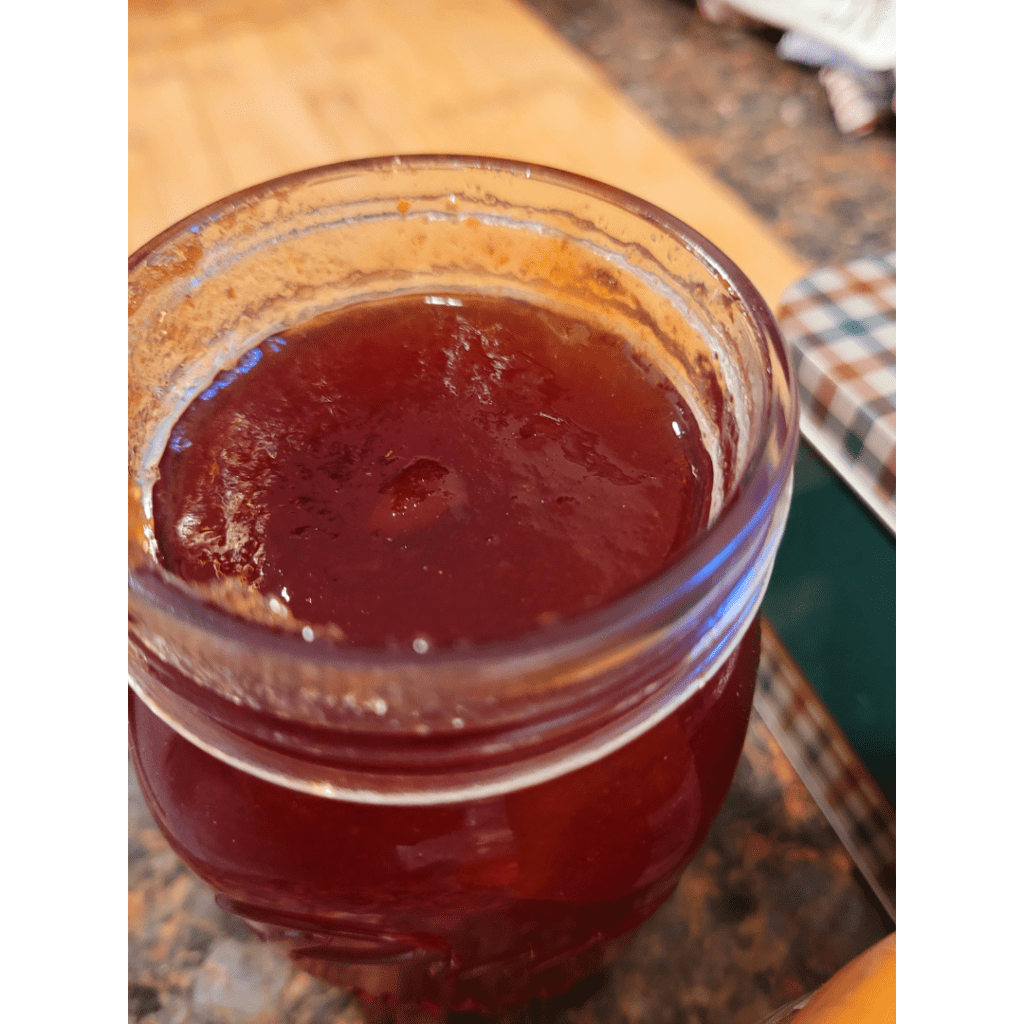
I used my homemade cherry pie jam that I grew, harvested, and canned from my backyard cherry tree! If you are interested in making cherry pie jam, here is my easy recipe tutorial.
How to Make and Can Cherry Pie Jam
Rolling up the Dough
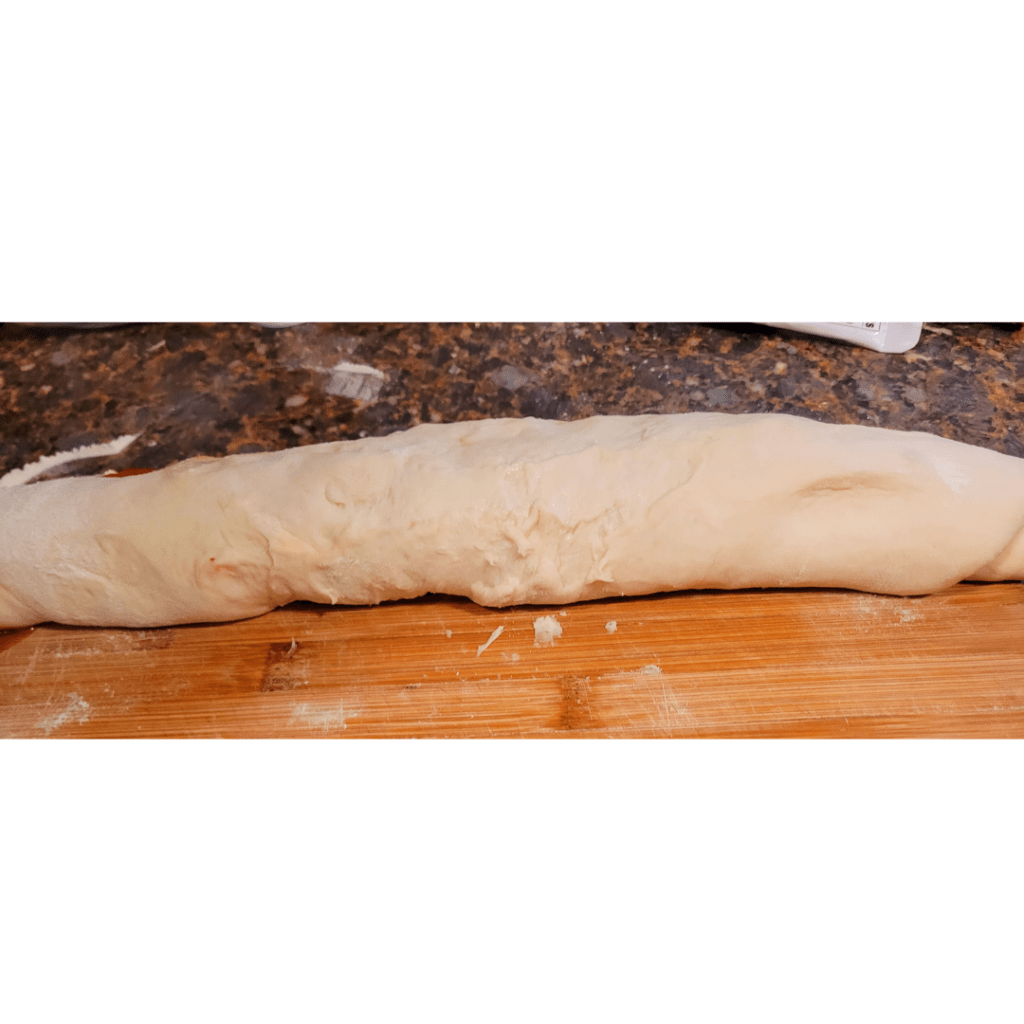
Starting from one long side of the rectangle, tightly roll up the dough into a log shape. Use your hands or a bench scraper to keep everything compact as you go.
Slicing the Peanut Butter and Jelly Rolls
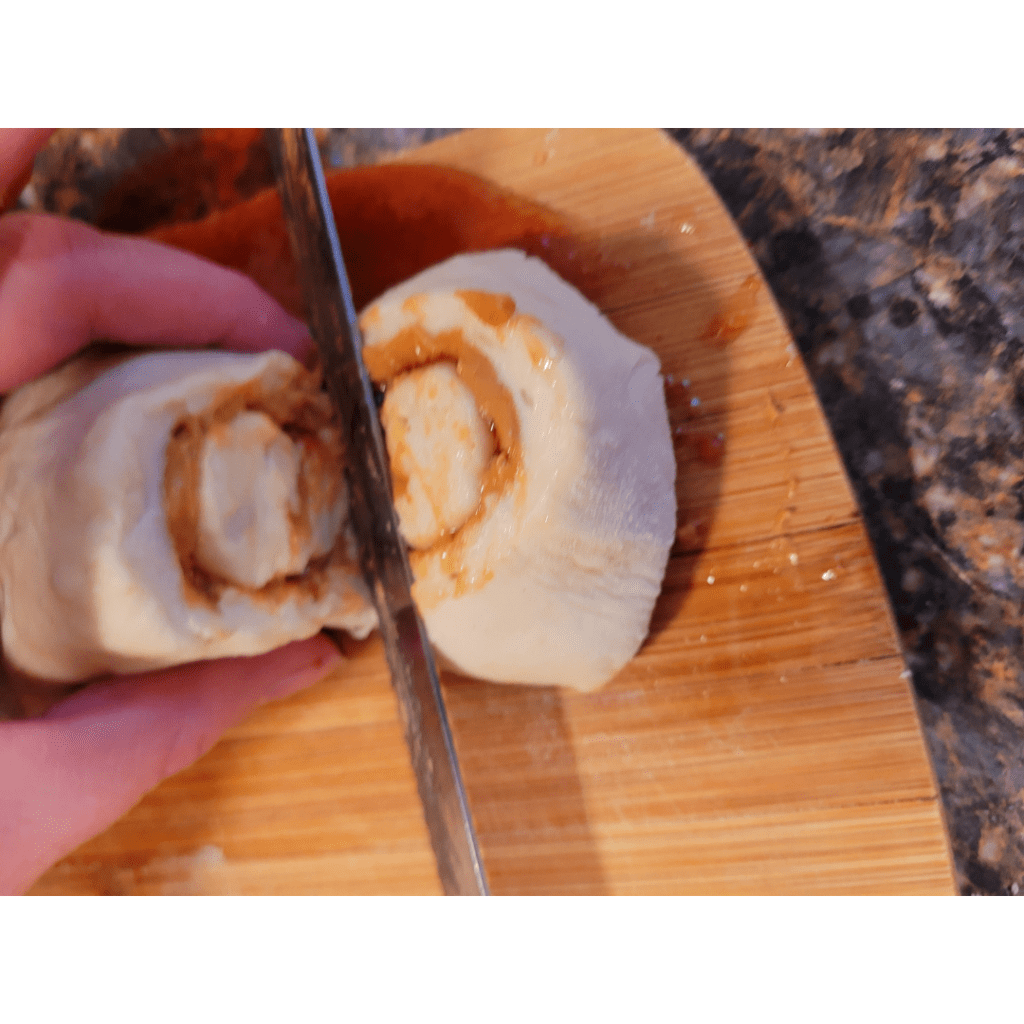
Once rolled up, slice the log into individual cinnamon rolls using a serrated knife or dental floss (yes, dental floss!). Finally, transfer them to baking pans lined with parchment paper.
Rising the Rolls to Perfection
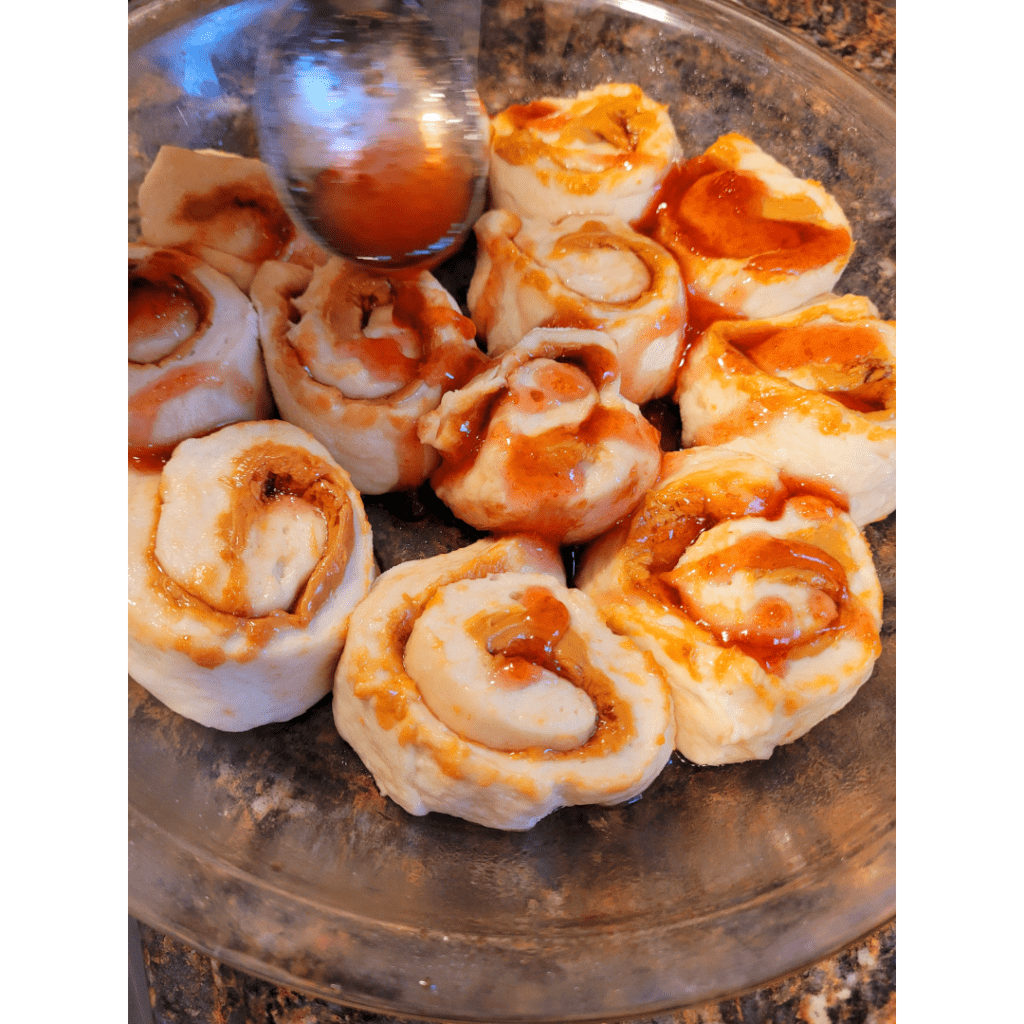
Allow the peanut butter and jelly rolls to rise until doubled in size. Letting the dough rest and proofing properly is a game-changer for achieving light and fluffy results. The process allows for the yeast to produce carbon dioxide gas, creating air pockets that give the final product its desired texture.
Allowing rolls to rise until doubled in size also enhances flavor development as the yeast ferments sugars present in the dough, resulting in a more complex taste profile. While it requires patience, this step is worth it, since underproofed dough will yield dense and heavy rolls that lack that delightful pillowy bite. So don’t rush through this stage; give your dough ample time to rise and be rewarded with these heavenly treats!
Drizzle some homemade jam over the top of the rolls for an extra gooey sensation!
Baking Time and Temperature Guidelines
Preheat your oven to around 375°F (190°C). Place your rolls on a baking sheet lined with parchment paper, leaving some space between each roll to allow for expansion. Bake for about 15-20 minutes or until the rolls turn golden brown and slightly crispy on the outside. Remember, ovens can vary, so keep an eye on them to avoid burning!
Remove from the oven and enjoy!
Serving and Storing: Tips for Enjoying and Preserving the Freshness of Your Rolls
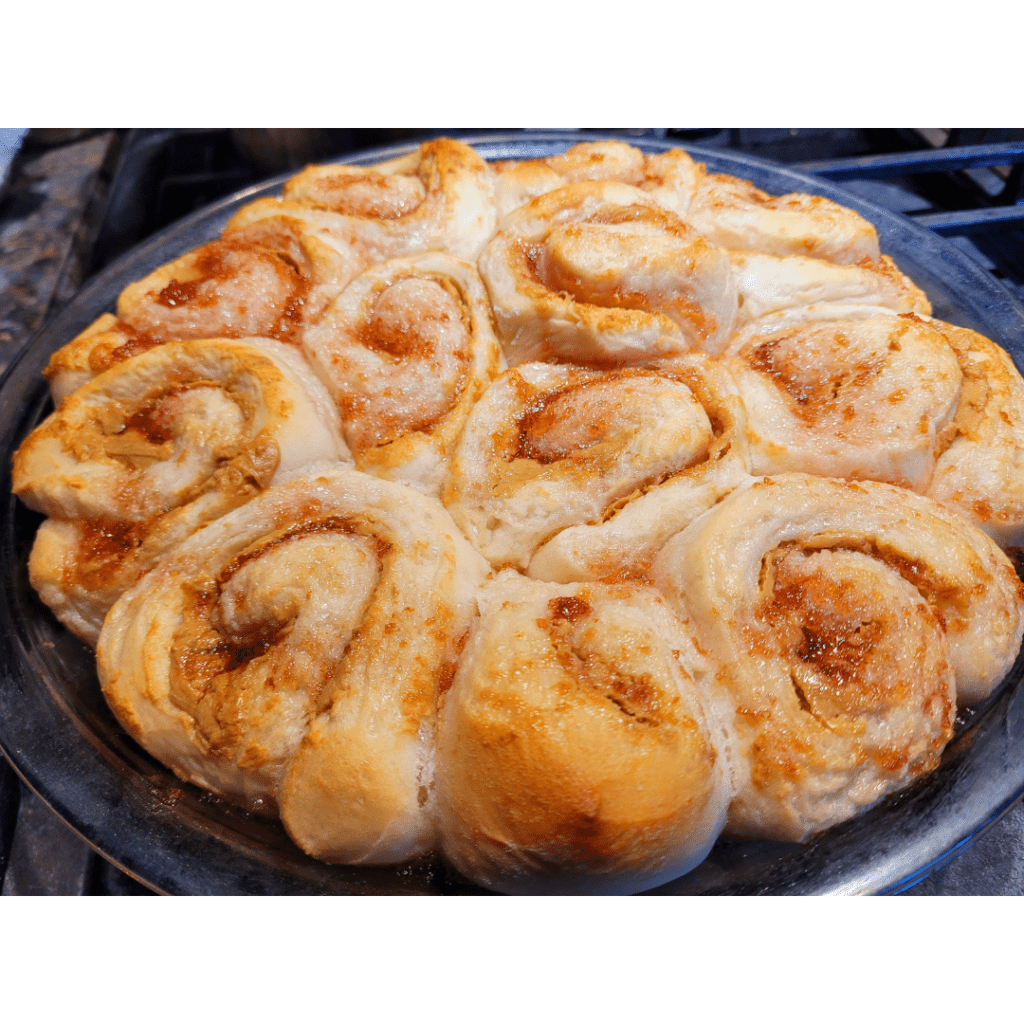
Allowing the Rolls to Cool Before Serving
As tempting as it may be to dive into your freshly baked peanut butter and jelly rolls, it’s best to let them cool slightly before indulging. This allows the flavors to settle and prevents any risk of burning your mouth. Plus, the aroma of warm rolls filling your kitchen is worth the patience!
Accompaniments and Serving Suggestions
While these rolls are delicious on their own, you can take the experience up a notch with some fun accompaniments. Serve them with a glass of cold milk or a piping hot cup of coffee. Feel free to dust some powdered sugar on top or drizzle them with a simple glaze for an extra touch of sweetness. You can also enjoy them with a dollop of whipped cream or a scoop of vanilla ice cream to create a decadent dessert.
Storing Leftover Rolls for Extended Freshness
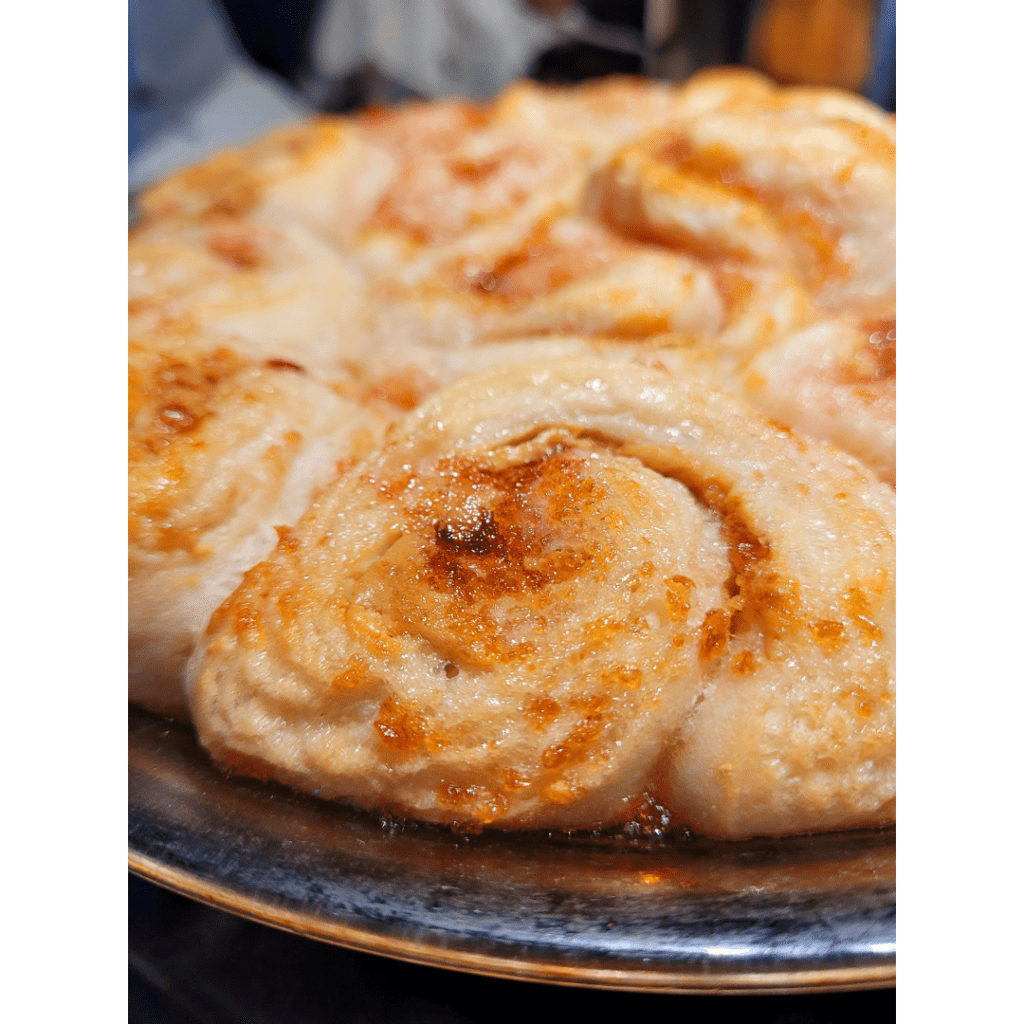
If you have any leftover rolls (which is a rare occurrence!), it is important to store them properly to maintain their freshness. Allow the rolls to cool completely before placing them in an airtight container or wrapping them tightly in plastic wrap. They can be stored at room temperature for up to 2 days or in the refrigerator for up to a week. To enjoy them warm again, simply pop them in the microwave for a few seconds or reheat them in the oven at a low temperature.
Conclusion
Now that your homemade peanut butter and jelly rolls are ready, it’s time to savor and enjoy the fruits of your labor. Serve them warm or at room temperature, alongside a cold glass of milk or a hot cup of coffee. These rolls are perfect for breakfast, brunch, or as a sweet treat any time of the day. Remember to store any leftovers properly to maintain their freshness. Whether you choose to refrigerate or freeze them, make sure they are tightly wrapped to prevent any air exposure. When you’re ready for another bite of nostalgia and deliciousness, simply reheat and enjoy.
Get creative and try different variations and fillings to keep the excitement alive. Homemade peanut butter and jelly rolls are a delightful way to infuse your kitchen with warmth, love, and a touch of nostalgia. So, roll up your sleeves, get baking, and indulge in the comforting flavors of this classic combination!
Frequently Asked Questions
1. Can I use a different type of nut butter instead of peanut butter?
Absolutely! While peanut butter is the classic choice for peanut butter and jelly rolls, you can experiment with different nut butter, such as almond butter or cashew butter. Just make sure the consistency and flavor of the nut butter complement the jelly or fruit spread you’re using.
2. Can I make these rolls ahead of time?
Yes, you can! If you want to prepare the rolls ahead of time, you can follow the recipe until the baking stage. Once you’ve rolled the dough and added the filling, you can refrigerate the rolls overnight. In the morning, simply take them out, let them come to room temperature, and bake as directed. This way, you can enjoy freshly baked rolls without the rush.
3. Can I freeze the rolls for later?
Definitely! If you want to store the rolls for a longer period, you can freeze them after they have cooled completely. Wrap each roll tightly in plastic wrap or aluminum foil, or place them in airtight containers or freezer bags. When you’re ready to enjoy them, thaw the rolls at room temperature or pop them in a preheated oven for a few minutes to warm them up.
4. Can I customize the flavors and fillings of the rolls?
Absolutely! One of the joys of homemade peanut butter and jelly rolls is the ability to customize them to your liking. You can experiment with different flavors of jelly or jam, add a sprinkle of cinnamon or a drizzle of honey to the peanut butter filling, or even incorporate other ingredients like sliced bananas or chocolate chips. Let your creativity run wild and make the rolls uniquely yours!
Peanut Butter and Jelly Rolls Recipe
Peanut Butter and Jelly Rolls Recipe
Equipment
- 1 large mixing bowl
- 1 baking pan
Ingredients
For the Dough
- ½ cup sourdough starter.
- ¼ cup butter, softened.
- 1 ¼ cups whole milk.
- 1 tbsp sugar.
- 1 tsp salt.
- 3 ½ cups all-purpose flour.
For the Filling
- ½ cup peanut butter.
- ½ cup jam or jelly.
Instructions
Mixing and Kneading the Dough
- Mix everything together until you have a shaggy dough.
- Then turn it out onto a lightly floured surface and knead until smooth and elastic. This usually takes about 5-7 minutes of kneading by hand or 3-4 minutes with a stand mixer fitted with a dough hook.
Allowing the Dough to Rise
- Once you've achieved a smooth dough, place it in a greased bowl and cover it with a clean kitchen towel or plastic wrap.
- Let it rise in a warm, draft-free place for about 8 to 12 hours, or until it has doubled in size. This step is crucial for achieving soft, pillowy rolls that will make you crave seconds. If you mix this up in the morning before you head to work or to do your daily chores, you can have it rising all this time for the bulk fermentation process. It will be ready when you are done working!
Rolling Out the Dough
- Now that you have your dough ready, it's time to get rolling! It should be doubled in size by now.
- Dust your work surface and rolling pin with flour to prevent sticking. Gently roll the dough into a rectangular shape, about a quarter-inch thick. Don't worry about achieving perfection – a rustic look adds charm to your rolls!
Spreading the Peanut Butter Filling
- Spread a generous layer of creamy or crunchy peanut butter over the rolled-out dough.
- Ensure the peanut butter covers the entire surface, reaching all the corners. This will give each bite a delightful peanut-ty taste.
Layering the Jelly
- Once the peanut butter is evenly spread, it's time to add the star of the show – the jelly.
- Take your evenly spread jelly and carefully spoon it over the peanut butter layer, leaving a small border around the edges. This will prevent any overflow during baking.
Rolling up the Dough
- Starting from the longer side, gently roll the dough into a tight log.
- Seal the edges by pressing them together with your fingers.
Slicing the Peanut Butter and Jelly Rolls
- Once rolled up, slice the log into individual cinnamon rolls using a serrated knife or dental floss (yes, dental floss!).
- Finally, transfer them to baking pans lined with parchment paper.
Rising the Rolls to Perfection
- Allow the peanut butter and jelly rolls to rise until doubled in size. Letting the dough rest and proofing properly is a game-changer for achieving light and fluffy results. The process allows for the yeast to produce carbon dioxide gas, creating air pockets that give the final product its desired texture.
- Drizzle some homemade jam over the top of the rolls for an extra gooey sensation!
Baking Time and Temperature Guidelines
- Preheat your oven to around 375°F (190°C).
- Place your rolls on a baking sheet lined with parchment paper, leaving some space between each roll to allow for expansion.
- Bake for about 15-20 minutes or until the rolls turn golden brown and slightly crispy on the outside. Remember, ovens can vary, so keep an eye on them to avoid burning!
- Remove from the oven and enjoy!
Summary
I hope I have inspired you to bake some sourdough peanut butter and jelly rolls to enjoy and share with your friends and family.
If you were encouraged by this post, I invite you to check out my FREE Printables Page for fun free printables, planners, and charts.
ENTER MY FREE Printables Page HERE
Here are some more of my bread-making inspiration posts to check out!
Scones: How to Make Easy Sourdough Discard Scones
Pumpkin Rolls: How to Make Pumpkin-Shaped Bread Rolls
Breadsticks: How to Make Easy Sourdough Breadsticks
Sourdough Discard Fry Bread: Easy Sourdough Discard Hack
Sourdough Buttermilk Drop Biscuits: The Ultimate Secret to Easy Biscuits!
How to Make Apple Fritter Bread: A Perfect Fall Treat
How to Make the Perfect Pumpkin-Shaped Sourdough Bread from Scratch
Easy Pumpkin Bread Recipe That Will Satisfy Your Fall Cravings
The Ultimate Snickerdoodle Zucchini Bread Recipe: Tips for a Perfect Bake
How to Turn Stale Bread into Irresistible Breadcrumbs!
The Best Fall Maple Sourdough Bread Recipe
The Ultimate Guide to Making Sourdough Bread from Scratch
The Ultimate Guide to Crafting a Perfectly Tangy Wild Sourdough Starter
Artisan Bread: How to Make Artisan Bread
Challah Bread: How to Make a 6 Braided Challah Bread
Sweet Bread: How to Make Sweet Bread
Blessings,
The Off Grid Barefoot Girl

