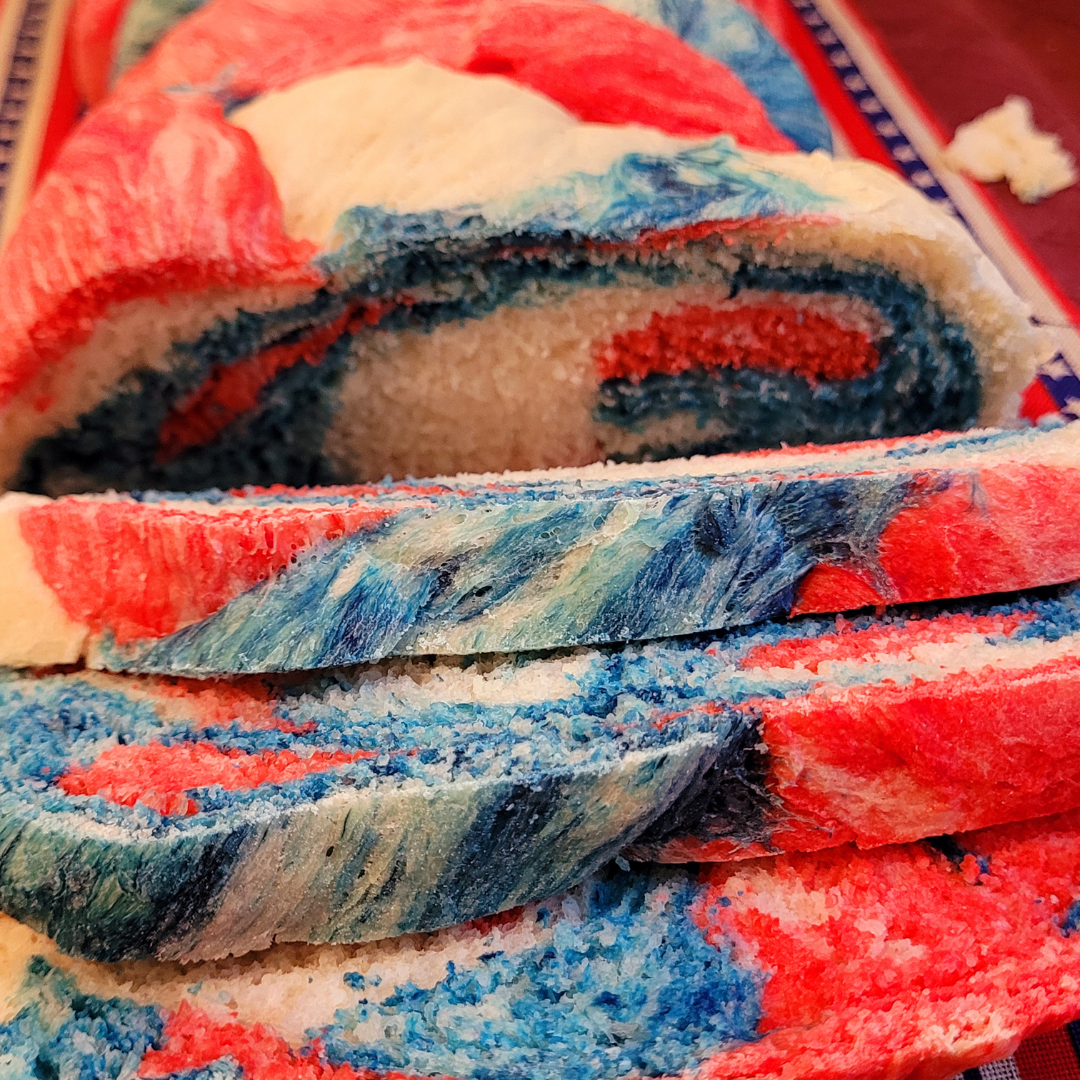
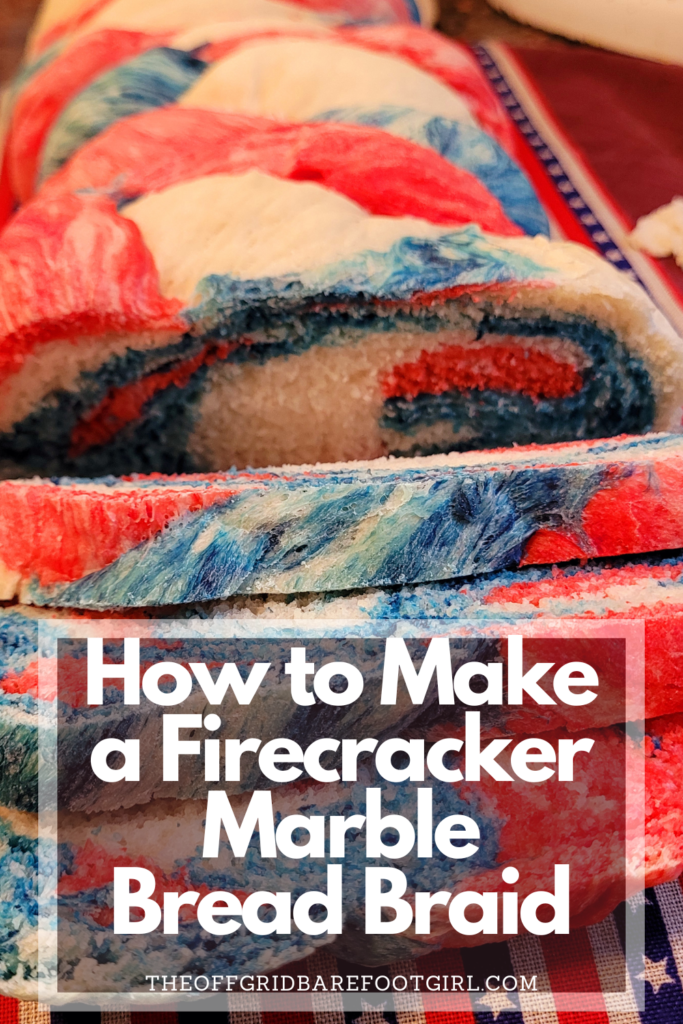
Firecracker marble bread braid.
Imagine biting into a firey spicy bread that lights up your taste buds as the sky ignites with the rocket’s red glare this 4th of July! Firecracker Marble Bread Braid is a showstopper of a recipe that will impress your family and friends with its stunning appearance and mouthwatering flavors for your festive picnic celebration.
This bread braid is bursting with spiciness and displayed with beautiful red, white, and blue marble tones. But don’t let its fancy exterior fool you – this bread is surprisingly easy to make at home with my recipe tutorial.
In this step-by-step guide, I’ll walk you through the braiding technique that gives this bread its gorgeous, eye-catching design. From mixing the dough to shaping the braid, you’ll learn all the tricks and tips to create a masterpiece worthy of a bakery display case. And if you’re feeling adventurous, I’ll even share some tasty variations to switch up the flavors and colors.
So roll up your sleeves, tie on an apron, and get ready to wow your loved ones with this bread that’s as fun to make as it is to devour. Trust me, once you master this recipe, you’ll want to braid all your breads!
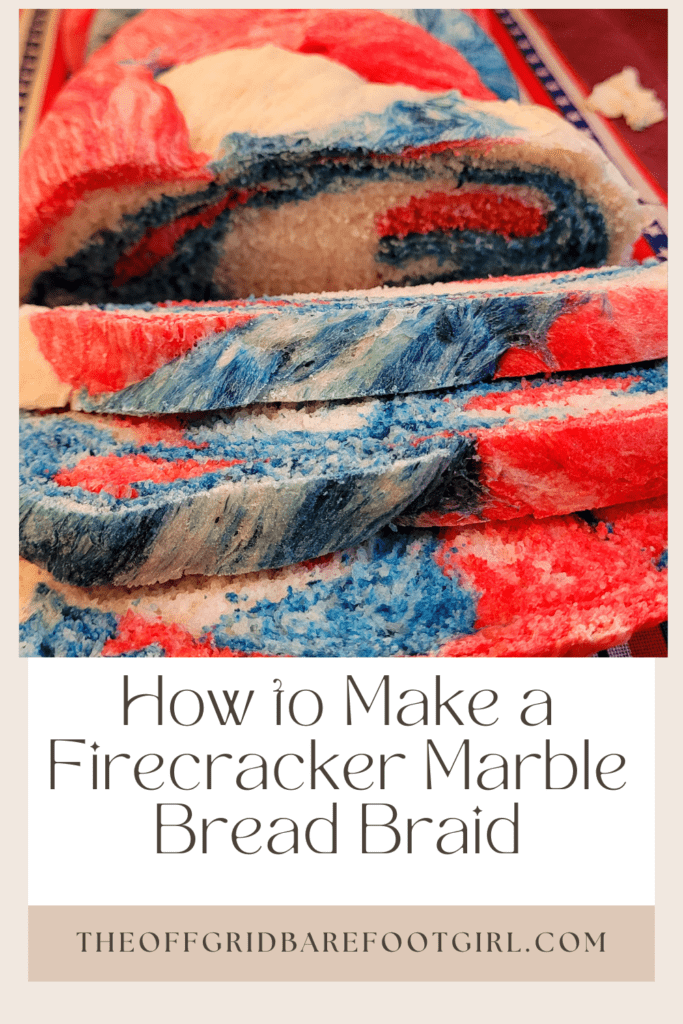
This is a pinnable post. Tap or hover over any image in this post to pin to your Pinterest Boards.
Ingredients and Preparation
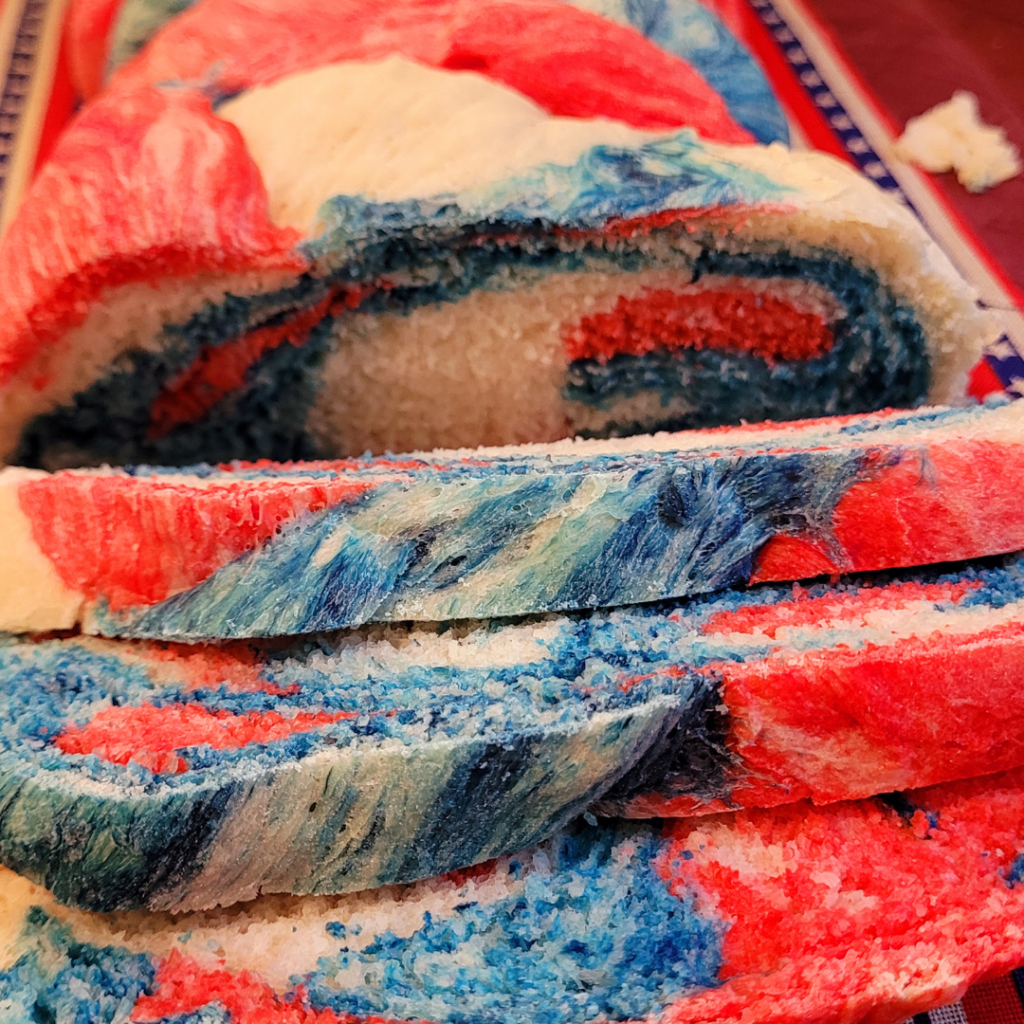
Making a firecracker marble bread braid is an exciting and rewarding baking adventure! The vibrant swirls of dough create a stunning visual effect, and the flavors are absolutely delightful. As an avid home baker, I’m thrilled to share my personal tips and tricks for crafting this showstopper.
Ingredients for Firecracker Marble Bread Braid
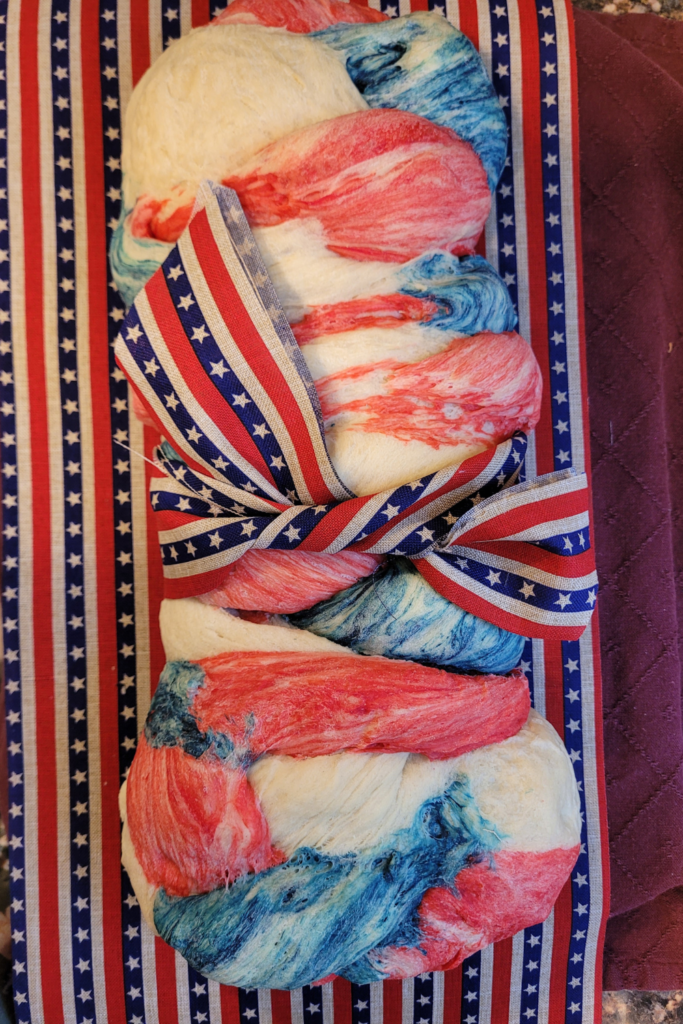
The key to achieving that beautiful marbled pattern lies in the preparation of three separate doughs: One red, one plain for white, and one blue.
But the real magic happens with the flavored dough. I love experimenting with different combinations, but my go-to flavor combination for the 4th of July celebration is a fiery blend of red food coloring, cayenne pepper, and a touch of paprika for the red dough. The result is a dough that packs a punch of heat and color, creating those eye-catching red swirls throughout the bread.
Proofing Yeast
- Lukewarm water.
- Dry active yeast.
- Sugar, honey, or maple syrup.
Bread Dough
- Proofed yeast mixture as above.
- All-purpose flour.
- Lukewarm water.
- Sea salt.
- Sugar, honey, or maple syrup.
- Melted butter oil.
Marble Effect
- Red food coloring.
- Cayenne pepper.
- Paprika.
- Blue food coloring.
Steps for Making the Dough

Preparing the dough is a labor of love, but the process is surprisingly simple. I start by proofing the yeast in warm water and sugar, allowing those tiny organisms to activate and work their leavening magic. While that’s happening, I mix the dry ingredients for the dough.
Once the yeast is bubbly and alive, I create a well in a bowl of dry ingredients and slowly incorporate the yeast mixture, kneading until smooth and elastic dough forms. Cover the dough and let it rise for 30 minutes.
After the dough has risen, it’s time for the fun part – making the bread braid. With each bread strand, those beautiful swirls start to take shape, promising a visually stunning and flavorful finished product.
Separate the dough into three equal parts. Set one aside for the plain white strand. Place the other two on two separate plates. It is time to get messy! I recommend you grab some gloves for this part! If not, you will end up like me where it looked like my hands were up to no good with blue and red stained fingers! They looked terrible like I had bruised and blood-stained hands from punching someone…for days…anyway, go grab some food-grade gloves!
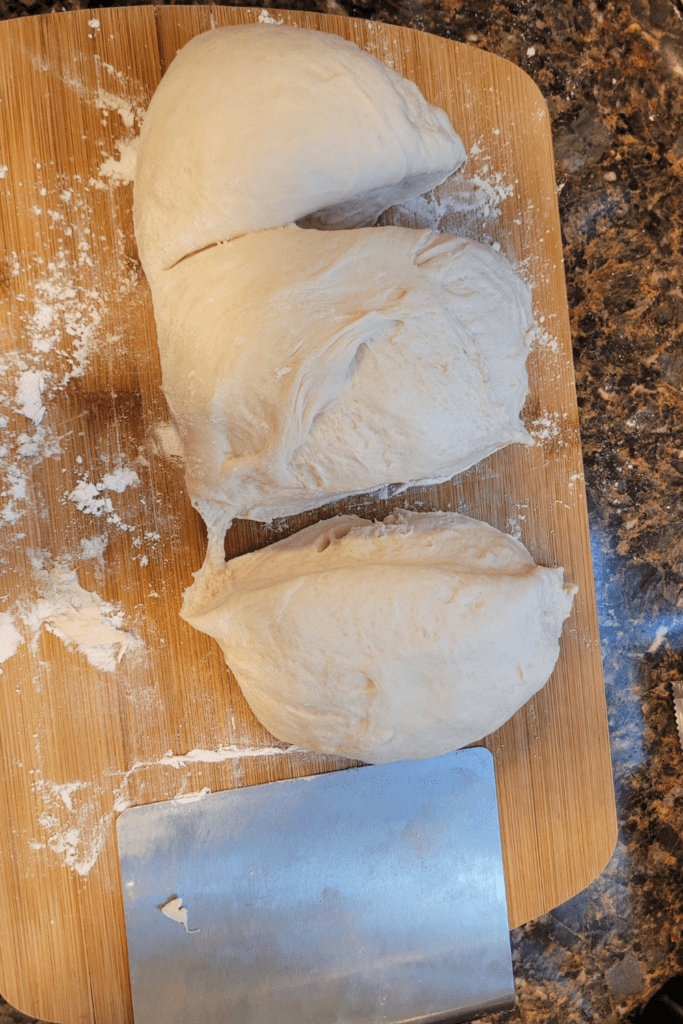
Dying the Dough Strands and Creating the Marbled Effect
Set aside the white (plain) dough. You will not add any flavors or colors to this strand.
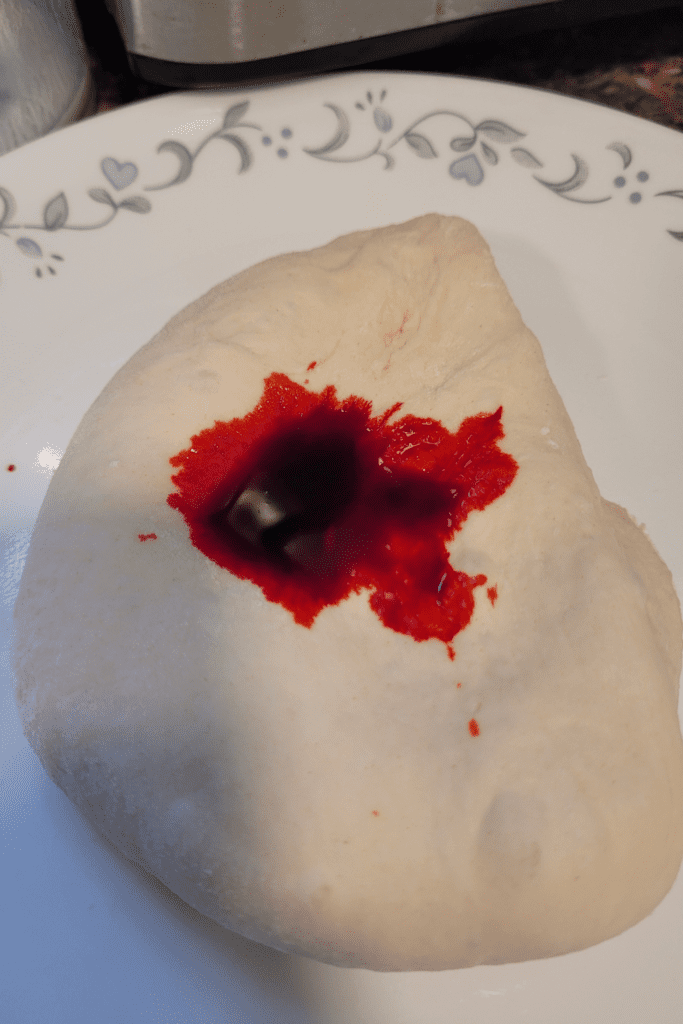
Add red food coloring to one of the dough and work it into the dough by kneading it and adding more drops as necessary. The dough will not be completely red. It will quickly be a marbled look and that is what we are going for. Work in cayenne pepper and paprika in the red dough to add the firecracker taste. Do not add it to any other strand.
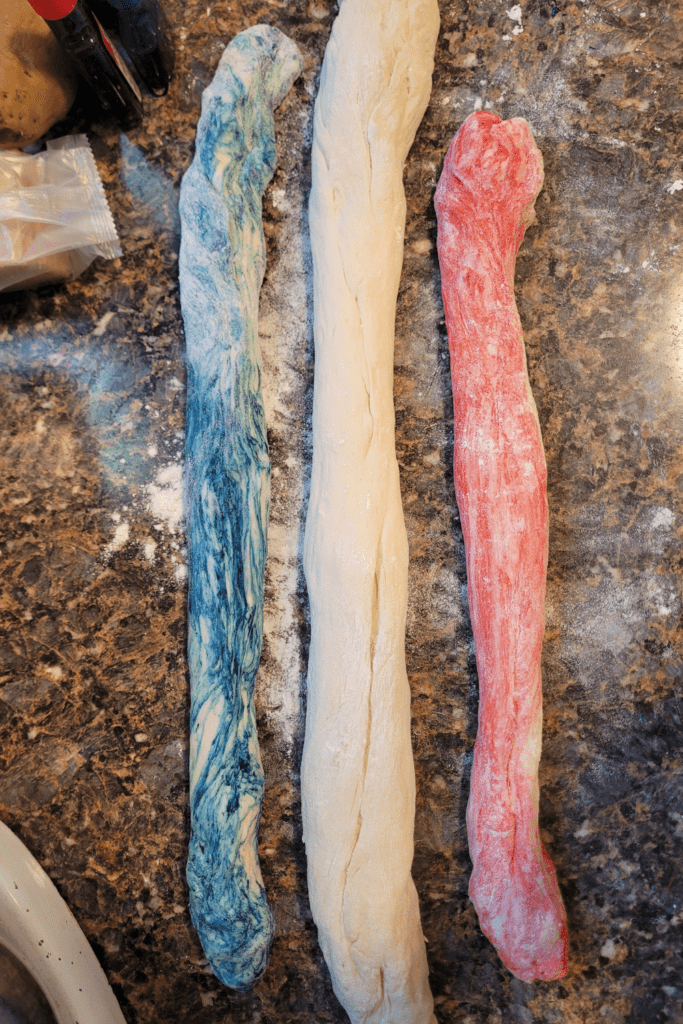
Now, repeat this process with the other dough using blue food coloring. Be sure to switch out your gloves first for the new color! You now have three different dough balls of red, white (plain), and blue.
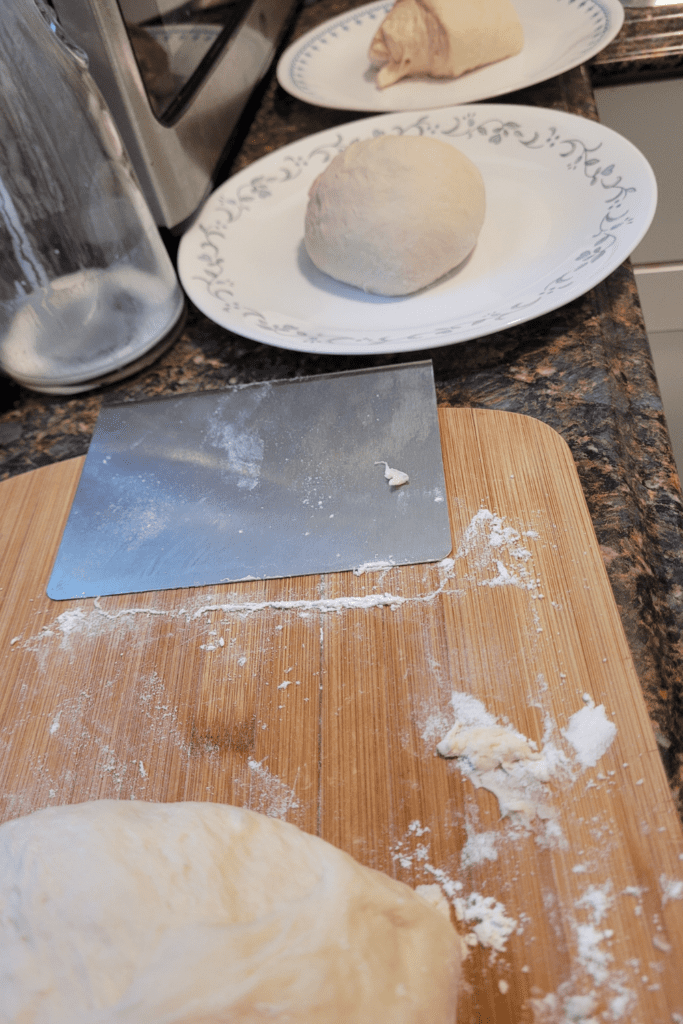
I felt reluctant to share this image of the red dough being prepared… It was not very appealing to look at!
Prep all the strands to prepare for the braiding technique.
It is now time for the next step!
Braiding Technique
As someone who loves experimenting with different bread recipes, I’ve always found the braiding technique to be both challenging and rewarding. The intricate patterns and textures you can create by simply weaving dough strands together are truly mesmerizing. Let me walk you through the process of mastering the braiding technique for this delightful Firecracker Marble Bread Braid.
Basics of Braiding Bread
At its core, braiding bread dough is about creating a visually stunning and structurally sound loaf. It involves dividing the dough into equal strands, arranging them side by side, and then interweaving them in a specific pattern. The key is to maintain an even tension throughout the process, ensuring that the braid holds its shape during the proofing and baking stages.
One of the most common braiding techniques is the simple three-strand braid, which is a great starting point for beginners. It’s like the classic pigtail braid, but with dough instead of hair. As you gain confidence, you can move on to more complex patterns like a four-strand braid or even a six-strand braid for an impressive centerpiece.
Step-by-Step Braiding Instructions
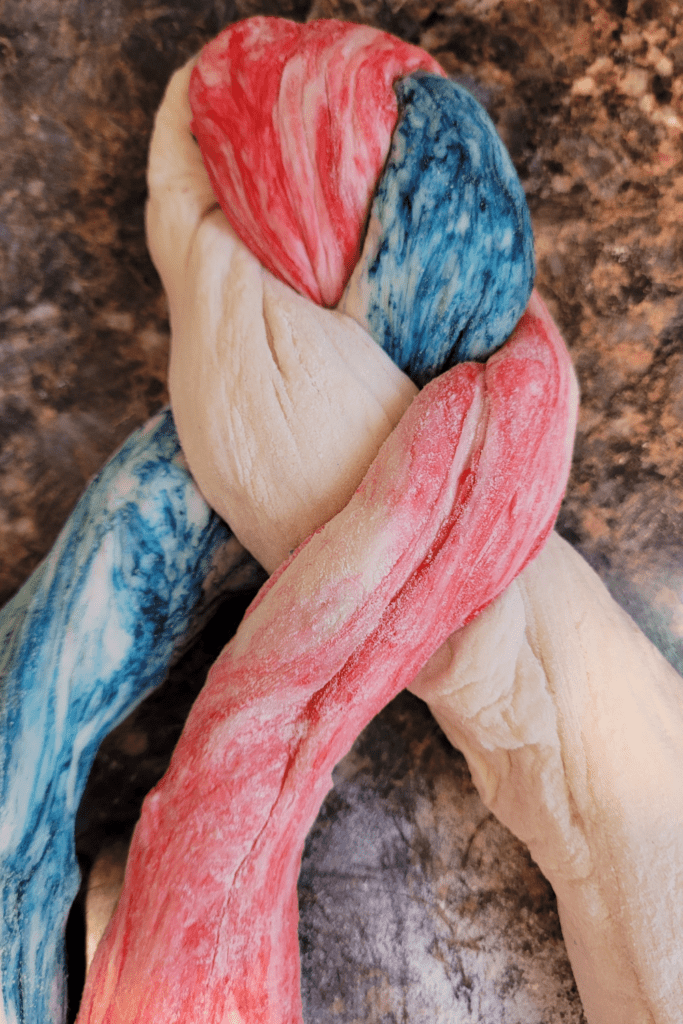
Now, let’s dive into the step-by-step process of braiding this Firecracker Marble Bread Braid:
- Roll the Strands: On a lightly floured surface, roll each portion into a long, even rope, about 12-14 inches long.
- Arrange the Strands: Lay the three strands side by side, parallel to each other.
- Start Braiding: Take the strand on the far right and cross it over the middle strand. Then, take the strand on the far left and cross it over the new middle strand. Repeat this pattern, alternating between the right and left strands, until you reach the end.
- Tuck the Ends: Once you’ve braided to the end, tuck the remaining ends underneath the braid to secure them in place.
- Transfer to a Baking Pan: Carefully transfer the braided loaf to a greased baking pan, shaping it into a ring or wreath if desired.
Remember, practice makes perfect! The more you braid, the smoother and more consistent your technique will become.
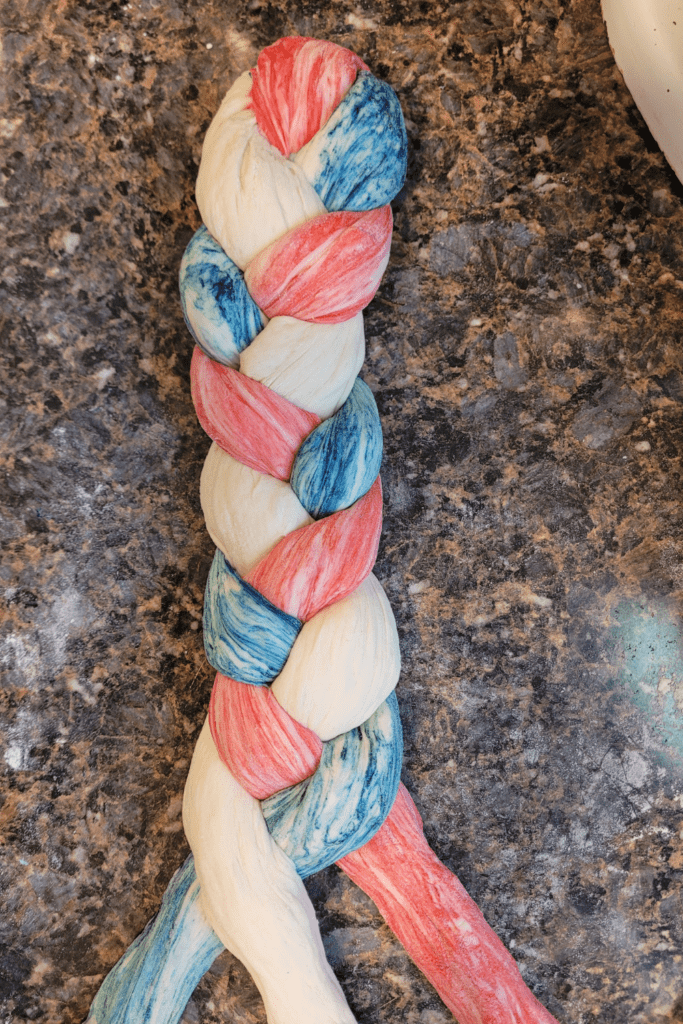
Baking the Braided Bread
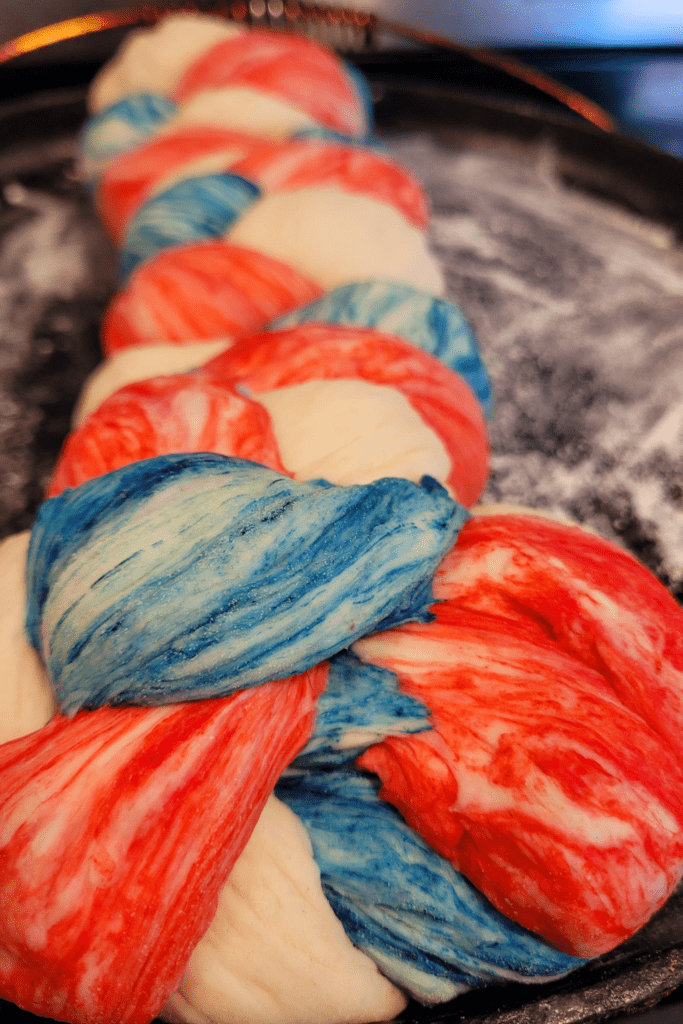
After all that meticulous braiding, it’s time to let your creation shine in the oven. Here are some tips for baking your Firecracker Marble Bread Braid to perfection:
- Proofing: Cover the braided loaf with a clean kitchen towel and let it proof for 15 to 30 minutes, or until it has nearly doubled in size. Depending on how warm your kitchen is, the faster it will rise, so keep a close watch on it! It is summer and the 4th of July season when I made this, so mine rose pretty quickly.
- Egg Wash: For a beautiful, golden-brown crust, gently brush the top of the loaf with an egg wash (a beaten egg mixed with a touch of water or milk) before baking.
- Baking Temperature and Time: Bake the bread at 350°F (175°C) for 30-35 minutes, or until the crust is a rich, golden color and the internal temperature reaches 190°F (88°C).
- Cooling: Once out of the oven, let the braided bread cool on a wire rack for at least 30 minutes before slicing. This allows the interior to set and the flavors to develop.
There’s nothing quite like the aroma of freshly baked bread wafting through your kitchen. Enjoy the fruits of your labor – a beautifully braided Firecracker Marble Bread Braid that’s sure to impress your family and friends!
Variations and Tips
As someone who loves experimenting in the kitchen, I always try to put my own spin on recipes. When it comes to this stunning firecracker marble bread braid, there are plenty of ways to switch things up and make it your own.
Recipe Variations for Marbled Bread
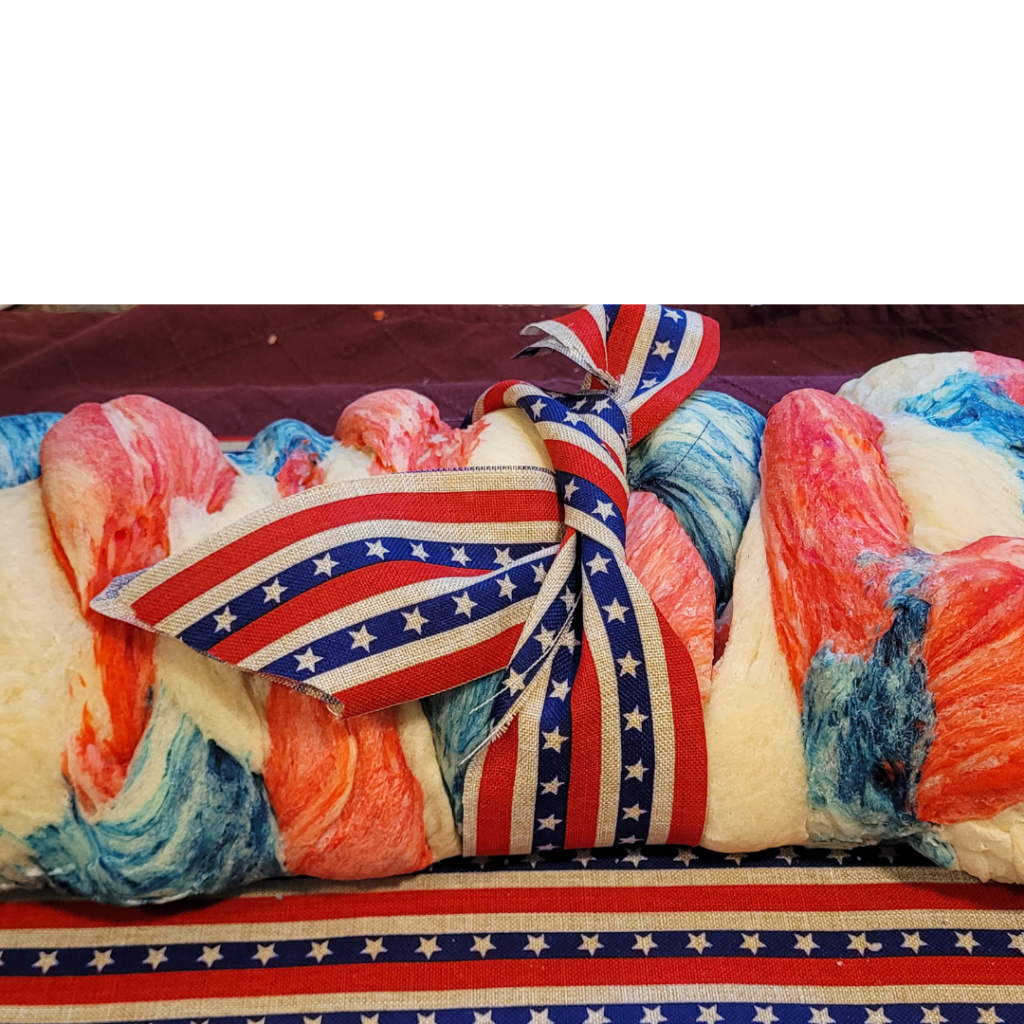
One of my favorite variations is to incorporate different types of dough or fillings into the braid. Instead of using only traditional bread dough, I sometimes like to braid in sections of brioche or challah dough for an extra-rich and buttery twist. You can also experiment with fillings beyond just the cocoa butter mixture – try swirling in a cinnamon-sugar mixture, finely chopped nuts, or even a fruity jam for a burst of flavor in each bite.
Another fun idea is to play with the color scheme. While the classic chocolate and vanilla marbling is gorgeous, you could also use matcha powder or turmeric for a vibrant green or golden hue. Get creative with natural food colorings to make a braid that’s as visually stunning as it is delicious.
It is fun to experiment with different combinations for different holiday seasons!
Storing Leftover Bread
Let’s be honest, it’s rare for this bread to last long enough for leftovers! But if you do have some slices left over, proper storage is key to keeping them fresh. I recommend wrapping any leftover bread tightly in plastic wrap or foil and storing it at room temperature for up to 3 days. You can also freeze the bread for longer storage – just be sure to wrap it well to prevent freezer burn.
To reheat frozen slices, simply pop them in the oven or toaster oven at 300°F for 5-10 minutes until warmed through. You can also give them a quick zap in the microwave, but be careful not to overheat and dry out the bread.
Tips and Tricks for a Successful Braid
Braiding the marbled dough can be a little tricky, but with a bit of practice, you’ll be a pro in no time. Here are a few tips that have helped me along the way:
- Work with well-chilled dough to prevent the colors from bleeding together too much.
- Roll the dough ropes out to an even thickness for a neat, uniform braid.
- Braid the dough on a lightly floured surface, and lift it gently onto the baking sheet when finished.
- For a beautifully swirled pattern, twist each dough rope a few times before braiding.
- Brush the braid with an egg wash before baking to get that gorgeous, glossy finish.
- Let the baked braid cool completely before slicing to prevent squishing the intricate design.
With a little patience and these handy tips, you’ll be able to create a showstopping firecracker marble bread braid that looks (and tastes) like it came straight from a professional bakery.
What Makes Marbled Bread Different
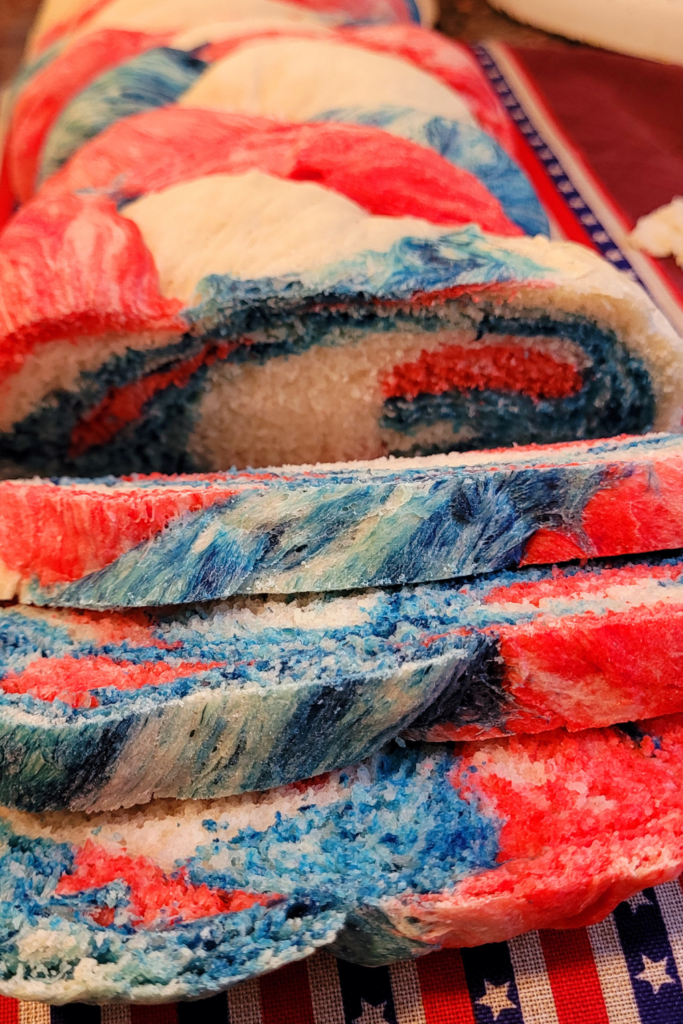
Among the many different bread varieties, marbled breads hold a special place in my heart. These beauties feature a swirl of contrasting colors and flavors, creating a mesmerizing pattern when sliced.
But marbled breads aren’t just visually stunning; they offer a delightful flavor experience with each bite. You’ll savor the harmonious blend of sweet or spicy flavors as they dance across your taste buds. It’s a true treat for the senses!
So, whether you’re a seasoned baker or a sweet bread novice, I encourage you to explore the world of marbled bread. With their beautiful swirls and delightful flavor combinations, they’re sure to become a beloved addition to your baking repertoire.
Conclusion
Baking delicious homemade bread is an incredibly rewarding experience, and the Firecracker Marble Bread Braid is a stunning addition to any baker’s repertoire. By following the simple steps outlined in this post, you now have the tools to create a visually striking and flavorful loaf that’s sure to impress your family and friends.
Mastering the braiding technique might take some practice, but don’t be discouraged – the beauty of this recipe lies in its versatility. Experiment with different colors, spices, and glazes to put your own unique spin on this classic bread. Who knows, you might even discover a new family favorite!
So, what are you waiting for? Gather your ingredients, roll up your sleeves, and get ready to bake bread that’s as beautiful as it is delicious. And if you’re feeling adventurous, share your creations on social media and inspire others to get started on their own bread-baking journey. Remember, the best part of baking is sharing the joy and flavors with those you love. Happy baking!
Resources: Here are some helpful resources for further information.
- Braided Bread – By I Heart Eating
- Beautiful Braided Bread Recipe – By Sustain My Cooking Habit
- Sweet Bread (Braided Bread) – By Sugar Spun Run
Frequently Asked Questions
1. What ingredients do I need to make a Firecracker Marble Bread Braid?
To make a Firecracker Marble Bread Braid, you will need ingredients such as bread dough recipe as above and red and blue food coloring. To spice things up, you will need cayenne pepper powder and a pinch of paprika.
2. How do I create the marble effect in the bread braid?
To achieve the marble effect, roll out the bread dough into 3 strands, one red, one plain for white, and one blue. Then, carefully roll the dough into strands for the braid to create the marble pattern.
3. How long should I bake the Firecracker Marble Bread Braid for?
Bake the Firecracker Marble Bread Braid in a preheated oven at the recommended temperature for about 25-30 minutes or until the bread is golden brown and fully cooked.
4. Can I customize the colors in the Firecracker Marble Bread Braid?
Yes, feel free to customize the colors in the bread braid according to your preferences.
Firecracker Marble Bread Braid
Equipment
- 1 baking pan
- 1 proofing bowl.
- 2 plates, for mixing different doughs with food coloring.
Ingredients
Proofing Yeast
- 1 cup lukewarm water.
- 2 ¼ tsp dry active yeast.
- 2 tbsp sugar, honey, or maple syrup.
Bread Dough
- Proofed yeast mixture.
- 4 ½ cups all-purpose flour.
- ½ cup lukewarm water.
- 1 ½ tsp sea salt.
- 2 tbsp sugar, honey, or maple syrup.
- 2 tbsp melted butter or oil.
For the Dough Strands and Creating the Marbled Effect
- 4 – 8 drops red food coloring.
- 1 tsp cayenne pepper.
- ¼ tsp paprika.
- 4 – 8 drops blue food coloring.
Instructions
Proofing Yeast
- Place the water in a warm mixer bowl.
- Stir in the sugar, honey, or maple syrup to dissolve, and sprinkle the yeast over the water. Gently stir to mix.
- Allow the yeast to sit in a warm place for about 15 minutes, until it’s activated and becomes bubbly and frothy.
Bread Dough
- To the proofed yeast mixture, add the flour, warm water, salt, sugar, honey, or maple syrup, and melted butter or oil.
- Mix the ingredients to form a rough dough. A dough whisk works great.
- Knead the dough for approximately 10 minutes. You can use your stand mixer if you desire. Knead until dough is smooth and slightly sticky consistency.
- Place the dough in a lightly oiled bowl, and cover with plastic wrap. Let the dough proof for about 1 hour until it has doubled in size.
- Turn the proofed dough out onto a lightly floured work surface and knead an additional 5 minutes.
Making the Marbled Effect
- Separate the dough into 3 equal parts. Set aside the white (plain) dough. You will not add any flavors or colors to this strand.
- Add red food coloring to one of the dough and work it into the dough by kneading it and adding more drops as necessary. The dough will not be completely red. It will quickly be a marbled look and that is what we are going for. Work in cayenne pepper and paprika in the red dough to add the firecracker taste. Do not add it to any other strand.
- Repeat this process with the other dough using blue food coloring. Be sure to switch out your gloves first for the new color! You now have three different dough balls of red, white (plain), and blue.
Step-by-Step Braided Instructions
- Roll the Strands: On a lightly floured surface, roll each portion into a long, even rope, about 12-14 inches long.Arrange the Strands: Lay the three strands side by side, parallel to each other.Start Braiding: Take the strand on the far right and cross it over the middle strand. Then, take the strand on the far left and cross it over the new middle strand. Repeat this pattern, alternating between the right and left strands, until you reach the end.Tuck the Ends: Once you've braided to the end, tuck the remaining ends underneath the braid to secure them in place.Transfer to a Baking Pan: Carefully transfer the braided loaf to a greased baking pan, shaping it into a ring or wreath if desired.
Baking the Braided Bread
- Proofing: Cover the braided loaf with a clean kitchen towel and let it proof for 15 to 30 minutes, or until it has nearly doubled in size. Depending on how warm your kitchen is, the faster it will rise, so keep a close watch on it! It is summer and the 4th of July season when I made this, so mine rose pretty quickly.Egg Wash: For a beautiful, golden-brown crust, gently brush the top of the loaf with an egg wash (a beaten egg mixed with a touch of water or milk) before baking.Baking Temperature and Time: Bake the bread at 350°F (175°C) for 30-35 minutes, or until the crust is a rich, golden color and the internal temperature reaches 190°F (88°C).Cooling: Once out of the oven, let the braided bread cool on a wire rack for at least 30 minutes before slicing. This allows the interior to set and the flavors to develop.
Summary
I hope I have inspired you to bake your very own bread loaves to enjoy and share with your friends and family.
If you were encouraged by this post, I invite you to check out my FREE Printables Page for fun free printables, planners, and charts.
ENTER MY FREE Printables Page HERE
Here are some more of my bread-making inspiration posts to check out!
Artisan Bread: How to Make Artisan Bread
Challah Bread: How to Make a 6 Braided Challah Bread
Sweet Bread: How to Make Sweet Bread
Blessings,
The Off Grid Barefoot Girl

