How to grow peppers from seed.
Starting pepper plants from seeds can be a rewarding and cost-effective way to grow a variety of peppers in your garden. Understanding the germination process, selecting the right pepper varieties, and providing optimal growing conditions are essential steps in successfully growing peppers from seed. In this article, I will explore the nuances of pepper seed germination, from selecting the best varieties to troubleshooting common issues, to help you achieve a bountiful pepper harvest.
This is a pinnable post. Tap or hover over any image in this post to pin to your Pinterest Boards.
Understanding Pepper Seeds and the Germination Process
Characteristics of Pepper Seeds
Pepper seeds come in various shapes and sizes, ranging from small and round to slightly elongated. They typically have a smooth or slightly wrinkled surface texture, depending on the variety. Pepper seeds are often dark-colored, ranging from black to brown, with some varieties even having a reddish hue. These seeds have a hard outer shell, providing protection during storage and transportation. When properly stored in cool, dry conditions, pepper seeds can remain viable for several years. Understanding the unique characteristics of pepper seeds is essential for successful germination and healthy plant growth.
The Science of Seed Germination
Seed germination is a fascinating process driven by various factors. When a seed is provided with the right conditions—such as moisture, warmth, and oxygen—it initiates metabolic activity. As water penetrates the seed coat, it activates enzymes responsible for breaking down stored nutrients. This energy fuels the growth of the embryonic plant, leading to the emergence of the radicle, or embryonic root. Subsequently, the shoot emerges from the seed, seeking light and further growth.
The process of germination is crucial for the propagation of plants, ensuring the continuation of species and biodiversity. Understanding the science behind seed germination enables gardeners to optimize conditions for successful plant growth and development.
Selecting the Right Pepper Varieties for Seed Starting
Determining Your Growing Goals
To kickstart your pepper-growing journey, it’s essential to clarify your growing goals upfront. Begin by considering the type of peppers you want to cultivate—whether it’s mild bell peppers, fiery habaneros, or something in between. Determine your preferred growing method, whether it’s in containers on a patio, raised beds in the backyard, or even indoors.
Consider factors like space availability, sunlight exposure, and climate conditions to ensure optimal growth. Decide whether you want to grow peppers for fresh consumption, culinary experimentation, or preservation through canning or drying. Setting clear goals will guide your growing strategy and help you achieve a bountiful pepper harvest tailored to your preferences and needs.
Determining the Pepper Varieties You Want to Grow
Here’s a list of popular pepper varieties to consider growing:
- Bell Peppers (Capsicum annuum)
- Jalapeño Peppers (Capsicum annuum)
- Cayenne Peppers (Capsicum annuum)
- Habanero Peppers (Capsicum chinense)
- Serrano Peppers (Capsicum annuum)
- Poblano Peppers (Capsicum annuum)
- Anaheim Peppers (Capsicum annuum)
- Banana Peppers (Capsicum annuum)
- Thai Chili Peppers (Capsicum annuum)
- Ghost Peppers (Bhut Jolokia) (Capsicum chinense)
- Scotch Bonnet Peppers (Capsicum chinense)
- Hungarian Wax Peppers (Capsicum annuum)
- Shishito Peppers (Capsicum annuum)
- Fresno Peppers (Capsicum annuum)
- Cherry Peppers (Capsicum annuum)
These varieties offer a range of flavors, heat levels, and culinary uses, allowing you to experiment and find the perfect peppers for your preferences and recipes.
Factors to Consider When Choosing Pepper Varieties
Here are some things to consider to help you when selecting the pepper varieties to grow to help narrow down your selection.
- Heat Level: Determine if you prefer mild, medium, or hot peppers.
- Flavor Profile: Choose peppers with flavors that complement your culinary preferences.
- Growth Habit: Decide between bushy or vining pepper plants based on your available space and growing method.
- Maturity Time: Check the number of days to maturity to ensure it fits your growing season.
- Disease Resistance: Look for varieties resistant to common pepper diseases in your area.
- Culinary Use: Select peppers suitable for fresh eating, cooking, pickling, or drying, depending on your intended use.
- Yield: Consider the expected yield per plant to meet your consumption or preserving needs.
- Appearance: Explore different colors, shapes, and sizes to add visual interest to your garden and dishes.
- Climate Suitability: Choose varieties adapted to your local climate and growing conditions for better success.
- Personal Preferences: Ultimately, pick pepper varieties that align with your taste preferences, gardening goals, and available resources.
Preparing the Ideal Growing Environment for Pepper Seeds
Selecting the Right Containers for Seed Starting
When selecting containers for starting pepper seeds, consider:
- Size: Choose containers that are deep enough for the seedlings’ root systems to develop.
- Drainage: Ensure the containers have drainage holes to prevent waterlogging and root rot.
- Material: Opt for biodegradable pots, plastic trays, or recycled containers that are clean and sanitized.
- Sterility: Use containers that are sterile or can be easily cleaned to minimize the risk of disease.
- Quantity: Determine the number of seeds you plan to start and select containers accordingly.
- Transplantability: Consider containers that allow for easy transplanting without disturbing the delicate roots.
- Labels: Use containers with space for labeling or choose containers that can be labeled clearly.
- Availability: Use containers readily available in your home or garden center to reduce costs and environmental impact.
- Uniformity: Aim for containers of similar size and shape for easier organization and management.
- Reuse: Consider containers that can be reused for future seed-starting or gardening projects to minimize waste.
How I Start My Pepper Seeds Each Year!
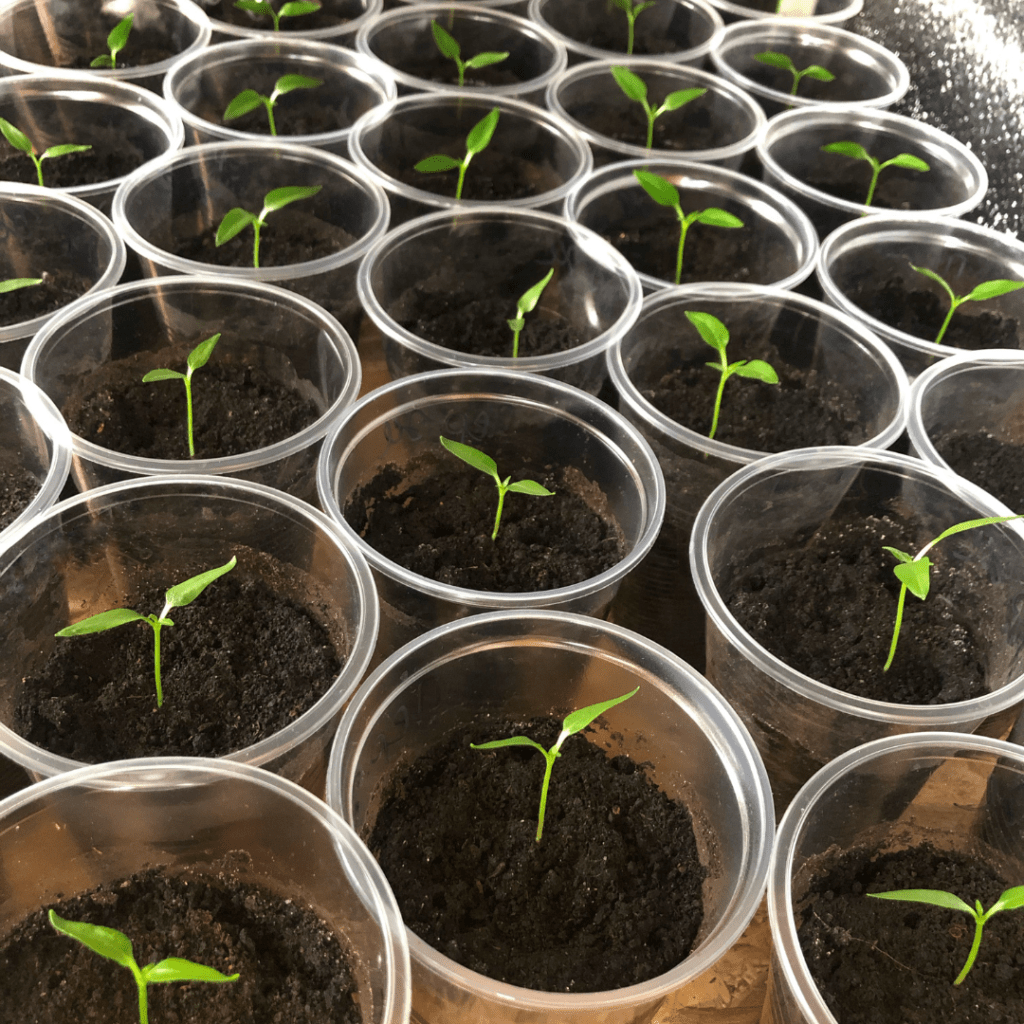
My Seed-Starting Success In Clear Plastic Cups!
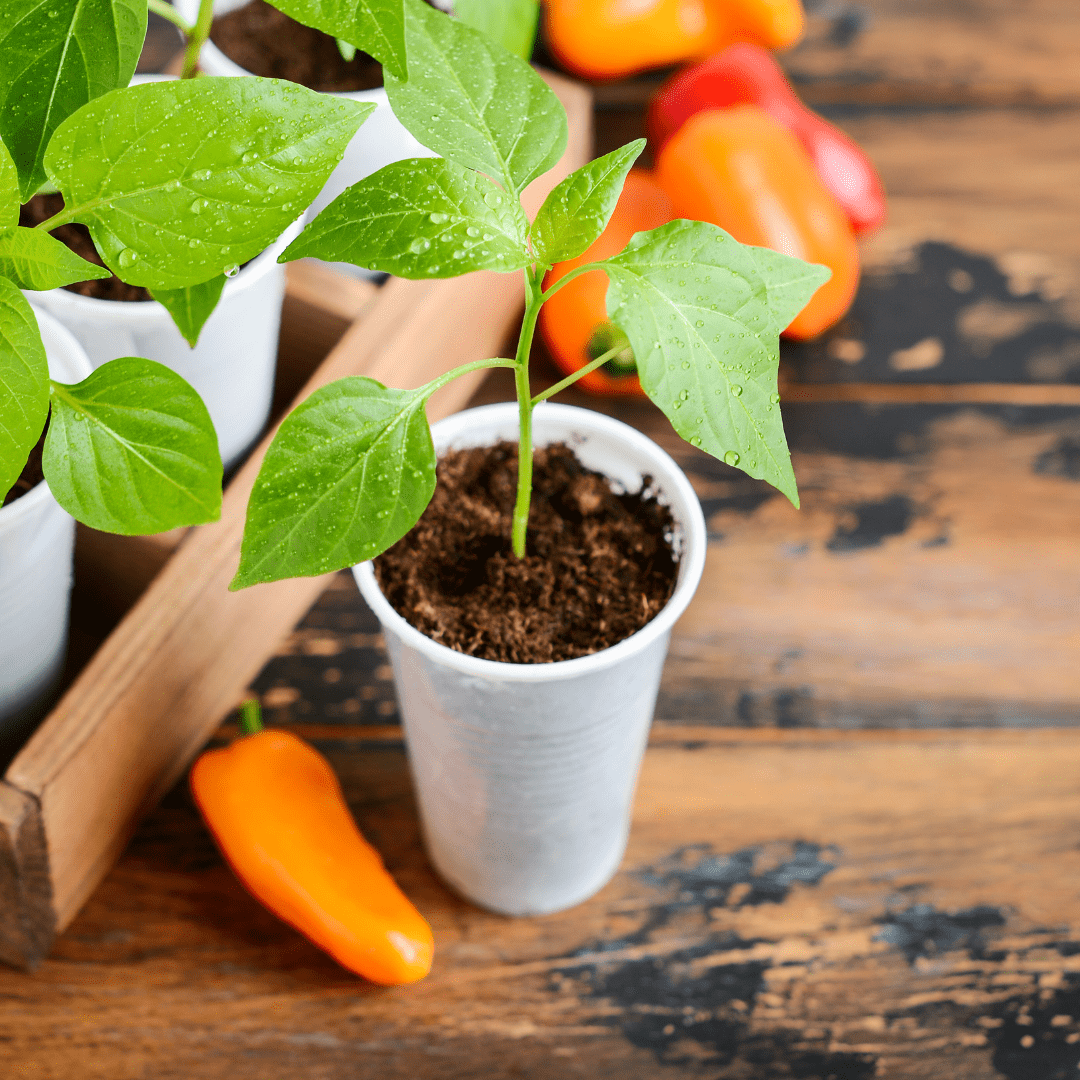
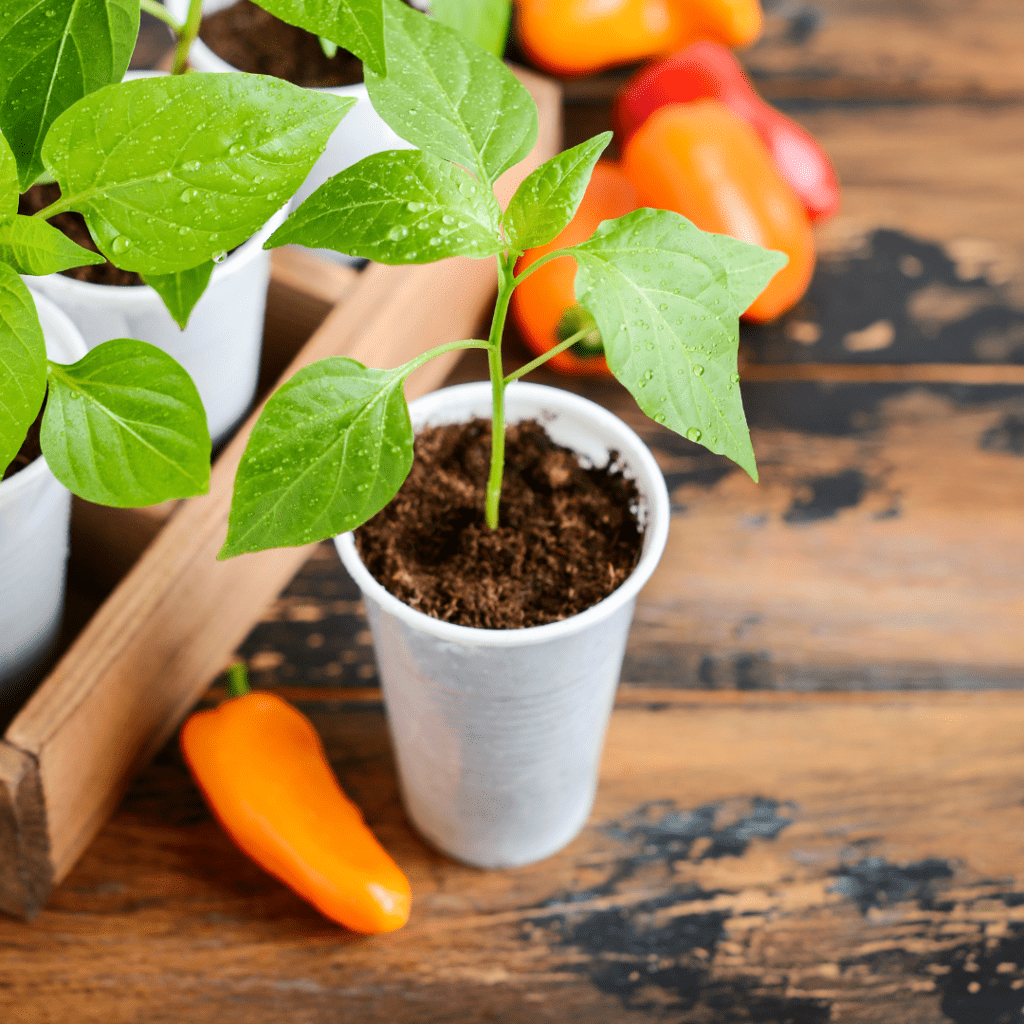
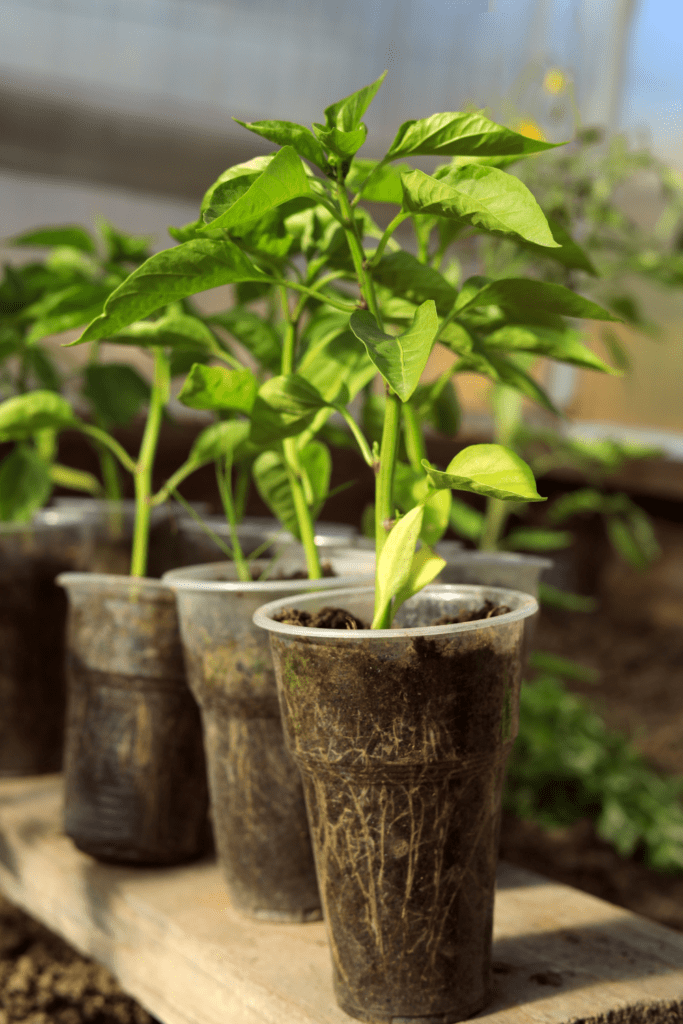
I start my pepper seeds in clear plastic cups for several reasons. Firstly, plastic cups are readily available and inexpensive, making them a convenient option for seed starting. Plus, they come in a long sleeve of cups! Additionally, their transparent nature allows me to monitor the seedlings’ progress and root development easily. Plastic cups also provide sufficient depth for the roots to grow before transplanting, promoting healthy growth. Bonus! No up-potting is necessary! Moreover, the flexibility of plastic cups makes them easy to handle and transport as needed. Lastly, their lightweight construction minimizes the risk of breakage, ensuring a safe and hassle-free seed-starting experience for me.
Oh, and by the way, using clear plastic cups for seed starting makes for easily washing them after each use! I just hand wash them in my sink and allow them to air dry on my counter. Do not put them in the dishwasher because you will end up with a bunch of deformed and melted cups!
Why I Do Not Use a Heat Mat for My Pepper Seed Germination
I know a lot of growers start their seeds in trays on a heat mat, which is optimal since they require warm soil for germination. However, in my case, starting pepper seeds on heat mats for germination isn’t always necessary for several reasons. Firstly, again as previously stated, peppers are warm-season plants that naturally germinate in warm soil temperatures, typically between 75°F to 85°F (24°C to 29°C). My indoor temperatures are already within this range, especially in spring or summer. Secondly, excessive heat can sometimes hinder germination or lead to leggy seedlings. Peppers prefer consistent warmth rather than extreme heat fluctuations.
Lastly, pepper seeds can germinate successfully without the aid of heat mats if provided with adequate moisture, oxygen, and light. Although it is best to take into consideration that they will have a much longer germination rate, but they will pop up! Therefore, while heat mats can accelerate germination in colder climates or during the early growing season, they are not always essential for successful pepper seed germination. So, I make sure to start them two weeks earlier than recommended to allow for them to take their time to sprout.
Here’s How I Start My Pepper Seeds In Plastic Cups
- First, I gather clean plastic cups and poke drainage holes in the bottom to ensure proper water drainage.
- Then, I fill the cups with moistened seed-starting mix, leaving some space at the top.
- Carefully, I plant one or two pepper seeds in each cup, making sure to follow the recommended planting depth.
- After covering the seeds with a thin layer of soil and gently patting it down, I label each cup with the pepper variety and planting date for easy identification.
- Next, I water the seeds gently, ensuring the soil is evenly moist, but not waterlogged.
- I either place the cups in a warm location with indirect sunlight or cover them with plastic wrap to create a mini greenhouse effect and wait patiently for them to sprout!
- Throughout the process, I monitor moisture levels closely and adjust watering as needed to prevent drying out or waterlogging.
- I also have to deal with batting away any of my cats whose soul’s desires are to knock off each and every one of my poor pepper cups!
- Once the seeds germinate, I remove any plastic covering and place the cups in a sunny spot or under grow lights to encourage healthy growth.
- Finally, when the seedlings have developed true leaves and are sturdy enough after a hardening-off period, I transplant them directly into the garden.
Creating the Optimal Growing Conditions for Pepper Seedlings
Creating the optimal growing conditions for pepper seedlings is essential for healthy plant development. Start by providing a warm and sunny environment, as peppers thrive in temperatures between 70°F to 85°F (21°C to 29°C). Ensure your seedlings receive at least 6 to 8 hours of sunlight daily or provide supplemental grow lights if natural light is insufficient.
Maintain consistent moisture levels by watering the seedlings when the top inch of soil feels dry, but avoid overwatering to prevent root rot. Use well-draining soil to prevent waterlogging and promote healthy root growth. Additionally, you need to provide good air circulation to prevent fungal diseases and strengthen the seedlings’ stems (an indoor fan works great for this! They don’t know the difference!) With these optimal growing conditions, your pepper seedlings will flourish and grow into robust plants ready for transplanting.
Why I Bottom-Water My Pepper Seedlings!
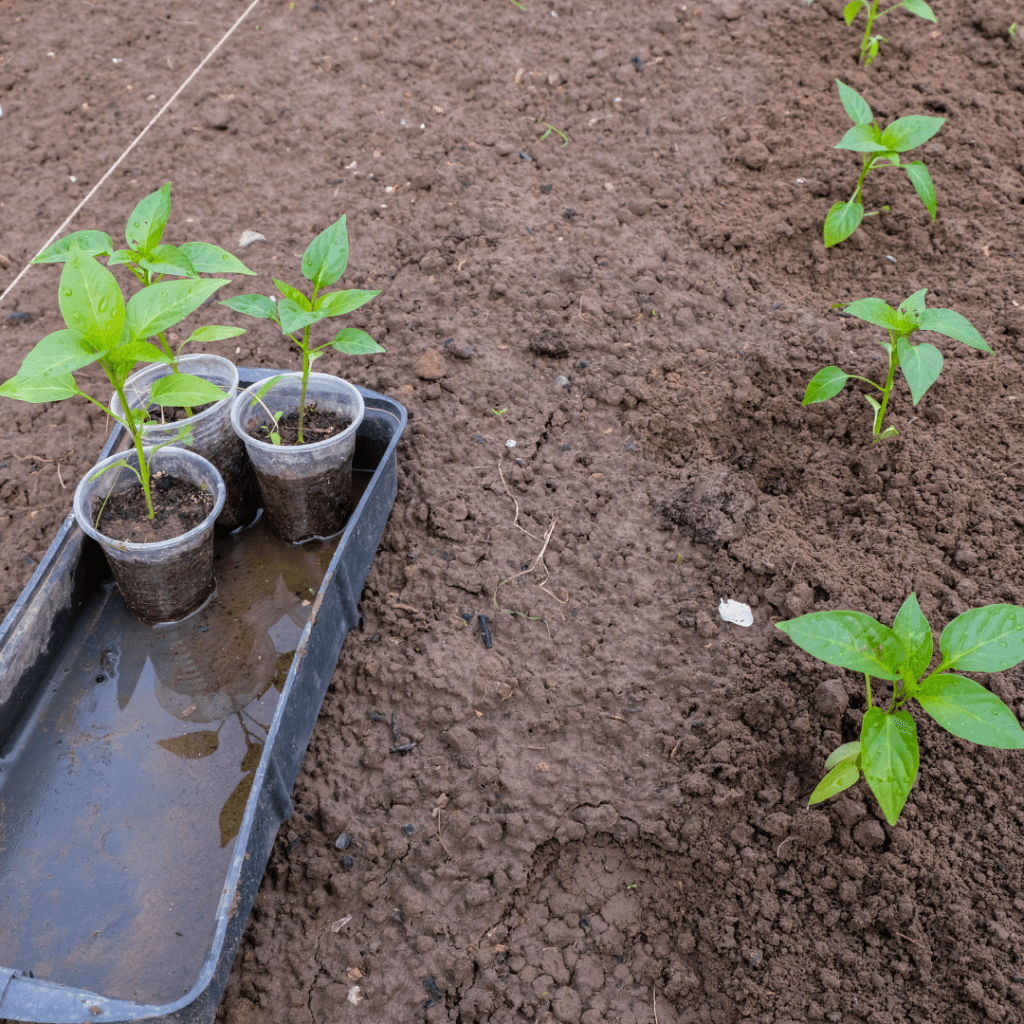
Bottom-watering pepper seedlings is a smart practice for several reasons. By watering from the bottom up, you encourage the development of strong and deep root systems as the roots grow downward in search of moisture. This method also helps prevent waterlogged soil, reducing the risk of damping off disease and other fungal issues that can plague young seedlings.
Additionally, bottom watering allows for more efficient water absorption, ensuring that each seedling receives the moisture it needs without excess runoff or evaporation. Overall, bottom watering promotes healthier and more resilient pepper seedlings, setting them up for success as they continue to grow and thrive.
Sowing Pepper Seeds: Techniques and Best Practices
Direct Sowing vs. Starting Indoors
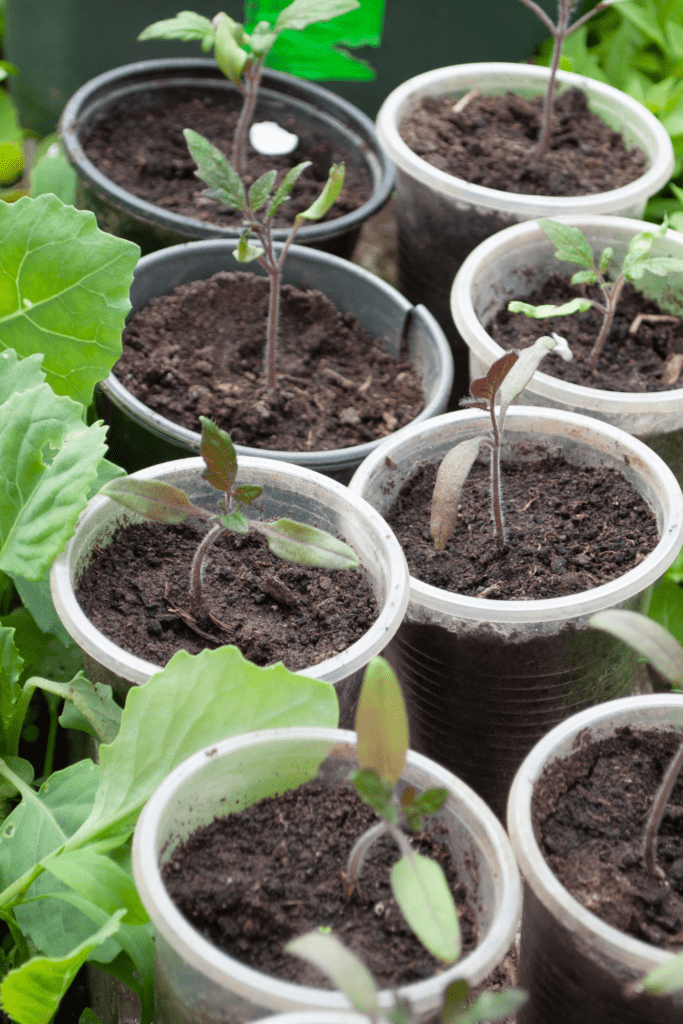
When deciding whether to directly sow pepper seeds or start them indoors, consider factors like your climate, growing season, and personal preference. Direct sowing involves planting seeds directly into the garden soil once the weather has warmed and all risk of frost has passed. This method is suitable for regions with long growing seasons and mild winters.
Starting seeds indoors, on the other hand, allows for an earlier start to the growing season and better control over environmental conditions to ensure healthy starts. It’s ideal for areas with shorter growing seasons or unpredictable weather patterns. Indoor sowing also gives seedlings a head start on growth before transplanting them outdoors. Ultimately, choose the method that aligns best with your gardening goals and local climate conditions.
Proper Seed Sowing Depth and Spacing
When sowing pepper seeds, it’s crucial to plant them at the proper depth and spacing to ensure optimal germination and growth. Aim to plant pepper seeds at a depth of about ¼ to ½ inch deep in the soil. This depth allows the seeds to be adequately covered while still receiving enough light for germination.
Additionally, ensure that seeds are spaced apart adequately to prevent overcrowding as they grow. Space pepper seeds at least 2 to 3 inches apart in rows, or follow the spacing recommendations provided on the seed packet. Proper seed sowing depth and spacing promote healthy root development and prevent competition for nutrients and space among seedlings.
Nurturing Pepper Seedlings for Healthy Growth

Nurturing pepper seedlings for healthy growth is crucial to ensure strong and productive plants. Proper care during the seedling stage establishes a solid foundation for the plant’s overall health and vitality. By providing optimal growing conditions, such as adequate light, warmth, and moisture, you encourage robust root development and sturdy stem growth.
Healthy seedlings are more resilient to pests, diseases, and environmental stressors, allowing them to thrive throughout the growing season. Additionally, well-nurtured seedlings are more likely to produce abundant yields of high-quality peppers. Investing time and attention into nurturing your pepper seedlings pays off in the form of a successful and rewarding harvest.
Watering and Feeding Seedlings
When watering and feeding pepper seedlings, there are essential tasks in their care regimen to consider.
Watering
It’s important to keep the soil consistently moist, but not waterlogged to prevent root rot and other moisture-related issues. Water the seedlings at the base to avoid wetting the foliage, which can promote fungal diseases.
Feeding
Provide a balanced fertilizer to support healthy growth, ensuring it contains essential nutrients like nitrogen, phosphorus, and potassium. Feed the seedlings sparingly, following the manufacturer’s instructions, as over-fertilizing can lead to nutrient imbalances and damage the delicate roots. Monitor the seedlings closely for signs of nutrient deficiencies or excesses, adjusting the feeding regimen accordingly to promote vigorous growth and robust pepper plants.
Providing Adequate Light and Temperature
Providing adequate light and temperature is crucial for the healthy development of pepper seedlings.
Light
Place the seedlings in a location where they receive plenty of bright, indirect sunlight for at least 6-8 hours a day. Supplemental grow lights can be used if natural sunlight is insufficient, ensuring they are positioned a few inches above the seedlings to prevent leggy growth.
Temperature
Maintain an optimal temperature range of 70-80°F (21-27°C) during the day and slightly cooler at night to mimic their natural growing conditions. Avoid exposing the seedlings to extreme temperatures or drafts, as they can stress the plants and hinder their growth.
Growing Happy Pepper Seedlings!
By creating the ideal environment with proper lighting and temperature, you’ll encourage strong and healthy pepper seedlings ready for transplanting into the garden!
Transplanting Pepper Seedlings into the Garden
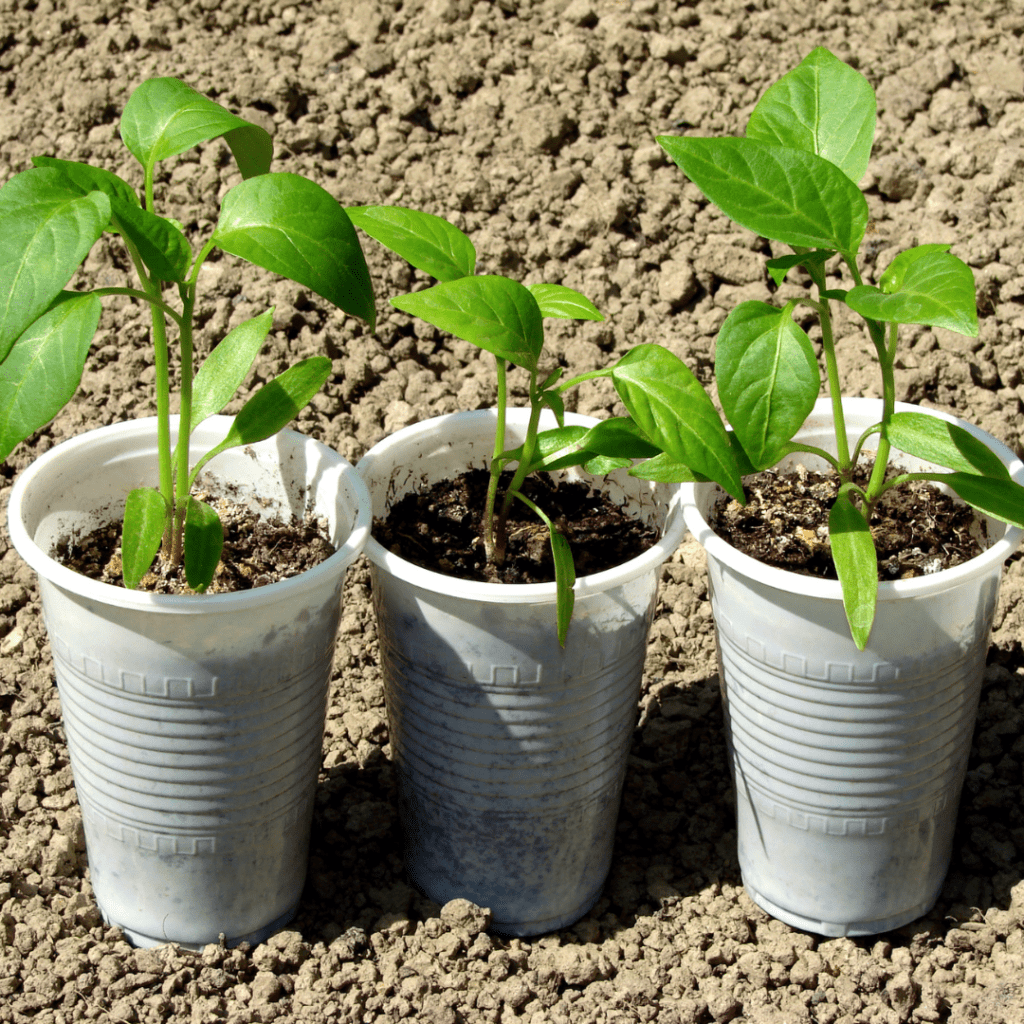
Hardening Off Seedlings
To harden off pepper seedlings for transplanting into the garden, gradually expose them to outdoor conditions over a period of 7-10 days. Start by placing the seedlings outdoors in a sheltered spot with indirect sunlight for a few hours each day, gradually increasing the duration and intensity of exposure. Protect the seedlings from strong winds and direct sunlight during this transition period to prevent them from becoming stressed or damaged.
Increase their exposure to outdoor conditions gradually, including cooler temperatures and fluctuating weather patterns, to help them acclimate to their new environment. By gradually toughening up the seedlings, you’ll ensure they are robust and resilient enough to thrive in the garden once transplanted.
Hardening Off Schedule for Seedlings
Here’s a general schedule for hardening off seedlings over a period of 7-10 days:
- Day 1-2: Place seedlings outdoors in a sheltered location with indirect sunlight for 1-2 hours.
- Day 3-4: Increase exposure to 3-4 hours of indirect sunlight, still in a sheltered area.
- Day 5-6: Gradually expose seedlings to direct sunlight for 1-2 hours, still in a sheltered spot.
- Day 7-8: Extend outdoor time to 4-6 hours in direct sunlight, but continue to shelter from strong winds.
- Day 9-10: Seedlings can now be left outdoors for the majority of the day, gradually introducing them to full sun and wind exposure.
Throughout the process, monitor the weather conditions and adjust accordingly to ensure the seedlings are not subjected to extreme temperatures, strong winds, or intense sunlight too soon (you know what I mean, the dramatic spring weather conditions we all experience!)
Transplanting Seedlings with Care
Transplanting pepper seedlings is a delicate process that requires care and attention to ensure their successful establishment in the garden. Start by preparing the planting area, loosening the soil, and incorporating compost or organic matter for added nutrients. Dig holes slightly larger than the root balls of the seedlings, ensuring they have enough space to spread out. Gently remove the seedlings from their containers, being careful not to damage the roots. Place each seedling in its prepared hole, ensuring it sits at the same depth as it was in the container. Backfill the holes with soil, gently firming it around the base of each seedling.
Finally, water the newly transplanted seedlings thoroughly to help settle the soil and reduce transplant shock. Keep the soil consistently moist in the days following transplantation, and provide shade or protection from intense sunlight until the seedlings become established. With proper care, your pepper seedlings will thrive and produce a bountiful harvest in the garden.
Troubleshooting Common Issues in Pepper Seed Starting
Troubleshooting common issues in pepper seed starting is crucial for ensuring the success of your gardening endeavors. Identifying and addressing problems early can prevent them from escalating and potentially damaging your seedlings. Issues such as damping off, nutrient deficiencies, pests, and diseases can all hinder the growth and development of your pepper plants if left unchecked.
By actively monitoring your seedlings and promptly addressing any issues that arise, you can maximize their chances of thriving and producing a healthy harvest. Additionally, troubleshooting allows you to learn from your experiences and improve your gardening practices for future seasons!
Addressing Seedling Diseases
Addressing seedling diseases is essential for maintaining the health of your pepper plants. When seedlings are affected by diseases such as damping off, fungal infections, or bacterial wilt, they may wilt, show signs of discoloration, or exhibit stunted growth. To address these issues, it’s crucial to practice good hygiene by using clean containers, sterilized soil, and proper watering techniques. Remove any infected seedlings promptly to prevent the spread of disease to healthy plants.
Consider applying organic fungicides or bactericides to affected seedlings as a preventive measure. Additionally, ensure proper air circulation and avoid overcrowding seedlings to minimize the risk of disease. Regularly monitor your seedlings for signs of disease and take swift action to prevent further damage and promote the overall health of your pepper plants.
Preventing Soil Mold Growth In Seedling Containers
Preventing soil mold growth in seedling containers is crucial for the health of your pepper seedlings.
- Start by using a sterile soil mix to reduce the risk of introducing mold spores.
- Ensure proper drainage by using containers with drainage holes and avoid overwatering, as soggy soil creates ideal conditions for mold growth.
- Maintain adequate air circulation around seedlings by spacing them appropriately and avoiding overcrowding.
- Place seedling containers in a well-ventilated area with sufficient sunlight, as sunlight helps to inhibit mold growth.
- If mold does appear, gently remove affected soil and increase air circulation by using a small fan or opening windows.
- Consider applying organic fungicides or using cinnamon powder as a natural antifungal agent to suppress mold growth.
Regularly monitor your seedlings and take proactive measures to prevent soil mold, ensuring the healthy development of your pepper plants.
Dealing with Fungus Gnats
Dealing with fungus gnats is essential to protect your pepper seedlings from potential harm. Start by addressing the source of the issue, which is often overwatered or poorly drained soil in already contaminated soil. Allow the soil to dry out between waterings to discourage fungus gnat larvae from thriving. Implement proper drainage in seedling containers by using pots with drainage holes and ensuring excess water can escape.
Consider using a layer of sand or gravel on top of the soil to deter adult fungus gnats from laying eggs. Alternatively, apply sticky traps near seedlings to capture adult gnats and reduce their population. Additionally, you can introduce beneficial insects like predatory mites or nematodes to control fungus gnat larvae naturally. Regularly monitor your seedlings for signs of fungus gnats and take prompt action to prevent infestations from worsening.
Sterilize Your Potting Soil Before Planting!
Sterilizing your potting soil before planting is a proactive step to prevent the occurrence of fungus gnats. The following tips can help you combat fungus gnats before they even become an issue in the first place! Take some measures to prepare your potting mix before you plant a single seed!
The Baking Method
Begin by preheating your oven to around 180-200°F (82-93°C). Spread a thin layer of potting soil on a baking sheet, ensuring it’s evenly distributed. Place the baking sheet in the preheated oven and let the soil bake for approximately 30 minutes. This process effectively kills any fungus gnat larvae, eggs, or pathogens present in the soil. Once sterilized, allow the soil to cool completely before using it for planting. Just try baking your soil in your oven on a day when you know you will be alone or your family may call the Looney Bin to come and take you away!
The Boiling Water Method
Alternatively, you can pour boiling water into the soil, preferably in a large tote, give it a good mix, and allow it to sit until cool to achieve similar results.
Why Do You Have to Bake or Sterilize Your Potting Mix, You Ask?
Good question! I am glad you asked! Sterilizing your potting soil eliminates potential sources of pests and diseases, providing a healthy environment for your pepper seedlings to thrive.
Dealing with Slow or Failed Germination
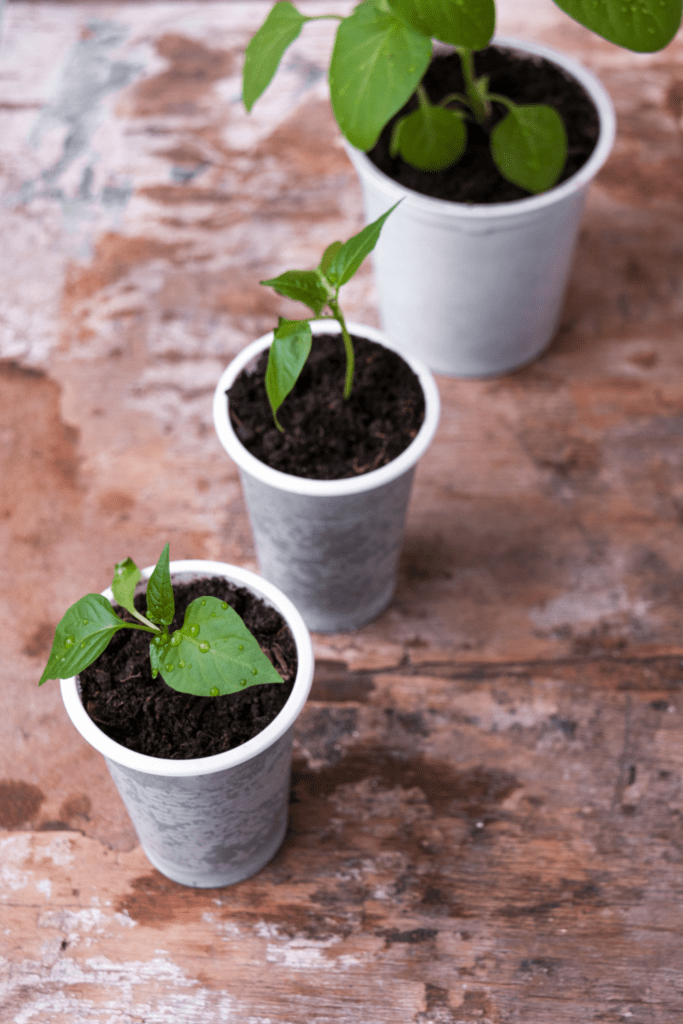
Don’t worry, it happens to the best of us. Dealing with slow or failed germination of peppers can be frustrating, but there are steps you can take to troubleshoot the issue.
- Start by ensuring that you’re using fresh, high-quality seeds from a reputable source.
- Check the soil temperature, as peppers require warm conditions for germination, ideally between 75-85°F (24-29°C).
- Keep the soil consistently moist, but not waterlogged, as overly wet conditions can inhibit germination.
- Consider using a seedling heat mat to provide consistent warmth if your environment is too cool.
- Additionally, cover your seed trays with a clear plastic dome or plastic wrap to create a greenhouse-like environment that retains moisture and warmth.
- If you’ve followed these steps and still experience slow or failed germination, try scarifying the seeds by gently rubbing them with sandpaper to break through their outer coating, which can sometimes improve germination rates.
Dealing with Pests That Attack Pepper Seedlings
Peppers are also susceptible to pests such as aphids, spider mites, and thrips, which can damage the plants and stunt their growth. These pests often feed on the leaves, sucking out vital nutrients and causing leaves to curl, yellow, or drop prematurely. Additionally, they can transmit diseases that further weaken the plants.
To prevent pest infestations, it’s essential to maintain good garden hygiene, regularly inspect plants for signs of pests, and promptly address any issues. Natural predators like ladybugs and lacewings can also help control pest populations, reducing the need for chemical interventions. Additionally, practicing crop rotation and interplanting with companion plants that repel pests can help deter them from infesting your pepper plants once they are out in the garden.
Conclusion
Growing peppers from seed can be a rewarding experience, offering the satisfaction of nurturing plants from their earliest stages to a bountiful harvest. By understanding the characteristics of pepper seeds, selecting the right varieties, and providing optimal growing conditions, you can set yourself up for success. Starting seeds indoors allows for greater control over environmental factors, but direct sowing can also be effective in warmer climates with longer growing seasons.
Nurturing seedlings with proper watering, lighting, and care is crucial for healthy growth, as is hardening them off before transplanting into the garden. Troubleshooting common issues like slow germination or seedling diseases ensures that your pepper plants thrive throughout their life cycle. With patience, attention to detail, and a little bit of know-how, you can enjoy a plentiful harvest of vibrant peppers to spice up your culinary creations.
Resources: Here are some helpful resources for further information to help you grow your best peppers ever!
- From Seed to Harvest: A Guide to Growing Peppers – By Urban Farmer
- Planting Pepper Seeds: Two Easy and Effective Methods – By Savvy Gardening
- Growing Sweet Peppers from Seed – By Gardeners’ World

Frequently Asked Questions
1. Can I use store-bought peppers to harvest seeds for planting?
Yes, you can absolutely use store-bought peppers to harvest seeds for planting! When selecting peppers from the grocery store, make sure to choose ones that are ripe and free from any signs of disease or rot. To harvest the seeds, simply cut open the pepper and remove them. It’s best to let the seeds dry out for a few days on a paper towel before planting them. Keep in mind that some store-bought peppers may be hybrids, which means that the plants grown from these seeds may not produce true-to-type offspring.
2. How long does it take for pepper seeds to germinate?
Pepper seeds typically take about 7-14 days to germinate under optimal conditions. Factors like temperature, moisture levels, and seed quality can all impact the germination time. To speed up the process, you can soak the seeds in water overnight before planting them or use a heat mat to keep the soil warm (around 70-80 degrees Fahrenheit). It’s important to provide consistent moisture during germination, but avoid overwatering, as this can cause rotting. Once your pepper seeds have sprouted, make sure they are getting plenty of sunlight and continue to provide them with proper care to ensure a healthy growth cycle.
3. Do pepper plants require special care during the seedling stage?
Pepper plants do require some special care during the seedling stage to ensure they grow healthy and strong. It is important to provide them with plenty of sunlight, at least 6-8 hours a day, as well as consistent watering to keep the soil moist, but not waterlogged. It is also beneficial to use a high-quality potting mix that is rich in nutrients and has good drainage. Some gardeners choose to use a heat mat or grow lights to help maintain the ideal temperature for pepper seedlings, which is around 70-80 degrees Fahrenheit. Additionally, it is helpful to gradually expose seedlings to outdoor conditions before transplanting them into the garden, in order to prevent shock.
4. What are some common problems that may arise when growing peppers from seed?
When growing peppers from seed, there are a few common problems that may arise. One issue is germination failure, which can be caused by factors like inadequate light, inconsistent watering, or incorrect soil temperature. Another problem is damping off, a fungal disease that can cause young seedlings to rot at the base and wilt. Peppers are also susceptible to pests such as aphids, spider mites, and thrips, which can damage the plants and stunt their growth. Additionally, overwatering or underwatering can lead to root rot or dehydration in pepper plants.
Summary
I hope I have inspired you to grow peppers with these tips and products.
If you were encouraged by this post, I invite you to check out my FREE Printables Page for fun free printables, planners, and charts.
ENTER MY FREE Printables Page HERE
Here are some more of my gardening inspiration posts to check out!
How to DIY a Milk Jug Drip Irrigation System!
Why Cedar Mulch Is The Perfect Natural Weed Barrier
Onions: How to Grow Onions for Storage
Peas: How to Grow Garden Peas for a Bumper Crop
Carrots: How to Grow Carrots for a Bountiful Harvest
Prep Your Garden for Spring Planting with These Expert Tips!
How to Grow a Prepper Garden to Survive and Thrive
The Best Garden Tools You Need for a Productive Season
Fastest Growing Vegetables for Your Survival Garden
How to Grow Marigolds As Pest Control In Your Vegetable Garden
Must-Have Tools for a Successful Balcony Vegetable Garden
How to Effectively Combat Powdery Mildew in Your Garden
The Best Tips for Organic Gardening
How to Release Ladybugs In Your Garden for Organic Pest Control
The Best Garden Snail Control Strategies
The Best Spring Vegetables to Grow in Your Garden
Seed Starter Mix: How To Make Your Organic Seed Starter Mix At Home
How to Grow a Productive Canning Garden
How to Plant and Grow a Salsa Garden
Easiest Heirloom Vegetable Seeds to Grow Now
How to Use the Hand Twist Claw Tiller: Tackling Tough Soil
More Fun Gardening Posts to Check Out!
Planning Your Garden: How to Plan a Vegetable Garden: Expert Green Thumb Tips!
Winterizing the Garden: How to Winterize Your Vegetable Garden: Step-by-Step Checklist
Mulching the Garden: How to Make Leaf Litter Mulch
Grow a Pumpkin Patch: How to Grow a Pumpkin Patch in Your Backyard
How to Grow a Fall Garden: 9 Best Fall Crops
Clever Ways to Incorporate Indoor Composting into Your Home
How to Start Composting for the Garden: A Step-by-Step Guide
The Ultimate Guide to Composting in Your Suburban Backyard
Why I Built A Survival Garden in My Backyard
16 Best Medicinal Herbs to Grow in Your Garden Now
Blessings,
The Off Grid Barefoot Girl

