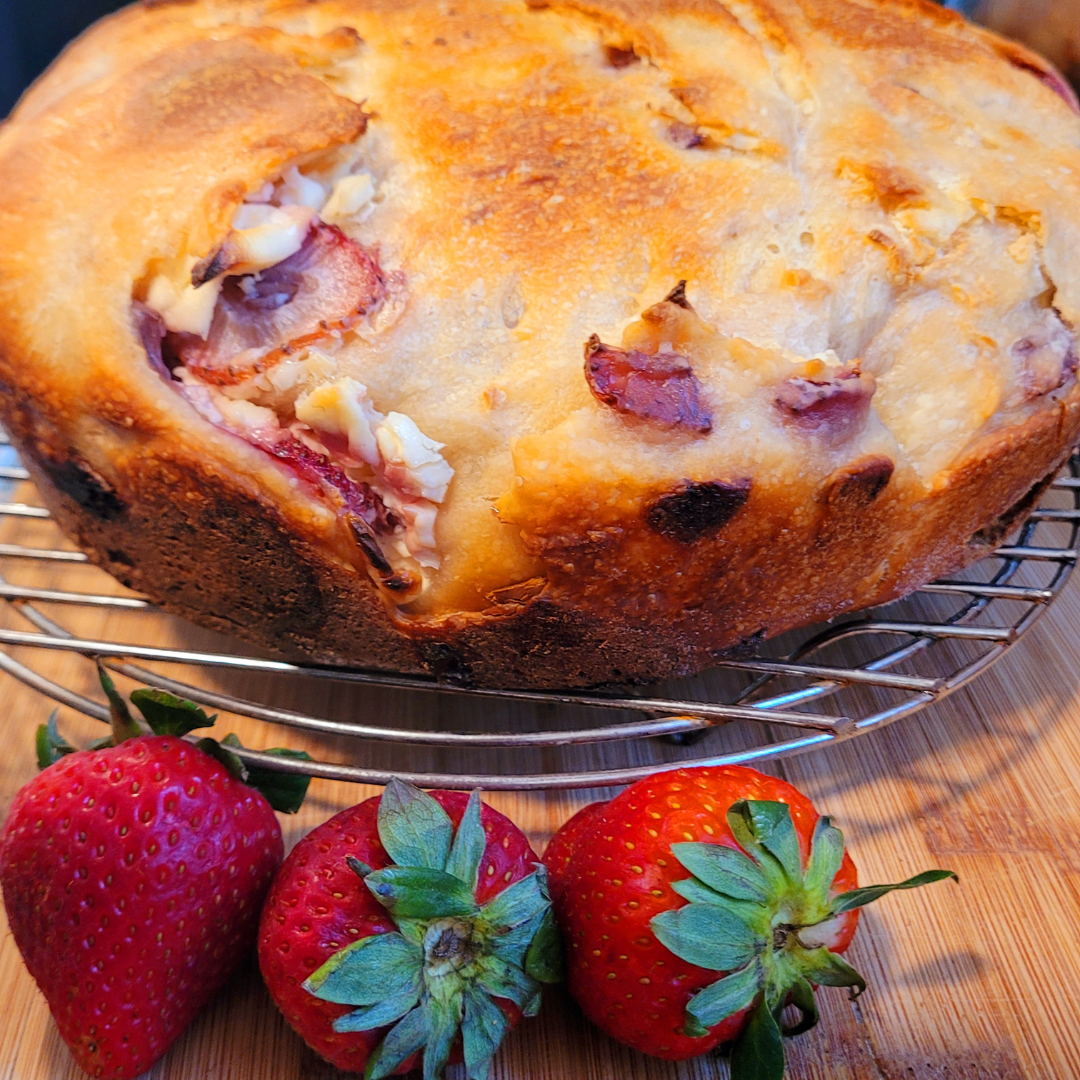
Strawberries and cream sourdough bread.
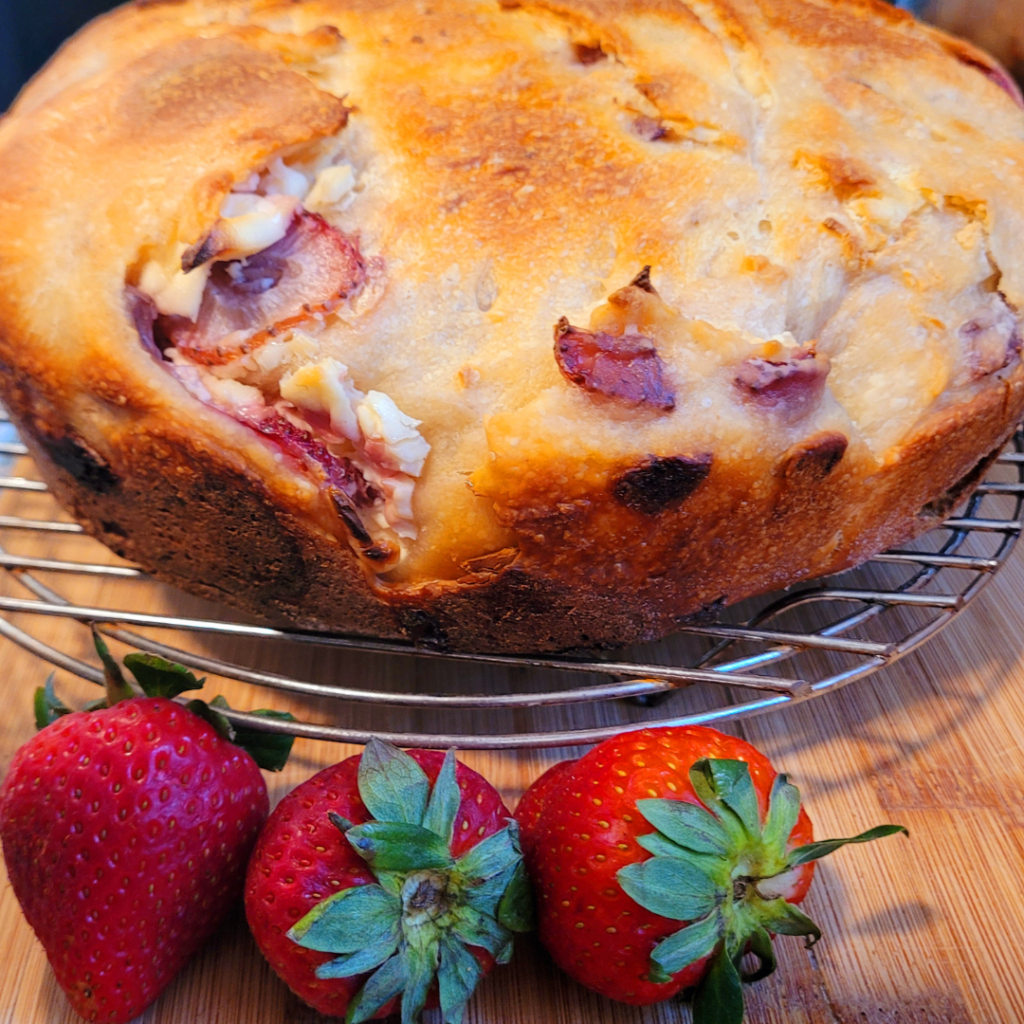
Have you ever tried strawberries and cream sourdough bread? If not, you’re in for a treat! This delightful twist on a classic sourdough loaf combines the tangy flavors of sourdough with the sweet, fruity essence of fresh strawberries and the rich creaminess of, well, cream. Trust me, it’s a flavor sensation that will have you coming back for slice after slice.
In this blog post, I’ll guide you through every step of the process, from preparing your sourdough starter to kneading the dough, incorporating the strawberry and cream flavors, and baking your masterpiece to perfection. So, roll up your sleeves, grab your apron, and let’s get started with our sourdough baking with a fruity and creamy twist!
This is a pinnable post. Tap or hover over any image in this post to pin to your Pinterest Boards.
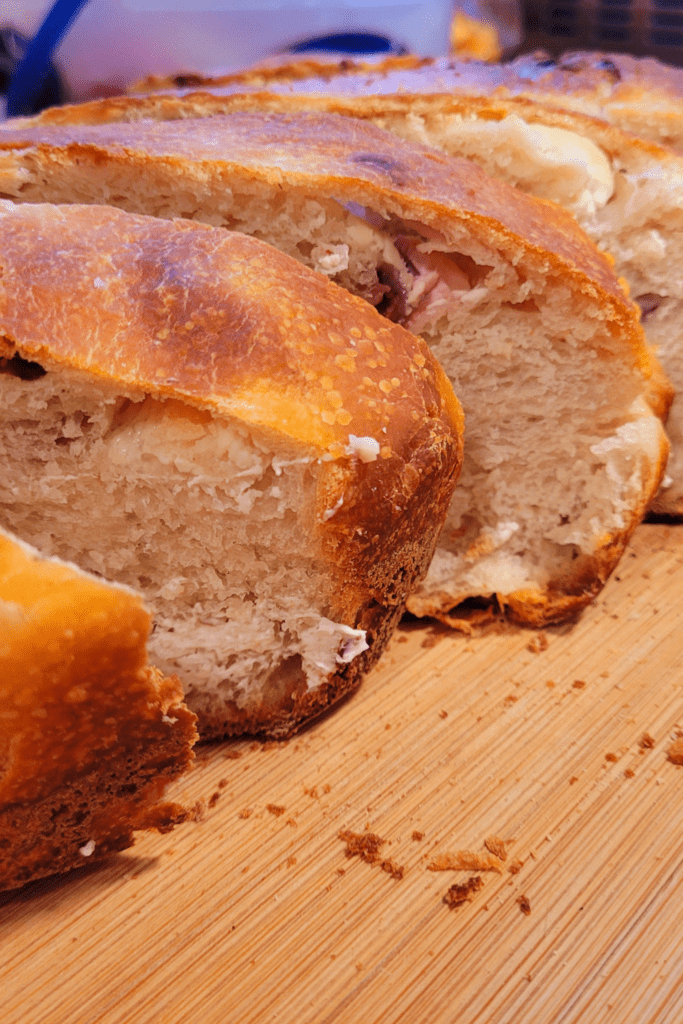
Imagine waking up to the aroma of freshly baked bread wafting through your kitchen, knowing that you crafted that deliciousness with your own two hands. And when you slice into that golden-brown loaf, revealing the vibrant swirls of strawberry and dollops of creamy goodness, you’ll feel a sense of pride and accomplishment that only homemade bread can bring.
Whether you’re an experienced sourdough baker or a newcomer to the world of bread-making, this recipe is incredibly approachable and rewarding. With a few simple ingredients and some patience, you can create a beautiful, artisanal loaf that’s perfect for breakfast, brunch, or even dessert.
Sourdough Bread Basics
Making delicious sourdough bread is an art that involves patience, technique, and a deep understanding of the process. In this section, I’ll explore the fundamentals of sourdough bread, covering what it is, its benefits, and the essential ingredients needed to create this tantalizing treat.
What is Sourdough Bread?
Sourdough bread is a type of bread that is made using a fermented mixture of flour and water, known as a sourdough starter. This starter acts as a natural leavening agent, causing the dough to rise without the need for commercial yeast. The fermentation process, which can take anywhere from 12 to 24 hours or more, is what gives sourdough bread its distinctive tangy flavor and chewy texture.
Benefits of Sourdough Bread
Beyond its delicious taste, sourdough bread offers several health benefits:
- Easier Digestion: The fermentation process breaks down some of the gluten and other compounds in the flour, making sourdough bread easier to digest for those with sensitivities.
- Nutrient-Rich: Sourdough bread is a good source of nutrients like iron, folate, and various antioxidants.
- Longer Shelf Life: The lactic acid produced during fermentation acts as a natural preservative, allowing sourdough bread to stay fresh longer than other types of bread.
Ingredients Needed for Strawberries and Cream Sourdough Bread

To make sourdough bread, you’ll need just a few simple ingredients:
- Sourdough Starter: This is the heart of sourdough bread, containing wild yeasts and beneficial bacteria that will ferment the dough.
- Flour: Bread flour or all-purpose flour is commonly used, but you can experiment with different types of flour for unique flavors.
- Buttermilk: This adds extra creaminess and tang to the bread. However, old H2O is also great for creating the dough and activating the fermentation process.
- Salt: A pinch of salt not only enhances the flavor, but also helps control the fermentation.
- Sugar: To help balance the flavor profile and activate the yeast.
- Soft Butter: This helps enrich the bread, further adding to the creamy texture.
- Fresh or Dehydrated Strawberries: Add the natural sweetness of strawberries to this bread with a hint of tartness.
- Cream Cheese: Cream cheese adds a rich, creamy filling and a subtle tangy flavor to strawberries and cream sourdough bread, enhancing its overall taste and moisture.
Pro Tip: Maintaining a healthy sourdough starter is key to achieving the best results. Feed your starter regularly and keep it at room temperature for optimal activity.
Preparing the Sourdough Starter

Creating a vibrant and active sourdough starter is the foundation of delicious sourdough bread. In this section, I’ll explore the process of preparing a sourdough starter from scratch, feeding it to keep it happy and healthy, and recognizing the signs of an active starter ready to bake with.
Creating a Sourdough Starter
Sourdough starters are a mixture of flour and water that capture wild yeasts and bacteria from the air. To begin, simply combine equal parts of whole wheat flour and filtered water in a jar or bowl. Cover it with a breathable cloth and let it sit at room temperature for 24 hours. Each day, discard half of the mixture and replenish it with fresh flour and water. This process introduces new food for the microorganisms and allows them to thrive.
For further instructions, you can visit my other post where I go into more detail to crafting your own wild sourdough starter.
The Ultimate Guide to Crafting a Perfectly Tangy Wild Sourdough Starter
Feeding the Sourdough Starter
Once your starter starts bubbling and developing a pleasantly sour aroma, it’s time to establish a regular feeding routine. Ideally, you’ll want to feed your starter once or twice a day, discarding half of the mixture and adding fresh flour and water. This consistent feeding schedule provides the yeasts and bacteria with a steady supply of nutrients, keeping them active and vigorous.
Pro Tip: Use a ratio of 1 part starter to 1 part flour to 1 part water for feedings. For example, if you have 1 cup of starter, add 1 cup of flour and 1 cup of water.
Signs of an Active Starter
After about a week of consistent feedings, your sourdough starter should be ready to use. Here are a few signs to look for:
- Bubbles and frothy activity on the surface and throughout the mixture.
- A pleasantly sour aroma, reminiscent of fermented grapes or yogurt.
- A doubling in volume within 4-8 hours after feeding.
- A bubbly, fluffy texture when stirred.
Keep this in mind: “A healthy sourdough starter is like a well-tended garden – with proper care and attention, it flourishes and yields delicious results.” – Sourdough Baker’s Proverb
Remember, creating a robust sourdough starter takes patience and practice. If your starter seems sluggish or develops an off-putting odor, don’t worry – simply discard it and start fresh. With time and consistency, you’ll soon have a vibrant starter ready to bring life to your sourdough creations.
Making the Dough
Creating the perfect dough is a crucial step in baking delicious strawberries and cream sourdough bread. Follow these steps to ensure a soft, flavorful, and visually appealing loaf.
Mixing the Dough
- Feed your sourdough starter a few hours before mixing the dough, ensuring it’s active and bubbly.
- Once it’s ready, combine it with buttermilk, melted butter, sugar, and salt in a large bowl.
- After mixing well, gradually incorporate the flour, forming a shaggy dough.
- Knead the dough to develop the gluten structure and give the bread its chewy texture.
- Once the dough becomes smooth and elastic, cover it and let it sit for 30 minutes.
Performing the Stretch and Folds Technique
- Take the dough on one side, stretch it up without tearing, and fold it over the dough. Turn the bowl and repeat this four times.
- Cover and rest for another 30 minutes.
- Repeat this process until about two to three stretch and fold rounds have been completed.
Mixing In the Strawberries
- Gently fold in diced fresh or dehydrated strawberries, being careful not to overmix and crush them.
- Cover and allow it to sit and bulk ferment on the counter for 8 hours or overnight.
- During this time, the dough will continue to rise and develop its airy texture.
Adding the Cream Cheese Filling
Elevating your sourdough bread with the delightful flavors of strawberry and cream is a surefire way to create a truly memorable loaf. This section will guide you through the process of filling your dough with the irresistible taste of the rich, creamy goodness of cheese.
- Roll out the dough into a square and spread the softened cream cheese evenly across it.
- Roll it up like a cinnamon roll and place it seam-side down in a parchment-lined proofing bowl or banneton for the final rise.
- Place it in the fridge for up to 2 to 8 hours for the final rise. Cold sourdough bread bakes so much better and performs a nice spring rise during the baking process compared to warm sourdough bread.
With the strawberry and cream flavors expertly woven into your dough, your sourdough bread is now ready for its final proof and baking. Brace yourself for a delightful explosion of flavors with every bite!
Baking and Serving
- Preheat your oven to a scorching 450°F (230°C) and prepare your Dutch oven or baking stone.
- Once the oven and Dutch oven are both hot, carefully transfer the proofed dough to the preheated vessel and score the top with a sharp knife, allowing it to expand during baking.
- For the first 30 minutes, bake the bread with the lid on to create a steam-filled environment, which helps develop a crisp, golden crust.
- Remove the lid and continue baking until the loaf reaches a deep, mahogany brown color and has an internal temperature of 205-210°F (96-99°C), about 15 minutes.
- Remove from the oven and Dutch oven to a cooling rack to cool completely before slicing.
Serving Suggestions
Allow the bread to cool completely on a wire rack before slicing. This sourdough loaf is a versatile canvas for a variety of toppings and accompaniments. Serve it with a dollop of sweetened whipped cream and fresh strawberries for a delightful twist on the classic strawberries and cream dessert.
Alternatively, you can toast or grill thick slices and top them with a generous spread of mascarpone cheese, strawberry compote, and a drizzle of honey or balsamic glaze for a decadent breakfast or brunch treat.
For a savory option, pair the bread with a creamy brie or camembert cheese, fresh basil leaves, and a drizzle of olive oil or balsamic vinegar. The tangy sourdough flavor complements the rich cheese beautifully.
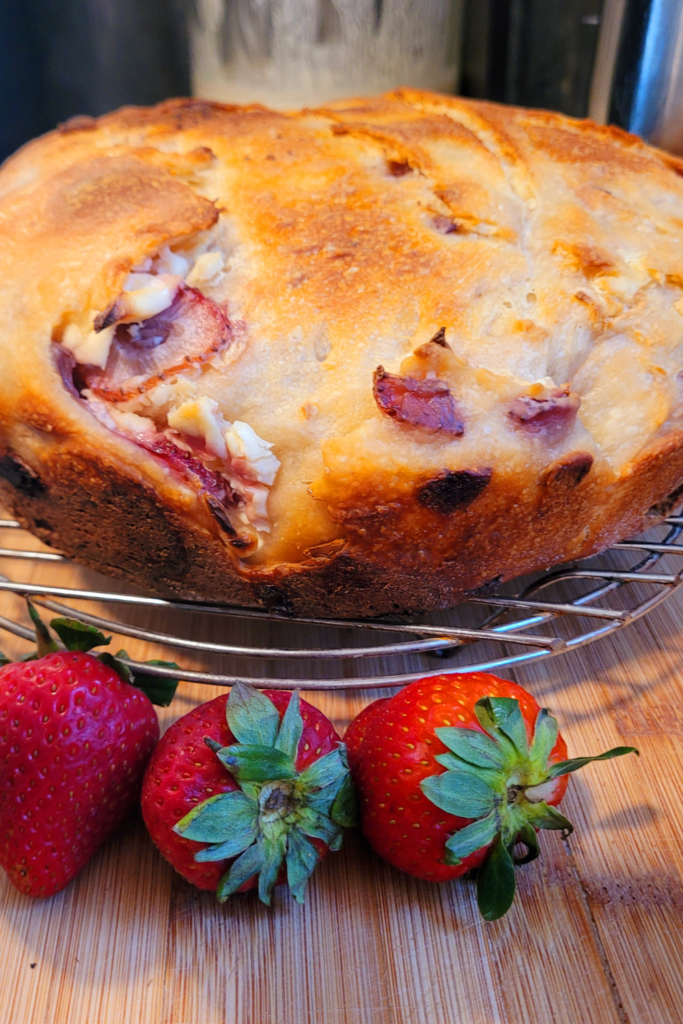
No matter how you choose to serve it, this strawberries and cream sourdough bread is sure to impress with its unique flavor and stunning appearance.
Conclusion
With a few simple ingredients and a bit of patience, you can create an incredibly delicious and unique strawberries and cream sourdough bread right in your own kitchen. By mastering the art of sourdough starter and carefully folding in those sweet, fruity flavors, you’ll end up with a loaf that’s sure to impress. The tartness of the sourdough pairs beautifully with the creamy richness and bright pops of strawberry.
So what are you waiting for? Gather your supplies, roll up your sleeves, and get baking! Don’t be afraid to experiment and make this recipe your own. Try different fruit combinations or swap out the cream for something like lemon curd. The possibilities are endless when you embrace the joy of homemade sourdough. And who knows? This could be the start of a delicious new hobby that brings you and your loved ones together through the simple pleasure of fresh-baked bread. Anything is possible when you follow your appetite for adventure.
Resources: Here are some helpful resources for further information.
- Delicious Everyday Sourdough Bread Recipe – By Heartbeet Kitchen
- Beginner’s Guide to Sourdough Bread – By Feasting At Home
- Good Sourdough Bread (My Master Sourdough Recipe) – By Grant Bakes
Frequently Asked Questions
1. Can I use frozen strawberries instead of fresh ones?
Yes, you can use frozen strawberries, but make sure to thaw and drain them well to avoid adding excess moisture to the dough.
2. How do I incorporate the cream cheese into the dough?
Cut the cream cheese into small cubes and gently fold them into the dough during the final mixing stage to ensure even distribution without overmixing or spreading in the middle and rolling like a cinnamon roll.
3. Do I need to adjust the hydration of the dough when adding strawberries?
Yes, you may need to slightly reduce the liquid content in your dough recipe, as strawberries release moisture during baking.
4. How long should I bake strawberries and cream sourdough bread?
Bake the bread at 450°F for 40-45 minutes, or until the crust is golden brown and the internal temperature reaches 200°F (93°C).
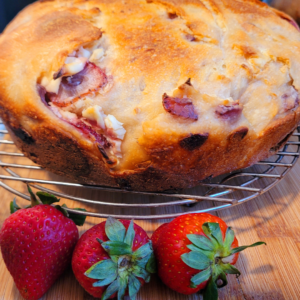
Strawberries and Cream Sourdough Bread
Equipment
- 2 mixing bowls.
- 1 Dutch oven.
Ingredients
For the Dough
- ½ cup sourdough starter.
- ¼ cup soft butter.
- 1 ¼ cups buttermilk.
- 1 tbsp sugar.
- 1 tsp salt.
- 3 ½ cups all-purpose flour.
For the Mix-Ins
- ½ cup diced fresh or dehydrated strawberries.
- 1 block softened cream cheese.
Instructions
Mixing the Dough
- Feed your sourdough starter a few hours before mixing the dough, ensuring it's active and bubbly.
- Once it's ready, combine it with buttermilk, melted butter, sugar, and salt in a large bowl.
- After mixing well, gradually incorporate the flour, forming a shaggy dough.
- Knead the dough to develop the gluten structure and give the bread its chewy texture.
- Once the dough becomes smooth and elastic, cover it and let it sit for 30 minutes.
Performing the Stretch and FoldsTechnique
- Take the dough on one side, stretch it up without tearing, and fold it over the dough.
- Turn the bowl and repeat this four times.
- Cover and rest for another 30 minutes.
- Repeat this process until about two to three stretch and fold rounds have been completed.
Mixing In the Strawberries
- Gently fold in diced fresh or dehydrated strawberries, being careful not to overmix and crush them.
- Cover and allow it to sit and bulk ferment on the counter for 8 hours or overnight.
- During this time, the dough will continue to rise and develop its airy texture.
Adding the Cream Cheese Filling
- Roll out the dough into a square and spread the softened cream cheese evenly across it.
- Roll it up like a cinnamon roll and place it seam-side down in a parchment-lined proofing bowl or banneton for the final rise.
- Place it in the fridge for up to 2 to 8 hours for the final rise. Cold sourdough bread bakes so much better and performs a nice spring rise during the baking process compared to warm sourdough bread.
Baking and Serving
- Preheat your oven to a scorching 450°F (230°C) and prepare your Dutch oven or baking stone.
- Once the oven and Dutch oven are both hot, carefully transfer the proofed dough to the preheated vessel and score the top with a lame or sharp knife, allowing it to expand during baking.
- For the first 30 minutes, bake the bread with the lid on to create a steam-filled environment, which helps develop a crisp, golden crust.
- Remove the lid and continue baking until the loaf reaches a deep, mahogany brown color and has an internal temperature of 205-210°F (96-99°C), about 15 minutes.
- Remove from the oven and Dutch oven to a cooling rack to cool completely before slicing.
Summary
I hope I have inspired you to bake your very own bread loaves to enjoy and share with your friends and family.
If you were encouraged by this post, I invite you to check out my FREE Printables Page for fun free printables, planners, and charts.
ENTER MY FREE Printables Page HERE
Here are some more of my bread-making inspiration posts to check out!
How to Make S’mores Sourdough Bread
July 4th Bread: How to Make a Firecracker Marble Bread Braid
Artisan Bread: How to Make Artisan Bread
Challah Bread: How to Make a 6 Braided Challah Bread
Sweet Bread: How to Make Sweet Bread
Blessings,
The Off Grid Barefoot Girl

