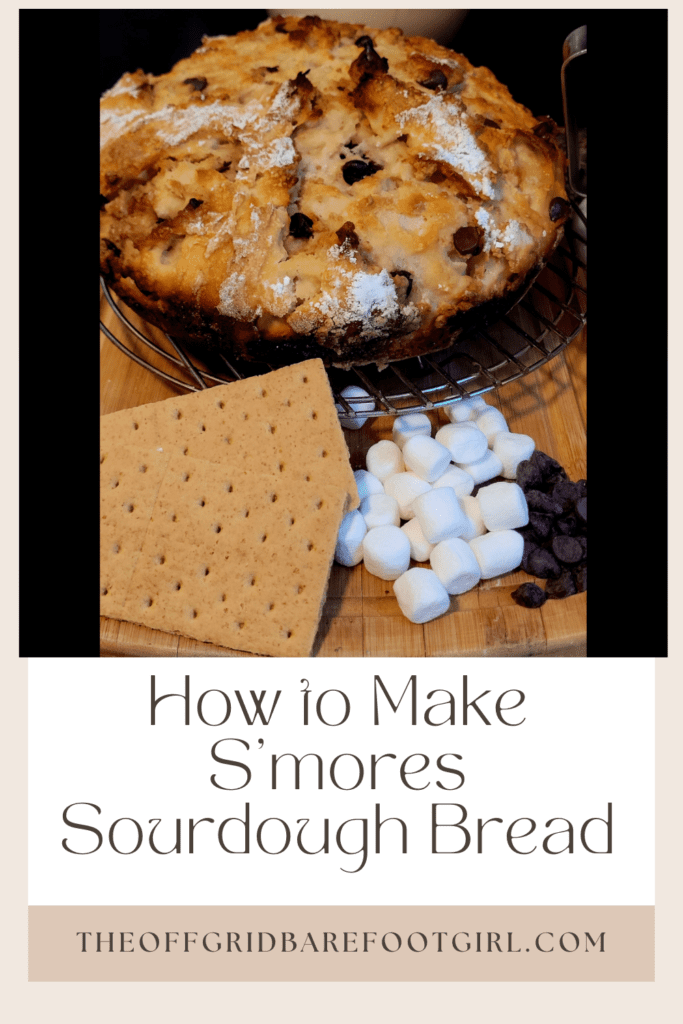
S’mores sourdough bread.
Do you absolutely love s’mores and sourdough? I know I do! S’mores is my weakness and when it is compared with my other weakness, sourdough bread, I simply cannot resist them and I just had to combine them into the ultimate campfire treat!
Imagine combining the comforting warmth of freshly baked sourdough bread with the gooey, chocolatey goodness of a classic s’more – a match made in flavor heaven! If this mouth-watering idea has you drooling, then you’re in for a treat!
We all know the joys of biting into a perfectly crisp yet chewy sourdough loaf, but what if I told you that you could elevate this beloved baked good to new heights of indulgence? By infusing the tantalizing flavors of buttery graham cracker filling, melted chocolate, and oozy marshmallows into a sourdough masterpiece, you’ll create a dessert bread that’s sure to become a new family favorite.
In this delectable blog post, I’ll guide you through the art of crafting s’mores sourdough bread from start to finish. You’ll learn the secrets of mastering sourdough fermentation, the techniques for achieving the perfect balance of flavors, and the tricks to nailing the baking process every time. Whether you’re a seasoned sourdough enthusiast or a curious newcomer, this step-by-step guide will equip you with the skills to transform a humble loaf into a decadent showstopper!
This is a pinnable post. Tap or hover over any image in this post to pin to your Pinterest Boards.
Understanding Sourdough Bread
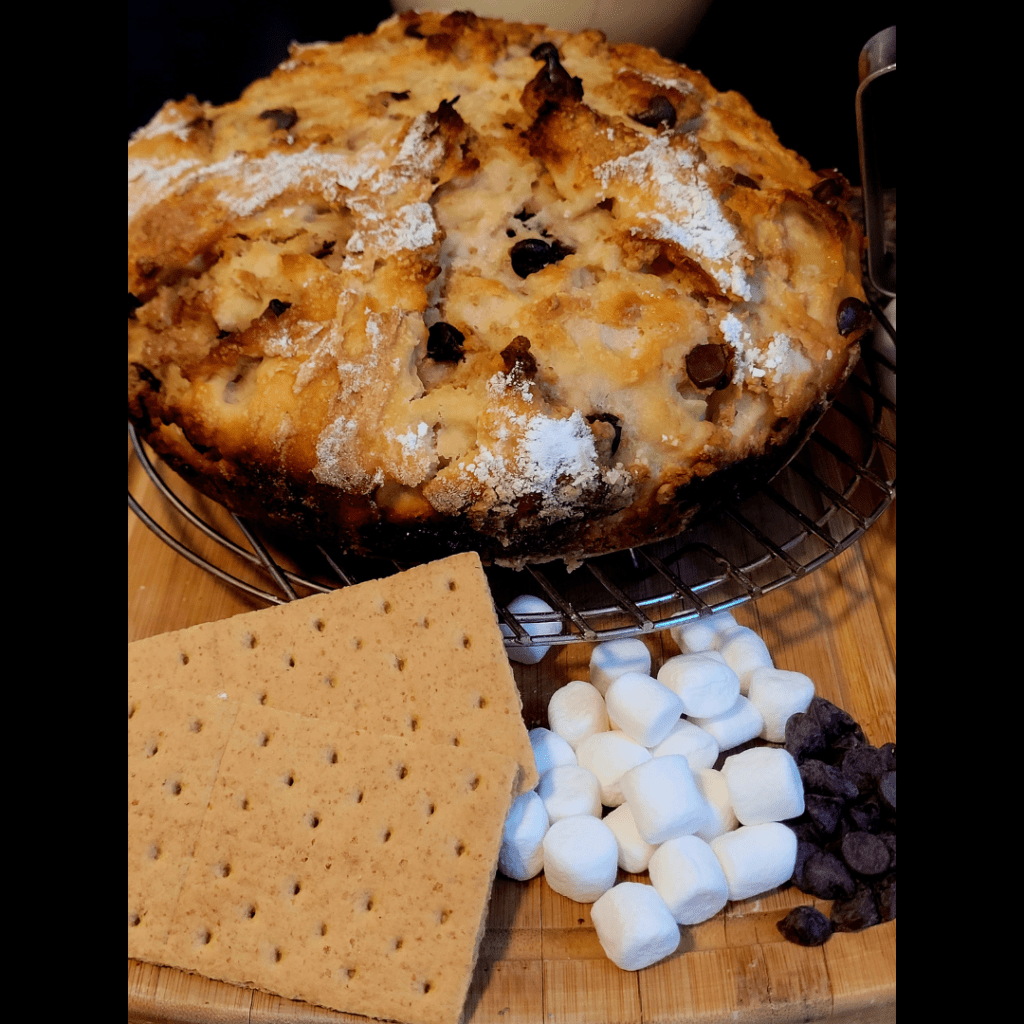
As an avid sourdough enthusiast, I can attest to the unique depth of flavor that this ancient bread-making technique brings to the table. Sourdough bread is a true labor of love, and understanding the intricacies behind its distinct sourness is key to mastering the craft.
What Makes Sourdough Sour?
The sourness in sourdough bread comes from the fermentation process, which involves the natural yeasts and bacteria present in the sourdough starter. This starter, a mixture of flour and water, is a living culture that contains lactobacilli bacteria and wild yeasts. As the starter ferments, the lactobacilli produce lactic acid, giving sourdough its characteristic tangy flavor.
Over time, as the starter matures and is regularly fed with more flour and water, the complexity of flavors in the sourdough bread deepens. The longer the fermentation time, the more lactic acid is produced, resulting in a more pronounced sour taste. Additionally, the wild yeasts in the starter contribute to the bread’s unique aroma and flavor profile.
Factors Impacting Sourdough Sourness
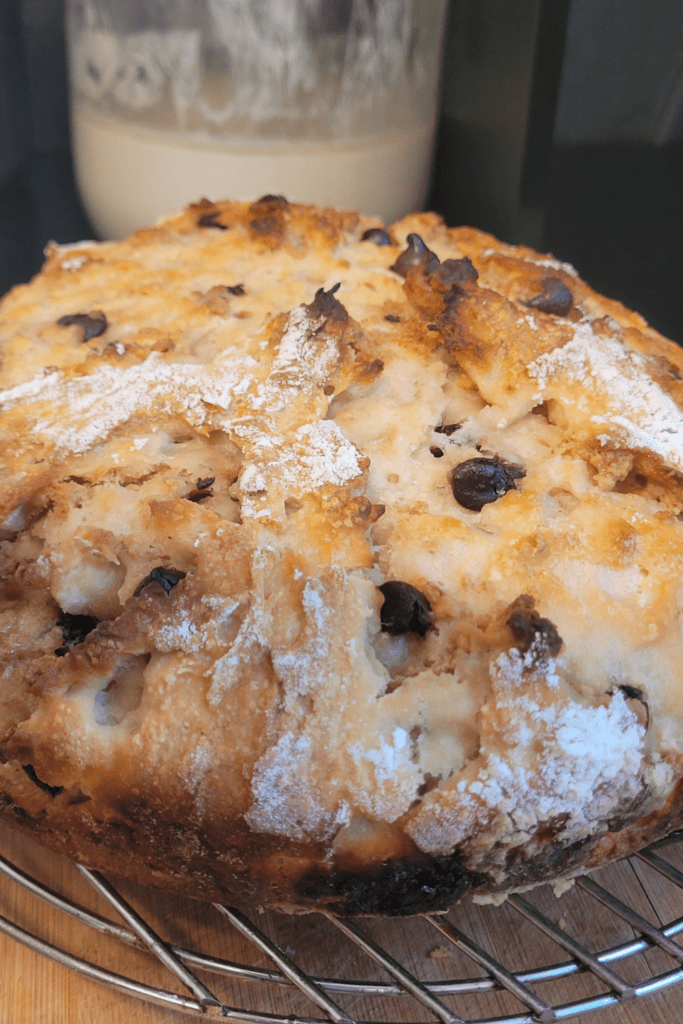
Several factors influence the level of sourness in sourdough bread. Temperature, for instance, plays a crucial role. Warmer temperatures accelerate the fermentation process, leading to a more sour flavor. Conversely, cooler temperatures slow down fermentation, resulting in a milder tang.
The type of flour used in the starter and dough also impacts sourness. Whole-grain flours, such as rye or whole wheat, contain more nutrients that feed the lactobacilli, resulting in a more robust sour flavor. Conversely, using only white flour can yield a more subdued sourness.
Another factor is hydration levels. A higher hydration dough (with more water) creates an environment that encourages lactobacilli growth, leading to increased sourness. Conversely, a drier dough can inhibit the bacteria’s activity, resulting in a milder flavor.
Enhancing Sourdough Flavor with Whole Grains
One of the easiest ways to amplify the flavor of sourdough bread is by incorporating whole grains into the dough. Whole-grain flours, such as rye, whole wheat, or spelt, are rich in nutrients that feed the lactobacilli in the sourdough starter, resulting in a more complex and robust flavor profile.
I’ve found that using a blend of whole-grain and white flour in my dough creates a perfect balance of tanginess and depth. The whole grains contribute earthy, nutty notes that complement the sourness beautifully, while the white flour ensures a light and airy crumb texture.
Additionally, whole grains add visual appeal to the bread, with flecks of wheat berries or rye grains dotting the crumb. This rustic appearance is a hallmark of artisanal sourdough bread and adds to the overall sensory experience.
Understanding the factors that influence sourness in sourdough bread is essential for any baker seeking to achieve their desired flavor profile. By playing with fermentation times, temperatures, hydration levels, and whole-grain flours, you can craft a loaf that perfectly suits your taste buds. Embrace the journey of sourdough bread-making, and let the tangy, complex flavors transport you to a world of culinary delight.
Mastering Sourdough Fermentation
When I first started exploring the world of sourdough baking, I was amazed by the depth and complexity of the fermentation process. Mastering the art of sourdough fermentation is key to achieving that perfect tangy flavor and airy crumb that we all crave. Let me share with you some insights I’ve gained along the way.
Long Fermentation Techniques
One of the secrets to creating a truly exceptional sourdough loaf lies in the power of long fermentation. By allowing the dough to ferment over an extended period, typically 12-24 hours, the wild yeast and bacteria have ample time to work their magic. The longer fermentation not only enhances the flavor profile, but also improves the dough’s structure and digestibility.
Over the years, I’ve experimented with various techniques, such as cold fermentation and stretch-and-fold methods, to achieve the perfect balance of tangy flavor and airy texture. For instance, when making my s’mores sourdough bread, I let the dough ferment overnight in the fridge, allowing the flavors to meld and develop before baking the next day.
Optimal Starter Maintenance
The heart and soul of any sourdough bake is the starter – a vibrant colony of wild yeast and lactic acid bacteria. Maintaining a healthy and active starter is crucial for consistent results. Through trial and error, I’ve learned the importance of regular feedings, using high-quality flour, and monitoring the starter’s activity.
I like to keep my starter at a 100% hydration level, feeding it equal parts flour and water. This consistency ensures that my starter remains bubbly and active, ready to work its magic in each bake. When incorporating it into my s’mores sourdough bread dough, I make sure to use a generous amount of starter for optimal fermentation and flavor development.
Learn How to Craft a Perfect Tangy Wild Sourdough Starter
In my other post, I teach the art of crafting the perfect tangy wild sourdough starter. This essential foundation for all your sourdough baking endeavors is more than just a mixture of flour and water – it’s a living and breathing entity that holds the key to deliciously tangy loaves.
I guide you through the process, from capturing wild yeast to nurturing a robust and flavorful starter that will elevate your sourdough creations to new heights. Click the link to learn more about how to start your own wild sourdough starter as I explore the alchemy of fermentation and unlock the secrets to achieving that distinct tang that sets homemade sourdough apart.
The Ultimate Guide to Crafting a Perfectly Tangy Wild Sourdough Starter
Temperature Control for Sourdough Development
Temperature plays a pivotal role in the fermentation process, influencing not only the rate of fermentation, but also the flavor and texture of the final product. Through experimentation, I’ve learned to fine-tune the temperature to suit my specific needs.
For a typical sourdough loaf, I aim for a dough temperature between 75-80°F (24-27°C) during bulk fermentation. This range allows for optimal yeast activity and flavor development without encouraging excessive sourness or over-fermentation. However, when making my s’mores sourdough bread, I slightly lower the temperature to around 70-75°F (21-24°C) to balance the rich flavors of the chocolate chips, marshmallows, and buttery graham cracker filling.
By mastering these key aspects of sourdough fermentation, you’ll be well on your way to creating truly exceptional loaves that burst with flavor and have a delightfully airy crumb. It’s a journey of patience, experimentation, and dedication, but the rewards are well worth it – especially when you bite into a slice of warm, fresh-from-the-oven s’mores sourdough bread!
Crafting S’mores Sourdough Bread
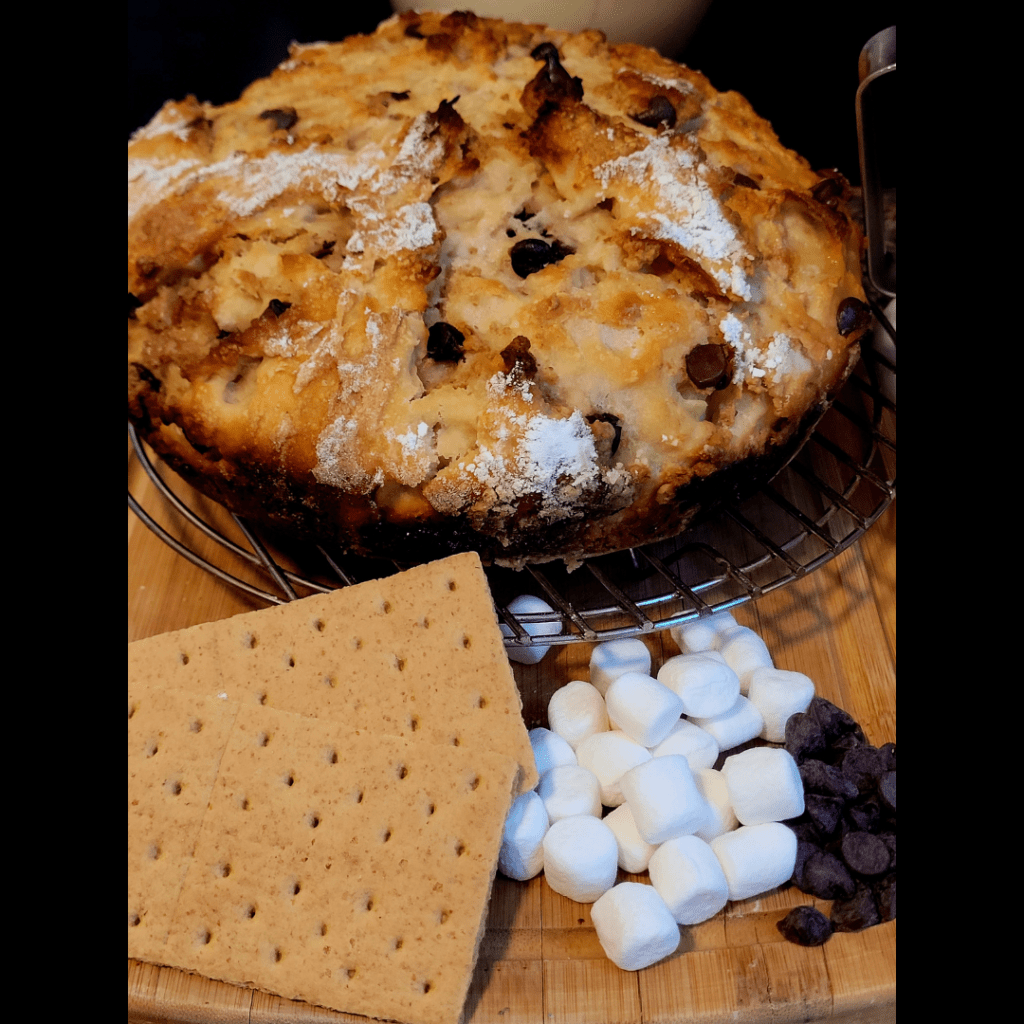
There’s nothing quite like the nostalgic flavor of s’mores – that perfect combination of gooey marshmallows, rich chocolate, and buttery graham crackers. But what if I told you that you could take that beloved treat to a whole new level by infusing it into a deliciously soft and tangy sourdough bread? Brace yourselves, because this s’mores sourdough bread is about to become your new obsession as it is mine!
Necessary Ingredients
The secret to this heavenly bread lies in the unique blend of ingredients. First, you’ll need a bubbly and active sourdough starter, which will give the bread its signature tangy flavor and chewy texture. Then, we’ll add some buttermilk for an extra dose of richness and moisture. Of course, no s’mores bread would be complete without butter, sugar, and a touch of salt to balance out the sweetness.
But the real magic happens when we fold in the star ingredients – those delightful chocolate chips and mini marshmallows. As if that wasn’t enough, we’ll also be incorporating a buttery graham cracker filling that will swirl through the dough, creating pockets of pure bliss.
Here’s What You Will Need
- Sourdough Starter: Sourdough starter adds a tangy depth to s’mores sourdough bread, enhancing the rich flavors of chocolate and marshmallow.
- Soft Butter: Soft butter enriches the s’mores sourdough bread, making it tender and adding a creamy texture to each bite
- Buttermilk: Buttermilk imparts a subtle tang and tenderness to the s’mores sourdough bread complementing the sweet flavors.
- Sugar: Sugar adds sweetness to the s’mores sourdough bread, balancing the tangy and rich flavors.
- Salt: Salt enhances the flavors in s’mores sourdough bread, providing a balance to the sweetness and tang.
- Flour: Flour provides the structure and base for this recipe, giving it its chewy texture.
- Chocolate Chips: Chocolate chips add bursts of rich, melty goodness to the s’mores sourdough bread.
- Mini Marshmallows: Marshmallows create gooey pockets of sweetness in this recipe.
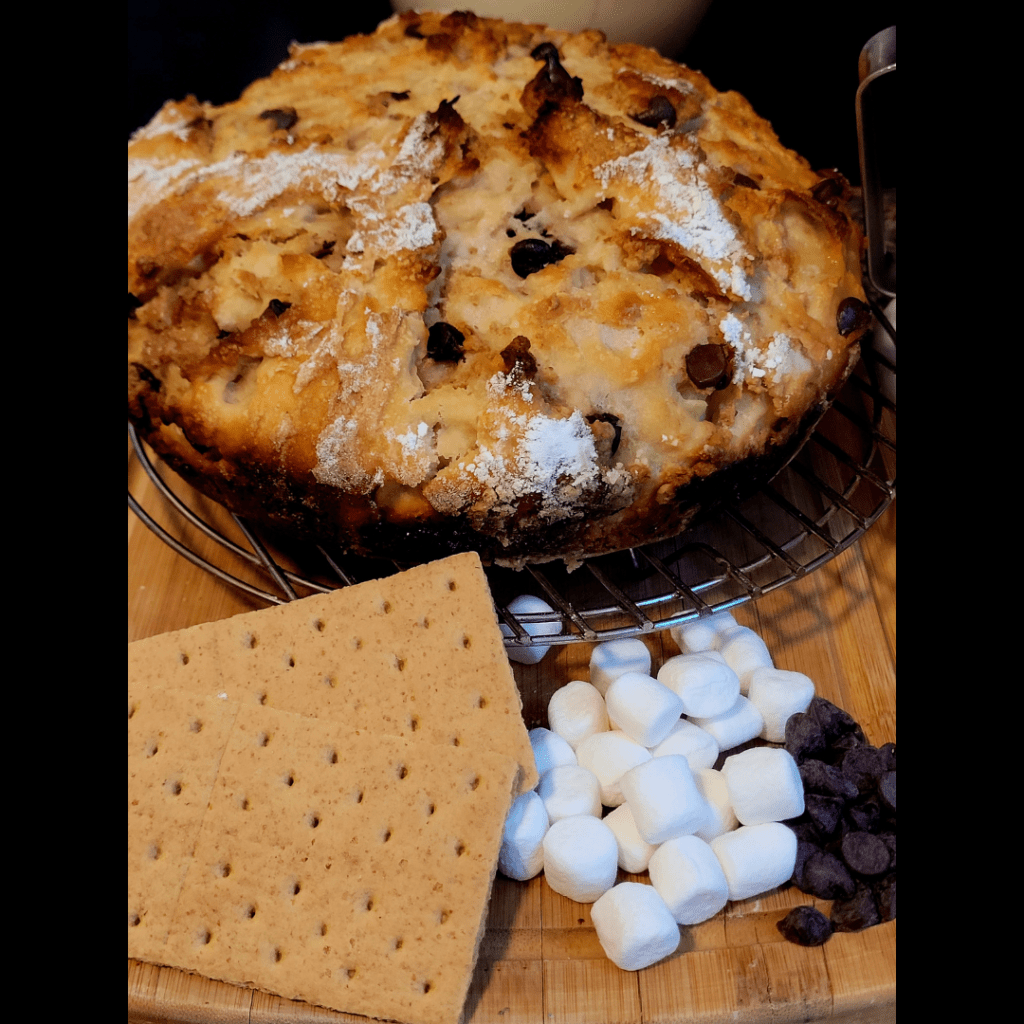
- Graham Crackers: Buttery graham cracker filling adds a crunchy, caramelized layer to the s’mores sourdough bread.
Unique Baking Tips for S’mores Flavor
While the basic recipe is already a winner, there are a few tricks I’ve picked up along the way to really amplify the s’mores flavor. First, consider toasting the marshmallows slightly before incorporating them into the dough. This will give you those delicious charred notes that are so iconic in a classic s’more. It will bring back happy childhood memories of eating firey charred roasted marshmallows at the campfire on carefree summer nights!
Another tip is to use a combination of milk and semi-sweet chocolate chips for the ultimate chocolate experience. And if you’re feeling extra indulgent, you can even drizzle the finished loaf with melted chocolate or dust it with graham cracker crumbs.
But perhaps the most important tip of all is to embrace the messy, gooey, and utterly delicious nature of this bread. It’s meant to be enjoyed with reckless abandon, savoring every bite of that glorious s’mores flavor.
Perfecting the Baking Process
Making s’mores sourdough bread is a delightful journey that combines the tangy flavor of sourdough with the nostalgic taste of campfire s’mores. In this section, I’ll guide you through the baking process, sharing my personal experiences and tips to help you achieve the perfect loaf.
Preparing the Dough
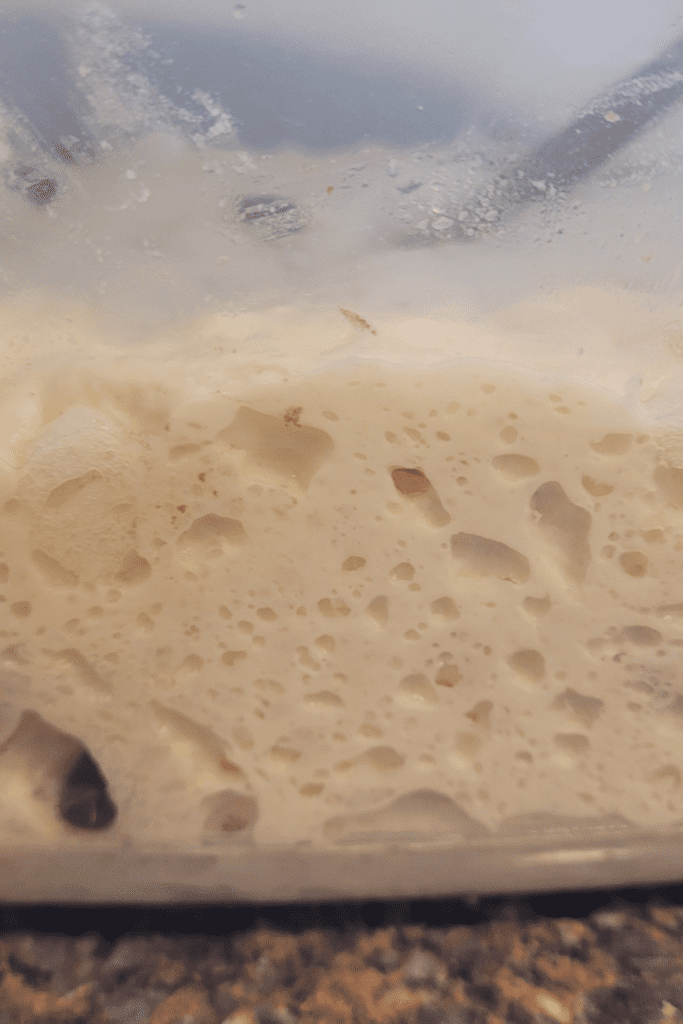
The dough is the foundation of this s’mores sourdough bread, and getting it right is crucial. I like to start by feeding my sourdough starter a few hours before mixing the dough, ensuring it’s active and bubbly. Once it’s ready, I combine it with buttermilk, melted butter, sugar, and salt in a large bowl. After mixing well, I gradually incorporate the flour, forming a shaggy dough.
Kneading is an essential step, as it develops the gluten structure and gives the bread its chewy texture. I prefer to knead the dough by hand, feeling its texture and adjusting the hydration as needed. Once the dough becomes smooth and elastic, I cover it and let it sit for 30 minutes.
Making the Buttery Graham Cracker Filling
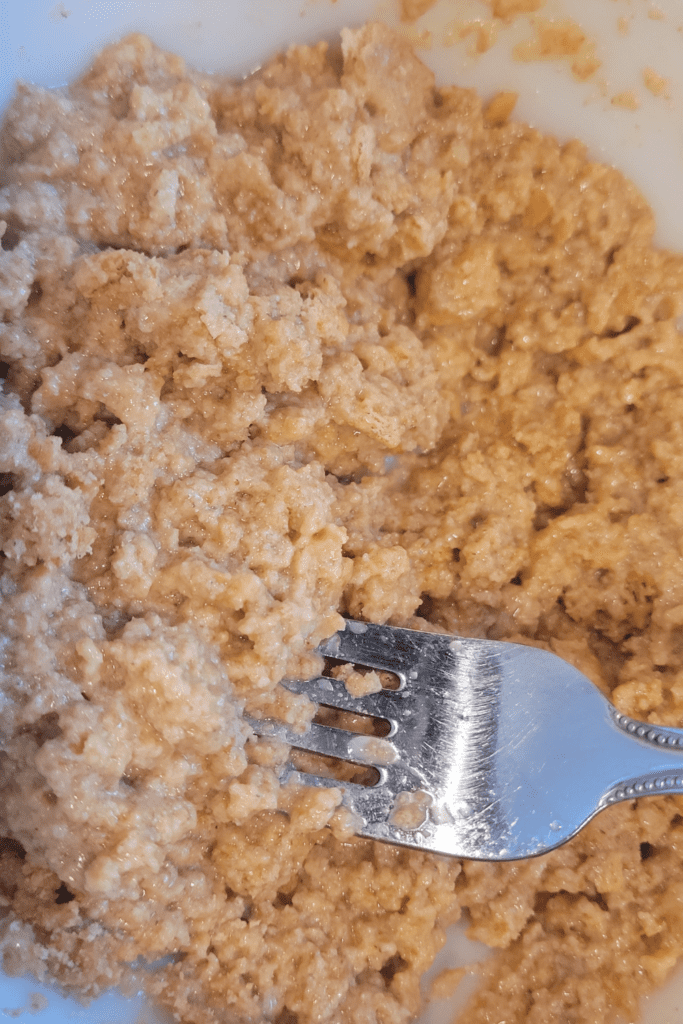
While the dough is resting, crush graham crackers and mix with melted butter in a bowl to create the buttery graham cracker filling. Place it in the fridge until needed.
Performing the Stretch and Folds Technique
After 30 minutes have passed, it is time to perform the first stretch and fold round. Take the dough on one side, stretch it up without tearing, and fold it over the dough. Turn the bowl and repeat this four times. Cover and rest for another 30 minutes. Repeat this process until about two to three stretch and fold rounds have been completed.
Mixing In the Chocolate Chips and Marshmallows
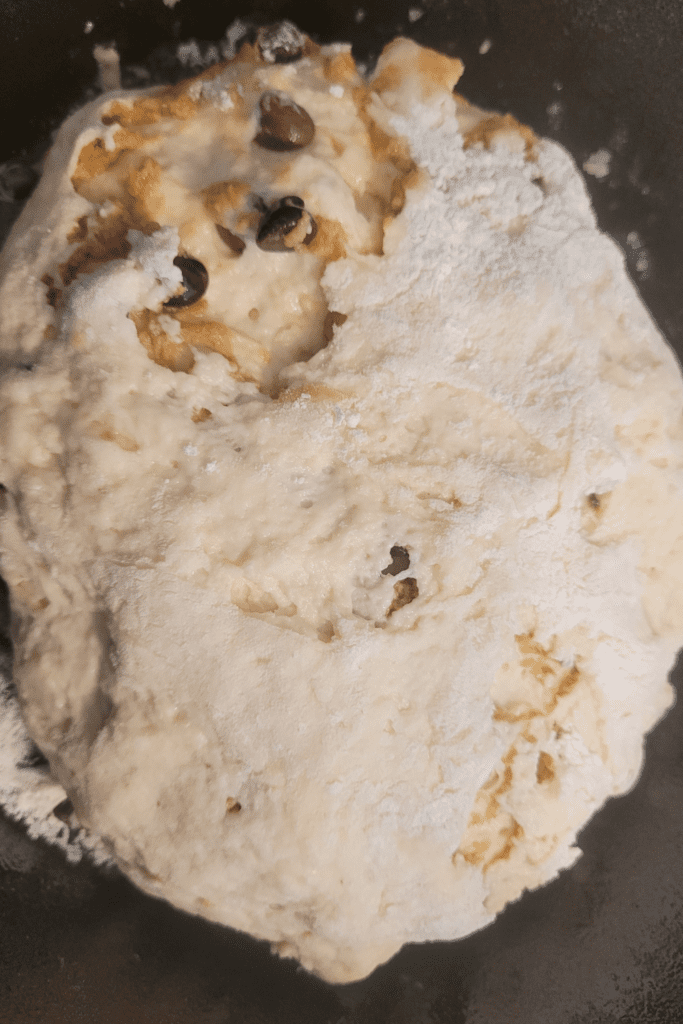
- Fold in the chocolate chips and marshmallows in the dough, being careful not to overmix.
- Cover and let it bulk ferment on the counter for up to 8 hours or overnight.
- During this time, the dough will continue to rise and develop its airy texture.
Adding the Buttery Graham Cracker Filling
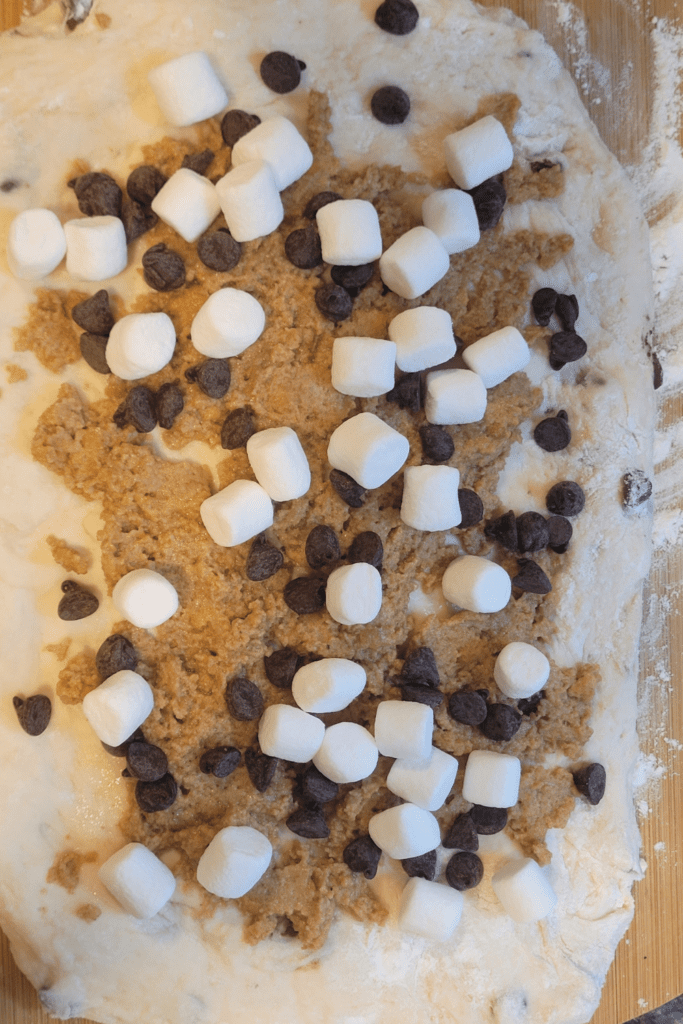
- Roll out the dough into a square and spread the graham cracker filling evenly across it. I added more chocolate chips and marshmallows on top of the graham cracker filling.
- Roll it up like a cinnamon roll and place it seam-side down in a parchment-lined proofing bowl or banneton for the final rise.
- Place it in the fridge for up to 2 to 8 hours for the final rise. Cold sourdough bread bakes so much better and performs a nice spring rise during the baking process compared to warm sourdough bread.
After a final rise, it’s time to bake this delicious treat to golden perfection. The aroma wafting through your kitchen will be nothing short of heavenly!
Baking and Finishing Touches
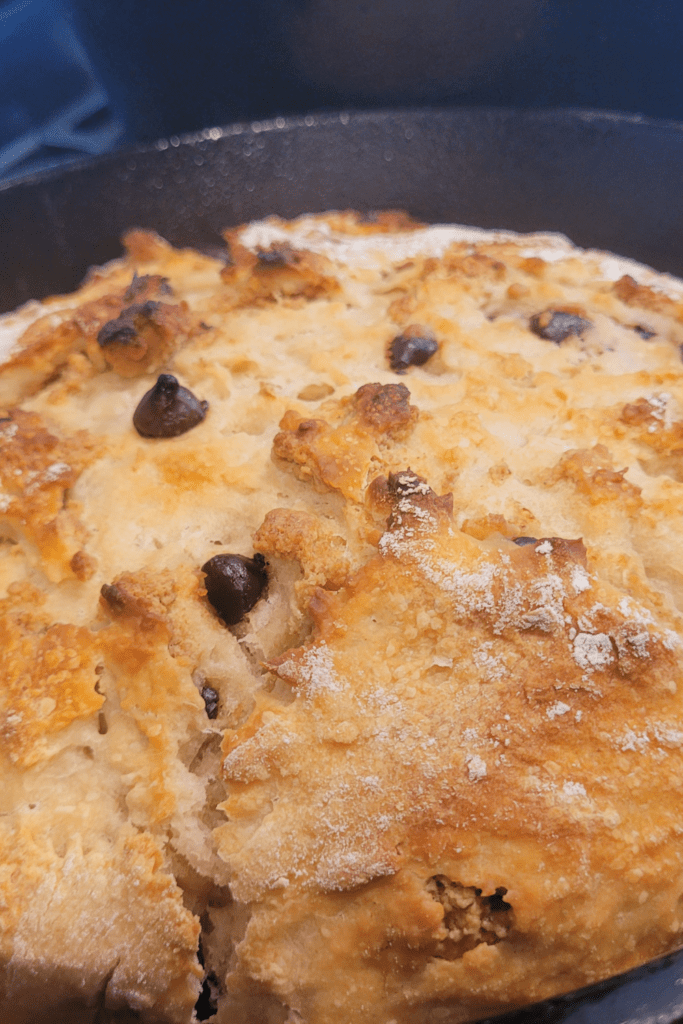
The moment we’ve been waiting for – baking! I preheat my oven to a scorching 450°F (230°C) and prepare my Dutch oven or baking stone. Once the oven and Dutch oven are both hot, I carefully transfer the proofed dough to the preheated vessel and score the top with a scoring knife, allowing it to expand during baking.
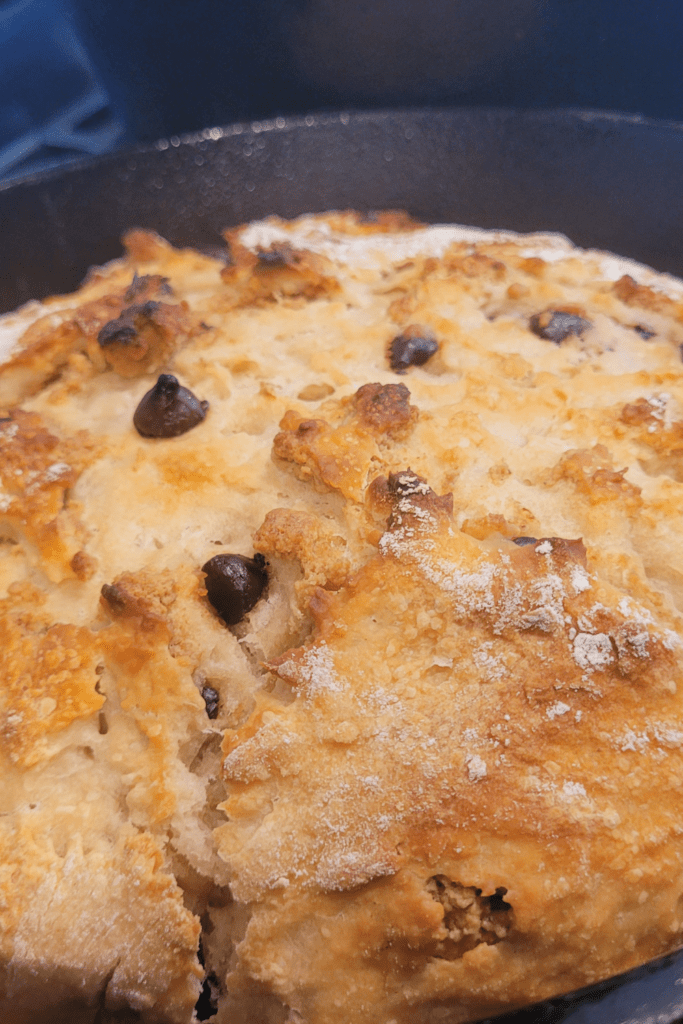
For the first 30 minutes, I bake the bread with the lid on to create a steam-filled environment, which helps develop a crisp, golden crust. Then, I remove the lid and continue baking until the loaf reaches a deep, mahogany brown color and has an internal temperature of 205-210°F (96-99°C), about 15 minutes.
Remember, baking is an art, and perfecting the process takes practice. Embrace the journey, trust your senses, and enjoy the delicious results of your labor!
Troubleshooting and Further Resources
As someone who has experienced the highs and lows of sourdough baking, I understand that challenges can arise along the way. Don’t be discouraged! With a little troubleshooting and perseverance, you’ll be on your way to sourdough success.
Common Sourdough Issues
Sourdough bread can be finicky, but understanding the common issues can help you avoid or overcome them. One frequent problem is a dense or gummy texture, which could be due to over-proofing, underbaking, or using too much water in the dough.
Another issue is a lack of rise or a flat loaf, which could result from an inactive starter, overworking the dough, or improper proofing conditions. Sometimes, you might also encounter a sour or vinegary taste, which usually indicates that the dough has over-fermented. Being mindful of the signs and adjusting your techniques accordingly can make a world of difference.
Remember, sourdough baking is a journey, and every baker has their own unique experiences and challenges. Don’t hesitate to reach out to fellow sourdough enthusiasts or consult trusted resources for guidance.
Conclusion
With a solid understanding of sourdough fermentation and the right techniques for crafting and baking s’mores sourdough bread, you’re now equipped to create this delightful treat in your own kitchen. Embrace the process, have fun experimenting with flavors, and don’t be discouraged by any initial setbacks – like any skill, mastering sourdough takes practice and patience.
Why not share your s’mores sourdough creations with friends and family, or join an online baking community to swap tips and tricks? There’s a wealth of resources available to help you troubleshoot any issues and continue expanding your sourdough repertoire.
Most importantly, enjoy the journey and savor the rewarding feeling of biting into a warm, fresh loaf that you crafted with your own hands. With a little persistence, you’ll be creating sourdough masterpieces that bring joy to every bite!
Resources: Here are some helpful resources for further information.
- Sourdough Bread: A Beginner’s Guide – By The Clever Carrot
- Homemade Sourdough Bread, Step by Step – By Alexandra’s Kitchen
- Beginner’s Guide to Sourdough Bread – By Feasting At Home
Frequently Asked Questions
1. How do I know when my starter is ready to use?
A healthy, active starter will have a bubbly, spongy texture and a pleasant, yeasty aroma.
2. Can I use bread flour for sourdough?
While bread flour is ideal, you can use bread flour, but you may need to adjust the water ratio.
3. How long does it take to make sourdough bread?
The entire process, from feeding the starter to baking, can take anywhere from 24 to 48 hours or more.
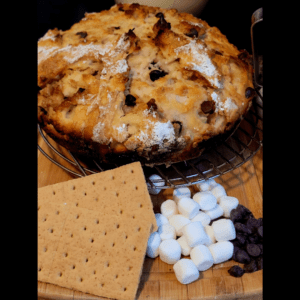
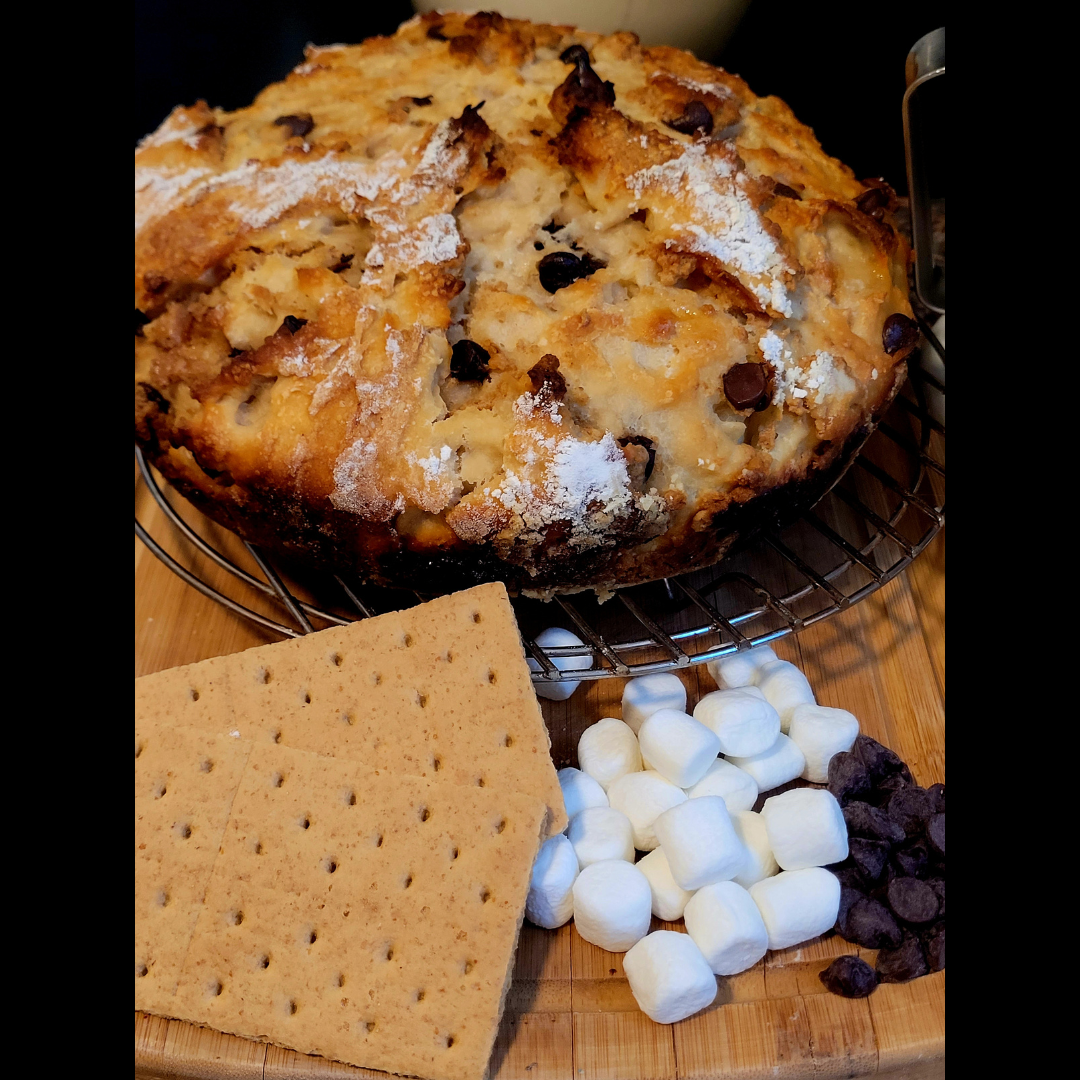
S’mores Sourdough Bread
Equipment
- 2 mixing bowls.
- 1 Dutch oven.
Ingredients
For the Dough
- ½ cup sourdough starter.
- ¼ cup soft butter.
- 1 ¼ cups buttermilk.
- 1 tbsp sugar.
- 1 tsp salt.
- 3 ½ cups all-purpose flour.
For the Mix-Ins
- ½ cup chocolate chips.
- ½ cup mini marshmallows.
For the Buttery Graham Cracker Filling
- 8 crushed graham crackers.
- ¼ cup melted butter.
Instructions
Preparing the Dough
- Feed your sourdough starter a few hours before mixing the dough, ensuring it's active and bubbly.
- Once it's ready, combine it with buttermilk, melted butter, sugar, and salt in a large bowl.
- After mixing well, gradually incorporate the flour, forming a shaggy dough.
- Knead the dough to develop the gluten structure and give the bread its chewy texture.
- Once the dough becomes smooth and elastic, cover it and let it sit for 30 minutes.
Making the Buttery Graham Cracker Filling
- While the dough is resting, crush graham crackers and mix with melted butter in a bowl to create the buttery graham cracker filling. Put it in the fridge until needed.
Performing the Stretch and Folds Technique
- Take the dough on one side, stretch it up without tearing, and fold it over the dough. Turn the bowl and repeat this four times.
- Cover and rest for another 30 minutes.
- Repeat this process until about two to three stretch and fold rounds have been completed.
Mixing In the Chocolate Chips and Marshmallows
- Fold in the chocolate chips and marshmallows in the dough, being careful not to overmix.
- Cover and allow it to sit and bulk ferment on the counter for 8 hours or overnight.
- During this time, the dough will continue to rise and develop its airy texture.
Adding the Buttery Graham Cracker Filling
- Roll out the dough into a square and spread the graham cracker filling evenly across it.
- Roll it up like a cinnamon roll and place it seam-side down in a parchment-lined proofing bowl or banneton for the final rise.
- Place it in the fridge for up to 2 to 8 hours for the final rise. Cold sourdough bread bakes so much better and performs a nice spring rise during the baking process compared to warm sourdough bread.
Baking and Finishing Touches
- Preheat your oven to a scorching 450°F (230°C) and prepare your Dutch oven or baking stone.
- Once the oven and Dutch oven are both hot, carefully transfer the proofed dough to the preheated vessel and score the top with a lame or sharp knife, allowing it to expand during baking.
- For the first 30 minutes, bake the bread with the lid on to create a steam-filled environment, which helps develop a crisp, golden crust.
- Remove the lid and continue baking until the loaf reaches a deep, mahogany brown color and has an internal temperature of 205-210°F (96-99°C), about 15 minutes.
- Remove from the oven and Dutch oven to a cooling rack to cool completely before slicing.
Summary
I hope I have inspired you to bake your very own bread loaves to enjoy and share with your friends and family.
If you were encouraged by this post, I invite you to check out my FREE Printables Page for fun free printables, planners, and charts.
ENTER MY FREE Printables Page HERE
Here are some more of my bread-making inspiration posts to check out!
July 4th Bread: How to Make a Firecracker Marble Bread Braid
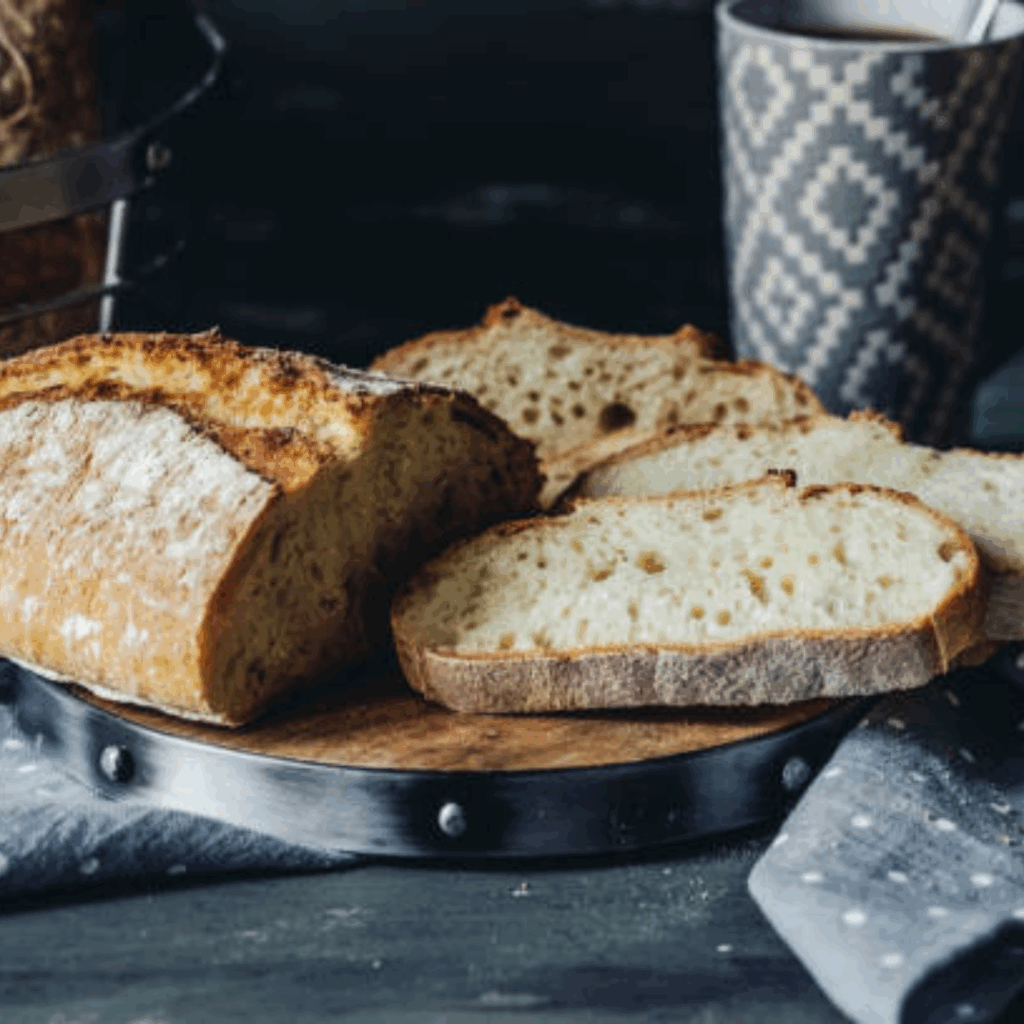
Artisan Bread: How to Make Artisan Bread
Challah Bread: How to Make a 6 Braided Challah Bread
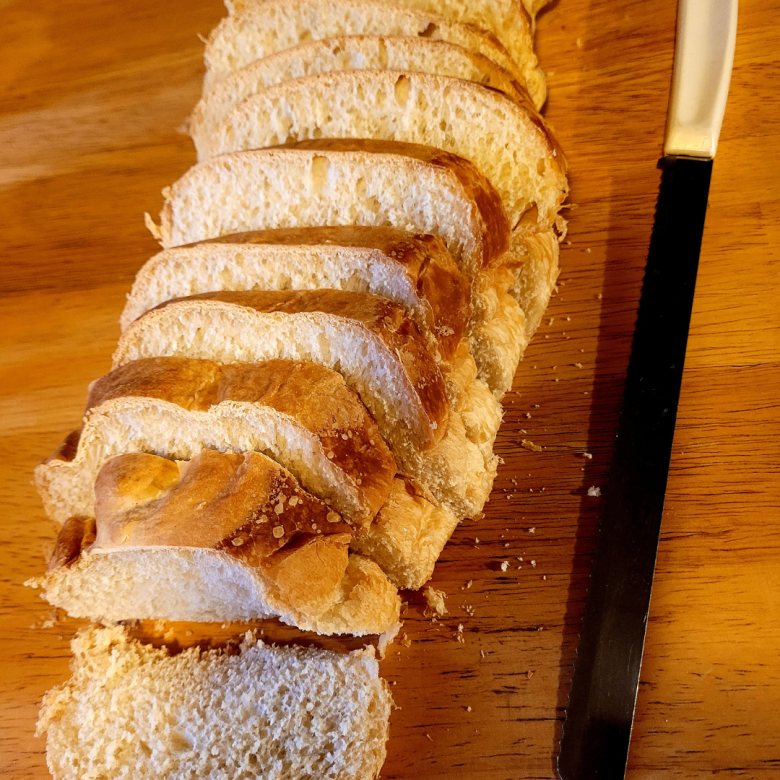
Sweet Bread: How to Make Sweet Bread
Blessings,
The Off Grid Barefoot Girl



Thanks for sharing. I read many of your blog posts, cool, your blog is very good.
Thanks for visiting!