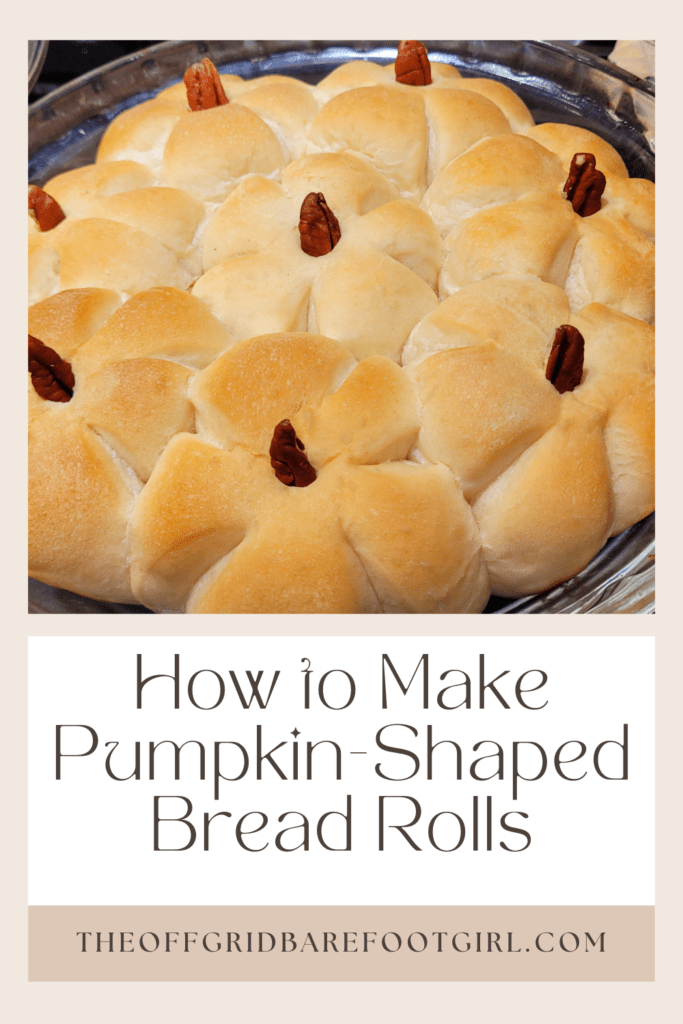
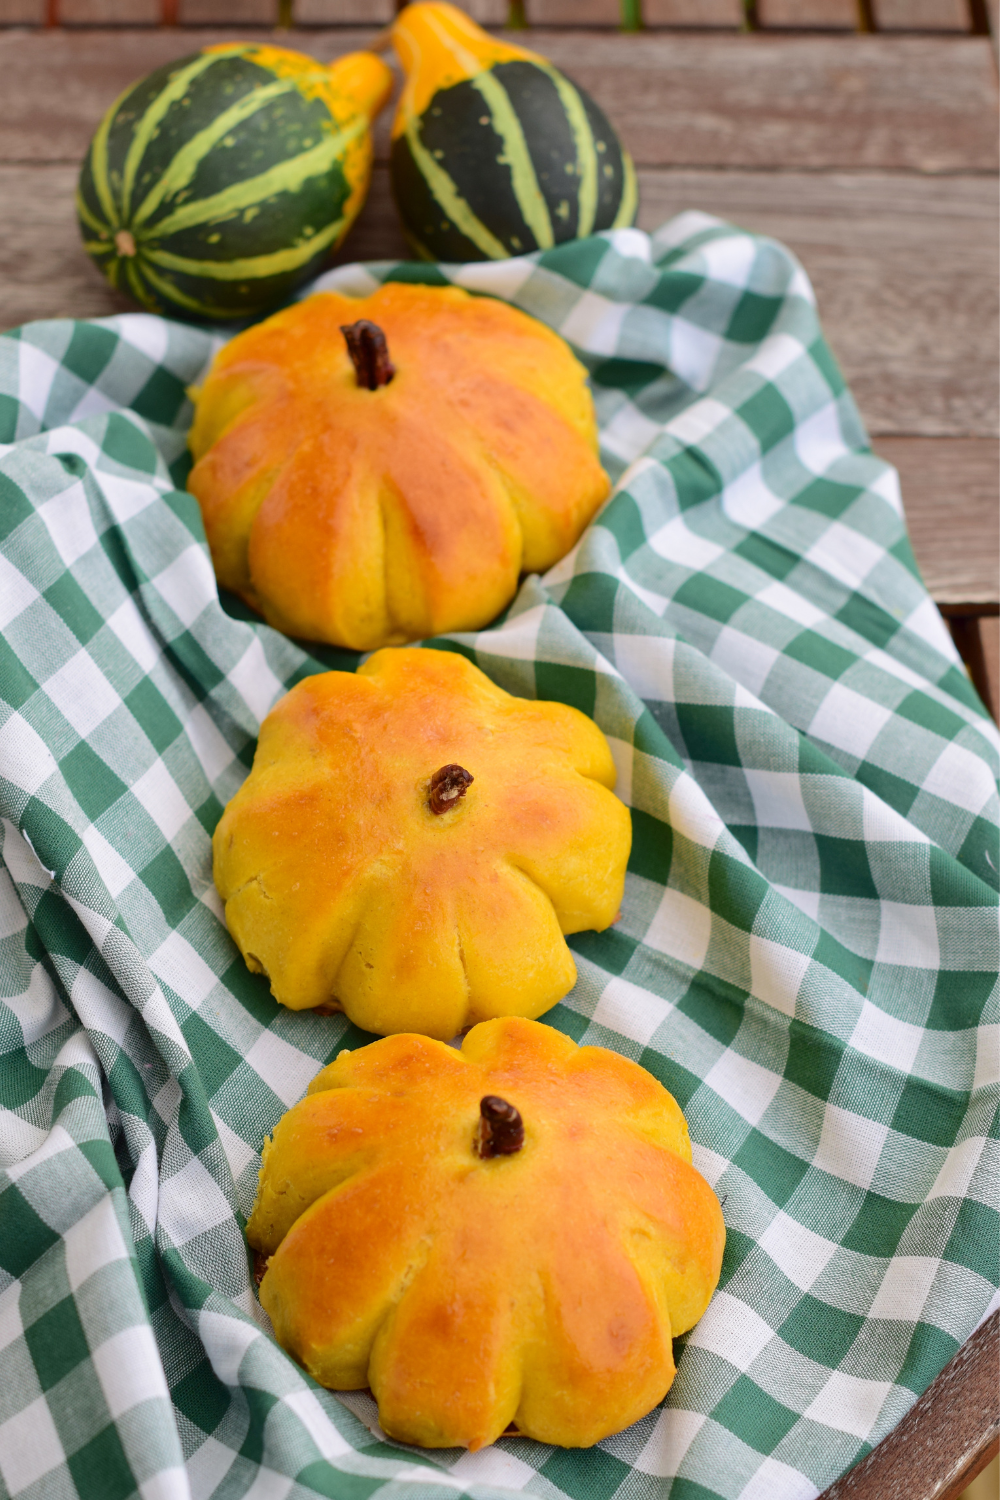
Bring the cozy charm of fall to your table with these adorable pumpkin-shaped bread rolls! This step-by-step guide shows you how to shape and bake festive pumpkin rolls that are perfect for Thanksgiving, autumn dinners, or harvest-themed gatherings. Made with simple ingredients and shaped with twine or snipped with scissors, these golden rolls look like mini pumpkins and taste just as good as they look.
Pumpkin-shaped bread rolls are not only a delightful addition to your autumn table, but also a creative way to infuse the spirit of the season into your baking. These golden, fluffy rolls, shaped like mini pumpkins, exude a visual charm that instantly captures attention and adds a festive touch to any fall gathering. Whether you are hosting a Halloween party, a Thanksgiving feast, or simply want to enjoy a delicious homemade fall treat, learning how to make pumpkin-shaped bread rolls will elevate your baking skills and impress your family and friends.
In this article, I will guide you through the process, providing step-by-step instructions, tips, and creative variations to ensure your pumpkin-shaped bread rolls turn out perfectly every time. Get ready to embark on a culinary adventure and savor the warmth and comfort of these adorable pumpkin-themed treats.
This is a pinnable post. Tap or hover over any image in this post to pin to your Pinterest Boards.
Introduction: The Appeal of Pumpkin-Shaped Bread Rolls
Pumpkin-shaped bread rolls are not just your ordinary dinner rolls. These adorable creations add a touch of whimsy and festivity to any table. Whether you’re hosting a Halloween party or simply want to bring a bit of seasonal cheer to your everyday meals, these pumpkin-shaped bread rolls are sure to impress both kids and adults alike. Plus, they taste just as good as they look, with a soft and fluffy interior that pairs perfectly with butter or your favorite soup. So, let’s dive into how you can easily make these delightful treats right in your own kitchen!
Ingredients and Equipment Needed for Making Pumpkin-Shaped Bread Rolls
Primary Ingredients
To make a batch of pumpkin-shaped bread rolls, you’ll need the following basic ingredients:
- Lukewarm water.
- Dry active yeast.
- Sugar.
- Salt.
- Melted butter.
- Flour.
- Orange food coloring (optional, but fun!).
- Halved pecans for the cute stems!
Additional Ingredients for Variations
If you want to get creative, you can also add these ingredients to your dough for some exciting flavor variations:
- Grated sharp cheddar cheese.
- Grated Parmesan cheese.
- Garlic powder.
- Dried herbs (such as rosemary, thyme, or oregano).
Essential Equipment
To bring your pumpkin-shaped bread rolls to life, make sure you have these essential tools:
- Mixing bowls.
- Measuring cups and spoons.
- Whisk or fork.
- Stand mixer or wooden spoon for mixing.
- Baking sheet lined with parchment paper.
- Pastry brush.
- Kitchen scissors or sharp knife (for shaping details).
Step-by-Step Instructions for Making the Dough
Preparing the Yeast Mixture
Start by activating the yeast. In a small bowl, combine the warm water, sugar, and yeast. Give it a gentle stir and let it sit for about 10 minutes until the mixture becomes frothy and bubbly.
Mixing the Dry Ingredients
In a large mixing bowl, whisk together the flour and salt. If you’re adding any additional ingredients for flavor variations, like cheese or herbs, now is the time to toss them in as well.
Combining the Wet and Dry Ingredients
Create a well in the center of the dry ingredients and pour in the yeast mixture and melted butter and the extra 1/2 cup of water. Mix everything together until a shaggy dough forms.
Kneading the Dough
Transfer the dough onto a lightly floured surface and knead it for about 5-8 minutes until it becomes smooth and elastic. If you prefer to use a stand mixer, you can also use the dough hook attachment and let it do the work for you. Place the kneaded dough in a greased bowl, cover it with a clean kitchen towel, and let it rise in a warm spot for about an hour or until it doubles in size.
Shaping the Dough Into Pumpkin Shapes
Dividing and Rounding the Dough
Once the dough has risen, punch it down to release any air bubbles. Divide the dough into equal portions depending on how many bread rolls you want. Take each portion and roll it into a smooth ball by cupping it with your hand and gently rotating your hand in a circular motion on the countertop.
Creating the Pumpkin Shape
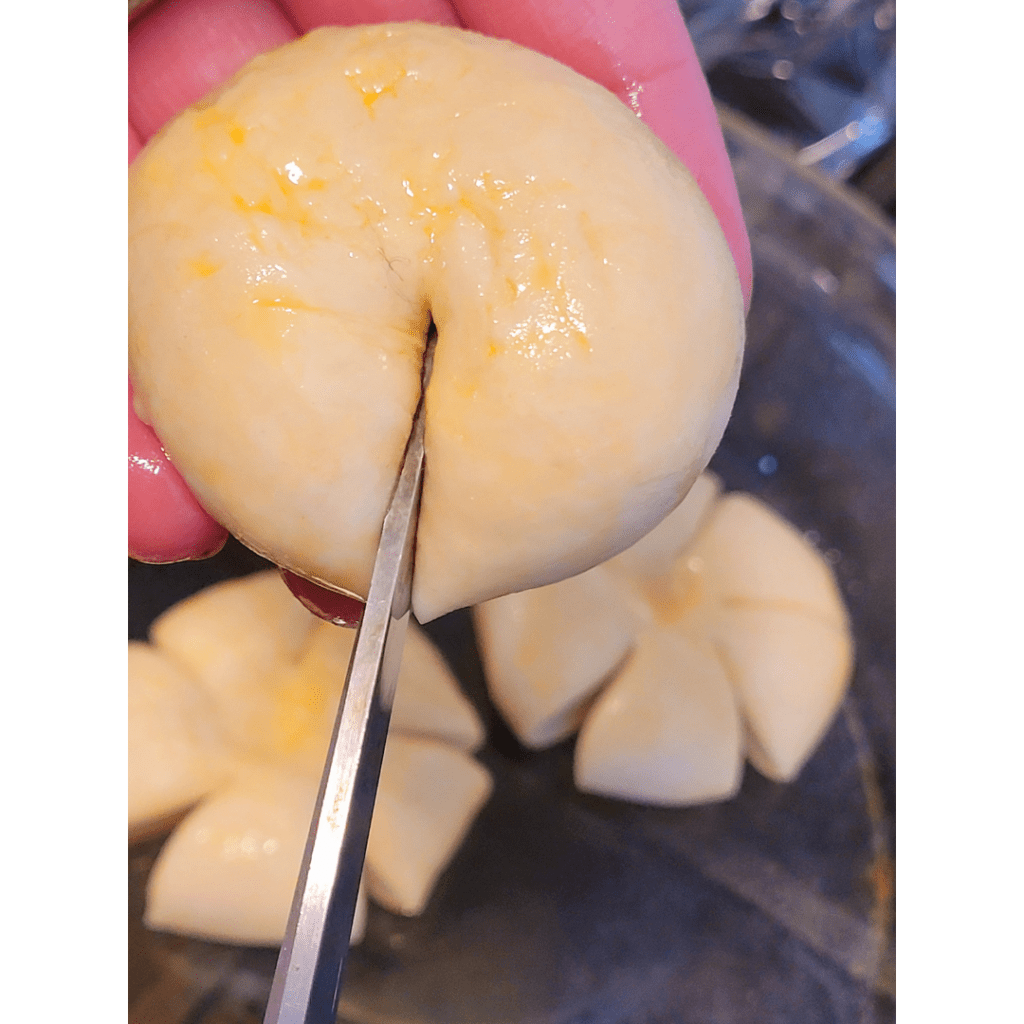
To shape the dough into pumpkin shapes, flatten each ball slightly with your palm. Using kitchen scissors or a sharp knife, make 5 vertical cuts around the sides of the dough, leaving the center intact.
Adding Details Like Pumpkin Ridges
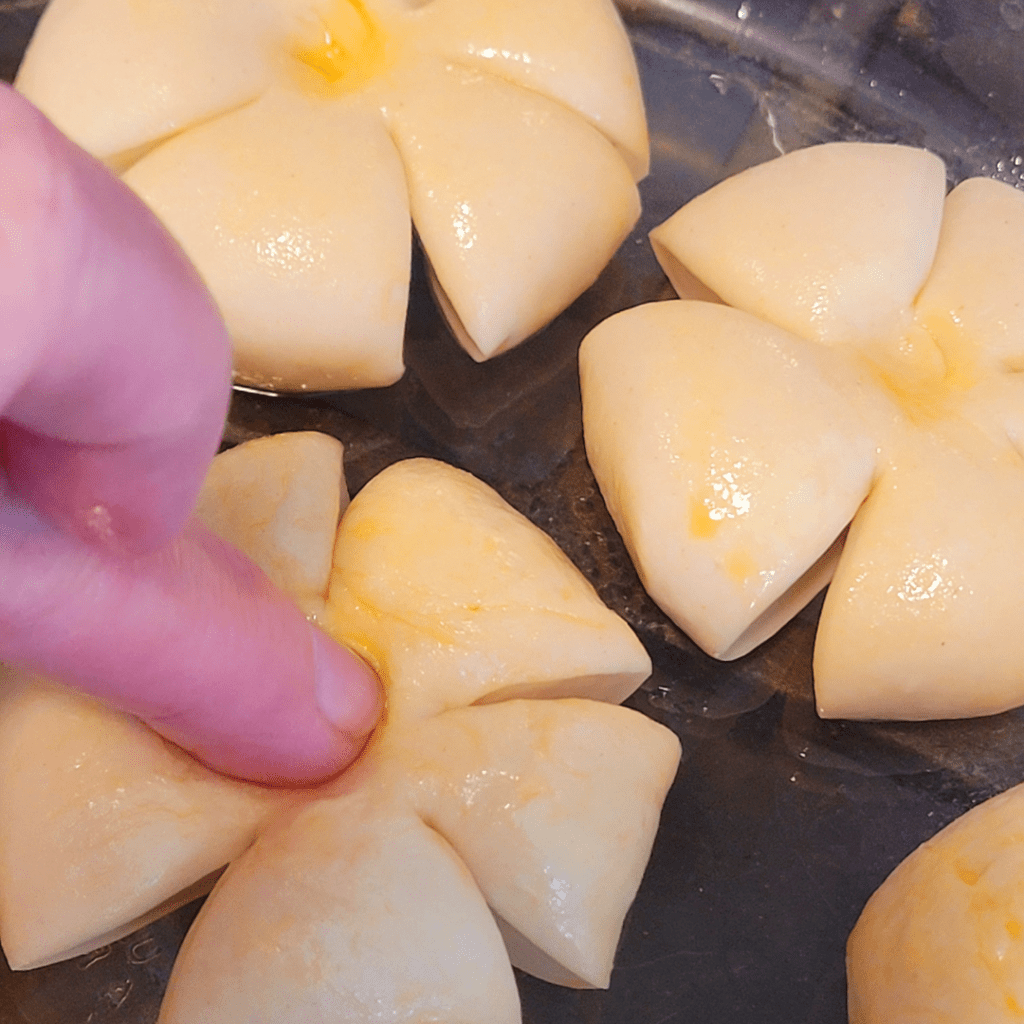
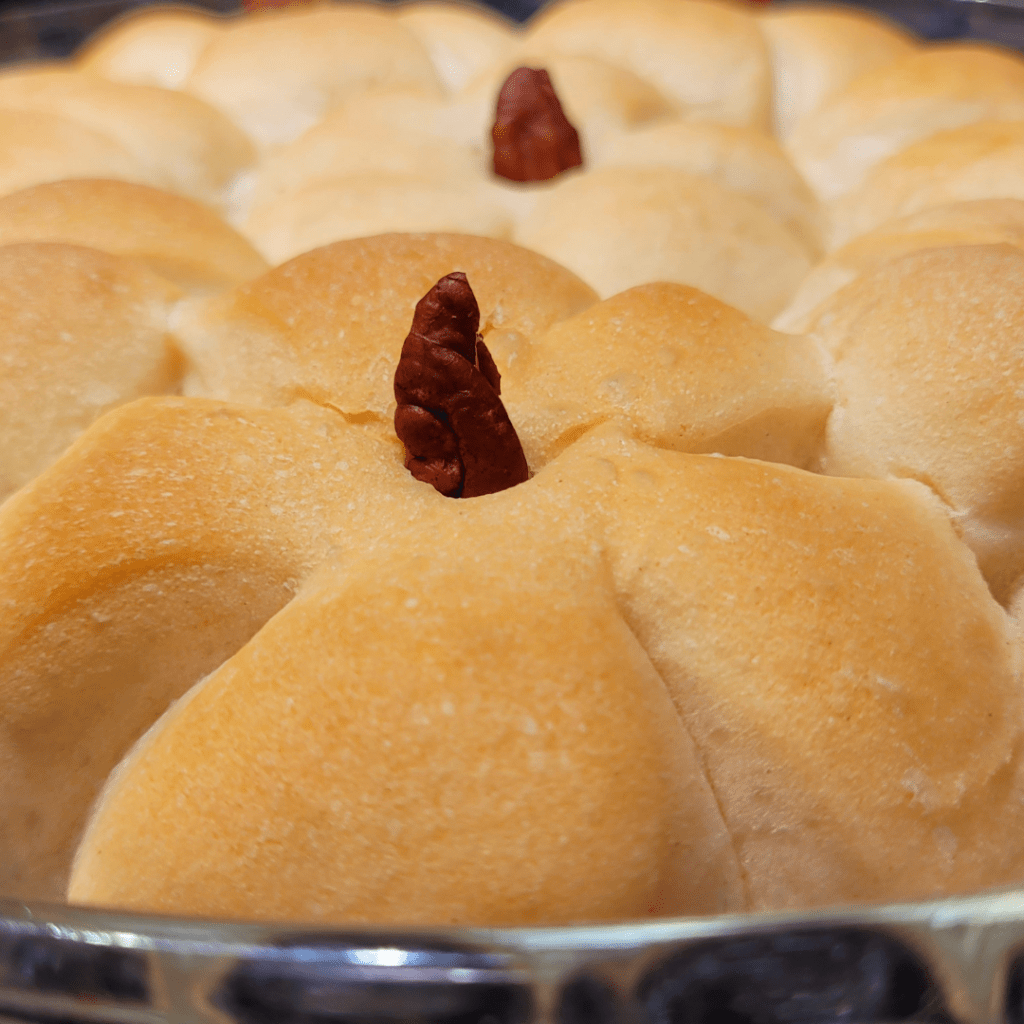
To make the pumpkin ridges more defined, you can use the handle end of a wooden spoon or your finger like I did to press gently down the center of each section. This is where the halved pecan stems will be.
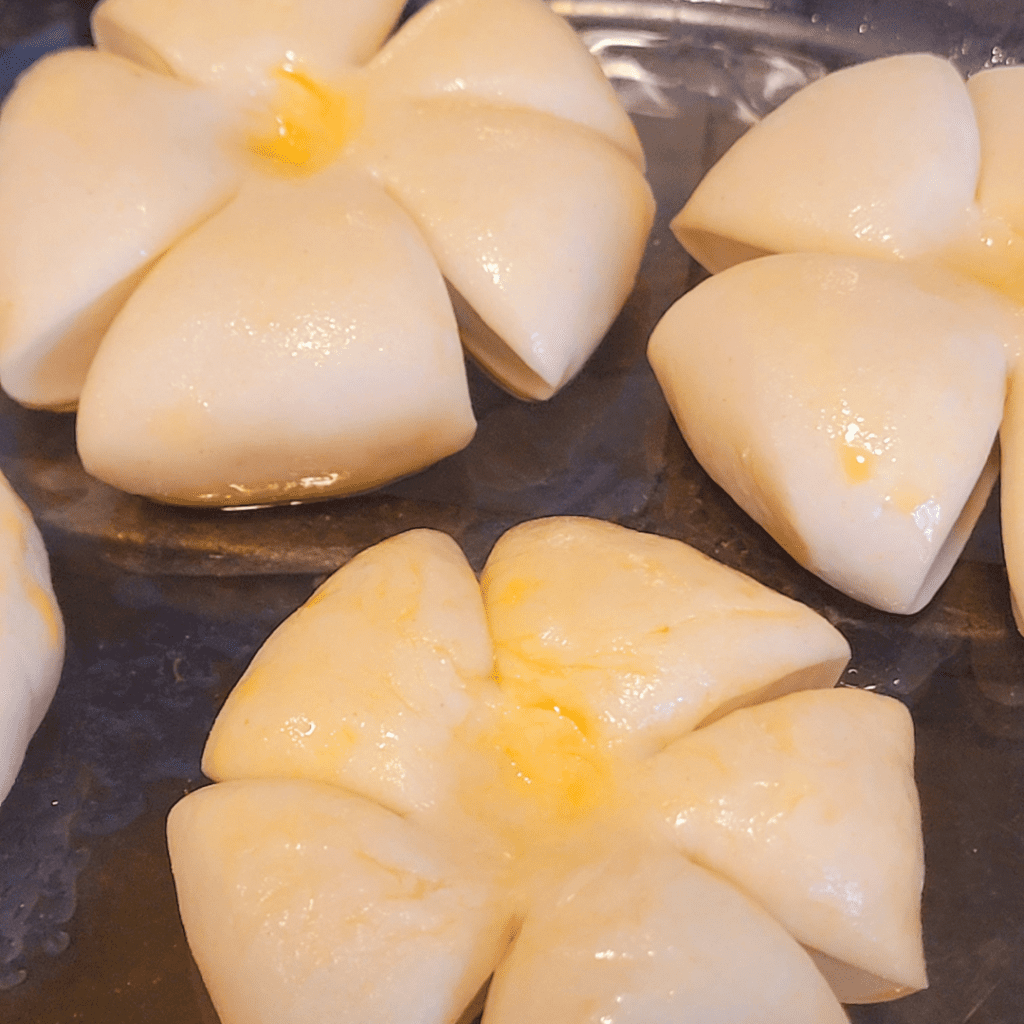
Take note of the depth of the indent to create the pumpkin ridges for each roll.
Baking and Finishing Touches for Pumpkin-Shaped Bread Rolls
Proofing the Pumpkin-Shaped Bread Rolls
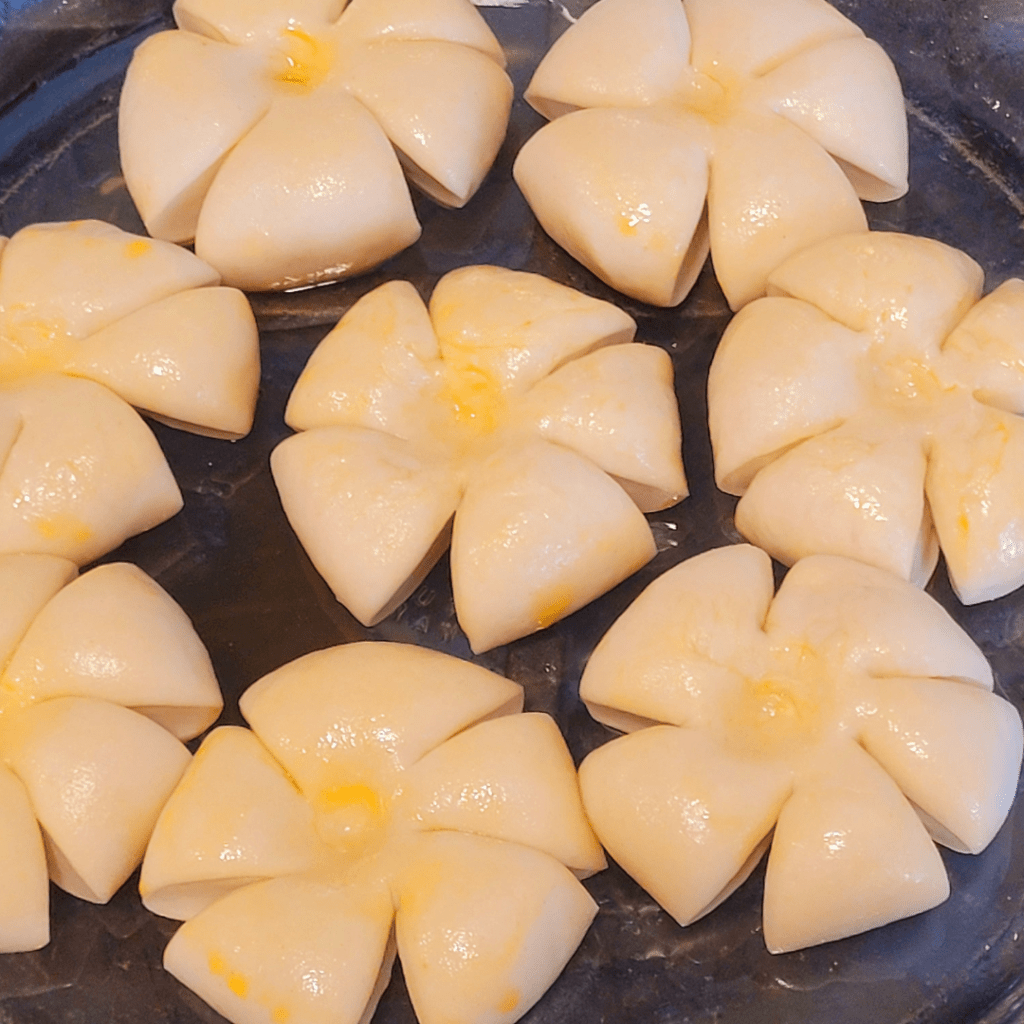
Now that you’ve shaped your dough into cute little pumpkin-shaped rolls, it’s time to let them do their thing and rise to perfection. Place the rolls on a baking sheet lined with parchment paper, making sure to leave enough space between them for expansion! Cover them with a clean kitchen towel and let them proof for about an hour, or until they double in size. This step is crucial for achieving light and airy puffy pumpkin-shaped rolls, so exercise patience, my friend.

Here are the pumpkin-shaped rolls proofed and doubled in size!
Applying an Egg Wash for a Glossy Finish
We’re all about elevating our pumpkin-shaped bread rolls to superstar status, and one way to do so is by giving them a shiny, glossy finish. Enter the egg wash. Whisk together an egg and a tablespoon of water, then generously brush this mixture over the risen rolls just before baking. This will give them that irresistible golden sheen that will have everyone drooling and reaching for seconds.
Adding Fun Toppings
Let’s not forget the crowning glory of our pumpkin-shaped bread rolls – the toppings! For an extra dash of visual appeal and a delightful crunch, sprinkle some sesame seeds over the egg-washed rolls before they go into the oven. Alternatively, you can get creative with other toppings like poppy seeds, flaky sea salt, or even grated cheese. These little additions not only add flavor and texture, but also make your bread rolls Instagram-worthy!
Baking the Pumpkin-Shaped Bread Rolls

Once your rolls have puffed up nicely, it’s time to pop them into the oven. Preheat your oven to 350 degrees and slide those rolls in. Now sit back and relax for the next 15-20 minutes while the magical aroma of freshly baked bread fills your home!
Adding the Halved Pecan Stems
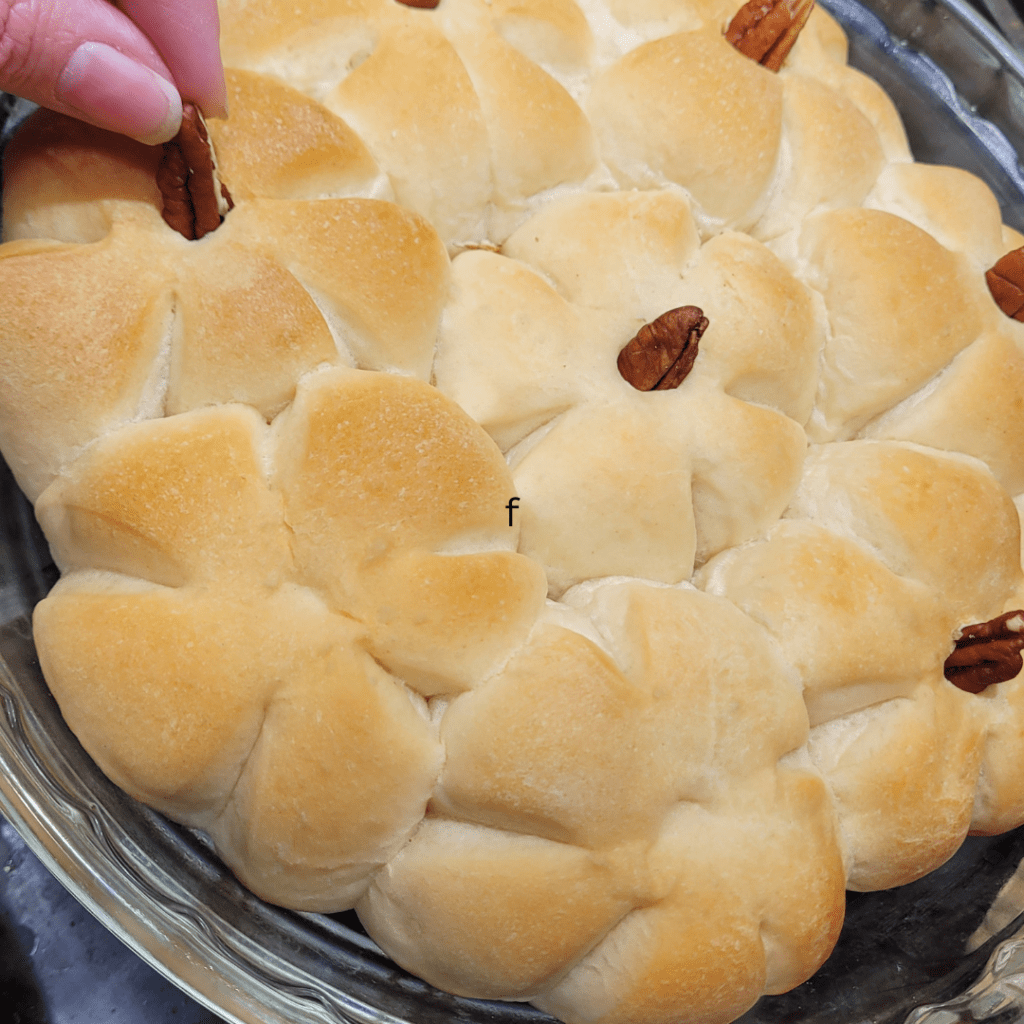
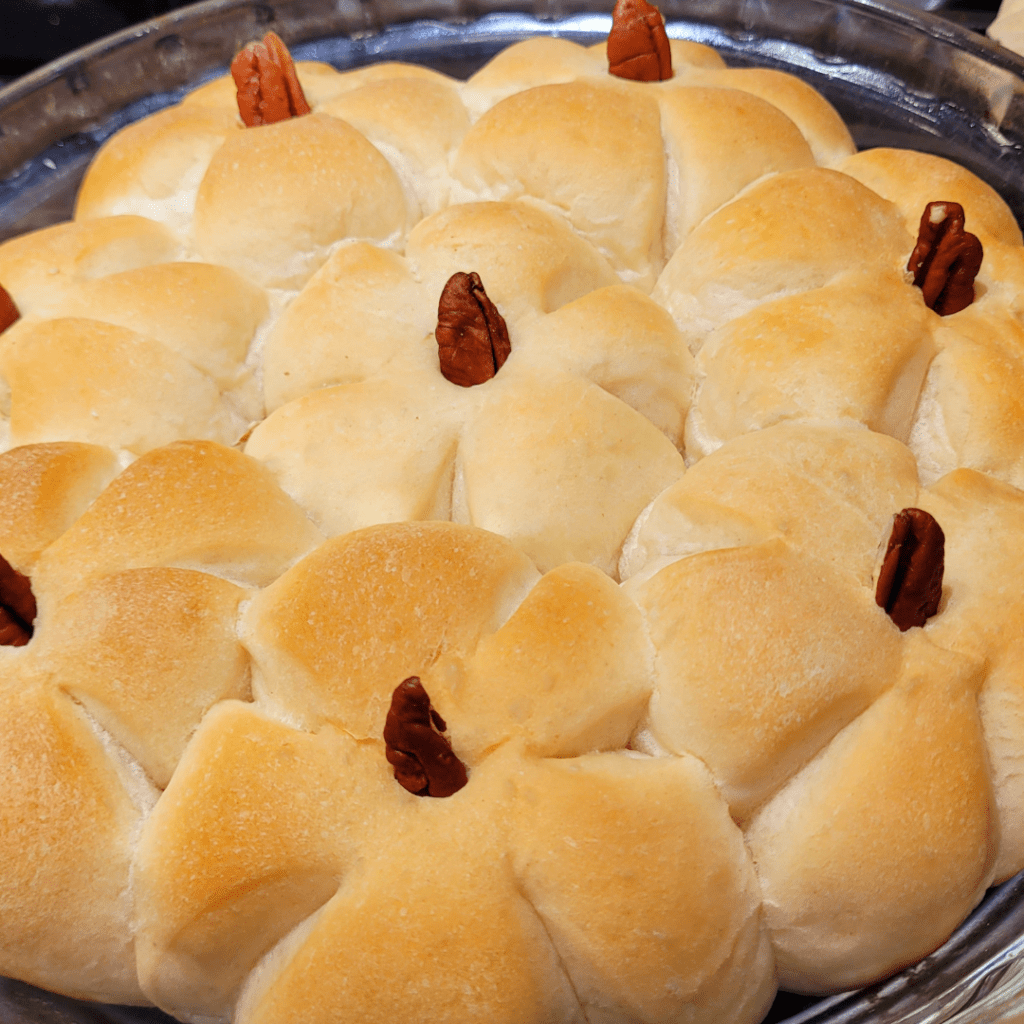
After the pumpkin-shaped rolls have come fresh out of the oven, gently press one halved pecan into the center of each roll. This creates a festive and cute little edible pumpkin stem!
Serving Suggestions and Creative Variations
Serving Options for Meals and Parties
Now that you have a batch of delicious pumpkin-shaped bread rolls in your hands, it’s time to think about how best to serve them. These versatile little treats can be enjoyed in a variety of ways. They make the perfect accompaniment to soups and stews, adding a festive touch to your fall meals. Hosting a holiday party or a potluck? Use these bread rolls as mini sandwiches, filling them with your favorite meats, cheeses, and spreads. Your guests will surely be impressed by this creative twist on classic rolls.
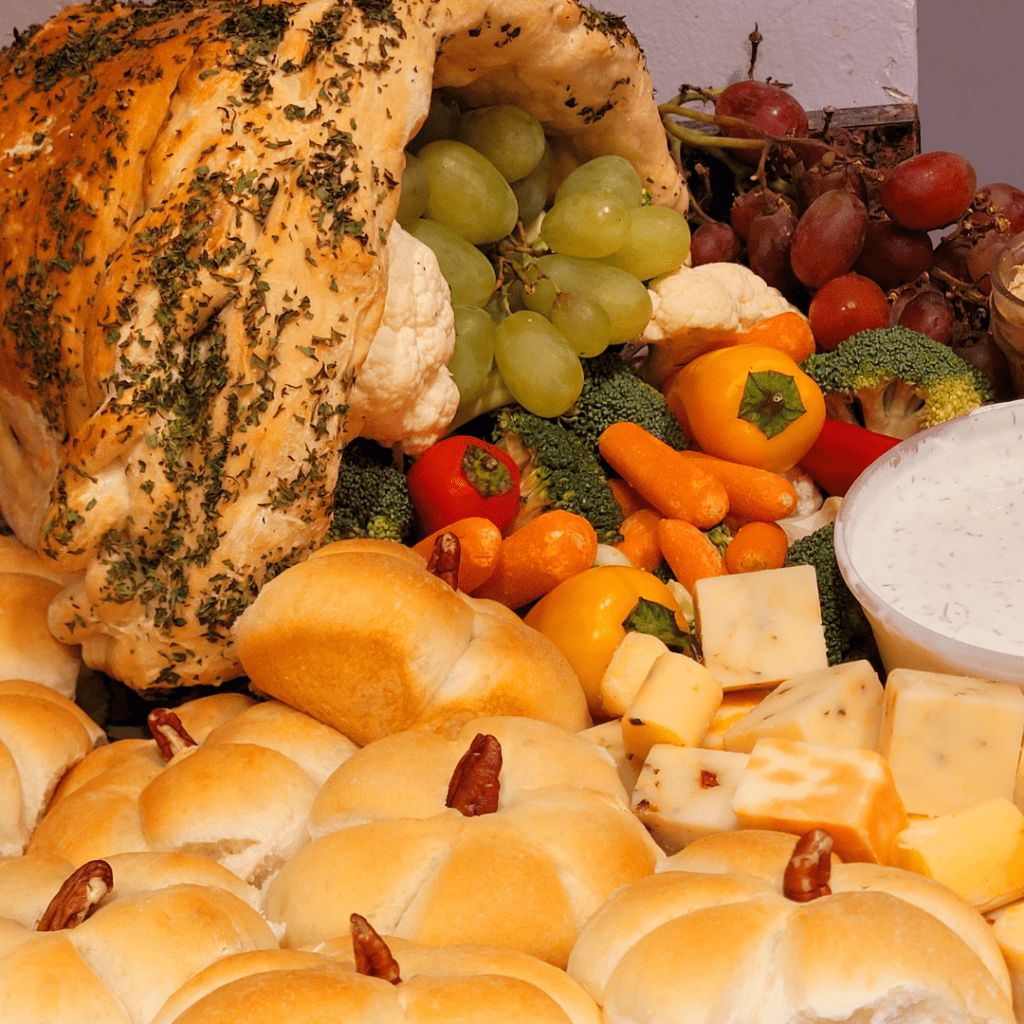
These adorable and delicious pumpkin-shaped rolls were served this year at Thanksgiving for my family and served on my gorgeous breaded cornucopia charcuterie board.
If you want to elevate your Thanksgiving table and want to try your hand at making your very own breaded cornucopia, I have made a simple tutorial that is easy to follow!
How to Make a Thanksgiving Breaded Cornucopia
Sweet and Savory Variations
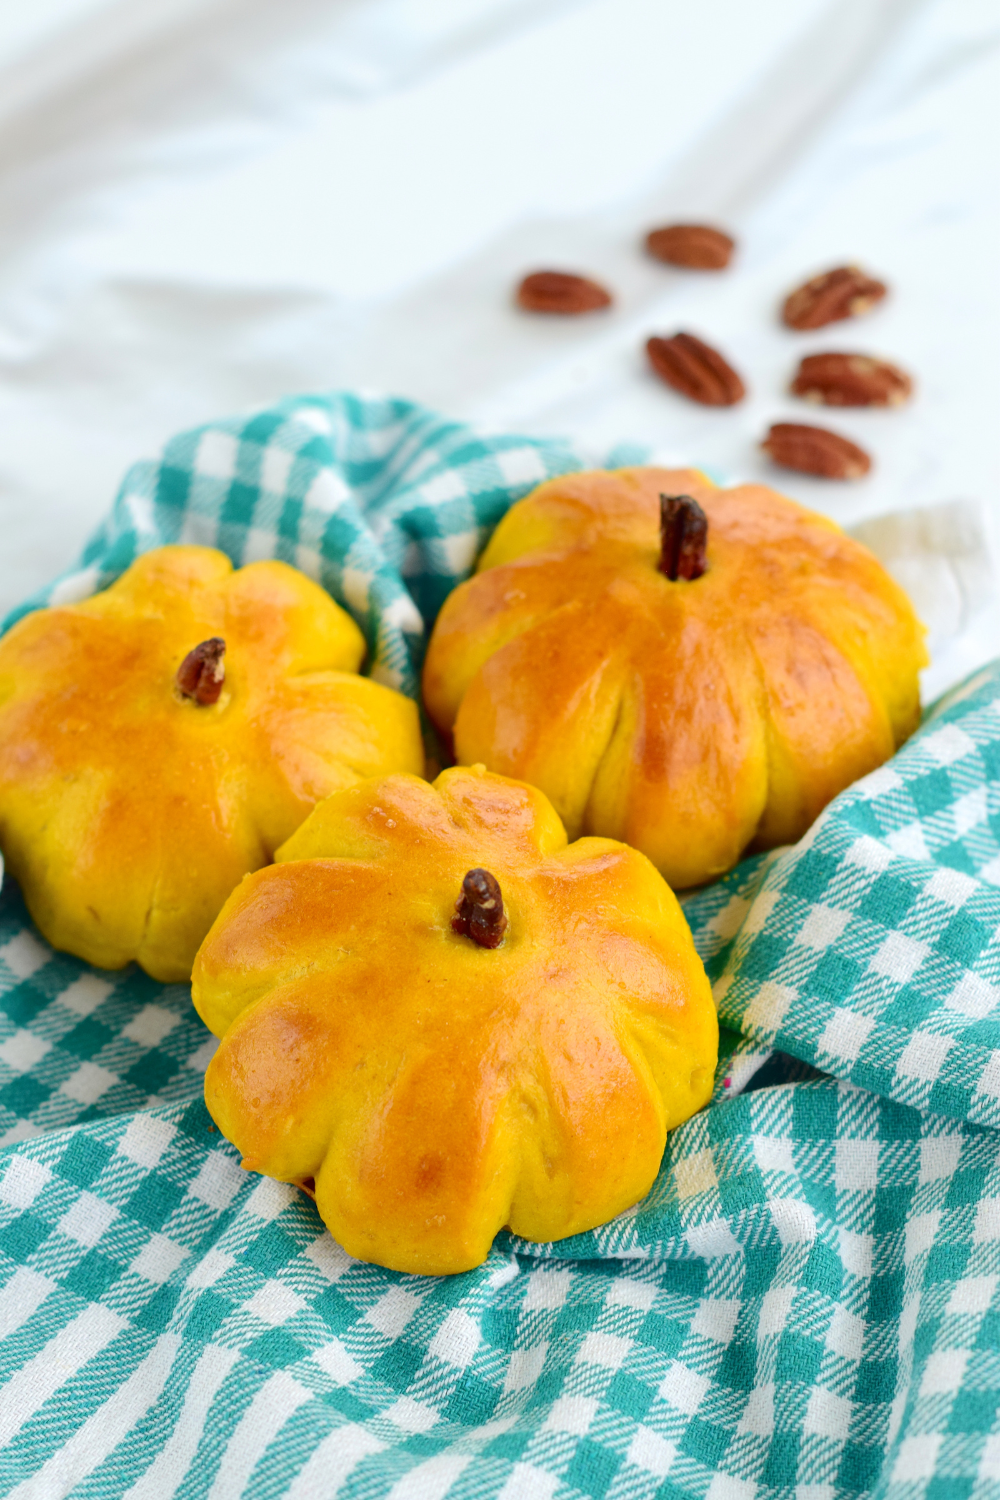
Don’t limit yourself to savory options with your pumpkin-shaped bread rolls – there’s room for sweetness too! Swap out the traditional bread roll spices for a touch of cinnamon and nutmeg, or even add a drizzle of honey or powdered sugar for a dessert-worthy treat. These sweet variations make for delightful breakfast rolls or afternoon snacks that will have you dreaming of pumpkin spice lattes and cozy sweater weather.
Tips and Tricks for a Successful Batch of Pumpkin-Shaped Bread Rolls
- Don’t rush the proofing process. Give your dough enough time to rise and double in size for fluffy and light bread rolls.
- Use a light touch when shaping the dough into pumpkin shapes. The less you handle it, the more tender and airy the final texture will be.
- Experiment with different toppings and spices to make the bread rolls your own. Get creative and let your taste buds be your guide.
- If you’re short on time, you can always opt for pre-made bread dough. I won’t tell if you won’t.
- Don’t be afraid to share your pumpkin-shaped bread rolls with others. Delicious baked goods are meant to be enjoyed and shared with loved ones.
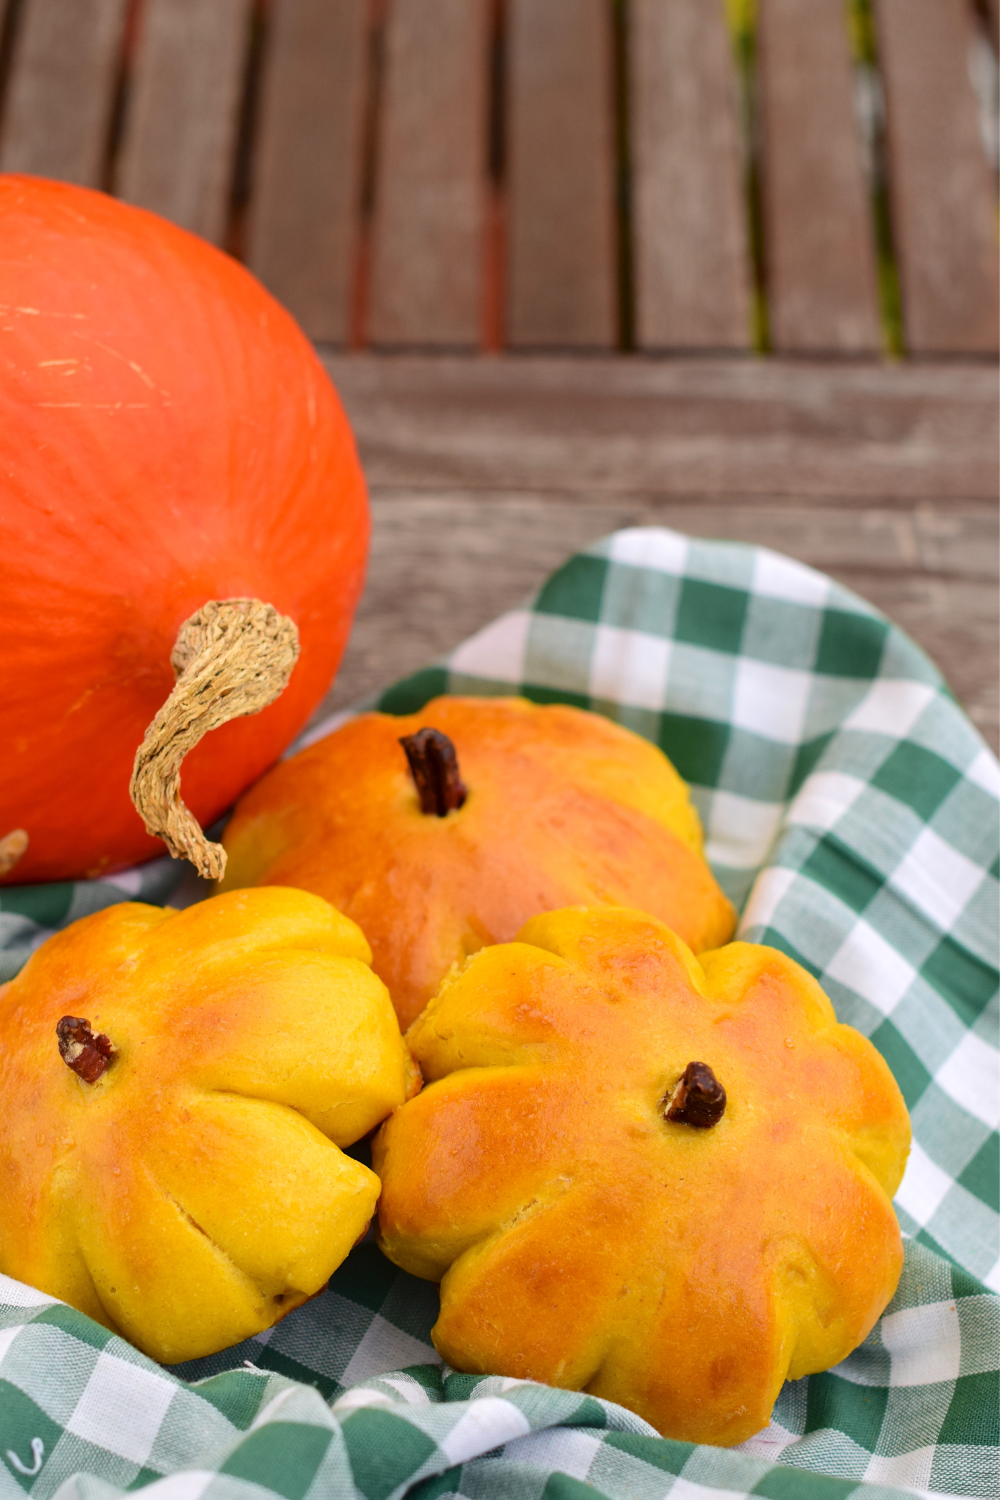
Conclusion: Enjoying the Homemade Goodness of Pumpkin-Shaped Bread Rolls
Congratulations! You’ve successfully embarked on the journey of making pumpkin-shaped bread rolls. With their adorable appearance and scrumptious taste, these bread rolls are sure to impress friends and family alike. So gather around the table, break open a roll, and savor the warm, homemade goodness that is sure to bring smiles and happy tummies. Cheers to your culinary masterpiece!
In conclusion, mastering the art of making pumpkin-shaped bread rolls allows you to indulge in the joy of baking while creating a whimsical and delicious treat. These golden, pumpkin-shaped delights not only bring a touch of seasonal charm to your table, but also showcase your culinary prowess. Whether enjoyed as a delightful accompaniment to a meal or as a standalone snack, pumpkin-shaped bread rolls are sure to delight both young and old. So, gather your ingredients, follow the steps outlined in this article, and let your creativity shine as you shape and bake your own batch of these festive bread rolls. With each bite, savor the homemade goodness and take pride in the delightful creations you have brought to life. Happy baking!
Frequently Asked Questions
1. Can I make pumpkin-shaped bread rolls without a specific pumpkin-shaped mold?
While using a pumpkin-shaped mold can give your bread rolls a more defined pumpkin shape, you can still make them without one. By simply shaping the dough into round rolls and adding details like pumpkin ridges and a stem, you can achieve a similar effect. The key is to be creative and have fun with the process!
2. Can I make pumpkin-shaped bread rolls using gluten-free flour?
Absolutely! With the increasing availability of gluten-free flour options, you can adapt this recipe to suit your dietary needs. Simply substitute the all-purpose flour with your preferred gluten-free flour blend and follow the rest of the instructions as mentioned. It may require some adjustments to the dough consistency, so feel free to add more liquid or flour as needed.
3. How long do pumpkin-shaped bread rolls stay fresh?
Like any other bread, pumpkin-shaped bread rolls are best enjoyed fresh. They will stay soft and delicious for about 2-3 days when stored in an airtight container at room temperature. If you want to extend their shelf life, you can freeze them for up to a month. To thaw, simply leave them at room temperature or reheat them in an oven or toaster oven until warm.
Pumpkin-Shaped Bread Rolls Recipe

Pumpkin-Shaped Bread Rolls Recipe
Equipment
- 1 large mixing bowl
- 1 Set of measuring tools.
- 1 Wooden spoon for mixing.
- 1 Baking sheet with parchment paper.
- 1 Kitchen scissors or sharp knife (for shaping details).
Ingredients
Proofing the Yeast
- 1 cup lukewarm water.
- 2 ¼ tsp dry active yeast.
- 2 tbsp sugar.
Bread Dough
- Proofed yeast mixture as above.
- ½ cup lukewarm water.
- 1 ½ tsp salt.
- 2 tbsp sugar.
- 2 tbsp melted butter.
- 4 ½ cups all-purpose flour.
Instructions
Preparing the Yeast Mixture
- Start by activating the yeast. In a small bowl, combine the warm water, sugar, and yeast. Give it a gentle stir and let it sit for about 10 minutes until the mixture becomes frothy and bubbly.
Mixing the Dry Ingredients
- In a large mixing bowl, whisk together the flour and salt. If you're adding any additional ingredients for flavor variations, like cheese or herbs, now is the time to toss them in as well.
Combining the Wet and Dry Ingredients
- Create a well in the center of the dry ingredients and pour in the yeast mixture and melted butter and the extra 1/2 cup of water. Mix everything together until a shaggy dough forms.
Kneading the Dough
- Transfer the dough onto a lightly floured surface and knead it for about 5-8 minutes until it becomes smooth and elastic. If you prefer to use a stand mixer, you can also use the dough hook attachment and let it do the work for you.
- Place the kneaded dough in a greased bowl, cover it with a clean kitchen towel, and let it rise in a warm spot for about an hour or until it doubles in size.
Dividing and Rounding the Dough
- Once the dough has risen, punch it down to release any air bubbles. Divide the dough into equal portions depending on how many bread rolls you want.
- Take each portion and roll it into a smooth ball by cupping it with your hand and gently rotating your hand in a circular motion on the countertop.
Creating the Pumpkin Shape
- To shape the dough into pumpkin shapes, flatten each ball slightly with your palm. Using kitchen scissors or a sharp knife, make 5 vertical cuts around the sides of the dough, leaving the center intact.
Adding Details Like Pumpkin Ridges
- To make the pumpkin ridges more defined, you can use the handle end of a wooden spoon or your finger like I did to press gently down the center of each section. This is where the halved pecan stems will be.
Proofing the Pumpkin-Shaped Bread Rolls
- Place the rolls on a baking sheet lined with parchment paper, making sure to leave enough space between them for expansion!
- Cover them with a clean kitchen towel and let them proof for about an hour, or until they double in size. This step is crucial for achieving light and airy puffy pumpkin-shaped rolls.
Applying an Egg Wash for a Glossy Finish
- Whisk together an egg and a tablespoon of water, then generously brush this mixture over the risen rolls just before baking. This will give them that irresistible golden sheen that will have everyone drooling and reaching for seconds.
Baking the Pumpkin-Shaped Bread Rolls
- Preheat your oven to 350 degrees and slide those rolls in. Now sit back and relax for the next 15-20 minutes while the magical aroma of freshly baked bread fills your home!
Adding the Halved Pecan Stems
- After the pumpkin-shaped rolls have come fresh out of the oven, gently press one halved pecan into the center of each roll. This creates a festive and cute little edible pumpkin stem!
Summary
I hope I have inspired you to bake your own pumpkin-shaped bread rolls to enjoy and share with your friends and family.
If you were encouraged by this post, I invite you to check out my FREE Printables Page for fun free printables, planners, and charts.
ENTER MY FREE Printables Page HERE
Here are some more of my bread-making inspiration posts to check out!
How to Make Easy Sourdough Breadsticks
Sourdough Discard Fry Bread: Easy Sourdough Discard Hack
Sourdough Buttermilk Drop Biscuits: The Ultimate Secret to Easy Biscuits!
How to Make Apple Fritter Bread: A Perfect Fall Treat
How to Make the Perfect Pumpkin-Shaped Sourdough Bread from Scratch
Easy Pumpkin Bread Recipe That Will Satisfy Your Fall Cravings
The Ultimate Snickerdoodle Zucchini Bread Recipe: Tips for a Perfect Bake
How to Turn Stale Bread into Irresistible Breadcrumbs!
The Best Fall Maple Sourdough Bread Recipe
The Ultimate Guide to Making Sourdough Bread from Scratch
The Ultimate Guide to Crafting a Perfectly Tangy Wild Sourdough Starter
Artisan Bread: How to Make Artisan Bread
Challah Bread: How to Make a 6 Braided Challah Bread
Sweet Bread: How to Make Sweet Bread
Blessings,
The Off Grid Barefoot Girl


