Turn sweet onions into a savory-sweet delight with my Balsamic Onion Jam! This easy homemade recipe is perfect for elevating sandwiches, cheese boards, or roasted meats.
Safe for water bath canning!
I’ve always loved the rich, deep flavor of caramelized onions, and when you add balsamic vinegar, it transforms them into a jam that’s both sweet and tangy—a total game-changer for your kitchen. Making and canning Balsamic Onion Jam is simpler than it sounds, and it’s a fun way to turn humble onions into a pantry treasure. In this guide, I’ll show you how to cook the onions to perfection, balance the flavors with balsamic and sugar, and safely water bath can jars so you can enjoy this savory-sweet treat anytime.
This is a pinnable post. Tap or hover over any image in this post to pin to your Pinterest Boards.
What is Balsamic Onion Jam?
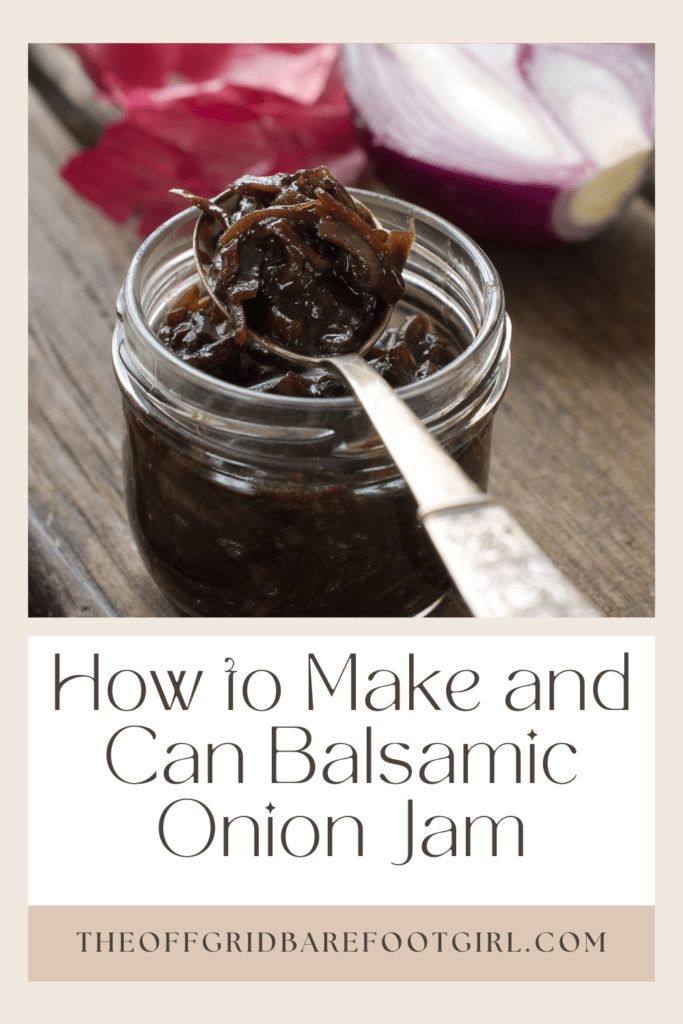
Picture this: the sweet, tangy aroma of caramelized onions infused with rich balsamic vinegar. Mouthwatering, isn’t it? Well, that’s exactly what balsamic onion jam is all about. It’s a delightful condiment that adds a burst of flavor to sandwiches, burgers, charcuterie boards, and more. This jam strikes the perfect balance between savory and sweet, making it a versatile and delicious addition to your pantry. Plus, it’s incredibly easy to make and can be stored for months, ready to elevate any dish you desire. So, let’s dive in and learn how to whip up a batch of this irresistible condiment!
Ingredients and Equipment Needed
Onions
First things first, you’ll need a generous amount of onions. Yellow or red onions work best for making balsamic onion jam. They have a mild, sweet flavor that intensifies when cooked down. Aim for around 4-5 medium-sized onions, thinly sliced. I have tried both red and sweet onions personally with fantastic results.
Balsamic Vinegar
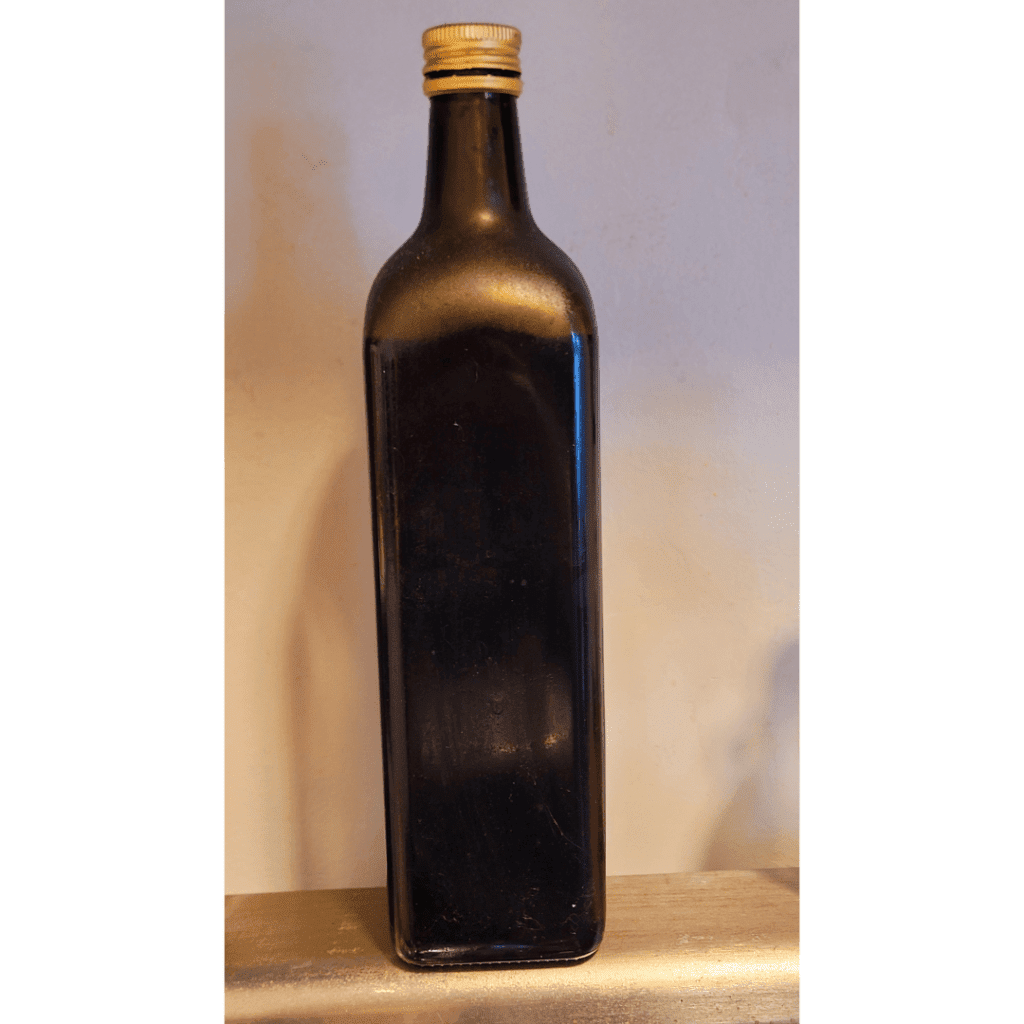
My beloved balsamic vinegar!
The star of the show, balsamic vinegar brings that signature tanginess and depth to the jam. Quality matters here, so opt for a good balsamic vinegar that is thick and syrupy. About 1/2 cup should do the trick, which also helps make this recipe safe for water bath canning!
Sweeteners and Spices
To balance out the tanginess, you’ll need some sweeteners. Brown sugar, honey, or maple syrup work beautifully. Aim for around 1 cup of sweetener for this batch in the form of 1/2 cup of pure maple syrup and 1/2 cup of sugar for example. Additionally, you can enhance the flavor with spices like thyme, rosemary, bay leaf, or a pinch of chili flakes. I, however, opt out of adding any herbs to mine every time since I know my kids do not like this savory jam with the herbs added.
Sea Salt
When it comes to canning balsamic onion jam, sea salt plays an essential role in enhancing the flavor and texture of this delicious condiment. Adding salt to the recipe helps to balance the sweetness of the onions and balsamic vinegar, creating a complex and satisfying taste. The sea salt also aids in preserving the jam by inhibiting the growth of bacteria and microorganisms. It acts as a natural preservative that ensures your onion jam stays fresh and safe to consume for months after canning.
However, it’s crucial not to overdo it with the salt, as you don’t want to overpower the natural sweetness of the onions. A sprinkle or two (1/2 tsp) will be enough to bring out the flavors without overwhelming them. So, make sure you have some high-quality salt on hand when preparing your balsamic onion jam recipe for canning—it will undoubtedly add that extra touch of savory goodness! I use sea salt in all my canning recipes.
100% Pure Apple Juice
This ingredient is an absolute game-changer when it comes to enhancing the flavors of your jam. The natural sweetness and acidity of the apple juice perfectly complement the rich and savory notes of the onions and balsamic vinegar. Not only does it add a delicious boost of flavor, but it also helps in achieving that perfect caramelization during the cooking process. Using 100% pure apple juice ensures that you’re getting all the wholesome goodness without any artificial additives or preservatives.
Powdered Pectin
Powdered pectin is a magical ingredient that helps achieve the perfect consistency and set of your homemade jams. Loved for its convenience, powdered pectin dissolves quickly and evenly in your jam mixture, ensuring a smooth texture without any lumps or clumps. Not only does it act as a stabilizer and thickener, but it also enhances the natural flavors of the onions and balsamic vinegar in this recipe.
Equipment
As for equipment, you’ll need a large, heavy-bottomed pot or Dutch oven to cook the onions, a stirring spoon, a sharp knife for chopping, and some canning jars to preserve the jam for later use. You will also need your water bath canner along with your canning supplies like a ladle, funnel, jar lifter, debubbler wand, jars, lids, and rings.
Step-by-Step Guide: Making Balsamic Onion Jam
Preparing and Chopping the Onions
Start by peeling and thinly slicing the onions. A handy tip here is to chill the onions in the refrigerator for about 15 minutes before chopping to minimize tearing up. Also, having a small dish of water sitting next to your cutting board will help combat the tears that the onions WILL cause you to have since the onion particles are drawn to moisture, which is why they love our eyes! Otherwise, grab your swimming goggles and get to chopping.
Pro Tip! Use a food processor for this step to prevent tearing of your eyes. The less hands-on chopping of onions for me, the better!
Cooking the Onions
Heat a tablespoon of olive oil or butter in your pot or Dutch oven over medium heat. Add the sliced onions and cook them slowly, stirring occasionally, until they turn golden brown and caramelized. This process can take anywhere from 30 to 40 minutes, so grab a book or your favorite TV show to pass the time.
Crockpot Method!
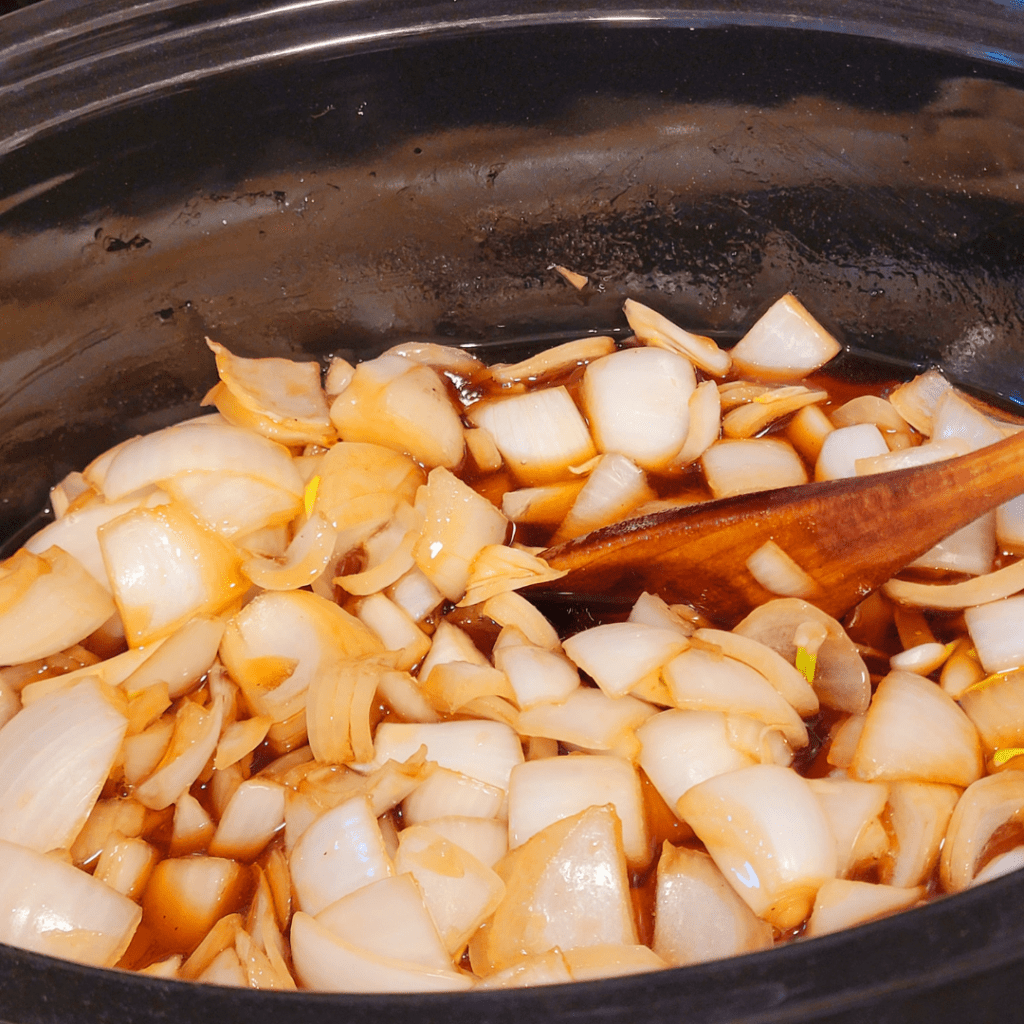
Yo! If you are like me and prefer a more hands-off approach to small-batch canning projects, the trusty crockpot is my go-to cooking method! I love having something cooking in my crockpot all day long for a canning project while I am free and busy doing other things around my house. I occasionally check on whatever is in my crockpot, give it a quick stir, and be about my day. Cook until onions are caramelized and everything is well-cooked. This typically takes me about four to five hours with my crockpot set to high.
Adding Balsamic Vinegar and Sweeteners
Once the onions are caramelized, it’s time to add the balsamic vinegar and sweeteners. Pour in the balsamic vinegar and stir well to coat the onions. Then, add your chosen sweetener, along with any desired spices. Give everything a good stir to combine the flavors.
Simmering and Reducing the Heat
Lower the heat to a gentle simmer and let the mixture cook for another 20-30 minutes, stirring occasionally. The jam is ready when it has thickened and reached a jam-like consistency. Keep in mind that it will continue to thicken as it cools, so don’t worry if it seems runnier at this stage.
Blending Up the Onions
If you did a rough chop of your onions because you could no longer stand the tearing effects onions offer, you can use your stick blender to blend the onions to the desired consistency you want for your jam to be spreadable.
Tips and Tricks for a Perfect Batch
Choosing the Right Onions
When selecting onions, look for ones that are firm and free of blemishes. Sweet, yellow, or red onions are your best bet for a balanced flavor in the jam.
Balancing Sweetness and Tanginess
Taste as you go when adding sweeteners and balsamic vinegar. Adjust the amounts to find the perfect balance that suits your taste buds.
Adjusting Consistency and Thickness
If your jam turns out too thick, you can add a splash of water to loosen it up. Conversely, if it’s too runny, continue simmering until it reaches the desired consistency.
Enhancing Flavor with Herbs and Spices
Feel free to get creative with your choice of herbs and spices. Experiment with different combinations to add an extra layer of flavor to your balsamic onion jam. It’s all about personal preference, but still keeping ratios safe for water bath canning.
Canning and Preserving Balsamic Onion Jam
Sterilizing Jars and Lids
Before you begin canning your delicious balsamic onion jam, it’s essential to start with clean and sterile jars and lids. Give them a good wash with hot, soapy water, and then place them in a large pot of boiling water for about 10 minutes. This will ensure that any bacteria or germs lurking in those jars are taken care of. Don’t forget to sterilize your utensils as well!
Filling and Sealing the Jars
Now that your jars and lids are sparkling clean, it’s time to fill them up with that gorgeous balsamic onion jam. Using a funnel, carefully transfer the jam into each jar, leaving about 1/4 inch of headspace at the top. Use your debubbler wand to remove any air bubbles by sticking it around the inside edges of each jar. Wipe the rims of the jars with a clean, damp cloth to remove any drips or spills. Then, place the lids on top and screw the bands on until they are just fingertip-tight.
Water Bath Canning Method
To seal in the flavors and ensure your balsamic onion jam stays fresh for months to come, you’ll want to process the jars using the water bath canning method. Fill a large pot with enough water to cover the jars by at least 1 inch, and bring it to a gentle boil. Carefully lower the sealed jars into the pot using canning tongs or a jar lifter, making sure they are fully submerged. Let them process for about 10-15 minutes, depending on your altitude. Once done, remove the jars from the pot and let them cool on a clean towel for 12-24 hours.
Storing and Shelf Life
Congratulations, you’ve successfully canned your balsamic onion jam! Now you need to store it properly to enjoy it for as long as possible. Store the sealed jars in a cool, dark place, like a pantry or cupboard. The jam will typically stay good for up to a year if stored correctly. Once opened, refrigerate the jar and consume the jam within a month or so. Trust me, it’s so tasty, it probably won’t last that long!
Creative Uses for Balsamic Onion Jam
Pairing with Cheese and Charcuterie Boards
There’s something undeniably magical about the combination of balsamic onion jam and a good cheese board. Spread some of this sweet and tangy jam on top of your favorite cheeses, and watch how it transforms the flavors. Add some crackers and charcuterie bard ingredients, and you have yourself the perfect appetizer for any gathering.
Spreading on Sandwiches and Burgers
Take your sandwiches and burgers to the next level by slathering a generous amount of balsamic onion jam on them. The savory sweetness of the jam adds a delightful contrast to the other ingredients, elevating your lunchtime or dinnertime experience.
Incorporating into Salad Dressings
Give your salads a flavor boost by incorporating balsamic onion jam into your homemade dressings. The jam adds depth and complexity to the dressing, taking it from ordinary to extraordinary. Whether it’s a simple green salad or a fancy mixed greens masterpiece, this dressing will be a game-changer.
Adding to Savory Baked Goods
Who says balsamic onion jam is limited to savory applications? Get creative in the kitchen and experiment with adding a dollop of this jam to your savory baked goods. Whether it’s a galette, tart, or even a savory bread, the jam’s rich flavors will add a surprising and delightful twist.
Conclusion
Now that you’ve mastered the art of making and canning balsamic onion jam, it’s time to savor the fruits of your labor. Whether you enjoy it on a crusty baguette with cheese, as a glaze for roasted meats, or as a unique topping for your favorite dishes, this homemade jam is sure to elevate your culinary creations. Share it with loved ones, gift it to food enthusiasts, or simply indulge in its deliciousness on your own. Making balsamic onion jam is not just about preserving flavors; it’s about creating a lasting impression with every bite. So go ahead, celebrate your culinary prowess, and relish in the delightful flavors of your very own homemade balsamic onion jam.
Frequently Asked Questions
1. How long does Balsamic Onion Jam last?
Balsamic onion jam can last for up to 2 weeks when stored in a sealed container in the refrigerator. If properly canned using the water bath method, it can have a shelf life of up to 1 year. Make sure to check for any signs of spoilage, such as mold or off smells, before consuming.
2. Can I substitute the type of vinegar used?
Yes, you can experiment with different types of vinegar, such as red wine vinegar or apple cider vinegar, to give your onion jam a unique flavor profile. Keep in mind that the taste may vary slightly, so adjust the amount of sweeteners accordingly to balance the flavors.
3. My jam turned out too runny, what can I do?
If your balsamic onion jam has a thinner consistency than desired, you can try cooking it for a bit longer to further reduce the liquid. Alternatively, you can add a small amount of pectin or cornstarch mixed with water to thicken the jam. Remember to follow the instructions provided by the thickening agent you choose and test the consistency before canning.
Balsamic Onion Jam Recipe
Balsamic Onion Jam Recipe
Equipment
- 1 large heavy-bottomed cooking pot.
- 1 water bath canner
- canning supplies
Ingredients
- 4-6 small/medium onions.
- ½ cup balsamic vinegar.
- ½ cup pure maple syrup.
- 2 cups 100% apple juice.
- ½ tsp sea salt.
- ½ cup sugar (add molasses for flavor enhancement).
- 3 tbsp powdered pectin.
Instructions
Preparing and Chopping the Onions
- Start by peeling and thinly slicing the onions. A handy tip here is to chill the onions in the refrigerator for about 15 minutes before chopping to minimize tearing up. Also, having a small dish of water sitting next to your cutting board will help combat the tears that the onions WILL cause you to have since the onion particles are drawn to moisture, which is why they love our eyes! Otherwise, grab your swimming goggles and get to chopping.
Cooking the Onions
- Heat a tablespoon of olive oil or butter in your pot or Dutch oven over medium heat. Add the sliced onions and cook them slowly, stirring occasionally, until they turn golden brown and caramelized. This process can take anywhere from 30 to 40 minutes, so grab a book or your favorite TV show to pass the time.
Crockpot Method!
- Yo! If you are like me and prefer a more hands-off approach to small-batch canning projects, the trusty crockpot is my go-to cooking method! I love having something cooking in my crockpot all day long for a canning project while I am free and busy doing other things around my house. I occasionally check on whatever is in my crockpot, give it a quick stir, and be about my day. Cook until onions are caramelized and everything is well-cooked. This typically takes me about four to five hours with my crockpot set to high.
Adding Balsamic Vinegar and Sweeteners
- Once the onions are caramelized, it's time to add the balsamic vinegar and sweeteners. Pour in the balsamic vinegar and stir well to coat the onions. Then, add your chosen sweetener, along with any desired spices. Give everything a good stir to combine the flavors.
Simmering and Reducing the Heat
- Lower the heat to a gentle simmer and let the mixture cook for another 20-30 minutes, stirring occasionally. The jam is ready when it has thickened and reached a jam-like consistency. Keep in mind that it will continue to thicken as it cools, so don't worry if it seems runnier at this stage.
Blending Up the Onions
- If you did a rough chop of your onions because you could no longer stand the tearing effects onions offer, you can use your stick blender to blend the onions to the desired consistency you want for your jam to be spreadable.
Sterilizing Jars and Lids
- Before you begin canning your delicious balsamic onion jam, it's essential to start with clean and sterile jars and lids. Give them a good wash with hot, soapy water, and then place them in a large pot of boiling water for about 10 minutes. This will ensure that any bacteria or germs lurking in those jars are taken care of. Don't forget to sterilize your utensils as well!
Filling and Sealing the Jars
- Now that your jars and lids are sparkling clean, it's time to fill them up with that gorgeous balsamic onion jam. Using a funnel, carefully transfer the jam into each jar, leaving about 1/4 inch of headspace at the top. Use your debubbler wand to remove any air bubbles by sticking it around the inside edges of each jar. Wipe the rims of the jars with a clean, damp cloth to remove any drips or spills. Then, place the lids on top and screw the bands on until they are just fingertip-tight.
Water Bath Canning Method
- To seal in the flavors and ensure your balsamic onion jam stays fresh for months to come, you'll want to process the jars using the water bath canning method. Fill a large pot with enough water to cover the jars by at least 1 inch, and bring it to a gentle boil. Carefully lower the sealed jars into the pot using canning tongs or a jar lifter, making sure they are fully submerged. Let them process for about 10-15 minutes, depending on your altitude. Once done, remove the jars from the pot and let them cool on a clean towel for 12-24 hours.
Storing and Shelf Life
- Congratulations, you've successfully canned your balsamic onion jam! Now you need to store it properly to enjoy it for as long as possible. Store the sealed jars in a cool, dark place, like a pantry or cupboard. The jam will typically stay good for up to a year if stored correctly. Once opened, refrigerate the jar and consume the jam within a month or so. Trust me, it's so tasty, it probably won't last that long!
Summary
I hope I have inspired you to stockpile your pantry for your survival needs.
If you were encouraged by this post, I invite you to check out my FREE Printables Page for fun free printables, planners, and charts.
ENTER MY FREE Printables Page HERE
Here are some more of my canning inspiration posts to check out!
Pears: How to Make and Can Pear Honey
Pears: How to Make and Can Salted Caramel Pear Butter
Butternut Squash: How to Make and Can Butternut Squash Butter
Quince: How to Make and Can Fall Spiced Quince Chutney
Quince: How to Can Quince
Carrot Cake Butter: How to Make and Can Carrot Cake Butter
Peach Pie Filling: How to Make and Can Peach Pie Filling
Pear Pie Filling: How to Make and Can Pear Pie Filling
The Best Winter Pantry Staples to Stockpile Now!
More Recipes!
Grapes: How to Make and Can Grape Jam
Apple Cider: How to Make Homemade Apple Cider Vinegar
How to Make and Can Cherry Plum Jam
How to Make and Can Apple Butter In Crockpot
Stockpiling Condiments for Survival: Learn How I Do It!
How to Make and Can Vegetable Pot Pie Filling
Easy Canning Applesauce Recipes to Stalk Your Pantry!
How to Make Peach Jalapeno Jam
Cherries: How to Make Cherry Pie Filling
Cherries: How to Make Cherry Syrup
Salsa: How to Make and Can Cherry Salsa
Peaches: How to Make and Can Peach Salsa
Canning Supplies You Need Now for a Successful Canning Season!
How to Make and Can Balsamic Onion Jam
Cranberry Sauce: How to Make and Can Old Fashioned Cranberry Sauce
How to Make and Can Cranberry Merry Jam
How to Make and Can Strawberry Shortcake Jam
Cherry Jam: How to Make and Can Cherry Pie Jam
Carrot Cake Jam: How to Make and Can Carrot Cake Jam
Quince Jam: How to Can a Year’s Supply of Quince Jam
Root Beer Float Jelly: How to Make and Can Root Beer Float Jelly
Blessings,
The Off Grid Barefoot Girl


