Bring holiday cheer to your table with a homemade Gingerbread Cornucopia! Learn step-by-step how to bake, assemble, and decorate this festive centerpiece for a Christmas that’s as cozy as it is delicious.
I’ve always loved creating special touches for Christmas, and this year I wanted a centerpiece that was both festive and edible. That’s when I decided to make a gingerbread cornucopia — a charming and delicious way to showcase seasonal treats. In this post, I’ll guide you step-by-step through my process for baking the gingerbread, shaping the cornucopia, and decorating it so it becomes the star of your holiday table. Whether you’re a seasoned baker or trying something new, this project brings a cozy, handmade feel to your Christmas celebrations.
This is a pinnable post. Tap or hover over any image in this post to pin to your Pinterest Boards.
Introduction to the Festive Gingerbread Cornucopia
Understanding the Tradition of the Cornucopia
‘Tis the season to get crafty in the kitchen and whip up some festive treats! One delightful treat that perfectly embodies the holiday spirit is a gingerbread cornucopia. But before we jump into the baking fun, let’s take a moment to understand the tradition behind the cornucopia.
The cornucopia, also known as the “horn of plenty,” has been a symbol of abundance and harvest for centuries. It represents the bountiful blessings and good fortune that come with the harvest season. What better way to celebrate Christmas than by creating your very own edible cornucopia filled with sweet delights?
Gathering the Necessary Ingredients and Tools
Ingredients for the Gingerbread Dough
Now that we appreciate the significance of the cornucopia, let’s gather everything we need to make our gingerbread masterpiece! Here are the key ingredients for the gingerbread dough:
You can double the recipe depending on how big you make your cornucopia.
- 3 cups all-purpose flour.
- 1/4 teaspoon baking soda.
- 2 teaspoons ground ginger.
- 2 teaspoons ground cinnamon.
- 1/2 teaspoon ground cloves or allspice.
- 1/4 teaspoon salt.
- 6 tablespoons unsalted butter, softened.
- 3/4 cup brown sugar.
- 1/2 cup molasses.
- 1 large egg, room temperature.
- 1 tablespoon water.
Ingredients for the Icing and Decorations
- Royal icing. Homemade or store-bought. For homemade, 2 cups powdered sugar and 2 tablespoons water.
- Assorted candies and sprinkles.
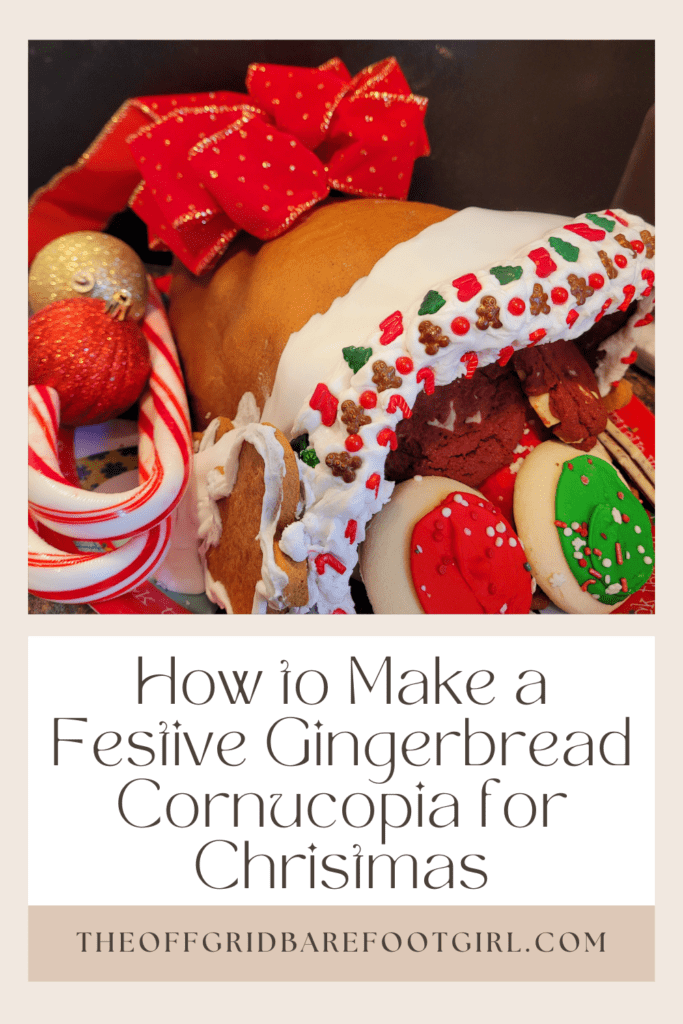
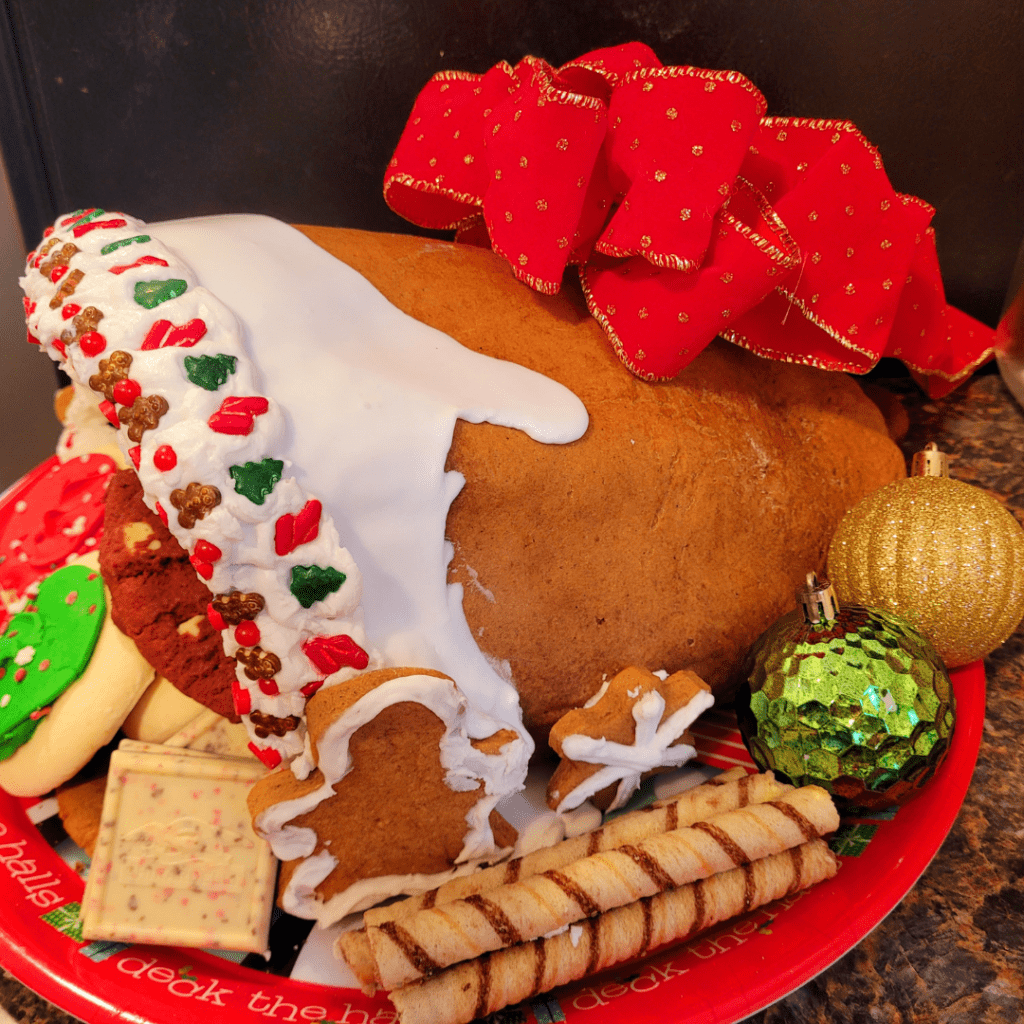
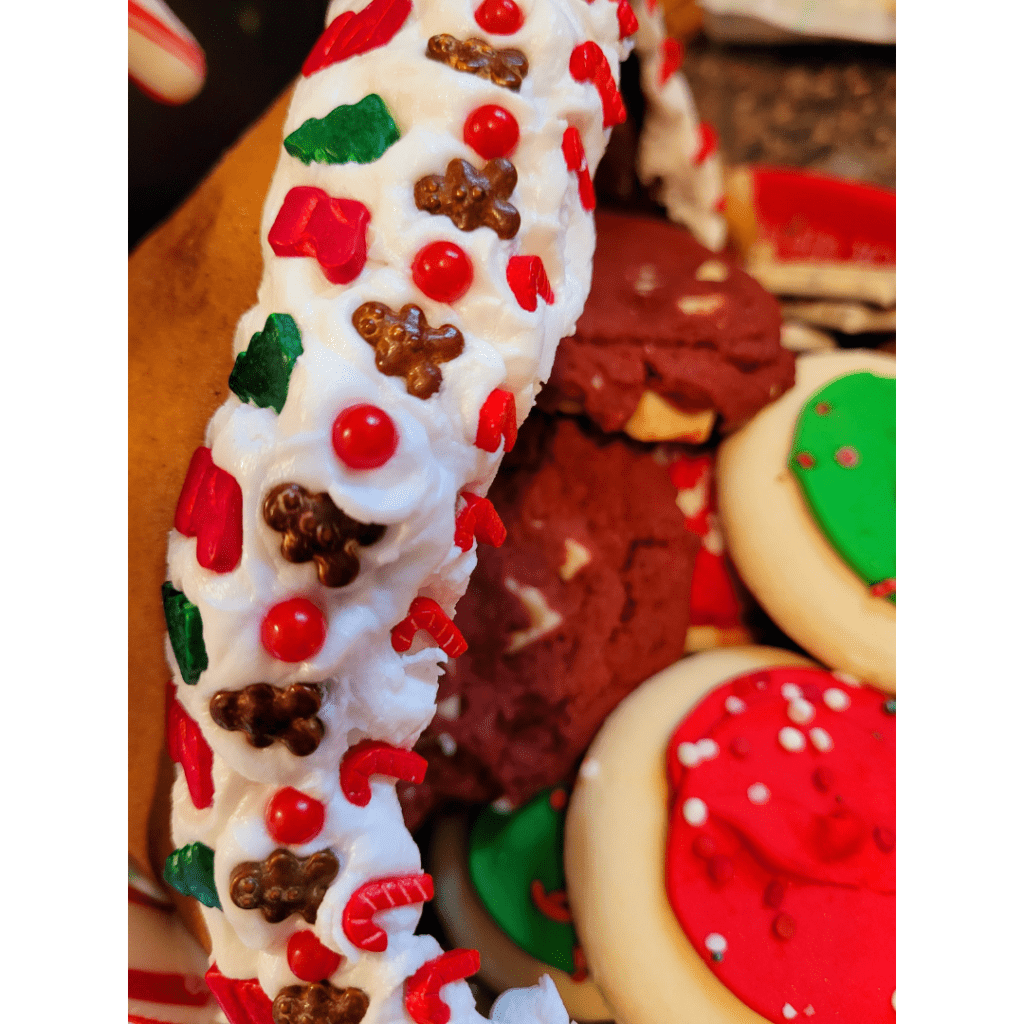
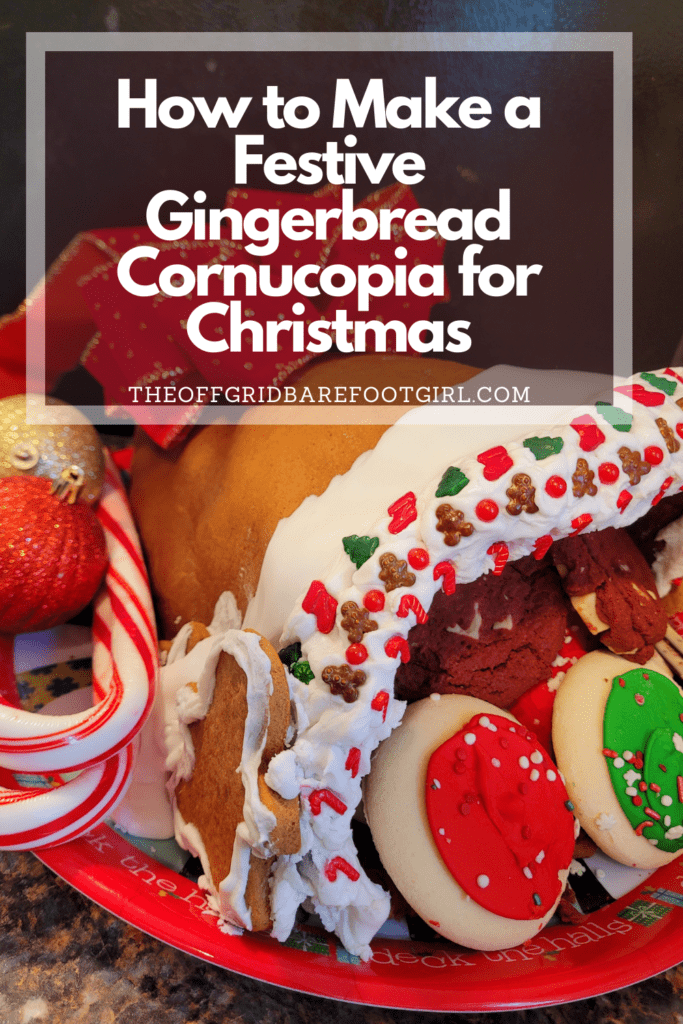
My festive gingerbread cornucopia is delicately and deliciously adorned and decorated with adorable tiny gingerbread men, stockings, Christmas trees, holly berries, and candy cane sprinkles. This gingerbread cornucopia is filled with festive Christmas sugar cookies, peppermint bark candies, and wafer sticks.
Gathering the Required Baking Tools
In addition to the ingredients, you’ll need a few essential baking tools, such as a rolling pin, parchment paper, baking sheets, aluminum foil, and a cornucopia mold (don’t worry, we will be making our own cornucopia mold!)
Step-by-Step Instructions for Making the Gingerbread Cornucopia

Preparing the Gingerbread Dough
Now comes the fun part – let’s make our gingerbread cornucopia! Follow these step-by-step instructions to ensure your creation turns out picture-perfect:
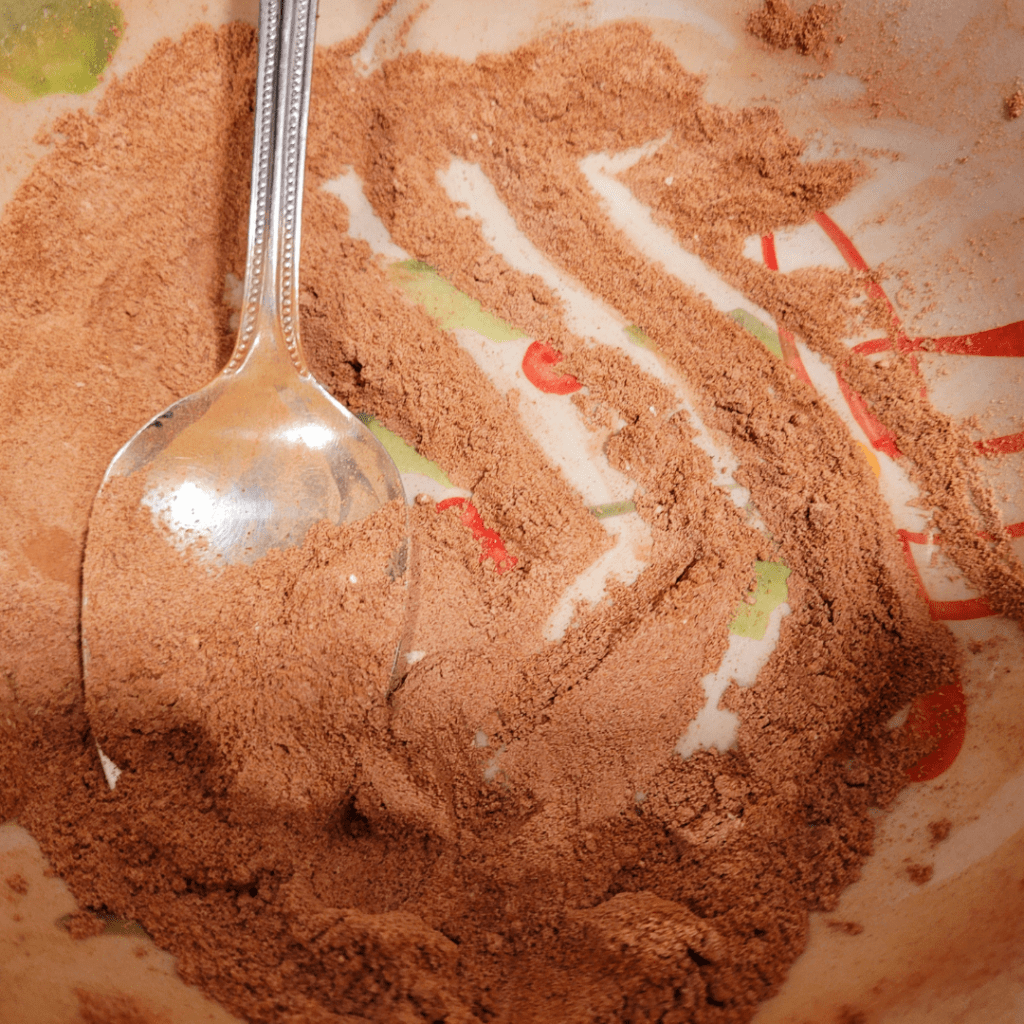
- In a large bowl, whisk together the flour, baking soda, ginger, cinnamon, cloves, and salt. Set aside.
- In a stand mixer, cream together the butter and brown sugar until light and fluffy. Add the molasses, egg, and water and mix until well combined.
- Gradually add the dry ingredients to the wet mixture, mixing until the dough comes together. Knead the dough gently with your hands or the kitchen aid paddle until it forms a smooth ball. (Dough will be sticky!)
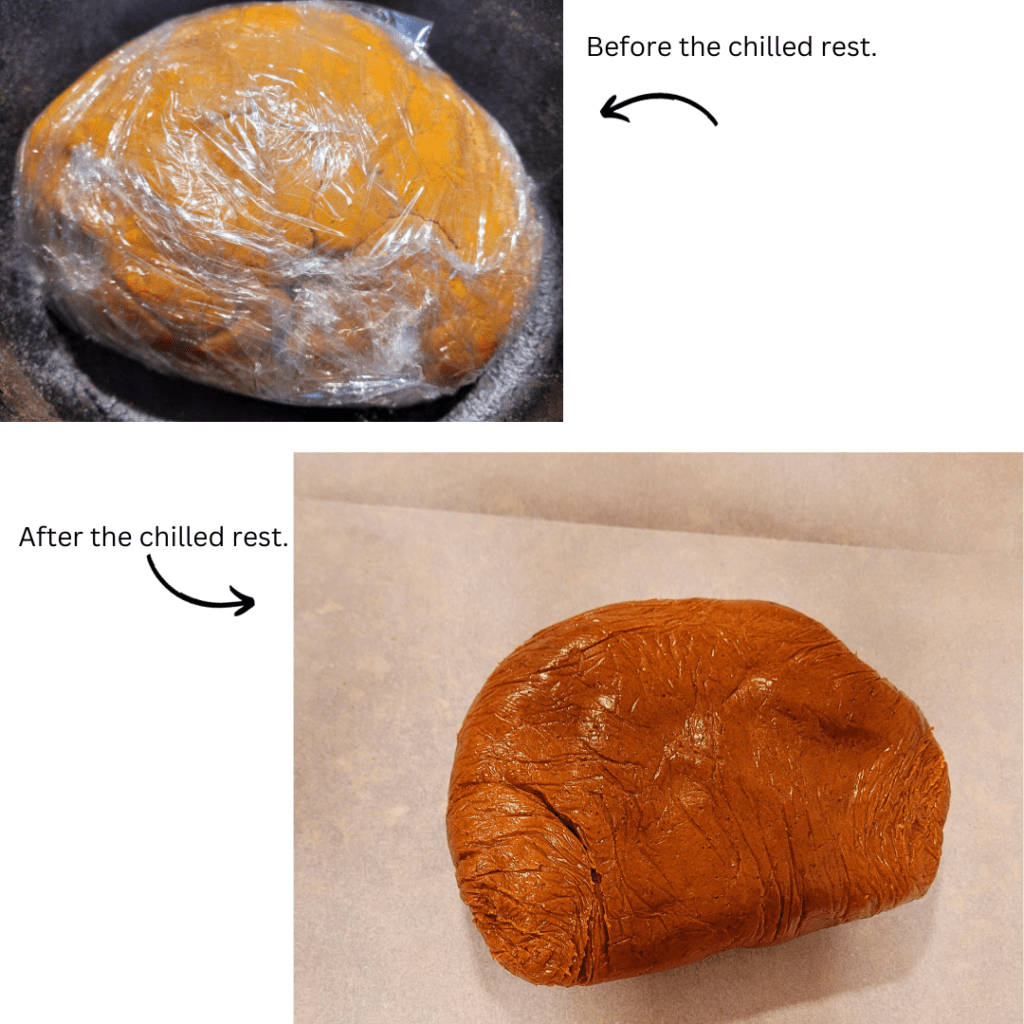
- Form the dough into a thick disk, wrap it in plastic wrap, and chill in the fridge for 2 hours or up to 2 days. (The longer it chills, the darker the color for that gorgeous gingerbread glow! Mine chilled for 2 days!)
Making the Gingerbread Cornucopia Shape Mold
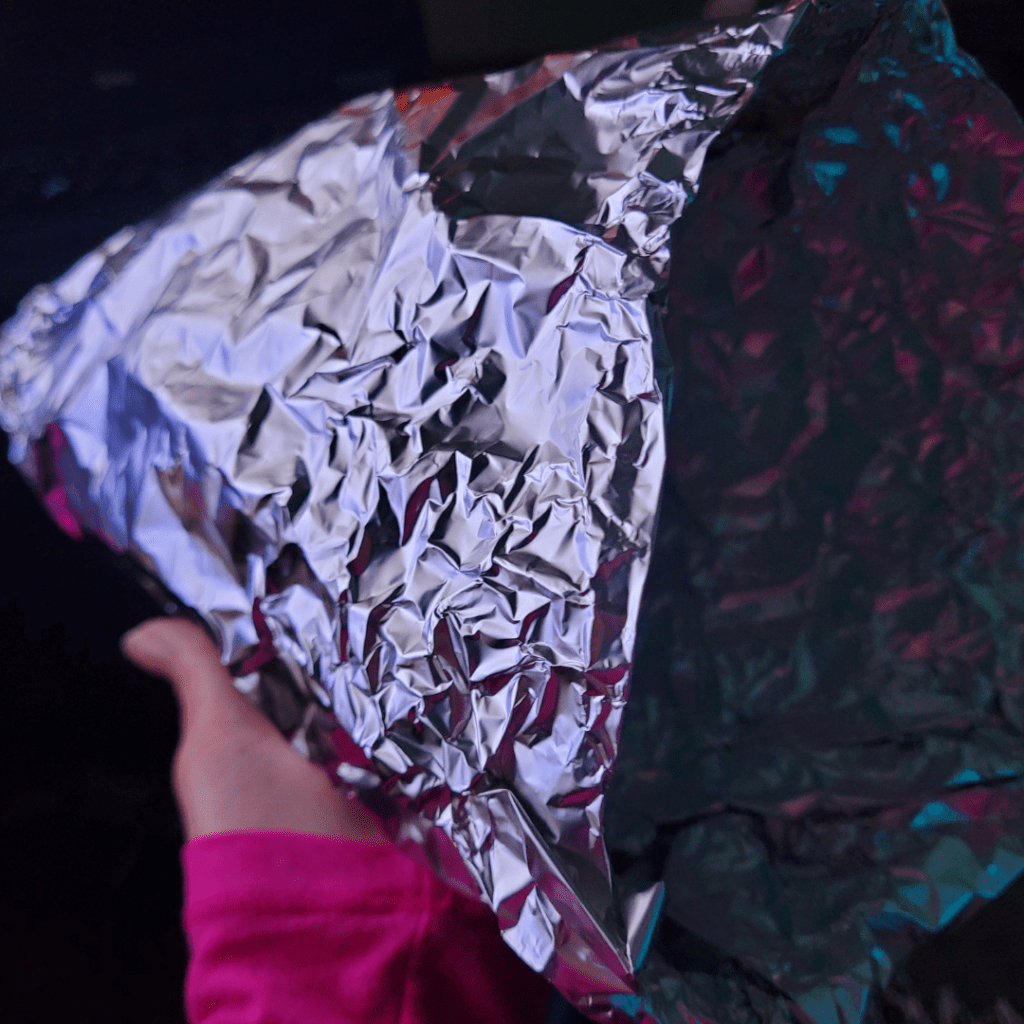
- While the dough is chilling and resting, grab sheets of aluminum foil, about the length of your arm from your elbow to your fingertips.
- Begin rolling the foil sheets into a cone shape one at a time, wrapping each sheet over the previous to create layers. Be sure to leave a hollow cone.
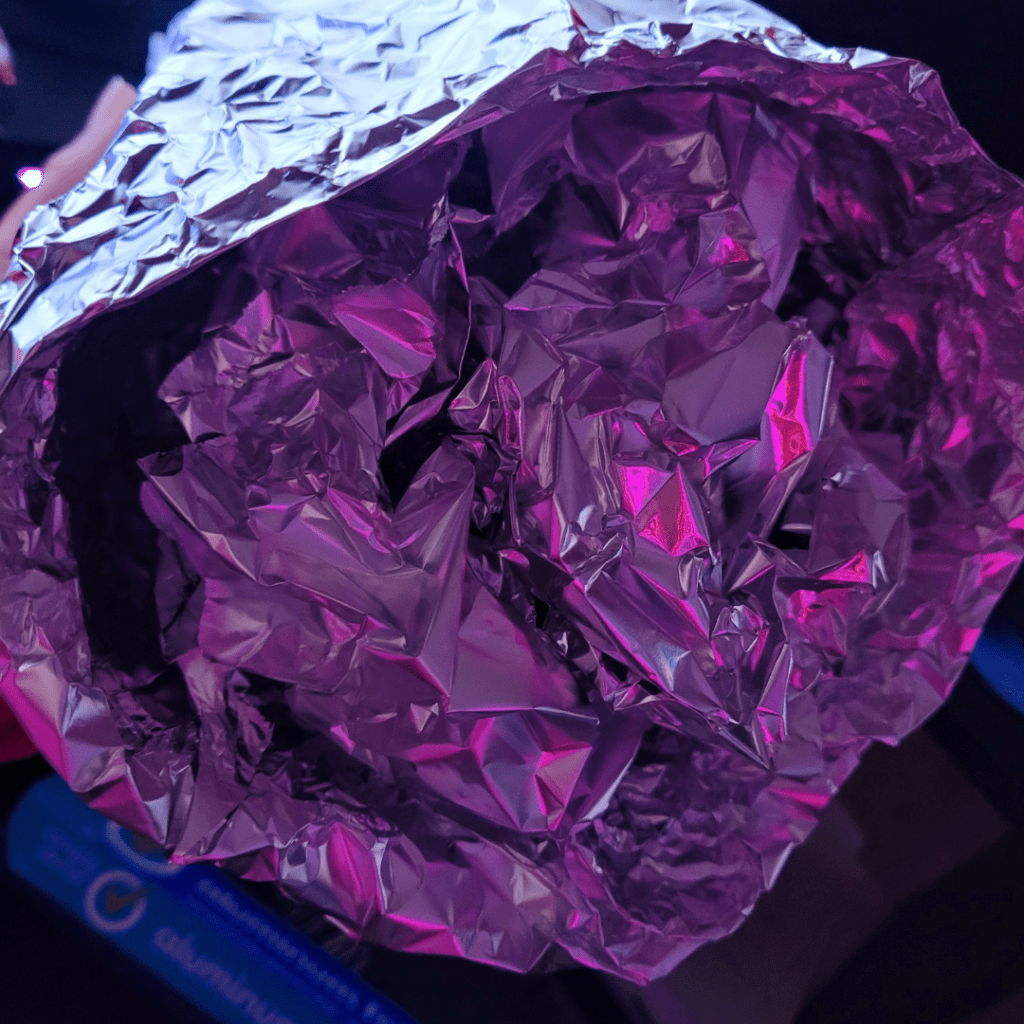
- Fold the edges of the opening (rim) of the cornucopia to pinch in the layers to keep it secure.
- Take a bunch of sheets of aluminum foil, crinkle them into small and large foil balls, and stuff them inside the foil-shaped cornucopia to keep it from collapsing once the dough is wrapped over it.
- Spray the whole foil-shaped cornucopia mold with cooking spray. Your mold is now ready!
Rolling Out the Gingerbread Dough

- In between two sheets of parchment paper, roll out the dough to a thickness of about 1/4 inch.
- Press the dough onto the foil-shaped cornucopia mold to create the gingerbread cornucopia shape. Pinch the dough to seal underneath.
TIP: If you need extra flour for dusting to prevent the dough from sticking, you can mix small amounts of flour with small amounts of cocoa powder to keep the dark consistency of the gingerbread dough and the white flour from showing!
Baking the Gingerbread Cornucopia to Perfection!
- Carefully transfer the formed cornucopia onto the prepared baking sheet.
- Bake in the preheated 350-degree oven for 20 minutes or until golden brown.
- Once baked, allow the gingerbread cornucopia to cool completely on a wire rack before moving on to the decoration step. Patience is key!
Decorating the Gingerbread Cornucopia with Festive Accents
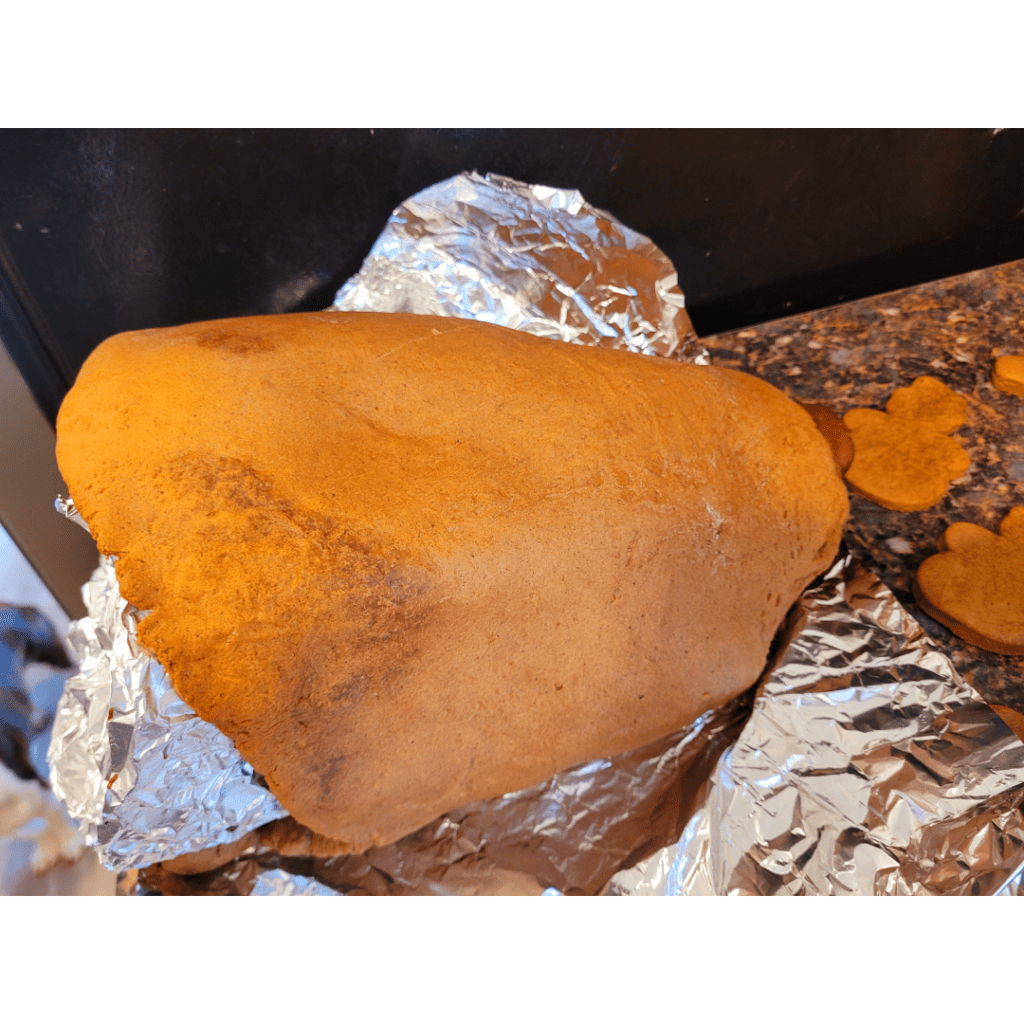
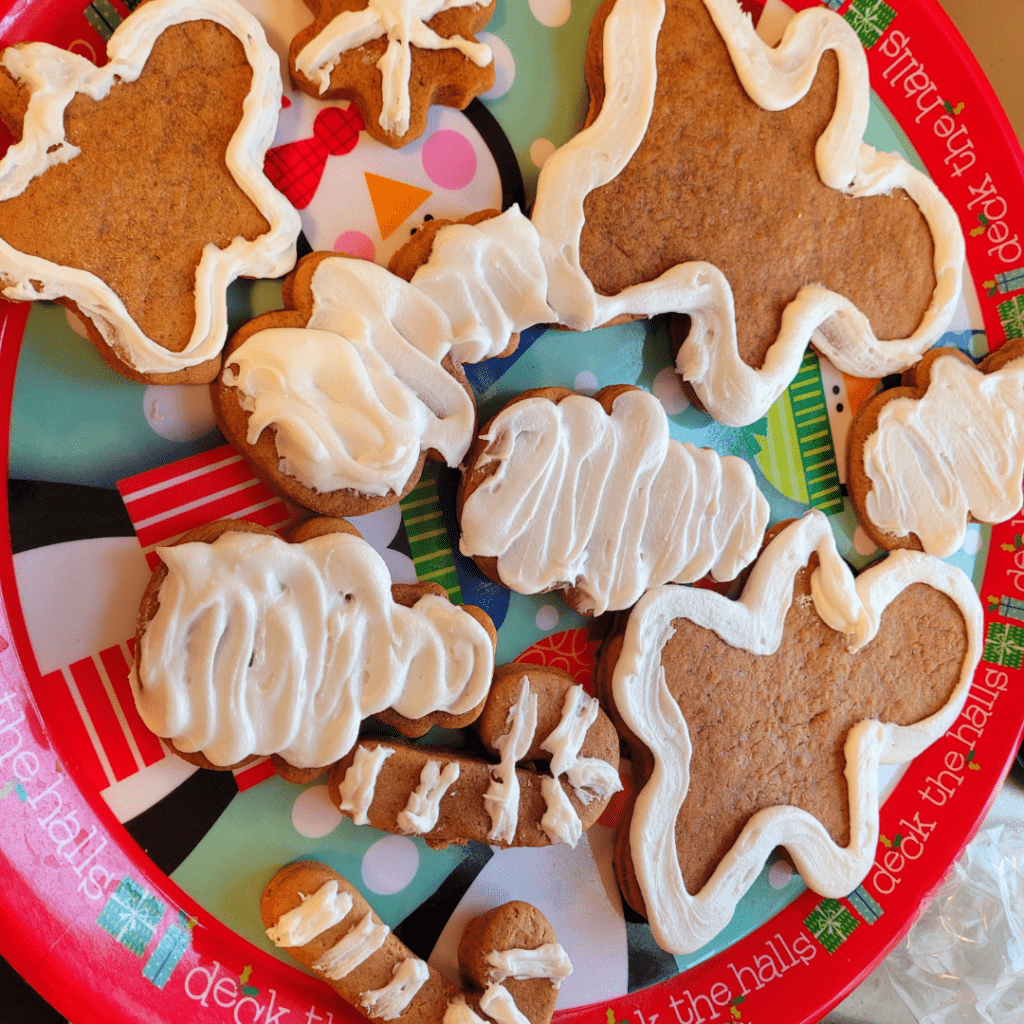
If you end up with extra gingerbread dough, cut out some cute gingerbread men shapes for gingerbread cookies!
Choosing and Preparing Icing for Decoration
Now that our gingerbread cornucopia has cooled down, it’s time to transform it into a festive masterpiece. Here’s how to add some pizzazz to your creation:
Adding Intricate Designs and Patterns to the Gingerbread
- Choose your icing wisely. Royal icing works best for gingerbread decorations. Prepare the icing by whisking together powdered sugar, a touch of vanilla extract, and a few tablespoons of water until you achieve a smooth consistency.
- Get creative with your designs! Use a piping bag or a ziplock bag with the tip cut off to pipe intricate patterns and designs onto the gingerbread. Don’t be afraid to let your artistic side shine!
Enhancing the Cornucopia with Edible Decorations
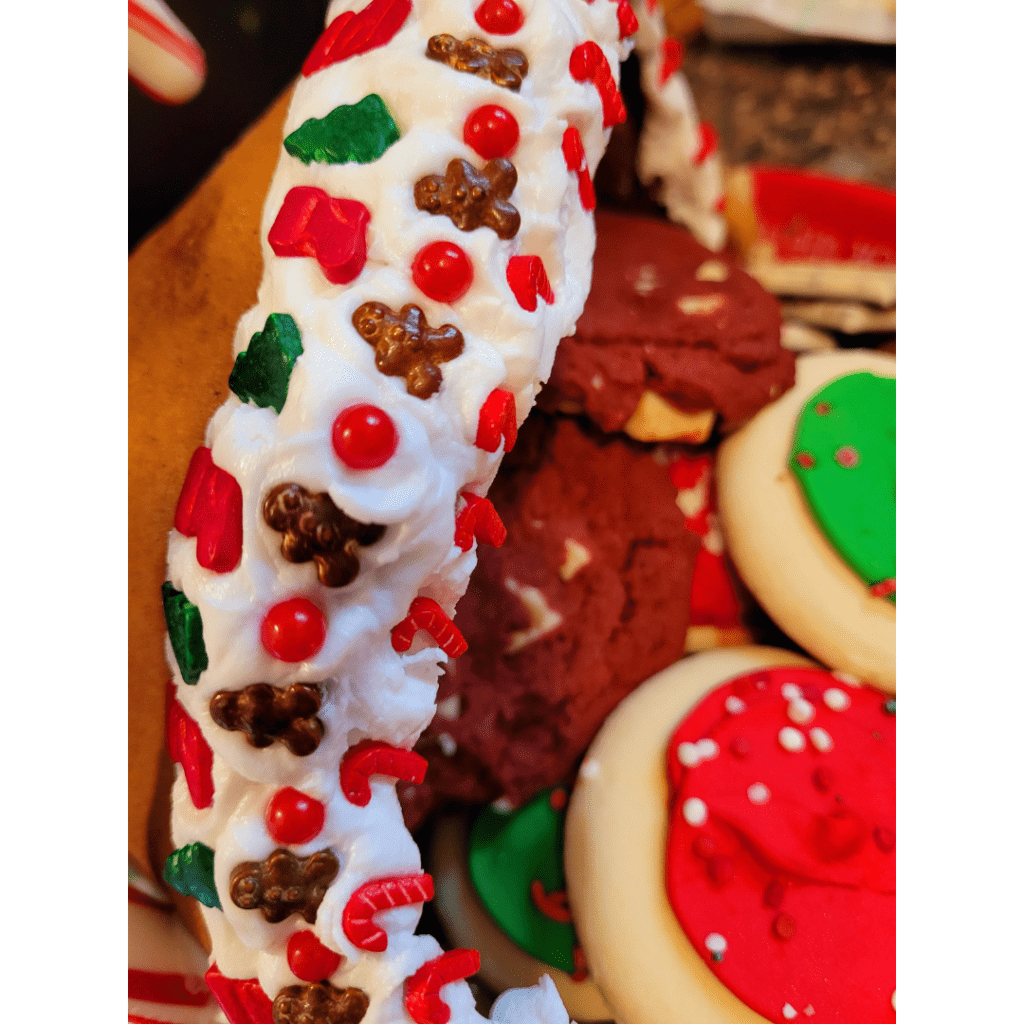
To enhance the cornucopia’s appeal, you can attach edible decorations like colorful candies, small cookies, or even dried fruit. Let your imagination run wild, but be careful not to overload the cornucopia and compromise its structural integrity.
Tips and Tricks for a Perfectly Shaped and Delicious Cornucopia
Ensuring the Right Consistency of the Gingerbread Dough
Baking the perfect gingerbread cornucopia starts with the right consistency of the dough. You want it to be firm enough to hold its shape, but not so dry that it crumbles. To achieve this, make sure you follow the recipe precisely and measure your ingredients accurately. If the dough feels too sticky, add a little more flour, but do so sparingly to avoid it becoming too dry.
TIP! I found my dough to be a bit dry and crumbly, so I placed a glass of water in the microwave and my dough along with it on a small plate, and microwaved it for 15 seconds. This made it feel like the consistency of playdough and was more fun and easier to work with!
Properly Shaping and Securing the Cornucopia Structure
Shaping the cornucopia can be a bit tricky, but with a few tips, you’ll be on your way to success. Start by rolling out the gingerbread dough on a lightly floured surface until it’s about 1/4 inch thick. Roll the dough between two pieces of parchment paper to prevent the dough from sticking to the surface and the rolling pin. Mix your flour with cocoa powder to keep the white of the flour from showing when rolling out the dough. Gently mold and shape the dough around the cone-shaped foil to give it the classic cornucopia shape. Secure the edges with a little water or egg wash, so they stick together.
Preventing Common Baking Mistakes and Challenges
When baking your gingerbread cornucopia, it’s important to keep a few common mistakes and challenges in mind. One is overbaking – gingerbread can quickly go from perfectly golden to burnt, so keep a close eye on it as it bakes. Another challenge is preventing the cornucopia from collapsing during baking. To avoid this, consider placing foil balls inside the foil-shaped mold to support the dough while it bakes. This will help maintain the shape and prevent any potential mishaps.
Creative Ways to Fill the Gingerbread Cornucopia with Christmas Treats

Exploring Various Types of Filling Options
Now that you’ve successfully baked your gingerbread cornucopia, it’s time to fill it with delightful Christmas treats. The options are endless! You can go for a classic assortment of colorful candies, chocolates, and cookies, or get creative with festive-themed treats like peppermint bark, gingerbread cookies, or cranberry white chocolate fudge. Consider incorporating a mix of textures and flavors to make it truly enticing.
Arranging and Presenting the Assortment of Christmas Treats
Arranging your Christmas treats in the cornucopia can be as much fun as making them. Start by placing larger items at the base, like cookies or brownies, and gradually work your way up with smaller treats. Make sure to leave some empty spaces between the goodies to create an appealing visual display. Don’t be afraid to play around with different heights and angles for an eye-catching presentation.
Incorporating Personalized Touches into the Filling
To add a personalized touch to your gingerbread cornucopia, consider incorporating treats that hold sentimental value. Maybe it’s your grandma’s famous homemade caramel or your kids’ favorite holiday cookies. By adding these personal favorites, you not only make the cornucopia more special but also create a nostalgic experience for everyone who enjoys the treats.
Displaying and Presenting the Gingerbread Cornucopia at Christmas Gatherings

Choosing the Right Display Surface or Stand
To showcase your gingerbread cornucopia in all its glory, it’s important to choose the right display surface or stand. A festive platter or wooden cutting board can make a great base, or you can go all out with a cake stand or a tiered dessert tray. Consider the size and height of your cornucopia to ensure it fits comfortably and is easily accessible for your guests. I took mine along with me to a festive family Christmas party and it was a huge hit!
Complementing the Cornucopia with Additional Festive Decor
Enhance the festive vibe by complementing your gingerbread cornucopia with additional decorative elements. You can sprinkle some powdered sugar on top of the treats for a snowy effect or add edible glitter for a touch of sparkle. Surround the display with fresh holly leaves, pinecones, or even miniature Christmas ornaments to create a charming holiday ambiance.
Placing and Presenting the Gingerbread Cornucopia as a Centerpiece
The gingerbread cornucopia can serve as the centerpiece of your Christmas gathering, stealing the show with its delicious treats and stunning appearance. Place it in the middle of your dining table, surrounded by other festive decorations and candles. Encourage your guests to help themselves and enjoy the sweet delights throughout the celebration. It’s the perfect conversation starter and a delightful way to spread Christmas cheer.
Conclusion and Final Thoughts on the Festive Gingerbread Cornucopia
Making a gingerbread cornucopia for Christmas is not only a tasty endeavor but also a creative and fun holiday project. With a perfectly shaped and deliciously filled cornucopia, you’ll impress your guests and create lasting memories. Remember to have fun with the process, embrace any mishaps as part of the charm, and enjoy the joy that comes from bringing a delightful edible centerpiece to your Christmas gatherings.
In conclusion, creating a festive gingerbread cornucopia is a delightful way to add a touch of magic to your Christmas celebrations. From the moment you shape the gingerbread dough to the final flourish of decorative accents, this homemade masterpiece will not only be visually stunning, but also a delicious treat for all to enjoy. Whether you fill it with an assortment of Christmas goodies or use it as a stunning centerpiece, the gingerbread cornucopia is sure to be a conversation starter and a memorable addition to your holiday festivities. So embrace your creativity, gather your ingredients and tools, and let the joyous process of making a gingerbread cornucopia bring warmth and happiness to your Christmas season. Happy baking and happy holidays!
Frequently Asked Questions
1. Can I make a gingerbread cornucopia without a cornucopia mold?
No. Without a cornucopia mold to hold the gingerbread structure, it will collapse in the baking process, if you even get it that far in the making. Don’t worry, though, because making a foil-shaped cornucopia mold is easy and cheap, and I show you how in this recipe tutorial above! All you need is a package of aluminum foil.
2. How long does it take to make a gingerbread cornucopia?
The time required to make a gingerbread cornucopia can vary depending on your baking experience and the intricacy of the design and decorations. Generally, it takes around 2-3 hours for preparation, baking, and decorating. However, keep in mind that the dough might require some chilling time before shaping.
3. How long does a gingerbread cornucopia stay fresh?
A properly stored gingerbread cornucopia can stay fresh for up to two weeks. To maintain its freshness, it is essential to store it in an airtight container in a cool and dry place. If you plan to fill the cornucopia with perishable items, it is best to do so just before serving.
4. Can I customize the size and design of the gingerbread cornucopia?
Absolutely! Feel free to customize the size and design of your gingerbread cornucopia according to your preferences and needs. Whether you want a smaller, individual-sized cornucopia or a larger centerpiece, you have the flexibility to adjust the measurements and shape the cornucopia accordingly. Get creative and make it uniquely yours!
Gingerbread Cornucopia Recipe

Gingerbread Cornucopia Recipe
Equipment
- 1 Rolling Pin
- 1 package of parchment paper.
- 1 package of aluminum foil. (For the cornucopia mold).
- 1 baking sheet.
- 1 serving platter.
Ingredients
For the Gingerbread Dough
- 3 cups flour.
- ¼ tsp baking soda.
- 2 tsp ground ginger.
- 2 tsp ground cinnamon.
- ½ tsp ground cloves or allspice.
- ¼ tsp salt.
- 6 tbsp unsalted butter, softened.
- ¾ cups brown sugar.
- ½ cup molasses.
- 1 large egg, room temperature.
- 1 tbsp water.
For the Royal Icing
- 2 cups powdered sugar.
- 2 tbsp water.
For the Edible Decorations
- Assorted candies.
- Assorted sprinkles.
Instructions
Preparing the Gingerbread Dough
- In a large bowl, whisk together the flour, baking soda, ginger, cinnamon, cloves, and salt. Set aside.
- In a stand mixer, cream together the butter and brown sugar until light and fluffy. Add the molasses, egg, and water and mix until well combined.
- Gradually add the dry ingredients to the wet mixture, mixing until the dough comes together. Knead the dough gently with your hands or the kitchen aid paddle until it forms a smooth ball. (Dough will be sticky!)
- Form the dough into a thick disk, wrap it in plastic wrap, and chill in the fridge for 2 hours or up to 2 days. (The longer the dough chills, the darker it will get for that perfect gingerbread glow!)
Making the Gingerbread Cornucopia Shape Mold
- While the dough is chilling and resting, grab sheets of aluminum foil, about the length of your arm from your elbow to your fingertips.
- Begin rolling the foil sheets into a cone shape one at a time, wrapping each sheet over the previous to create layers. Be sure to leave a hollow cone.
- Take a bunch of sheets of aluminum foil, crinkle them into small and large foil balls, and stuff them inside the foil-shaped cornucopia to keep it from collapsing once the dough is wrapped over it.
- Spray the whole foil-shaped cornucopia mold with cooking spray. Your mold is now ready!
Rolling Out the Gingerbread Dough
- Between two pieces of parchment paper, roll out the dough to a thickness of about 1/4 inch.
- Press the dough onto the foil-shaped cornucopia mold to create the gingerbread cornucopia shape.
Baking the Gingerbread Cornucopia to Perfection!
- Carefully transfer the formed cornucopia onto the prepared baking sheets.
- Bake in the preheated 350-degree oven for 20 minutes or until golden brown.
- Once baked, allow the gingerbread cornucopia to cool completely on a wire rack before moving on to the decoration step. Patience is key!
Enhancing the Cornucopia with Edible Decorations
- Pipe the royal icing to the edge of the opening of the cornucopia and add the edible decorations per your desire.
Summary
I hope I have inspired you to bake gingerbread cornucopia to enjoy and share with your friends and family.
If you were encouraged by this post, I invite you to check out my FREE Printables Page for fun free printables, planners, and charts.
ENTER MY FREE Printables Page HERE
Here are some more of my bread-making inspiration posts to check out!
How to Make Pumpkin-Shaped Bread Rolls
How to Make Easy Sourdough Breadsticks
Sourdough Discard Fry Bread: Easy Sourdough Discard Hack
Sourdough Buttermilk Drop Biscuits: The Ultimate Secret to Easy Biscuits!
How to Make Apple Fritter Bread: A Perfect Fall Treat
How to Make the Perfect Pumpkin-Shaped Sourdough Bread from Scratch
Easy Pumpkin Bread Recipe That Will Satisfy Your Fall Cravings
The Ultimate Snickerdoodle Zucchini Bread Recipe: Tips for a Perfect Bake
How to Turn Stale Bread into Irresistible Breadcrumbs!
The Best Fall Maple Sourdough Bread Recipe
The Ultimate Guide to Making Sourdough Bread from Scratch
The Ultimate Guide to Crafting a Perfectly Tangy Wild Sourdough Starter
Artisan Bread: How to Make Artisan Bread
Challah Bread: How to Make a 6 Braided Challah Bread
Sweet Bread: How to Make Sweet Bread
Blessings,
The Off Grid Barefoot Girl


