Learn how to harvest and pickle garlic scapes with this simple guide. Preserve their fresh, garlicky flavor for year-round enjoyment in salads, sauces, and more.
Every spring, I eagerly await the arrival of garlic scapes in my garden. These curly, vibrant green shoots are not only a sign that my garlic plants are thriving, but also a delicious treat that I love to preserve. Over the years, I’ve learned the best ways to harvest garlic scapes and turn them into tangy, flavorful pickles that brighten up my meals year-round.
In this post, I want to share my personal tips and techniques for harvesting and pickling garlic scapes. From knowing exactly when to pick them to crafting a perfect pickling brine, I’ll guide you through the process so you can enjoy these tasty treats long after the growing season has ended. Whether you’re a seasoned gardener or a curious foodie, I hope you’ll find this guide helpful and inspiring. Let’s learn more about these wonderful crunchy flavorful stalks!
This is a pinnable post. Tap or hover over any image in this post to pin to your Pinterest Boards.
What Are Garlic Scapes?
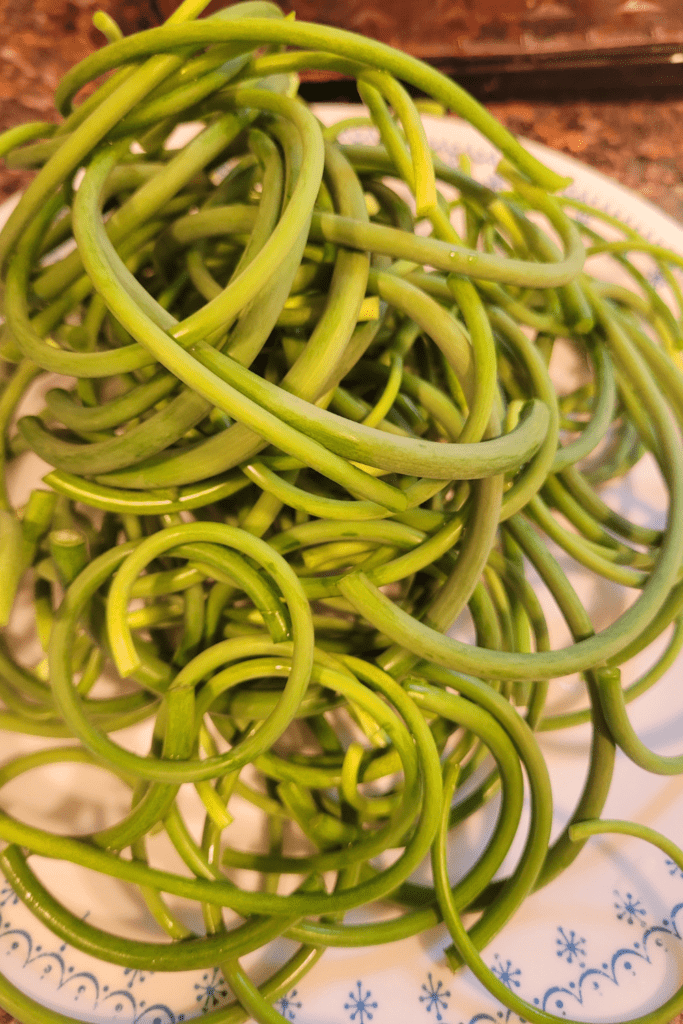
Garlic scapes are the curly, vibrant green shoots that grow from the tops of hardneck garlic plants. These scapes are not only visually striking, but also serve essential purposes in the growth and development of garlic plants. In this section, I will talk about the definition of garlic scapes and explore their significant role in plant growth.
What I love about the garlic plant is that it deters pests in the garden while it is growing. It produces delicious crunchy garlic scapes so we can enjoy the flavor of garlic while we wait for the garlic bulbs to form and cure, which seems to take forever! This makes this plant amazing as we basically get two different forms of garlic to harvest from each plant!
Definition of Garlic Scapes
Garlic scapes are the flower stems that emerge from the tops of hardneck plants. These graceful curls not only add an aesthetic appeal to the garlic plant, but also indicate the stage of growth. Typically, they appear a few weeks before the garlic bulbs are ready to be harvested. These stalks have a mild garlic flavor, making them a sought-after ingredient in culinary creations. Harvesting these scapes at the right time ensures both the plant’s health and a flavorful addition to dishes. Softneck varieties do not produce any scapes.
Role of Garlic Scapes in Plant Growth
Garlic scapes play a crucial role in the overall growth and development of the plants. They act as a natural pruning mechanism for the plant, redirecting energy from the growth of the scape to the bulb. By removing them at the optimal time, the plant can channel more nutrients and resources toward bulb formation, resulting in larger and healthier garlic bulbs.
My Experience with Garlic Bulbils
Additionally, allowing them to mature fully can lead to the production of bulbils, commonly known as garlic seeds, which can be used for planting in the following season. However, in my experience, it takes two years for the garlic to form the bulb when it is growing from the bulbils. It is much quicker to just plant the cloves.
Planting garlic bulbils is a great way to establish a garlic perennial patch that you typically will not be harvesting from for consumption. In this case, I established a garlic perennial bed in my rose and hollyhock cottage garden. I thin them out whenever they become too crowded. Garlic is a great companion plant for roses and hollyhocks and helps keep pests away. Plus, the flowering garlic stems look amazing growing tall and beautiful in my cottage garden!
I will also grow a garlic perennial patch in my orchard for organic pest control for my fruit trees and berry bushes. Garlic is a great organic pest control option and works wonderfully growing as a perennial. I will allow the garlic bulbs to break open in the ground and it will reseed itself. The bulbs will not be big enough for storage or consumption, but the soil will be full of the garlic aroma underground while the plants above ground will fill the surroundings with its aroma. This makes the garden and orchard organically pest-free!
Harvesting Garlic Scapes
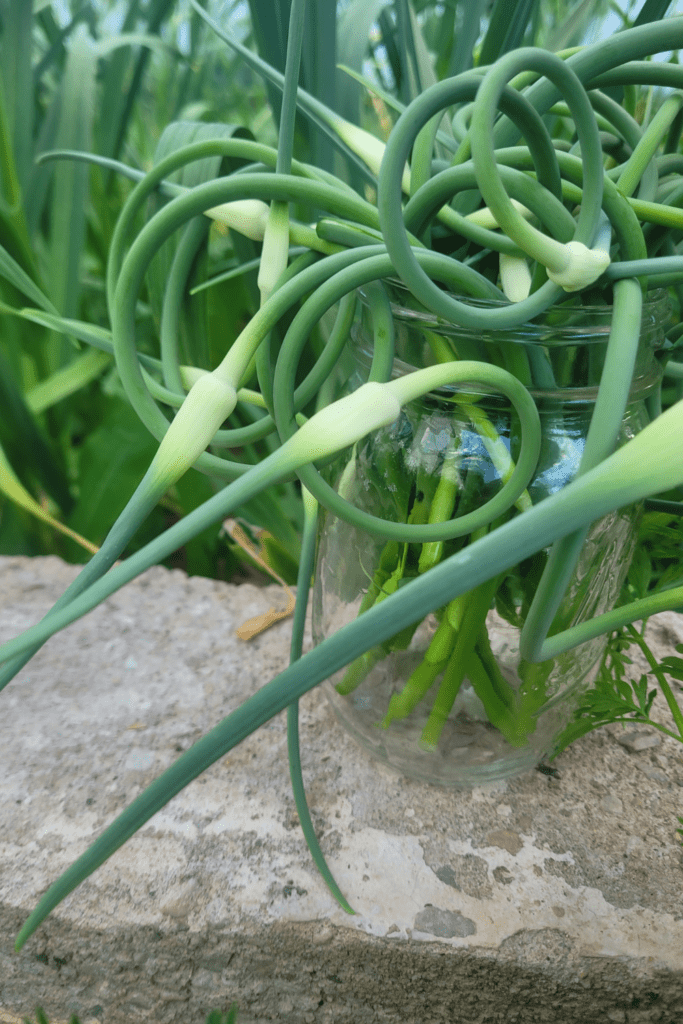
Harvesting garlic scapes is a crucial step in the growth of the plants as it ensures optimal flavor and plant development. It is essential to harvest at the right time to make the most of these flavorful shoots.
This section will discuss the optimal time for harvesting, different methods to harvest them, and the consequences of harvesting them too early.
Optimal Harvest Time
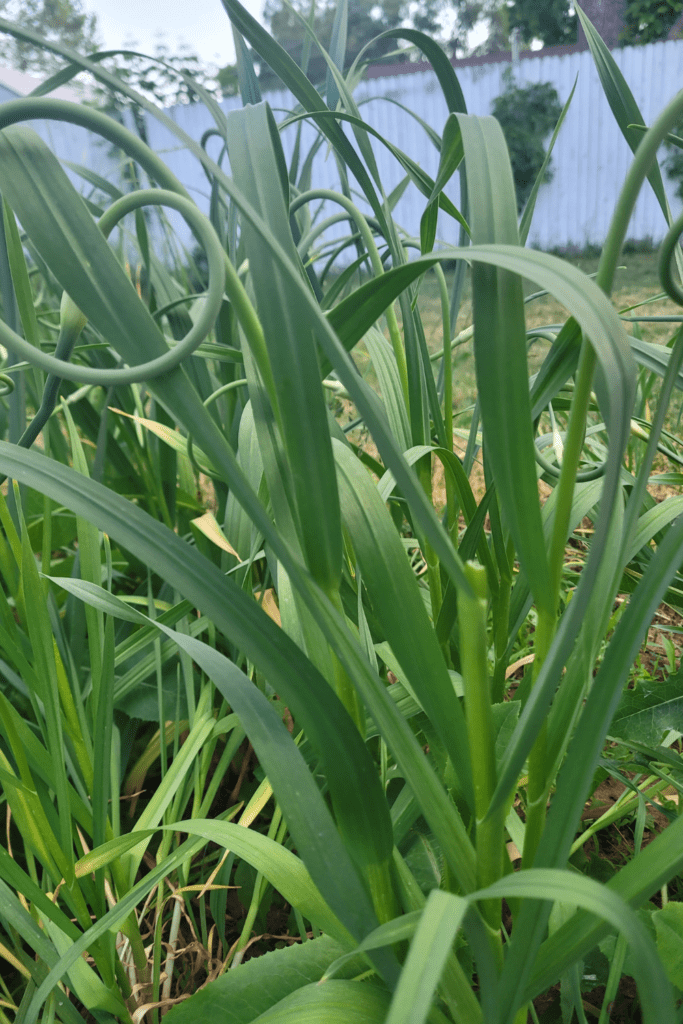
Knowing the right time to harvest garlic scapes is vital for both flavor and plant growth. Typically, scapes are ready to be harvested about 3-4 weeks after they appear. Look for scapes that have made one full curl, but haven’t straightened out yet.
Harvesting at this stage ensures that the scapes are tender and flavorful. If left too long, they can become tough and less palatable.
Methods for Harvesting
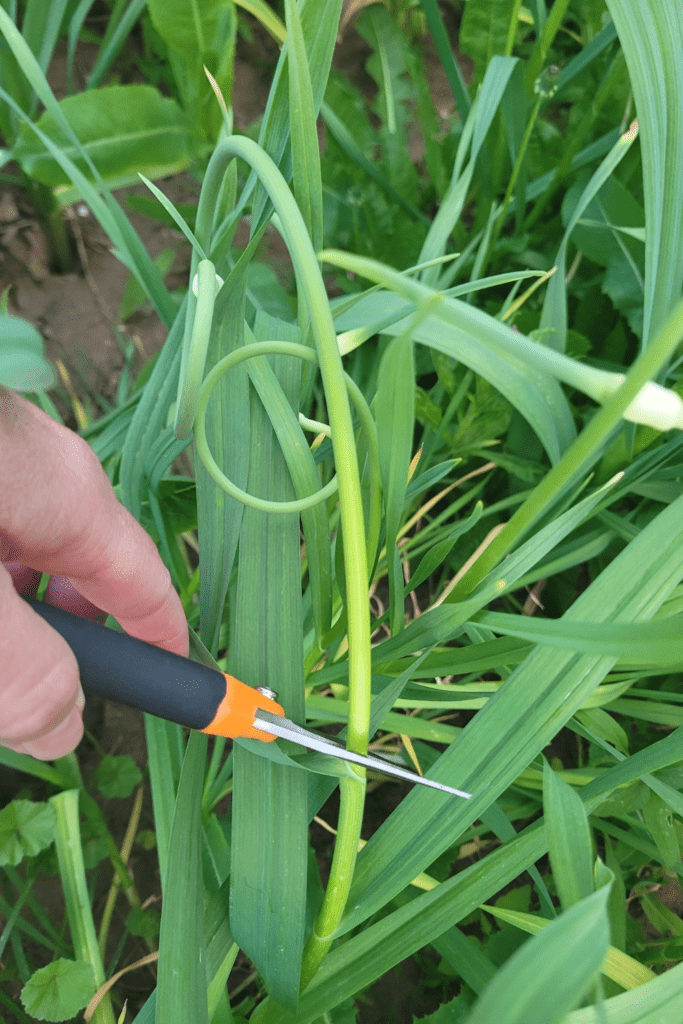
When it comes to harvesting these from your garden, there are a few methods to consider. The most common method is to hand-snip them off the plant using a pair of scissors or pruners. Make sure to cut the scapes above the top set of leaves.
Another method is to gently bend the scape until it snaps off naturally. This technique is suitable if you prefer a hands-on approach without cutting tools.
Consequences of Early Harvest
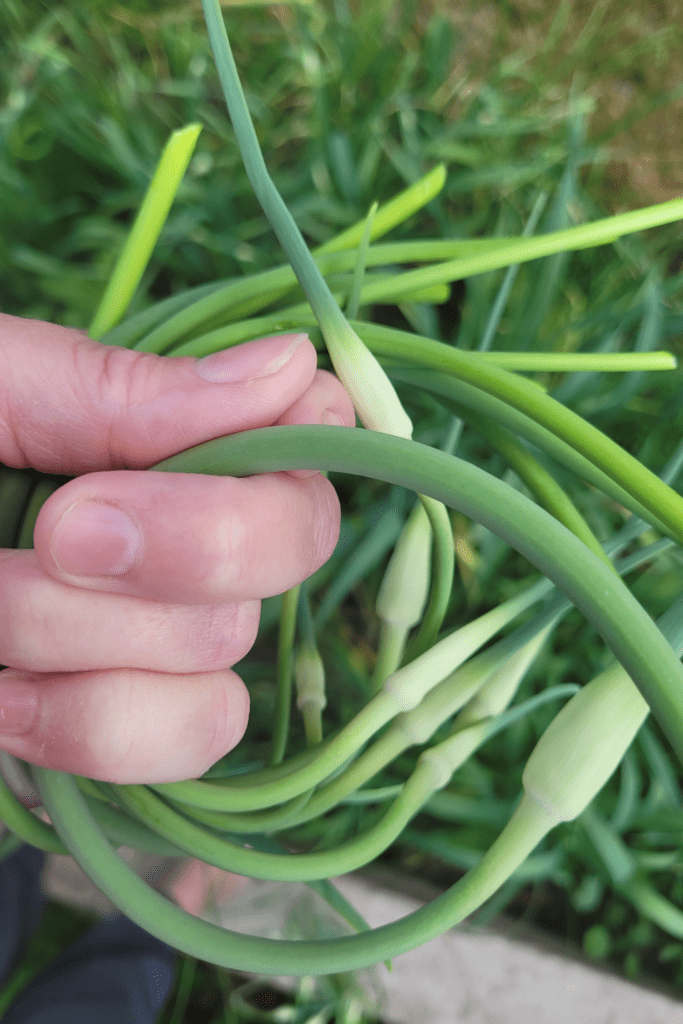
Harvesting these too early can have several consequences. If harvested prematurely, the scapes may not have developed their full flavor and nutritional content. Additionally, early harvest can impact the garlic plant’s overall growth and bulb development.
To ensure the best outcome, it’s essential to wait until they have reached the optimal size and curl before harvesting them.
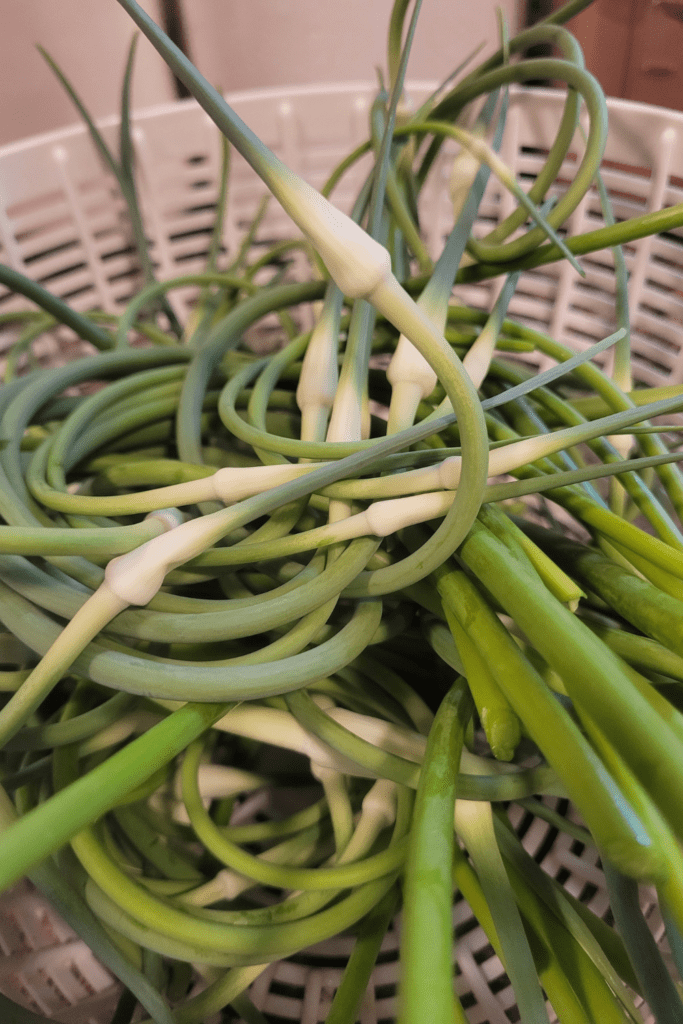
How to Pickle Garlic Scapes for Canning
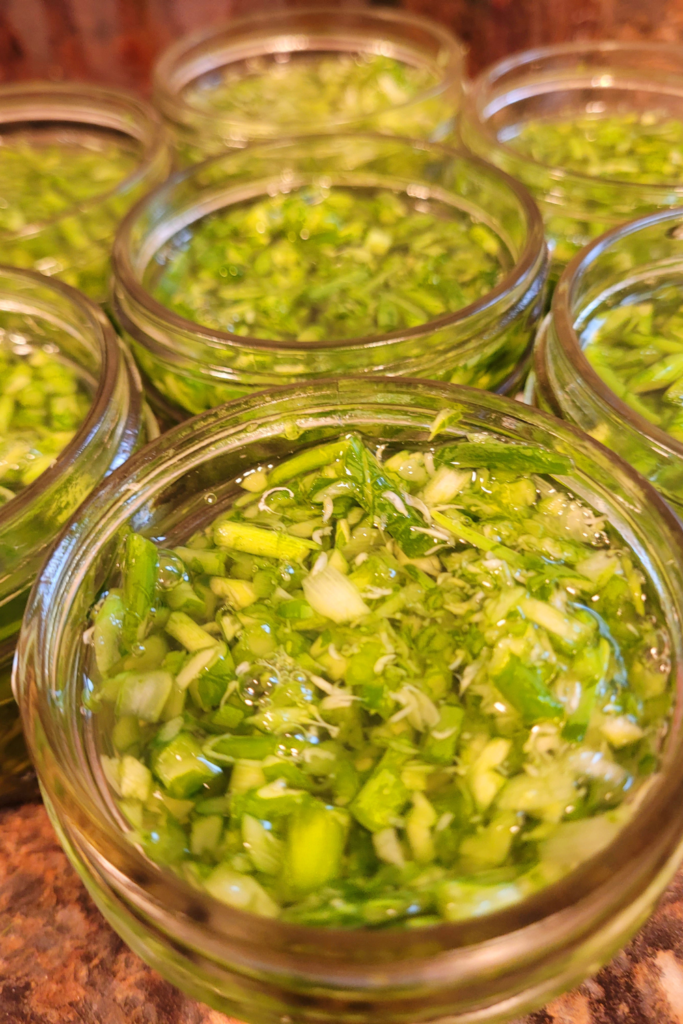
Pickling garlic scapes is a delightful way to preserve the unique flavor of this early summer treat. Garlic scapes, the green, curly shoots that emerge from garlic plants, are both tasty and versatile. By pickling them, you can enjoy their tangy goodness year-round, adding a burst of flavor to a variety of dishes.
Here’s a step-by-step guide to help you pickle garlic scapes for canning.
Selecting and Preparing the Scapes
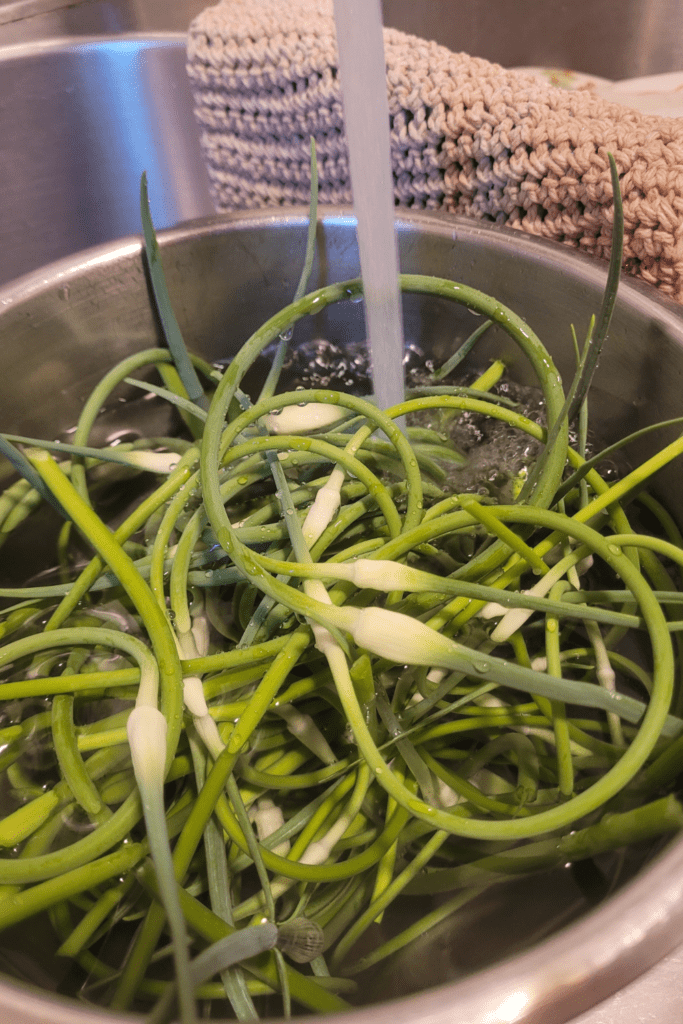
The first step in pickling garlic scapes is to choose fresh, tender scapes. Look for scapes that are bright green and firm, with no signs of wilting or yellowing. Once you’ve gathered your scapes, wash them thoroughly under cold water to remove any dirt or debris. Trim off any tough ends and cut the scapes into uniform lengths that will fit comfortably into your canning jars.
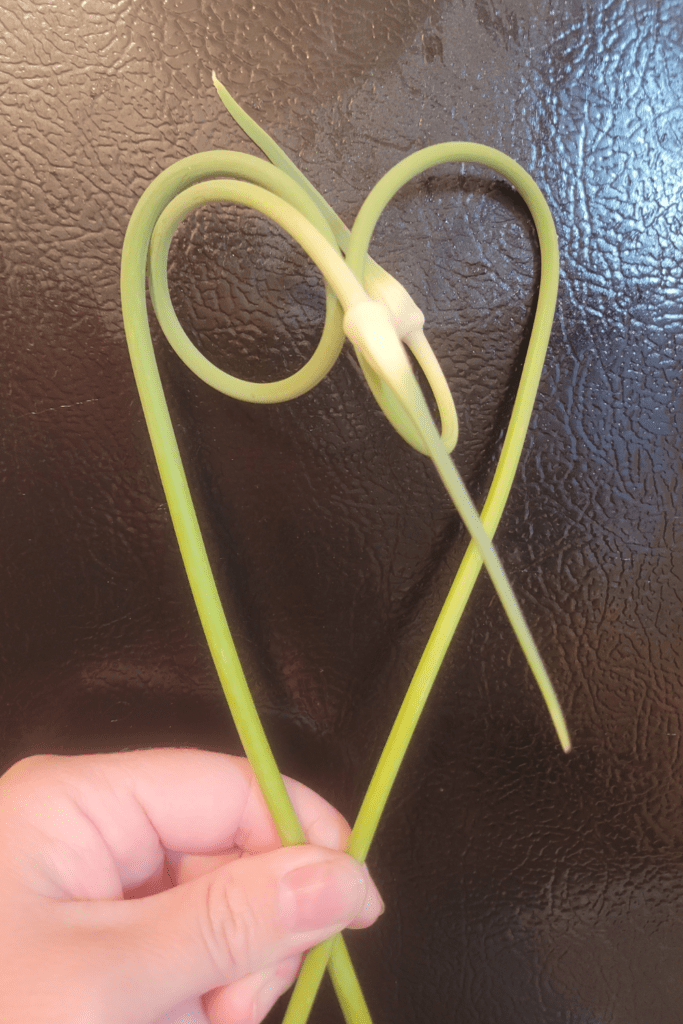
How I Prep My Garlic Scapes for Pickling and Canning
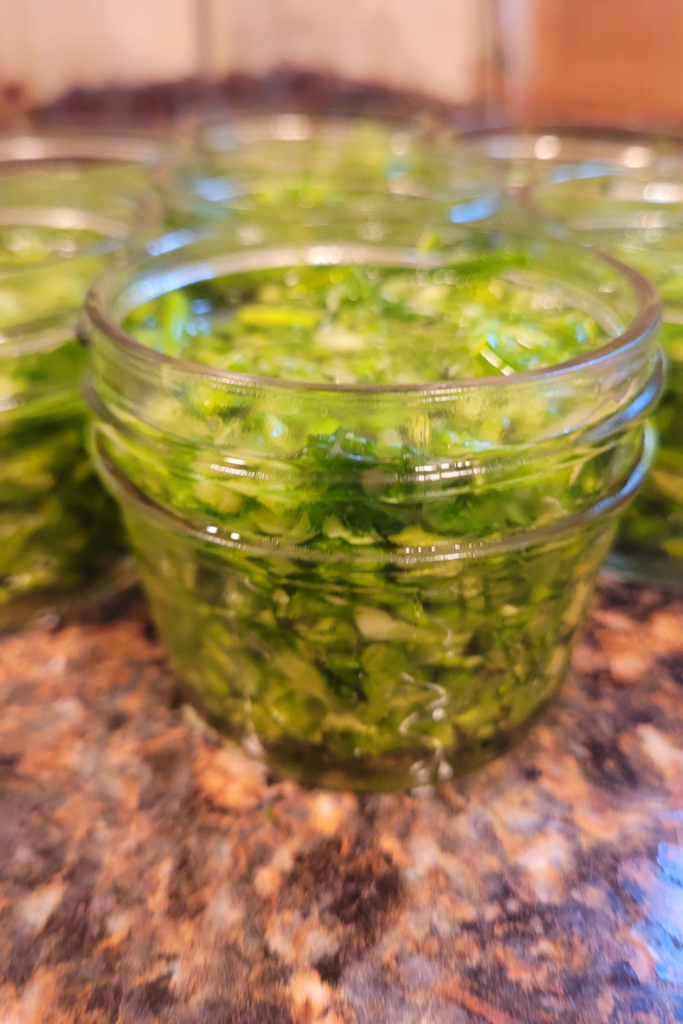
I typically prepare this produce by slicing them into the cuts I want and separating them out into different piles. I cut the curls and place them on a plate. The florals are cut and placed onto another plate. And the straight stalks are cut into the lengths of the jars I will be using for them.

Making the Brine
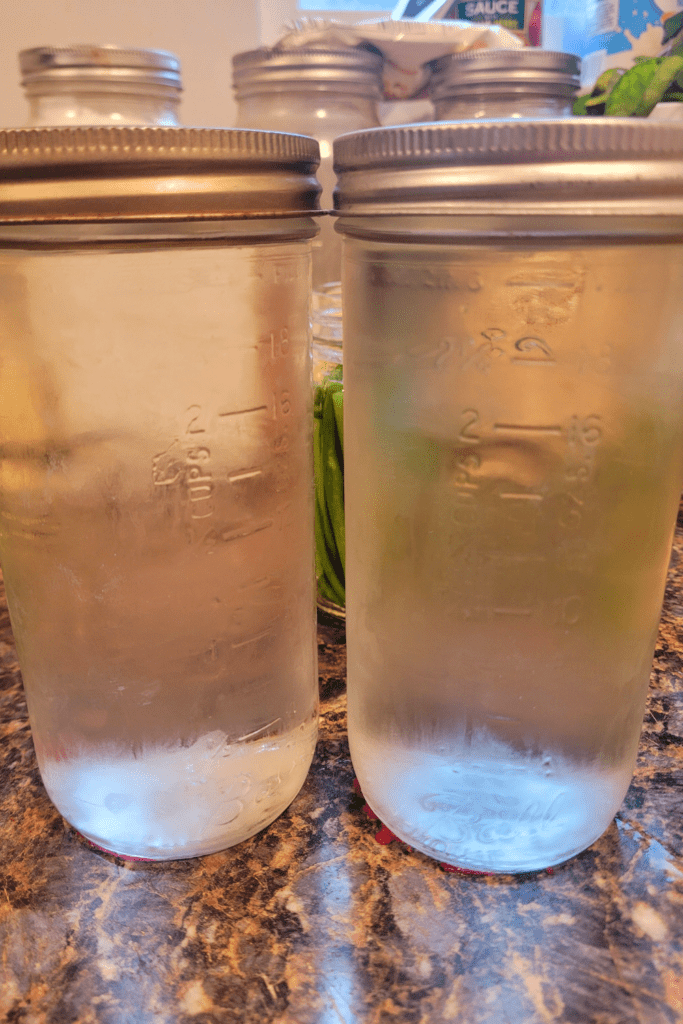
The brine is the key to flavorful pickled garlic scapes. To make the brine, combine white vinegar, water, and pickling salt in a large saucepan. Bring the mixture to a boil, stirring until the salt is completely dissolved. For added flavor, you can include spices such as dill seeds, mustard seeds, peppercorns, and a couple of bay leaves. Once the brine is ready, reduce the heat and let it simmer while you pack the scapes into jars.
My Brine Recipe
- 2 cups of white vinegar.
- 2 cups of water.
- 2 tbsp of pickling salt.
Instructions
- Add all ingredients in a large saucepan.
- Bring the mixture to a boil, stirring until the salt is completely dissolved.
- Pour into prepared jars to cover the produce of what you are canning.
During harvesting season, I typically keep tall jars of pickling brine in my refrigerator to have prepared at any time I need to pickle produce that is coming out of my garden. This helps make for a quick pickling and canning day!
My Pickled Canned Scapes In Different Forms!
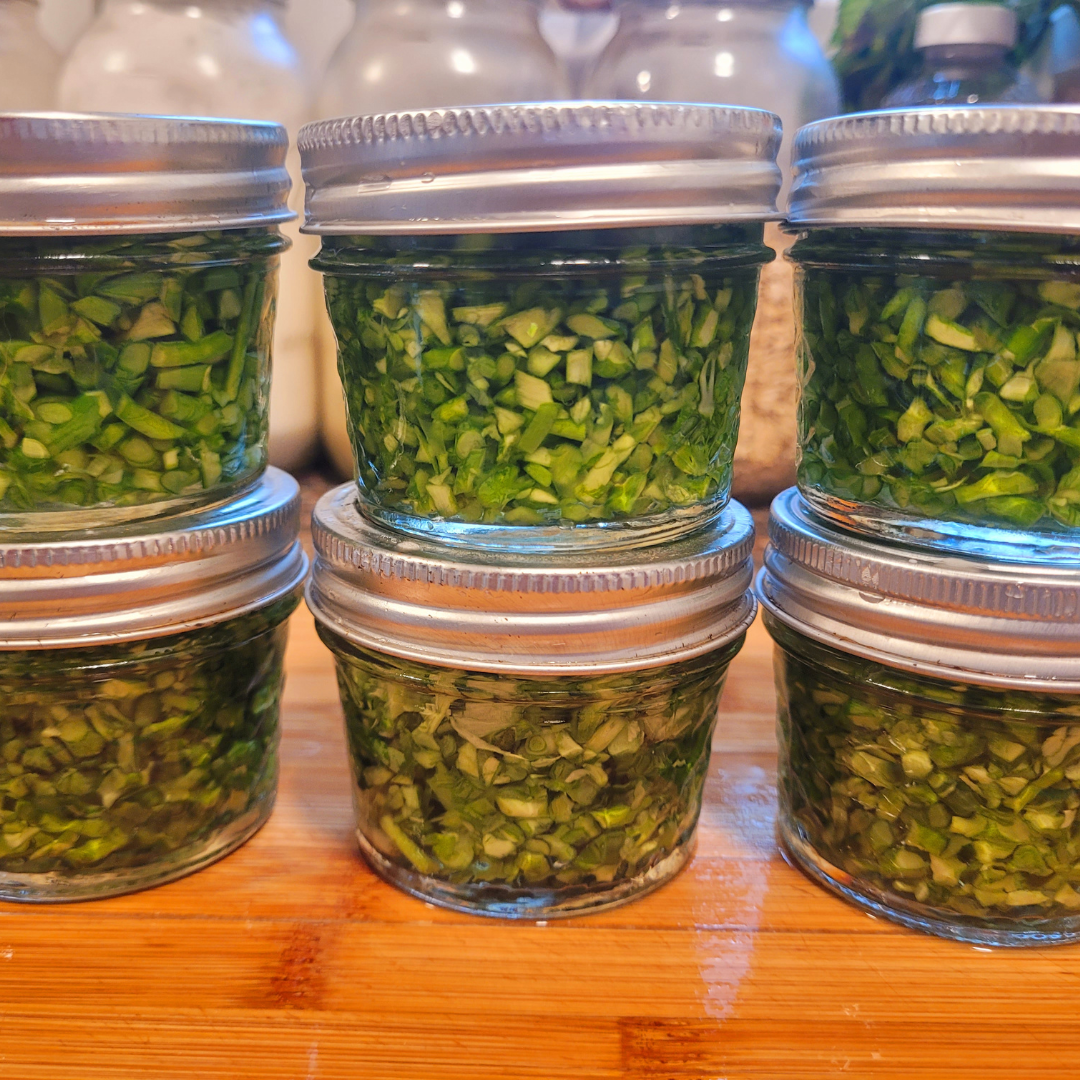
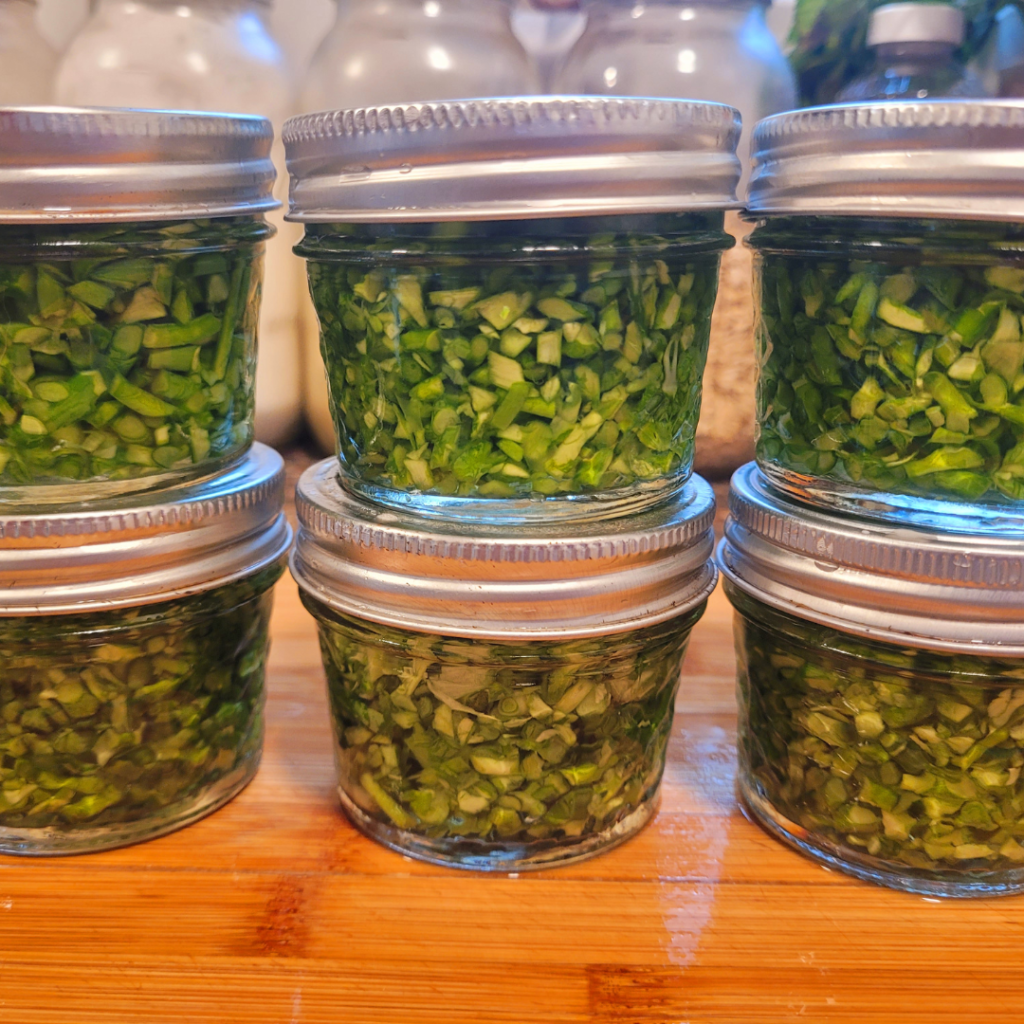
Minced Pickled Garlic Scapes

These are great to use for sauteing and adding to anything that you would add minced garlic to. You can rinse them in the sink to help remove any pickling flavor if necessary. Pickling helps with preservation.
Pickled Garlic Stape Stalks
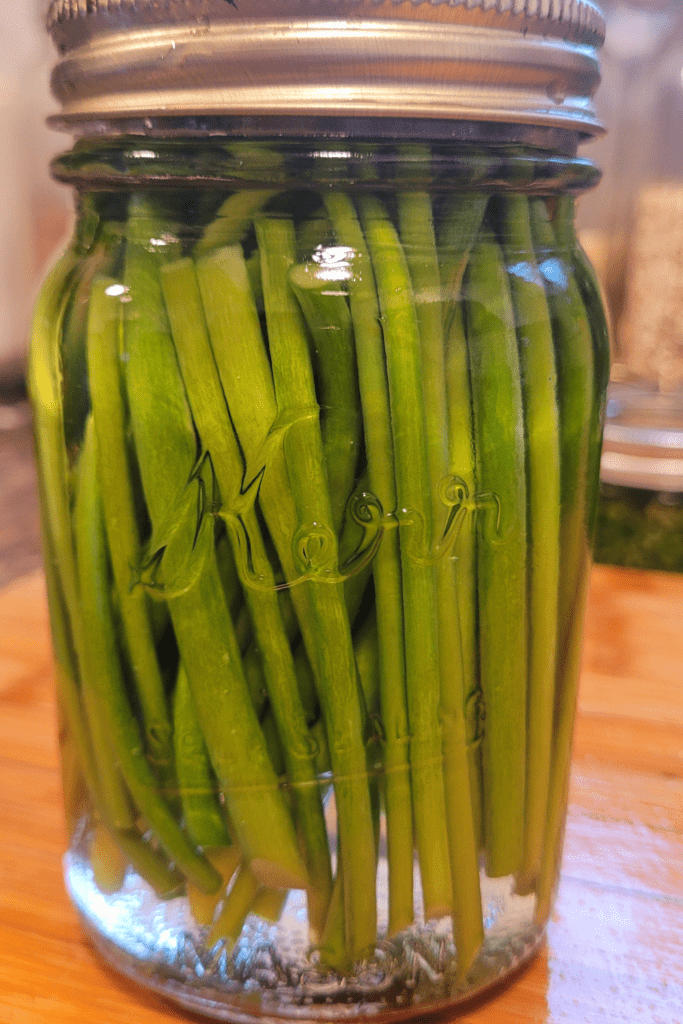
The stalks are great for grilling and adding as a side dish as you would green beans or asparagus! Plus, if you run out of your minced ones, you can always chop these stalks up!
Pickled Garlic Scape Curls
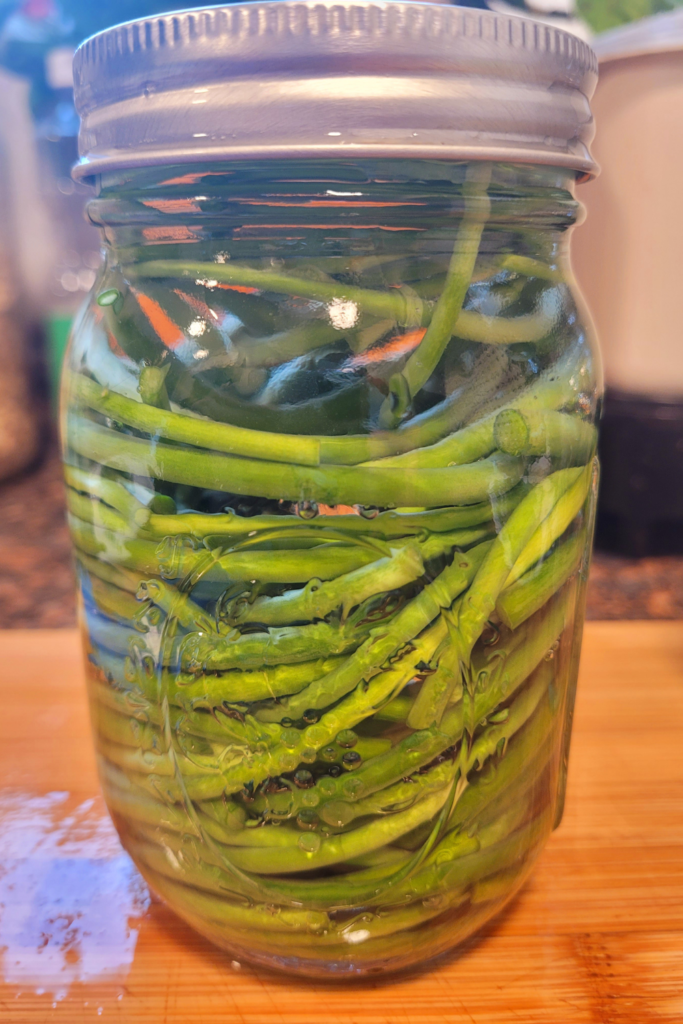
The curls are great to add to salads to fancy up your plate. I typically do not keep a lot of the curls on my pantry shelves as I like to mince these up for smaller canning jars as I know they will be used more often in my kitchen this way. But it is fun to have a few jars of the curly ones!
Pickled Garlic Scape Florals
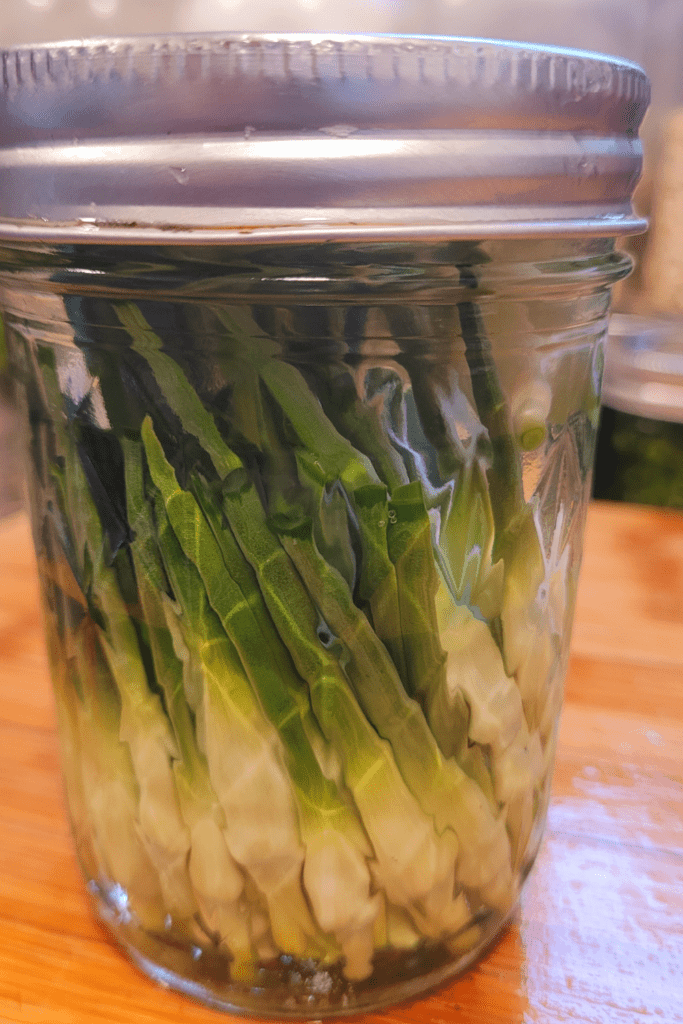
The florals are great to add to salads or stir-fry dishes. They pack a ton of garlic flavor and add beauty to any dish! Be careful because a lot goes a long way!
Canning the Scapes
- Sterilize your canning jars and lids by boiling them in water for 10 minutes.
- Carefully pack the scapes into the hot, sterilized jars, leaving about half an inch of headspace at the top.
- Pour the hot brine over the scapes, making sure they are completely submerged.
- Wipe the rims of the jars with a clean cloth, place the lids on top, and screw on the bands until they are fingertip tight.
- Process the jars in a boiling water bath for 10 minutes to ensure a proper seal and to kill any potential bacteria.
- Once the processing time is up, remove the jars from the water bath and let them cool on a towel or a cooling rack.
- You should hear a popping sound as the jars seal, indicating they are properly canned.
- Store the jars in a cool, dark place, and let the scapes pickle for at least two weeks before enjoying them.
The Amazing Qualities of Having Pickled Garlic Scapes!
Pickled garlic scapes make a wonderful addition to salads, sandwiches, and charcuterie boards. They can also be chopped and used in sauces, dips, or as a garnish for cocktails. By following these simple steps, you can savor the distinctive taste of garlic scapes long after their growing season has ended.
Utilizing Garlic Scapes
Culinary Use
Garlic scapes are versatile and flavorful additions to various dishes. Here are some popular culinary uses of garlic scapes:
- Pesto: Blend garlic scapes with nuts, Parmesan cheese, olive oil, and salt to make a delicious pesto sauce.
- Stir-fries: Add chopped garlic scapes to stir-fries for a mild garlic flavor and crunchy texture.
- Salads: Use thinly sliced scapes to garnish salads or mix them into salads for a subtle garlic taste.
- Grilled: Grill whole garlic scapes with olive oil, salt, and pepper for a savory side dish.
Exploring these culinary options can add a unique garlic flavor to your meals and elevate the taste profile of various dishes.
Recipes and Cooking Ideas
Incorporating garlic scapes into your cooking can bring a fresh and mild garlicky flavor to your dishes. Here are some creative recipes and cooking ideas to inspire you:
- Garlic Scape Soup: Create a flavorful soup by sautéing chopped scapes with vegetables and broth, then blending until smooth.
- Garlic Scape Butter: Mix minced scapes with softened butter and herbs to make a fragrant spread for bread or steamed vegetables.
- Garlic Scape Pasta: Toss cooked pasta with sautéed garlic scapes, cherry tomatoes, olive oil, and parmesan cheese for a simple yet tasty meal.
- Garlic Scape Dip: Blend garlic scapes with Greek yogurt, lemon juice, and seasonings to make a refreshing dip for chips or veggies.
Experimenting with these recipes can introduce a new dimension of flavor to your culinary repertoire while using up your garlic scape harvest!
Other Preservation Techniques
To enjoy garlic scapes beyond their harvest season, consider preserving them using the following techniques:
- Freezing: Chop scapes into desired lengths and freeze them in airtight containers for later use in soups, stews, or sauces.
- Dehydrating: Dry garlic scapes and grind them into a powder to add flavor to dishes throughout the year.
- Infusing: Make garlic scape-infused oils or vinegar by steeping chopped scapes in the liquid of your choice for a few weeks.
By using these preservation methods, you can extend the shelf life of garlic scapes and enjoy their unique taste in your cooking year-round.
Differentiation from Green Garlic

When it comes to distinguishing between garlic scapes and green garlic, it’s important to note that they are different parts of the same plant. Garlic scapes are the curly, vibrant green shoots that grow from the garlic bulb, while green garlic refers to garlic plants harvested earlier before the bulbs mature.
Green garlic has a milder flavor than mature garlic cloves and is often used similarly to scallions or spring onions in cooking. On the other hand, garlic scapes have a unique flavor profile, bringing a hint of garlic with a touch of sweetness, making them a versatile ingredient in various dishes.
Enjoying and Using Your Garlic Scapes
Harvesting and using canned creations not only provides an additional yield from your garlic plants, but also offers a versatile ingredient for culinary creations. Understanding the optimal time for harvesting, various methods for utilization, and storage techniques are essential for maximizing the benefits of this product.
Benefits of Incorporating Garlic Scapes in Your Culinary Repertoire
Garlic scapes contribute a unique flavor profile to dishes, combining the pungency of garlic with a subtle hint of sweetness. Including this produce in your cooking not only enhances the taste, but also offers potential health benefits due to their nutrient-rich composition.
Encouragement for Sustainable Practices
By utilizing garlic scapes in your dishes, you are engaging in sustainable practices by reducing food waste and maximizing the yield from your garlic plants. Embracing the use of garlic scapes promotes a farm-to-table approach, prioritizing fresh, homegrown ingredients in your meals.
Inspiration for Creativity in the Kitchen
Experimenting with garlic scapes opens up a world of culinary possibilities, from simple stir-fries to elaborate gourmet recipes. The versatility of garlic scapes allows you to explore different cooking techniques and flavor combinations, adding a gourmet touch to your homemade meals.
Conclusion
In conclusion, harvesting and using garlic scapes is a rewarding experience that not only adds depth to your culinary creations, but also aligns with eco-friendly practices. Take the opportunity to explore the diverse ways in which garlic scapes can elevate your dishes and contribute to a sustainable approach to cooking. Let your creativity flourish in the kitchen with this flavorful and nutritious ingredient.
Resources: Here are some helpful resources for further information.
- Garlic Scape Pesto – By Vanilla and Bean
- 10 Garlic Scape Recipes – By Grow a Good Life
- Grilled Garlic Scapes – By Weekend at the Cottage
Frequently Asked Questions
1. When is the best time to harvest garlic scapes?
The best time to harvest garlic scapes is when they are young and tender, typically when they form a full curl, but before they start to straighten out. This is usually a few weeks before the garlic bulbs are ready to harvest, around late spring to early summer.
2. How do I prepare garlic scapes for pickling?
First, wash the garlic scapes thoroughly under cold water to remove any dirt. Trim off any tough ends and cut the scapes into uniform lengths that fit comfortably into your canning jars. This ensures even pickling and makes them easier to pack into jars.
3. What ingredients do I need for the pickling brine?
To make a basic pickling brine, you’ll need 2 cups of white vinegar, 2 cups of water, and 2 tablespoons of pickling salt. You can also add spices like dill seeds, mustard seeds, peppercorns, and bay leaves for extra flavor. Bring the mixture to a boil, then let it simmer while you pack the scapes into jars.
4. How long do pickled garlic scapes last?
When properly canned and stored in a cool, dark place, pickled garlic scapes can last up to a year. Ensure the jars are sealed correctly and check for any signs of spoilage before consuming. Once opened, store the jar in the refrigerator and use within a few months for the best flavor and texture.
Summary
I hope I have inspired you to make and can this recipe to enjoy and share with your friends and family.
If you were encouraged by this post, I invite you to check out my FREE Printables Page for fun free printables, planners, and charts.
ENTER MY FREE Printables Page HERE
Here are some more of my jam inspiration posts to check out!
Canning Supplies You Need Now for a Successful Canning Season!
How to Make and Can Balsamic Onion Jam
Cranberry Sauce: How to Make and Can Old Fashioned Cranberry Sauce
How to Make and Can Cranberry Merry Jam
How to Make and Can Strawberry Shortcake Jam
Cherry Jam: How to Make and Can Cherry Pie Jam
Carrot Cake Jam: How to Make and Can Carrot Cake Jam
Quince Jam: How to Can a Year’s Supply of Quince Jam
Root Beer Float Jelly: How to Make and Can Root Beer Float Jelly
Blessings,
The Off Grid Barefoot Girl

