Make the most of your pear harvest with Canning Pear Sauce: An Easy Step-by-Step Guide! This simple tutorial walks you through every part of the process, from selecting perfectly ripe pears to safely preserving your homemade sauce for your pantry. Whether you’re a beginner or a seasoned home canner, this guide will help you create a delicious, sweet, and smooth pear sauce that’s perfect for breakfast, desserts, or gifts. Learn the tips and tricks that make canning pears easy, safe, and rewarding!
There’s something so comforting about the sweet aroma of pears simmering on the stove, filling the kitchen with warmth and memories. Making your own pear sauce is like capturing a little bit of autumn in a jar—perfect for cozy breakfasts, desserts, or thoughtful homemade gifts. With just a few simple steps, you can transform fresh, juicy pears into a smooth, flavorful sauce that will brighten your pantry and your table. In this guide, I’ll walk you through the entire canning pear sauce process, making it easy, safe, and utterly satisfying.
This is a pinnable post. Tap or hover over any image in this post to pin to your Pinterest Boards.
Introduction to Canning Pear Sauce
Why Can Pear Sauce?
Canning pear sauce is a fantastic way to preserve the sweet and tangy goodness of fresh pears all year round. When you can pear sauce, you not only extend its shelf life, but also lock in its natural flavors and nutrients. Plus, it’s a great way to reduce food waste and put those surplus pears to good use!
Benefits of Homemade Pear Sauce
There’s something incredibly satisfying about making your own pear sauce. Besides the fact that it tastes way better than store-bought alternatives, homemade pear sauce allows you to control the ingredients, ensuring a healthier and more natural product. Plus, it’s a fun and rewarding kitchen project that will make you feel like a true domestic wizard.
It also guarantees a burst of fresh flavors that are unmatched by commercially produced alternatives. Pears are naturally sweet and packed with vitamins and fiber, making them an excellent choice for promoting digestive health and boosting your immune system.
Additionally, homemade pear sauce is incredibly versatile; it can be used as a topping for pancakes or yogurt, stirred into oatmeal or smoothies, or even served alongside savory dishes like roasted pork tenderloin or grilled chicken. With its vibrant taste and indulgent texture, homemade pear sauce not only offers numerous health benefits, but also adds a touch of luxury to any meal – truly a delicious way to enhance your overall well-being.
Gathering the Necessary Equipment and Ingredients
Essential Canning Equipment
Before diving into canning pear sauce, make sure you have the necessary arsenal of canning equipment. You’ll need mason jars with lids, a canning pot, a jar lifter, a canning funnel, a bubble remover, and a clean kitchen towel. Don’t forget to give them a good wash before starting!
Choosing the Right Pears for Sauce
When it comes to pear sauce, not all pears are created equal. Look for ripe and flavorful varieties such as Bartlett, Anjou, or Bosc. Avoid overly mushy or overly firm pears, as they won’t blend well into a silky sauce. Experiment with different types to find your personal favorite!
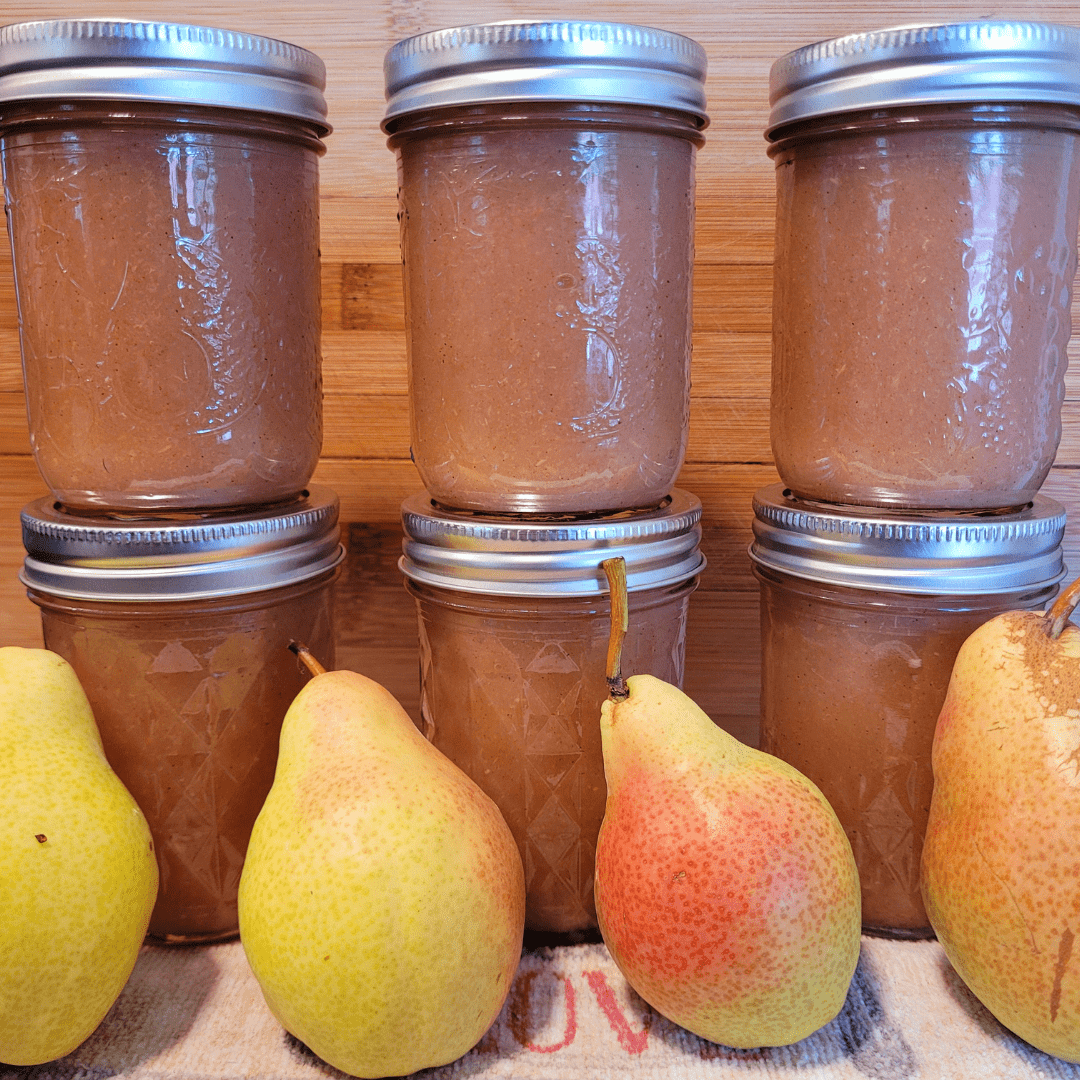
In this recipe, I will be using the pears from my pear tree, which is the Bartlett variety. They are sweet and a bit on the small side. I find that approximately 30 pears will make about 3 pints or 6 half pints of pear sauce.
Additional Ingredients for Flavoring
While pear sauce is delicious on its own, you can take it up a notch by adding some flavorful extras. Consider including spices like cinnamon, nutmeg, or cloves for a warm and cozy taste. And if you’re feeling adventurous, a splash of vanilla extract or a drizzle of honey can elevate your pear sauce to a whole new level of yumminess!
Typically, I add in cinnamon and vanilla along with a splash of lemon juice for brightness. This combination is perfect for my kids and they really enjoy devouring these little half-pint jars of this fall-flavored pear sauce. I like to can my pear sauce in half-pint jars since they are the perfect size for a single serving that my family can grab right off the pantry shelf to enjoy.
I also can my pear sauce in 4-ounce jars if my kids just want a little bit of pear sauce since they are used to the little cups from the grocery store. You know, those cute little fruit and pudding snack cups? Well, the 4-ounce jars make a perfect homemade resemblance of those types of handy snacks for kids.
Preparing the Pears for Sauce
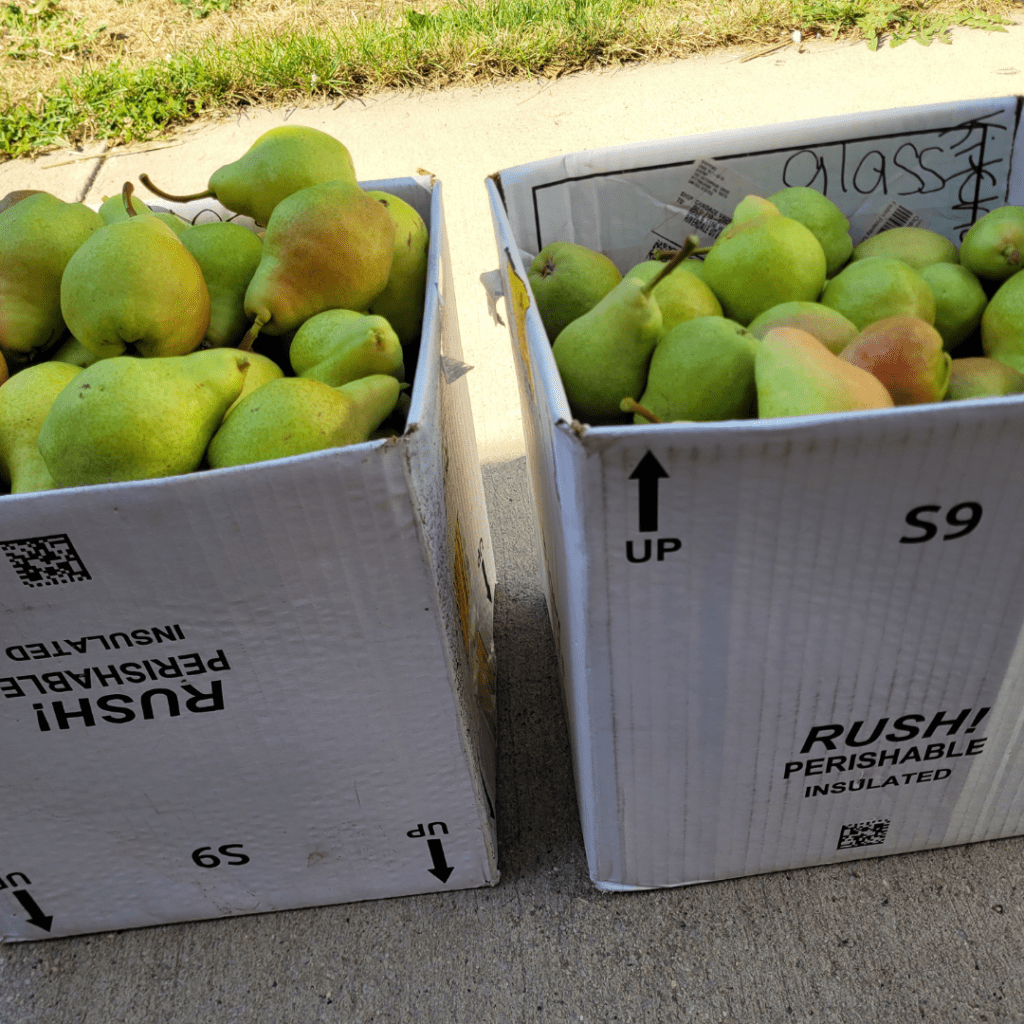
Harvesting Pears From Your Tree
If you will be obtaining your pears from your pear tree like me, you will find them to be ready mid-to-late August. Slightly tug upwards on the pears to see if they come loose and the tree lets go of them. Harvest the ones that are ready first. Pears have a small harvesting window. They ripen from the inside out and if they are already squishy, you have already waited too long to harvest them.
Last year I only got 11 pears from my tree. You can imagine my delightful surprise when the tree blessed us this year with two full boxes of pear-fectly ripe pears!
Learn more about growing and caring for pear trees in my other post if you are interested in growing your own pears.
All About Pear Trees: Ultimate Guide
Washing and Peeling the Pears
Before you can transform your pears into sauce, give them a gentle wash to remove any dirt or debris. Once clean, peel off their skins using a trusty vegetable peeler or a paring knife.
While some people do leave the peels on when making and canning pear sauce, I would rather peel the pears for my preference. I like to serve my family a beautiful product of bright and clean fresh pears without the peels. I also ensure I remove all seeds, tough cores, and bug-infested areas of the pears.
Removing the Cores and Seeds
To ensure a smooth and seed-free sauce, it’s important to remove the cores and seeds from your pears. Use a sharp knife to cut the pears in half, then scoop out the woody core and discard it. You can also use a handy apple corer if you’re feeling fancy and efficient! I toss all the pear scraps right into the compost pile. If you have chickens, you can toss it to them and they’ll take care of the yummy pear scraps for you!
If you grow your pears organically, be prepared to see some friendly critters pop out of the fruit to say hi. Actually, they disgust me, but it is all part of the home-grown food process.
Slicing or Dicing the Pears
Once your pears are peeled and free of unwanted bits, it’s time to chop them into smaller pieces. Depending on your preference, you can either slice them or dice them into chunks. Just remember: the smaller the pieces, the quicker they’ll cook down into sauce.
The slicing and dicing of the pears can seem like it will never end. It is a great time to plug in the earbuds and put on a great audible to help keep you chopping!
Cooking and Blending the Pear Sauce
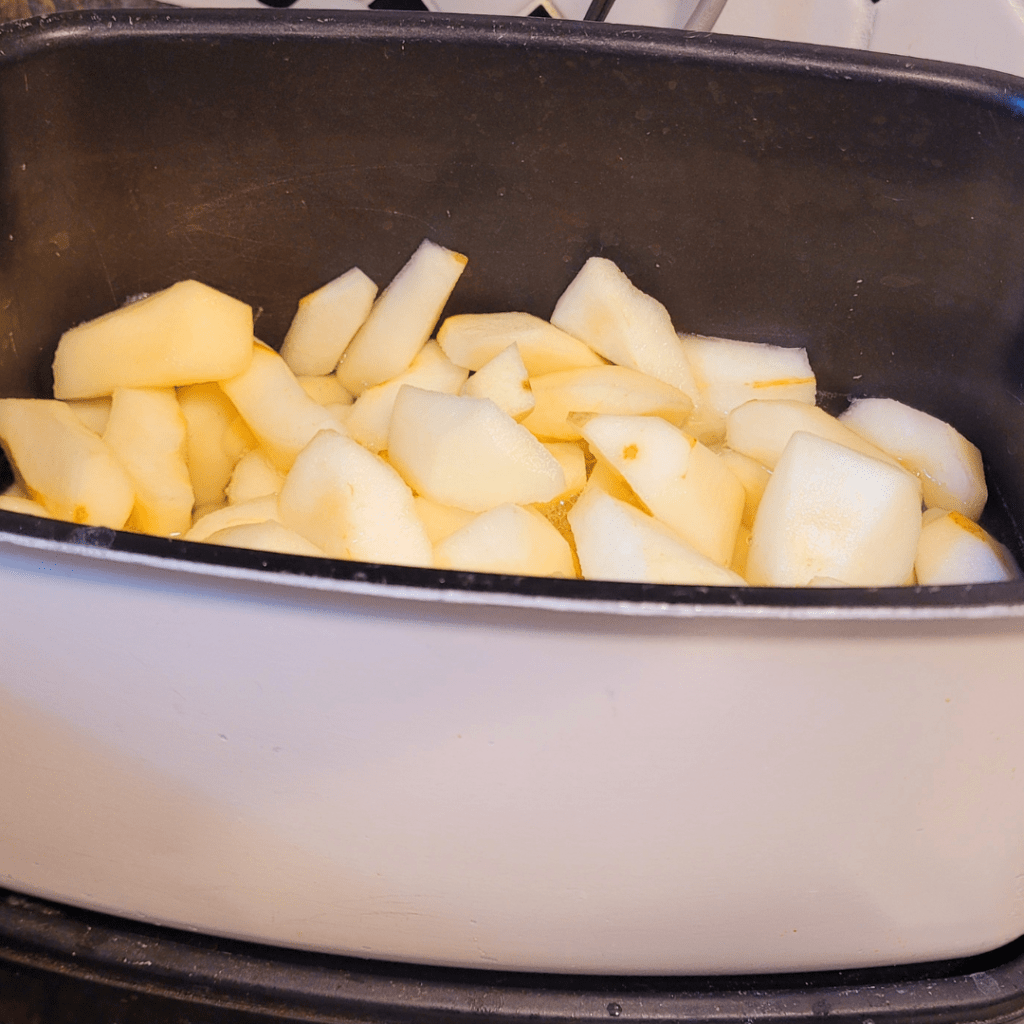
Selecting the Cooking Method
When it comes to cooking pear sauce, you have two main options: stovetop or slow cooker. The stovetop method is quicker, while the slow cooker method allows for a hands-off approach. Choose the method that suits your schedule and kitchen setup.
I add 30 pears to each of my two slow cookers to obtain a batch of 12 half-pints of pear sauce. I like to use my slow cookers by preparing them early in the morning to be ready to can in late afternoon. This allows me to have a completely hands-off approach to making my pear sauce. I can stir and check on them throughout the day, but I do not have to babysit the slow cookers!
Slow Simmering the Pear Sauce
If you’ve opted for the stovetop method, gently cook your sliced or diced pears over medium heat until they soften and release their juices. Stir occasionally to prevent sticking and burning. For the slow cooker method, place the pears in the pot, cover them, and let them simmer on high for a few hours until they’re tender and ooze deliciousness.
Slow simmering my pear sauce is by far my favorite method. As previously mentioned, I can run around the house and property doing other things while cooking a homemade delicious fall pear sauce to can later in the day.
Blending the Cooked Pears into a Smooth Sauce
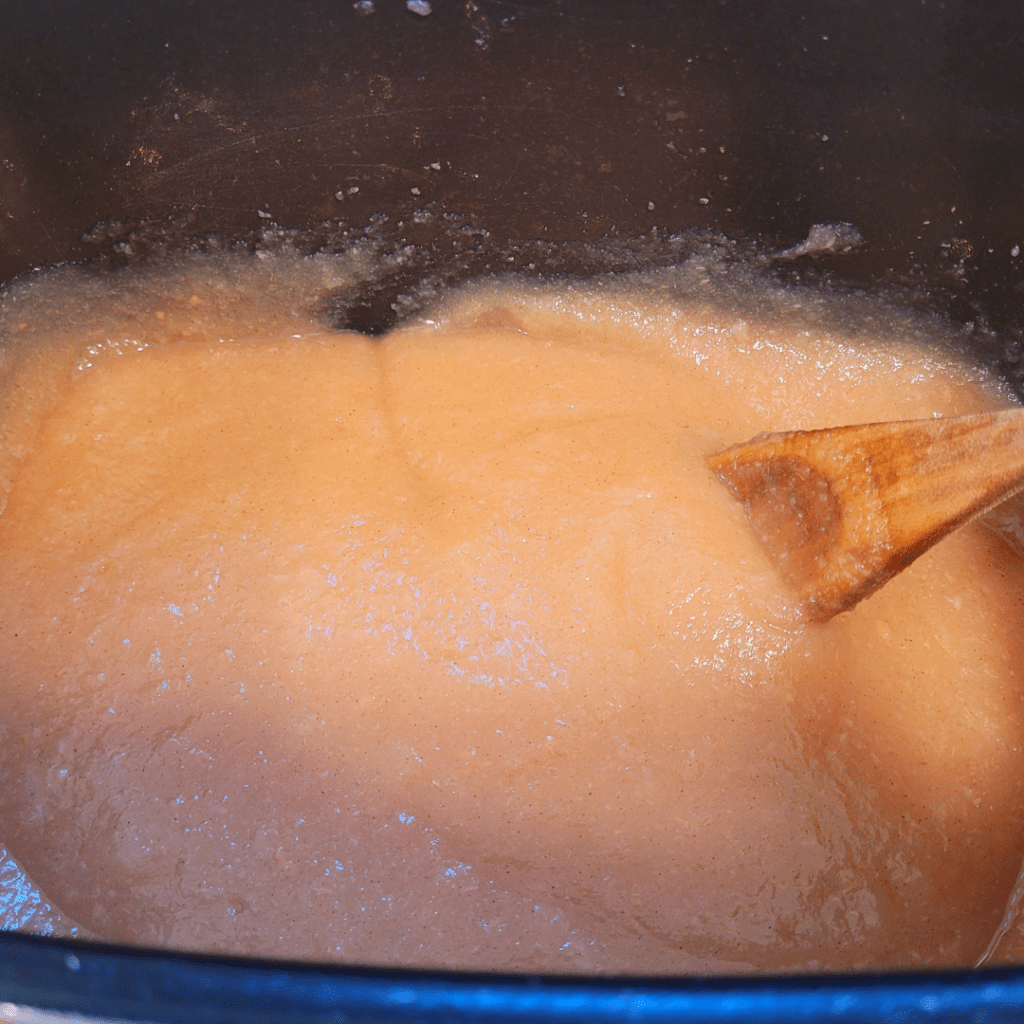
Once your pears are soft and cooked down, it’s time to turn them into a fabulous sauce! Use a blender, food processor, or immersion blender to puree the cooked pears until you achieve a smooth and velvety consistency. If you prefer a chunkier sauce, pulse the blender a few times for a more textured result.
I like to use my immersion blender to blend right in the slow cooker. This prevents a mess of dirtying other dishes like a blender. The immersion blender makes this part a breeze and I highly recommend you use an immersion blender.
After it is all blended, here is the part where you can customize the flavor of your pear sauce. Give it a taste test to see what kind of adjustments, if any are needed before adding the pear sauce to the jars. You can adjust the warm spicy seasonings to your liking, add a pinch of salt, a dash of sugar, and a splash of lemon juice for brightness. You can even add some vanilla extract to enhance the warm fall flavor.
Sterilizing the Canning Jars and Lids
Cleaning the Jars and Lids
Before you dive into the world of pear sauce canning, it’s important to ensure your jars and lids are squeaky clean. Give them a good wash with warm, soapy water, making sure to remove any dirt or residue. You can use a bottle brush to reach the nooks and crannies if needed. Rinse them thoroughly to remove any soap residue.
Boiling or Using the Dishwasher Method
There are two popular methods for sterilizing your canning jars and lids: boiling and using the dishwasher. The boiling method involves placing the jars and lids in a pot of boiling water for around 10 minutes. Alternatively, you can use the dishwasher by running a hot cycle without detergent.
Drying and Inspecting the Sterilized Jars and Lids
Once your jars and lids have been sterilized, it’s important to let them dry completely before filling them with delicious pear sauce. Inspect the jars and lids for any cracks or chips, as these can hinder the sealing process. If you come across any damaged jars or lids, it’s best to replace them to ensure a successful canning experience.
Filling and Sealing the Jars with Pear Sauce
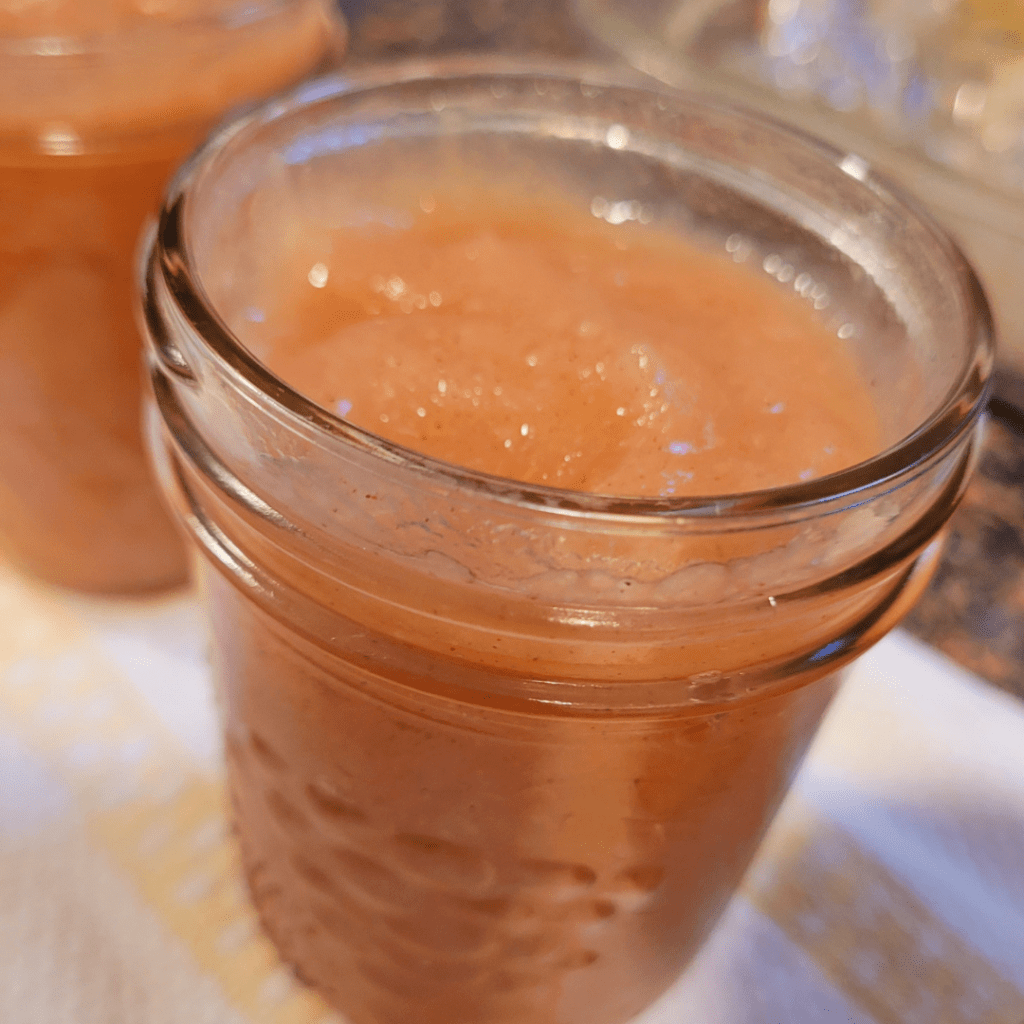
Filling the Jars with Hot Pear Sauce
Now comes the satisfying part – filling those pristine jars with your homemade pear sauce. Make sure your pear sauce is hot and freshly cooked. Using a ladle and funnel, carefully fill each jar, leaving about half an inch of headspace at the top.
It is a good idea to ensure you will have more than enough clean jars ready to fill to make the process easier. Trust me, it is no fun to stop the process only to go on a jar hunt when you realize you did not prepare enough jars. It is always better to have too many than not enough!
Choosing the Right Jar Sizes to Use
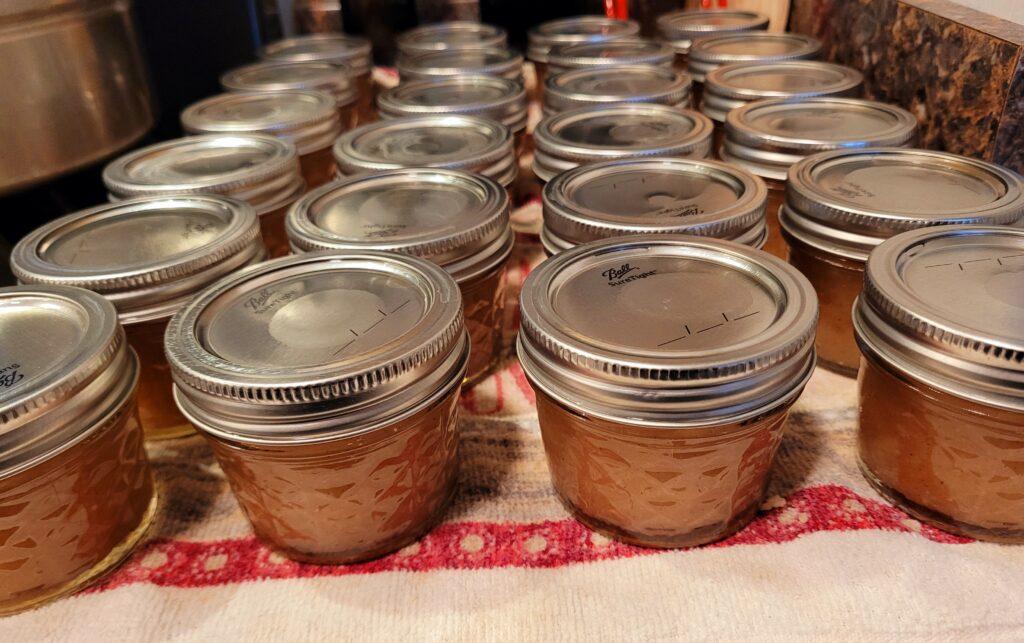
Think of how you plan to use and serve your pear sauce. Remember, 30 pears will make 3 pints, or 6 half pints, or 12 4-ounce jars.
I had a lot of pears to process. For my pear sauce, I made 6 half pints and 24 4-ounce jars. This is a lot of pear sauce, but I am sure we will go through it without any issues since it tastes so good. I can use the half-pint jars to make delicious fall pear bread throughout the fall and winter seasons. One half-pint jar will most likely yield in two loaves of fall pear bread. That is enough for at least twelve loaves of fall pear bread to serve my family during the colder months.
Having the 4-ounce jars of pear sauce on the pantry shelves offers my family a delicious and wholesome homemade snack they can enjoy at any time. These jars make a wonderful single serving to enjoy any time of the day, especially for kids for a healthy after school snack! These jars are also like the single serving sizes you can buy at the grocery store in those fruit cups, but these are so much better! For one, they are homemade and you have complete control over the ingredients you use.
Removing Air Bubbles and Adjusting Headspace
After filling the jars, use a non-metallic tool, such as a wooden chopstick or plastic spatula, to remove any air bubbles trapped in the sauce. Gently run the tool along the inside of the jar, allowing any bubbles to escape. Adjust the headspace, if necessary, by adding or removing pear sauce.
Wipe the rims of each jar with a damp clean cloth to remove any pear sauce residue. A clean rim will ensure a safe and successful seal of the lids.
Securing the Lids for a Proper Seal
Once your jars are filled and air bubble-free, it’s time to seal the deal. Place the lids on top of each jar, ensuring they are centered. Screw the bands on until they are finger-tight, making sure not to over-tighten. This allows air to escape during processing, resulting in a proper seal.
Processing and Storing the Canned Pear Sauce
Processing the Jars in a Water Bath or Pressure Canner
To give your pear sauce a long shelf life, it needs to go through a processing method. You can choose between a water bath or pressure canner, depending on the recipe and altitude guidelines. Follow the specific instructions for your chosen method to ensure safe processing. Most likely, you will only need a water bath canner since pears can be safely water bathed.
Proper Cooling and Checking of the Seals
Once the processing is complete, carefully remove the jars from the canner and place them on a towel-lined countertop. Let them cool undisturbed for 12 to 24 hours. After cooling, gently press down on the center of each lid to check for a proper seal. If the lid doesn’t flex, it’s a good sign that your pear sauce is safely sealed.
Labeling and Storing the Canned Pear Sauce
Last but not least, label your jars with the date and contents before storing them in a cool, dark place. Properly sealed and stored jars of pear sauce can last up to a year, but let’s be honest – they’ll probably be devoured long before that.
Tips and Troubleshooting for Successful Pear Sauce Canning
Common Mistakes to Avoid
While pear sauce canning is a relatively straightforward process, there are a few common mistakes to steer clear of. Avoid using jars with cracks or chips, as they may not seal properly. Also, make sure to follow the recommended processing times and adjust for altitude if needed.
Troubleshooting Tips for Sealing Issues
If you encounter any issues with sealing your jars of pear sauce, fear not! One common problem is an incomplete seal, which can be remedied by reprocessing the jars or refrigerating the sauce for immediate consumption. It’s also a good idea to double-check that your lids and bands are in good condition before starting the canning process.
Storage Recommendations and Shelf Life
Proper storage is key to preserving the deliciousness of your pear sauce. Store your canned jars in a cool, dark place, such as a pantry or cellar. Avoid areas with extreme temperature fluctuations. When stored correctly, your canned pear sauce can maintain its quality for up to a year. However, let’s be honest again – it’s likely to disappear from your shelves much sooner than that. Enjoy every spoonful!
Conclulsion
Canning pear sauce is a rewarding and practical skill to acquire. By following this easy step-by-step guide, you can confidently create jars of delicious pear sauce that will add a burst of flavor to your meals throughout the year. The process may seem daunting at first, but with the right equipment and a little patience, you’ll soon be enjoying the satisfaction of homemade pear sauce that tastes just as good as store-bought, if not better. So don’t let those ripe pears go to waste – start canning your pear sauce and relish in the joy of preserving a taste of the season for months to come.
There is nothing more satisfying than looking at your home canned pantry shelf full of homemade goodies that you took the time to make for your family. It is a precious art you can provide and nourish for your family. The best part about home canning is that you have complete control over the ingredients!
Resources: Here are some helpful resources for further information.
- Strawberry Butter – By Belly Full
- Sunshine Fruit Butter – By Seed to Pantry
- Mixed Fruit Slow Cooker Butter – By Food in Jars
Frequently Asked Questions
1. How long does canned pear sauce last?
Canned pear sauce, when stored properly in a cool and dark place, can last up to one year. It is important to check the seals on the jars before consuming and discard any jars with compromised seals.
2. Can I use different varieties of pears for making pear sauce?
Absolutely! Different varieties of pears will lend slightly different flavors and textures to the sauce. Experiment with different combinations or use a single variety of pears based on your preferences.
3. Can I add spices or flavorings to my pear sauce?
Yes, you can add spices like cinnamon, nutmeg, or ginger to enhance the flavor of your pear sauce. Additionally, you can also experiment with adding vanilla extract, lemon juice, or orange zest for a unique twist.
4. Do I need any special equipment for canning pear sauce?
While you don’t need any specialized equipment for canning pear sauce, it is important to have basic canning supplies such as canning jars, lids, a large pot for boiling water, and a jar lifter. These tools will ensure the safe and effective preservation of your pear sauce.
Pear Sauce Recipe
Pear Sauce Recipe
Equipment
- 1 water bath canner
- Canning supplies ladle, jar lifter, jars, rings, lids, funnel, and a bubble remover.
Ingredients
- 30 whole pears
- 1 cup sugar or brown sugar
- ¼ cup lemon juice
- 2 tsp ground cinnamon
- 1 cup water
- 1 tsp vanilla extract
Instructions
Preparing the Pears
- Wash, peel, slice, core, and chop the pears.
Cooking the Pears in the Crockpot
- Add all of the ingredients to the crockpot and combine well. Cook on high for 4 to 5 hours until pears are soft.
Blending the Pears into Pear Sauce
- Blend the pears with an immersion blender as it is much easier and less messy than pouring it into a blender. If you are using a blender, allow the pears to cool first before blending to avoid spewing the hot liquid out of the blender. Blend until the consistency you desire.
Canning the Pear Sauce
- Heat up your water bath canner. The amount of water you will need in your canner will depend on the size of the jars you are using.
- Ladle the pear sauce into clean prepared jars using the funnel, leaving 1/2 inch of headspace.
- Use the bubble remover wand to remove the air bubbles and adjust the headspace accordingly.
- Wipe the rims of the jars clean and screw on the lids and rings until fingertip tight.
- Process the jars for ten minutes. Process your jars in batches according to how many jars you can fit at once time in your canner until all jars are processed.
- Remove the jars from the canner and allow them to cool on a towel on the counter undisturbed for 24 hours. Listen to the sounds of the jars sealing. Once the jars are cooled, label them clearly and store them in a cool dark pantry for up to one year. They will most likely be consumed long before then in which case you get to make more pear sauce!
Summary
I hope I have inspired you to stockpile your pantry for your survival needs.
If you were encouraged by this post, I invite you to check out my FREE Printables Page for fun free printables, planners, and charts.
ENTER MY FREE Printables Page HERE
Here are some more of my canning inspiration posts to check out!
Pears: How to Make and Can Salted Caramel Pear Butter
Butternut Squash: How to Make and Can Butternut Squash Butter
Quince: How to Make and Can Fall Spiced Quince Chutney
Quince: How to Can Quince
Carrot Cake Butter: How to Make and Can Carrot Cake Butter
Peach Pie Filling: How to Make and Can Peach Pie Filling
Pear Pie Filling: How to Make and Can Pear Pie Filling
The Best Winter Pantry Staples to Stockpile Now!
More Recipes!
Grapes: How to Make and Can Grape Jam
Apple Cider: How to Make Homemade Apple Cider Vinegar
How to Make and Can Cherry Plum Jam
How to Make and Can Apple Butter In Crockpot
Stockpiling Condiments for Survival: Learn How I Do It!
How to Make and Can Vegetable Pot Pie Filling
Easy Canning Applesauce Recipes to Stalk Your Pantry!
How to Make Peach Jalapeno Jam
Cherries: How to Make Cherry Pie Filling
Cherries: How to Make Cherry Syrup
Salsa: How to Make and Can Cherry Salsa
Peaches: How to Make and Can Peach Salsa
Canning Supplies You Need Now for a Successful Canning Season!
How to Make and Can Balsamic Onion Jam
Cranberry Sauce: How to Make and Can Old Fashioned Cranberry Sauce
How to Make and Can Cranberry Merry Jam
How to Make and Can Strawberry Shortcake Jam
Cherry Jam: How to Make and Can Cherry Pie Jam
Carrot Cake Jam: How to Make and Can Carrot Cake Jam
Quince Jam: How to Can a Year’s Supply of Quince Jam
Root Beer Float Jelly: How to Make and Can Root Beer Float Jelly
Blessings,
The Off Grid Barefoot Girl

