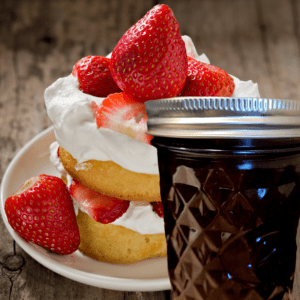
Strawberry Shortcake Jam Recipe
This Strawberry Shortcake Jam is a delightful treat that combines the sweetness of ripe strawberries with the delicious taste of shortcake. This delicious jam effortlessly blends together two classic flavors to create a truly irresistible spread. Each spoonful is bursting with chunks of juicy strawberries, adding a delightful texture to every bite. Spread this delectable concoction onto warm toast or freshly baked scones for an indulgent breakfast or afternoon snack.
Equipment
- 1 pot.
- 1 water bath canner
- canning supplies
Ingredients
- 5 cups or 5 pounds crushed strawberries.
- ¼ cup cup lemon juice.
- 6 tbsp powdered pectin.
- 7 cups sugar.
- 1 tsp vanilla extract.
- 1 tsp almond extract.
Instructions
Washing and Hulling the Strawberries
- Before making the jam, make sure to wash the strawberries thoroughly under cool water. Gently pat them dry with a kitchen towel. Remove the stems and leaves, also known as hulling, using a sharp knife or a strawberry huller. Tip: Don't be tempted to skip this step; clean and hulled strawberries will ensure a smooth and delicious jam.
Chopping or Mashing the Strawberries
- Once the strawberries are hulled, you can choose to either chop them into small pieces or mash them with a potato masher. Chopping will give your jam a chunkier texture, while mashing creates a smoother consistency. You can even combine both methods for a jam with varying textures. The choice is yours!
Combining Ingredients
- In a large pot, combine the chopped or mashed strawberries, sugar, lemon juice, pectin, and vanilla and almond extract. Stir the mixture until the sugar and pectin dissolve completely. Make sure to use a pot with enough room for the jam to bubble and expand while cooking.
Bringing the Mixture to a Boil
- Place the pot over medium-high heat and bring the strawberry mixture to a rolling boil. Keep stirring frequently to prevent the jam from sticking to the bottom of the pot. This step helps activate the pectin and allows the jam to thicken.
Simmering and Stirring
- Once the mixture reaches a rolling boil, reduce the heat to medium-low and let the jam simmer for about 20-30 minutes. Stir occasionally to prevent the jam from scorching. The longer you simmer, the thicker the jam will become.
Preparing the Jars
- Grab your jars and give them a good wash with hot soapy water. Don't forget to scrub off any labels or sticky residue.
Filling the Jars with Jam
- Take your beautifully sterilized jars and start spooning that luscious strawberry shortcake jam into each jar. Fill them up, leaving about half an inch of headspace at the top. Make sure there's enough room for the jam to expand a little as it cools.
Sealing and Processing the Jars
- Once your jars are positively bursting with jammy goodness, it's time to seal the deal. Place those lids on top and tighten them securely. Now, we need to give our jars a little hot tub time. Grab a big pot and fill it with enough water to cover the jars by at least an inch. Carefully lower the jars into the pot and let them process in the boiling water for 10 minutes. This process helps create a vacuum seal and keeps the jam safely preserved.
Allowing the Jars to Cool
- After the jars have taken their hot bath, it's time to let them cool their jets. Carefully remove the jars from the pot using jar tongs or kitchen gloves, and place them on a clean towel or cooling rack. Let them sit undisturbed until they reach room temperature. This gives the jam time to set.
Checking for Proper Sealing
- Once the jars have cooled down, it's time for a little inspection. Gently press down on the center of each lid – they should be firm and not pop back up. If any of the lids pop up, sadly, it means they didn't seal properly. But don't worry, you can still enjoy that jar right away or store it in the refrigerator for immediate consumption. The rest of the sealed jars can be stored in a cool, dark place for further seasoning and admiration. Keep in mind that sometimes jars take a bit of time to seal. I have often heard one ding in the middle of the night as he was a late dinger... if that even makes any sense.
Storing the Jam
- Store your sealed jars in a cool, dark place like a pantry or cupboard. Make sure to label them with the date so you can keep track of their delicious aging process.