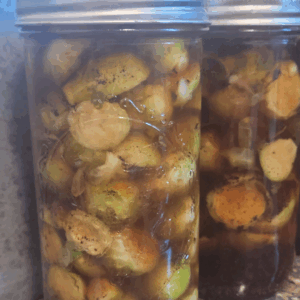
Maple Balsamic Brussel Sprouts
These Maple Balsamic Brussel Sprouts are a delicious blend of sweet, tangy, and savory. Inspired by Rachael from That 1870’s Homestead, they’re a great addition to any pantry shelf and perfect for those who love to can and preserve unique, flavorful veggies!
Equipment
- 1 Large pot for blanching
- 4 pint-size canning jars with lids and rings.
- 1 water bath canner
- 1 set of canning supplies such as debubbler tool, funnel, and jar lifter.
Ingredients
- 2 lbs fresh Brussel sprouts (trimmed and halved)
- ½ cup water
- 2 ½ cups white balsamic vinegar (or regular balsamic for a deeper flavor)
- ½ tbsp Kosher salt
- ⅓ cup real maple syrup
- 6 cloves garlic (sliced)
- Pinch red pepper flakes (optional, for a little kick)
Instructions
Step 1:
- I started by washing and trimming all the Brussel sprouts. If any were larger than bite-sized, I cut them in half to help the flavor soak in better.
Step 2:
- In a large pot of boiling water, I blanched the sprouts for about 4 minutes. Then I drained them and set them aside while I worked on the brine.
Step 3;
- I combined 2½ cups of water with 2½ cups of white balsamic vinegar in a large saucepan. Then I stirred in 1½ tablespoons of kosher salt and ⅓ cup of real maple syrup. I heated it just until everything dissolved and the brine was hot but not boiling.
Step 4:
- With clean, sterilized pint jars ready, I added a few slices of garlic and a pinch of red pepper flakes to the bottom of each jar. Then I packed in the Brussel sprouts snugly, but not too tightly.
Step 5:
- Using a funnel, I poured the hot brine over the sprouts, leaving ½ inch headspace. I used a chopstick to remove bubbles and wiped the rims clean before adding the lids and rings.
Step 6:
- I processed the jars in a boiling water bath for 15 minutes, adjusting for altitude as needed. After removing them, I let them cool for 24 hours and checked for proper seals.