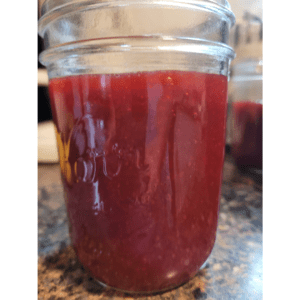
Cherry Plum Jam
This Cherry Plum Jam recipe captures the vibrant, sweet-tart flavors of fresh cherry plums in a jar. With just a few simple ingredients, you can create a delicious homemade jam that's perfect for spreading on toast, adding to desserts, or gifting to friends and family. The rich color and intense flavor make this jam a delightful treat that preserves the taste of summer all year long!
Equipment
- 1 large non-reactive pot.
- 4 canning jars, lids, and bands.
- 1 set of canning supplies
- 1 water bath canner
Ingredients
- 4 pounds ripe cherry plums.
- 4 cups sugar.
- 2 tbsp lemon juice.
- 1 package pectin (if desired). Note: Pectin is optional in this recipe. The instructions below follow the cook-down method (no added pectin), which thickens the jam naturally by simmering. If you prefer to use added pectin—either powdered or liquid—follow the instructions on the package, as the timing and method can differ. I included pectin in the ingredient list for flexibility, depending on your preference.
Instructions
Preparing the Fruit
- The first step in making cherry plum jam is to prepare the fruit.
- Select ripe, fresh cherry plums and wash them thoroughly.
- Remove the pits and stems, then roughly chop or slice the fruit into smaller pieces. The smaller the pieces, the faster they'll break down during cooking.
- Once you've prepped the fruit, measure out the amount. You can adjust the quantity based on your preferences or the size of your jam batch.
Cooking the Jam
- In a large, wide pot, combine the prepared cherry plums with sugar (about 3/4 cup of sugar per cup of fruit) and a squeeze of lemon juice (to enhance the flavor and help the jam set).
- Bring the mixture to a boil over medium-high heat, stirring frequently to prevent scorching.
- Once it reaches a rolling boil, reduce the heat to medium-low and let it simmer, continuing to stir occasionally.
- As the jam cooks, the fruit will break down, and the mixture will thicken. This process can take anywhere from 30 minutes to an hour, depending on the amount of jam you're making and the desired consistency.
Testing for Doneness
- Spoon or Plate Test: Dip a cool spoon or plate into the simmering jam and let it cool slightly. If the jam forms skin or wrinkles when you push it with your finger, it's ready.
- Temperature Test: Use a candy thermometer to check the temperature of the jam. Most jams reach the gel stage between 220°F and 222°F (104°C and 105°C).
- Freezer Test: Place a small amount of jam on a plate and put it in the freezer for a few minutes. If it firms up and holds its shape, it's done.
- Once your cherry plum jam has reached the desired consistency, remove it from the heat and prepare for canning or storage.
Sterilizing Jars and Lids
- Before you start filling your jars, it's crucial to sterilize them thoroughly. This process kills any bacteria or microorganisms that could spoil your jam. Here's how you do it:
- Wash the jars and lids in hot, soapy water, and rinse them well.
- Place the jars and lids in a large pot, cover them with water, and bring to a boil.
- Boil for at least 10 minutes to ensure thorough sterilization.
- Remove the jars and lids from the water using a jar lifter or tongs, and place them on a clean towel to air dry.
Filling and Sealing the Jars
- Ladle the hot jam into the jars, leaving about 1/4 inch of headspace at the top.
- Run a clean, non-metallic utensil around the inside of the jar to remove any air bubbles.
- Wipe the rim of the jar with a clean, damp cloth to remove any drips or residue.
- Place the lid on the jar, and screw the ring on firmly, but not too tightly.
Processing the Jars
- Place the sealed jars in the canner or pot, and cover them with at least 1 inch of water.
- Bring the water to a rolling boil, and process the jars for 10 minutes.
- After processing, remove the jars from the canner or pot using a jar lifter or tongs, and place them on a towel or cooling rack.
- Leave the jars undisturbed for 12-24 hours, and listen for the satisfying "ping" sound as the lids seal.
- Pro Tip: If any of the lids don't seal properly, simply refrigerate those jars and consume the jam within a few weeks.
- Enjoy!